


前言
基于上篇博客 springboot 整合 Mybatis-plus 连接数据库的基础上,再增加 Vue 和 Axios 技术实现数据库的增删改查。
一、技术栈
1. Vue
Vue 是一款用于构建用户界面的 JavaScript 框架。它基于标准 HTML、CSS 和 JavaScript 构建,并提供了一套声明式的、组件化的编程模型,帮助你高效地开发用户界面。无论是简单还是复杂的界面,Vue 都可以胜任。
特点:
声明式渲染:Vue 基于标准 HTML 拓展了一套模板语法,使得我们可以声明式地描述最终输出的 HTML 和 JavaScript 状态之间的关系。
响应性:Vue 会自动跟踪 JavaScript 状态并在其发生变化时响应式地更新 DOM。
渐进式框架:功能覆盖了大部分前端开发常见的需求
引用 Vue.js 文件有很多种方法,我这里推荐使用以下方法:
直接官网下载,然后通过路径引用。链接:安装 — Vue.js
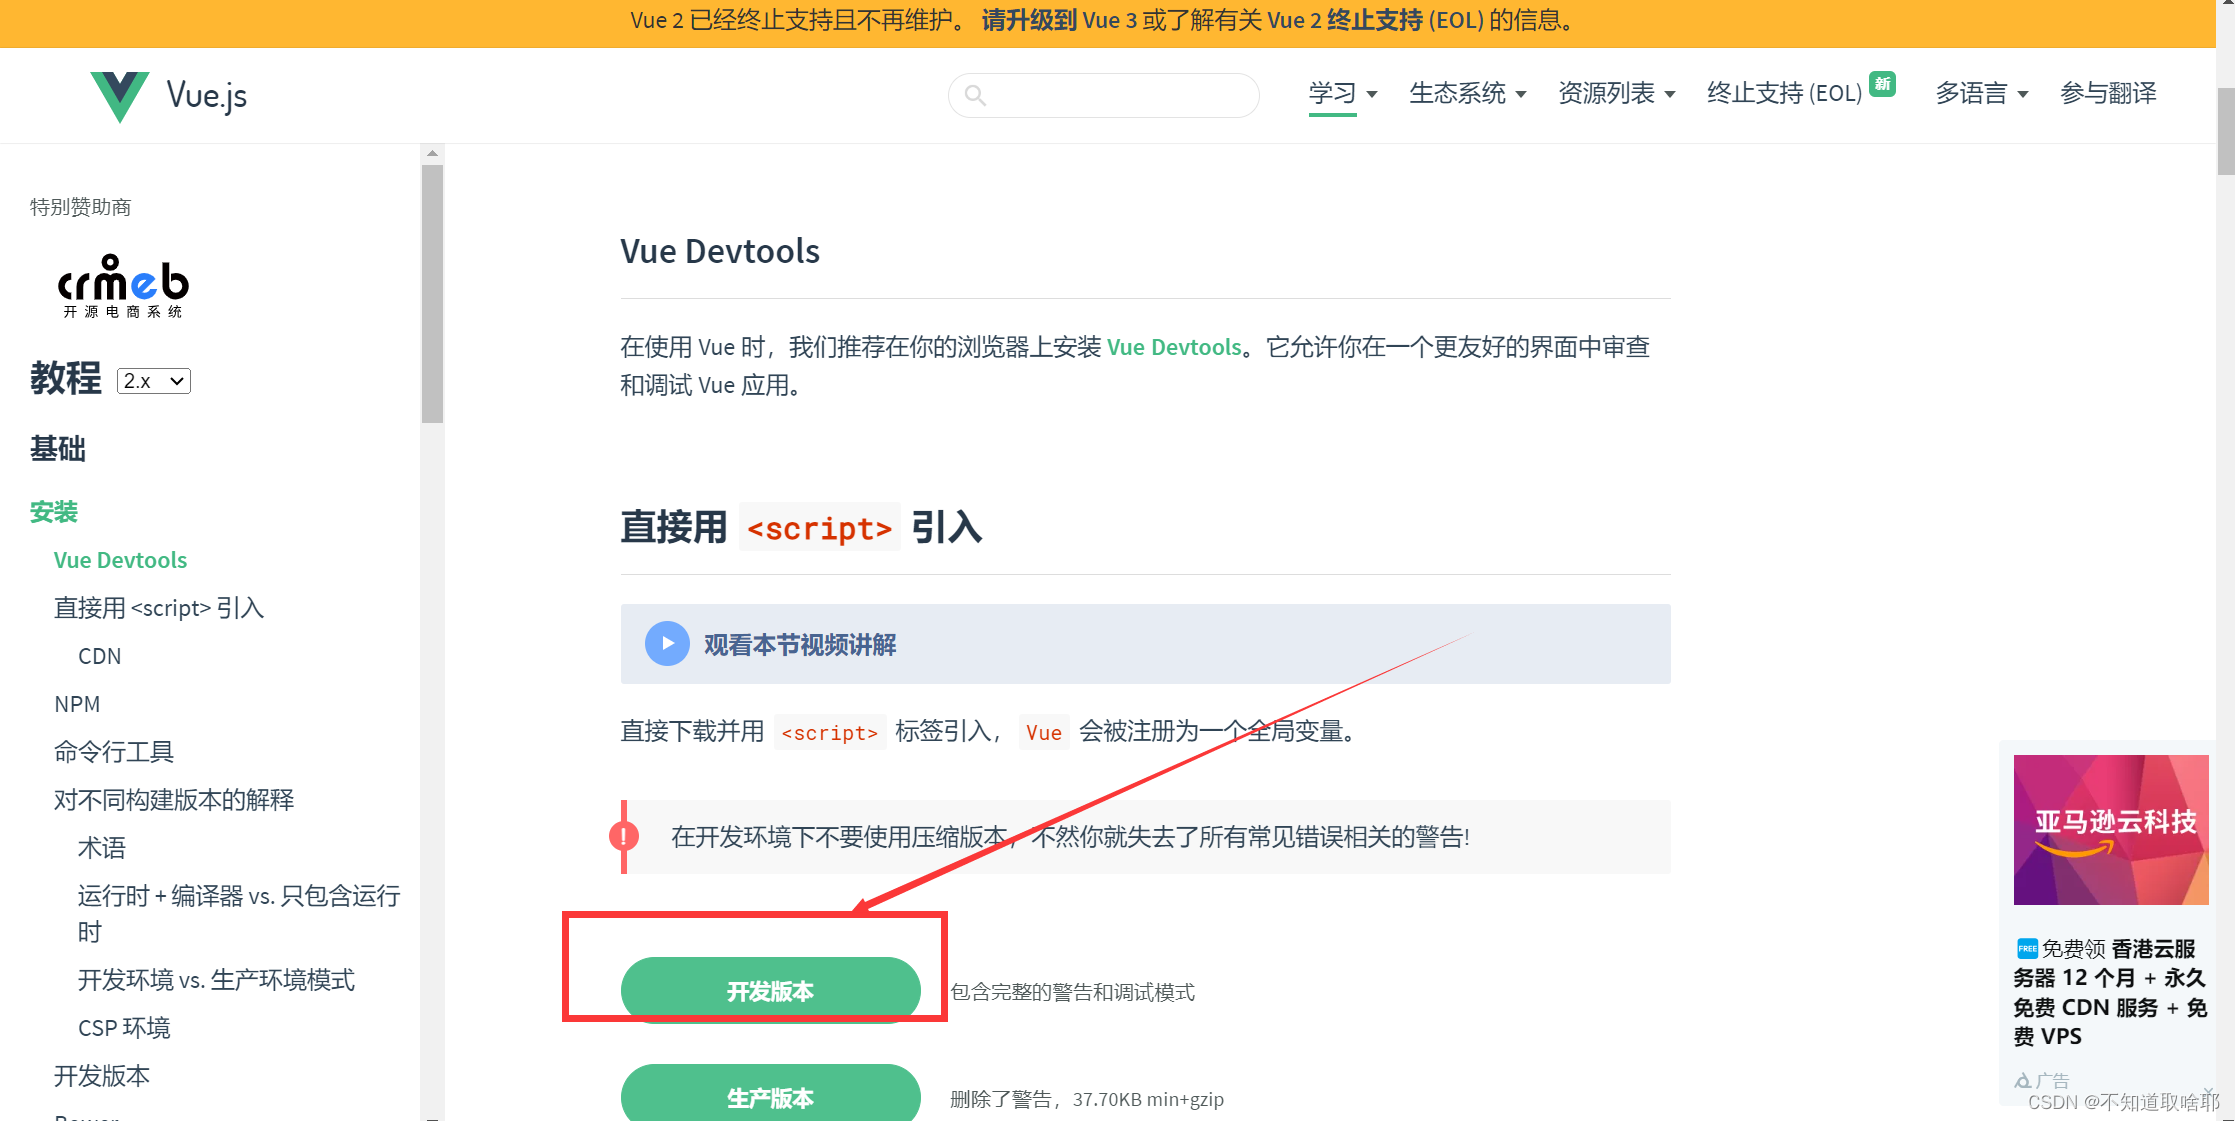
然后选择安装路径即可。直接下载并用 <script> 标签引入,Vue 会被注册为一个全局变量
2. Axios
Axios 是一个基于 promise 网络请求库,作用于node.js 和浏览器中。 它是 isomorphic 的(即同一套代码可以运行在浏览器和node.js中)。在服务端它使用原生 node.js http 模块, 而在客户端 (浏览端) 则使用 XMLHttpRequests
特性:
- 从浏览器创建 XMLHttpRequests
- 从 node.js 创建 http 请求
- 支持 Promise API
- 拦截请求和响应
- 转换请求和响应数据
- 取消请求
- 超时处理
- 查询参数序列化支持嵌套项处理
- 自动将请求体序列化为:
- JSON (
application/json)- Multipart / FormData (
multipart/form-data)- URL encoded form (
application/x-www-form-urlencoded)- 将 HTML Form 转换成 JSON 进行请求
- 自动转换JSON数据
- 获取浏览器和 node.js 的请求进度,并提供额外的信息(速度、剩余时间)
- 为 node.js 设置带宽限制
- 兼容符合规范的 FormData 和 Blob(包括 node.js)
- 客户端支持防御XSRF
- axios 通常和 Vue 一起使用,实现 Ajax 操作
安装 Axios 并使用 axios.min.js 文件
使用 npm 命令本地安装,确保自己已经安装了node 工具。在想要安装的文件目录下面使用终端打开,输入如下命令:
npm install axios
即可安装成功

可以看到生成了 node_modules 文件,node_modules\axios\dist 目录下可以看到如上的 axios 文件,( axios.min.js 文件是 axios.js 的压缩版,随便引用其中一种即可)
也可以直接在 <script> 标签中直接引用
<script src="https://unpkg.com/axios/dist/axios.min.js"></script>
3.iView
iView 是一套基于 Vue.js 的开源 UI 组件库,主要服务于 PC 界面的中后台产品。
安装。在想要安装的文件目录下终端打开,(确保已经安装了nodejs工具)输入如下命令
npm install iview --save
就可以在本地文件看到 node_modules 文件,在 node_modules\iview\dist 目录下可以看到如下要引用的文件
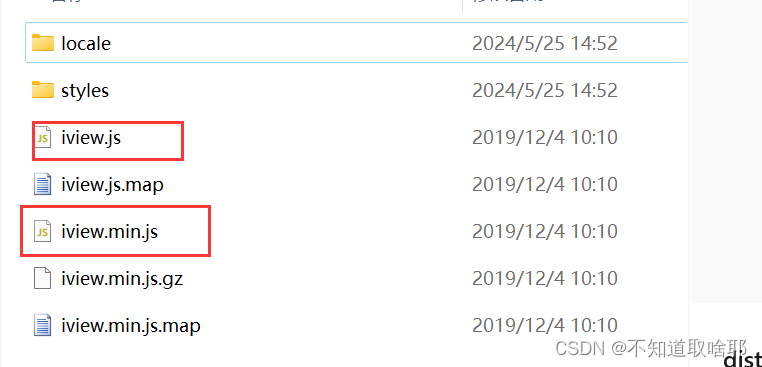
styles 文件下有要引用 css 文件

二、发送Axios请求
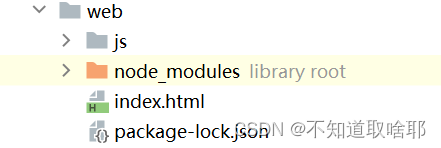
2.1 新建文件用来保存外部引用的文件
新建一个文件夹 web ,index.html 是我们要编写的前端页面代码
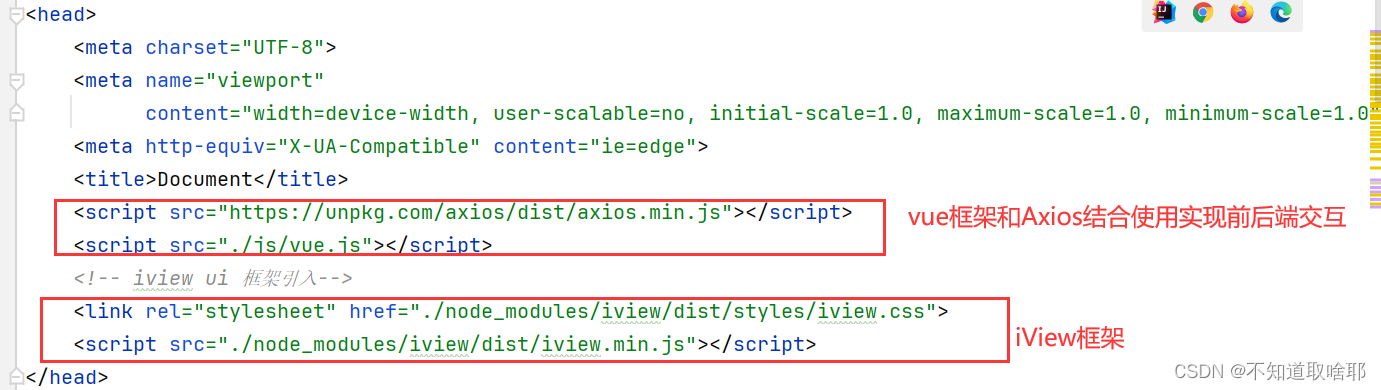
2.2 编写 index.html 文件
在头文件中引用完框架之后,在<body>中添加<div id="app"></div> 用来绑定根元素,然后在script中编写js代码。
new Vue({
        el: "#app",
        data() {
            return {
            msg:"测试"

}在上边的div标签中写入{{msg}}然后运行代码,在网页中打印测试这两个字说明框架引用是没有问题的。
定义methods,methods在vue2中是存放方法的地方;再定义一个生命周期创建的方法created,用来调用methods中的方法。在methods中编写getList发法来发送一个Axios请求,在created中调用
 created() {
            // 调用
            this.getList()
        },
methods:{
getList(){
axios.get('http://localhost:8080/user/page') // page 是之前写的接口
.then(function (response) {
// 处理成功情况
console.log(response);
})
.catch(function (error) {
// 处理错误情况
console.log(error);
})
.finally(function () {
// 总是会执行
});
}
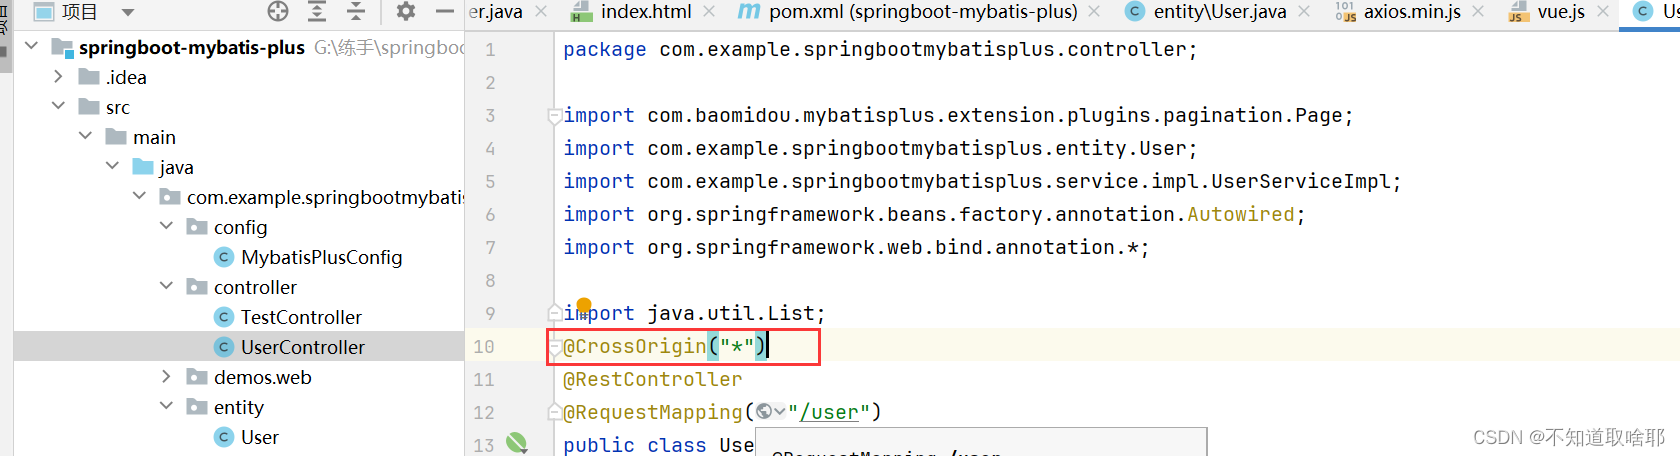
}在controller层下的UserController中添加@CrossOrigin注解,解决跨域问题
三、iView UI框架
官网链接:https://v2.iviewui.com/docs/guide/introduce
在index.html 文件中引用,上文已经讲述就不再赘述了
在iView组件中找到表格的组件,找一款适合自己设计数据库列表的组件,我选择的是这个,表头是可以修改的

复制一下代码到div标签中
<i-Table border ref="selection" :columns="title" :data="tableData" @on-selection-change="select"></i-Table>title是定义的字段名称,tableData是表格数据, @on-selection-change 当选中时,触发自定义的方法select
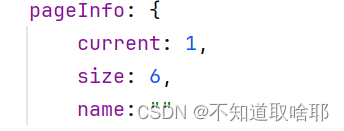
在data中定义tableData方法,是一个空数组,再定义分页pageInfo,其中有三个参数。
current:1 表示当前页
size:6 表示展示的条数
name:"" 表示查询的结果,为空是实现模糊查询
继续在data中定义title变量
          title: [
                    {
                        type: 'selection',
                        width: 60,
                        align: 'center'
                    },
                    {
                        title: 'ID',
                        key: 'id'
                    },
                    {
                        title: '用户名',
                        key: 'name'
                    },
                    {
                        title: '年龄',
                        key: 'age'
                    },
                    {
                        title: '来源',
                        key: 'source'
                    },
                    {
                        title: '操作',
                        key: 'text',
                        width: 250,
                        align: 'center',
                        render: (h, params) => {
                            return h('div', [
                                h('Button', {
                                    props: {
                                        type: 'primary',
                                        size: 'small'
                                    },
                                    style: {
                                        marginRight: '5px'
                                    },
                                    on: {
                                        click: () => {
                                            this.isShowModal = true
                                            this.ruleForm = Object.assign({}, params.row)
                                            this.titleModal = "编辑用户"
                                        }
                                    }
                                }, '编辑'),
                                h('Button', {
                                    props: {
                                        type: 'error',
                                        size: 'small'
                                    },
                                    on: {
                                        click: () => {
                                            console.log(params.row)
                                            this.delIds = [params.row.id]

                                            this.isConfirmDelete = true
                                        }
                                    }
                                }, '删除')
                            ]);
                        }
                    }
                ]
该代码是实现表头的字段的创建,和绑定字段的编辑和删除操作。
获取后端的数据:,在get Axios请求中修改和添加如下代码,从数据库中获取数据打印到前端页面中,在script开始的位置增加代码,设置自动获取当前的域名进行请求
//全局声明,网址请求
    axios.defaults.baseURL = "http://localhost:8080"
axios.get('/user/page', {
params: this.pageInfo // 后面实现分页的传参
})
.then((response) => {
// 处理成功情况
console.log(response);
let data = response.data
this.tableData = data.records
this.pageInfo.current = data.current
this.pageInfo.size = data.size
this.pageInfo.total = data.total
})
.catch(function (error) {
// 处理错误情况
console.log(error);
})
.finally(function () {
// 总是会执行
});分页插件。在iView UI 组件中找到 page 分页组件
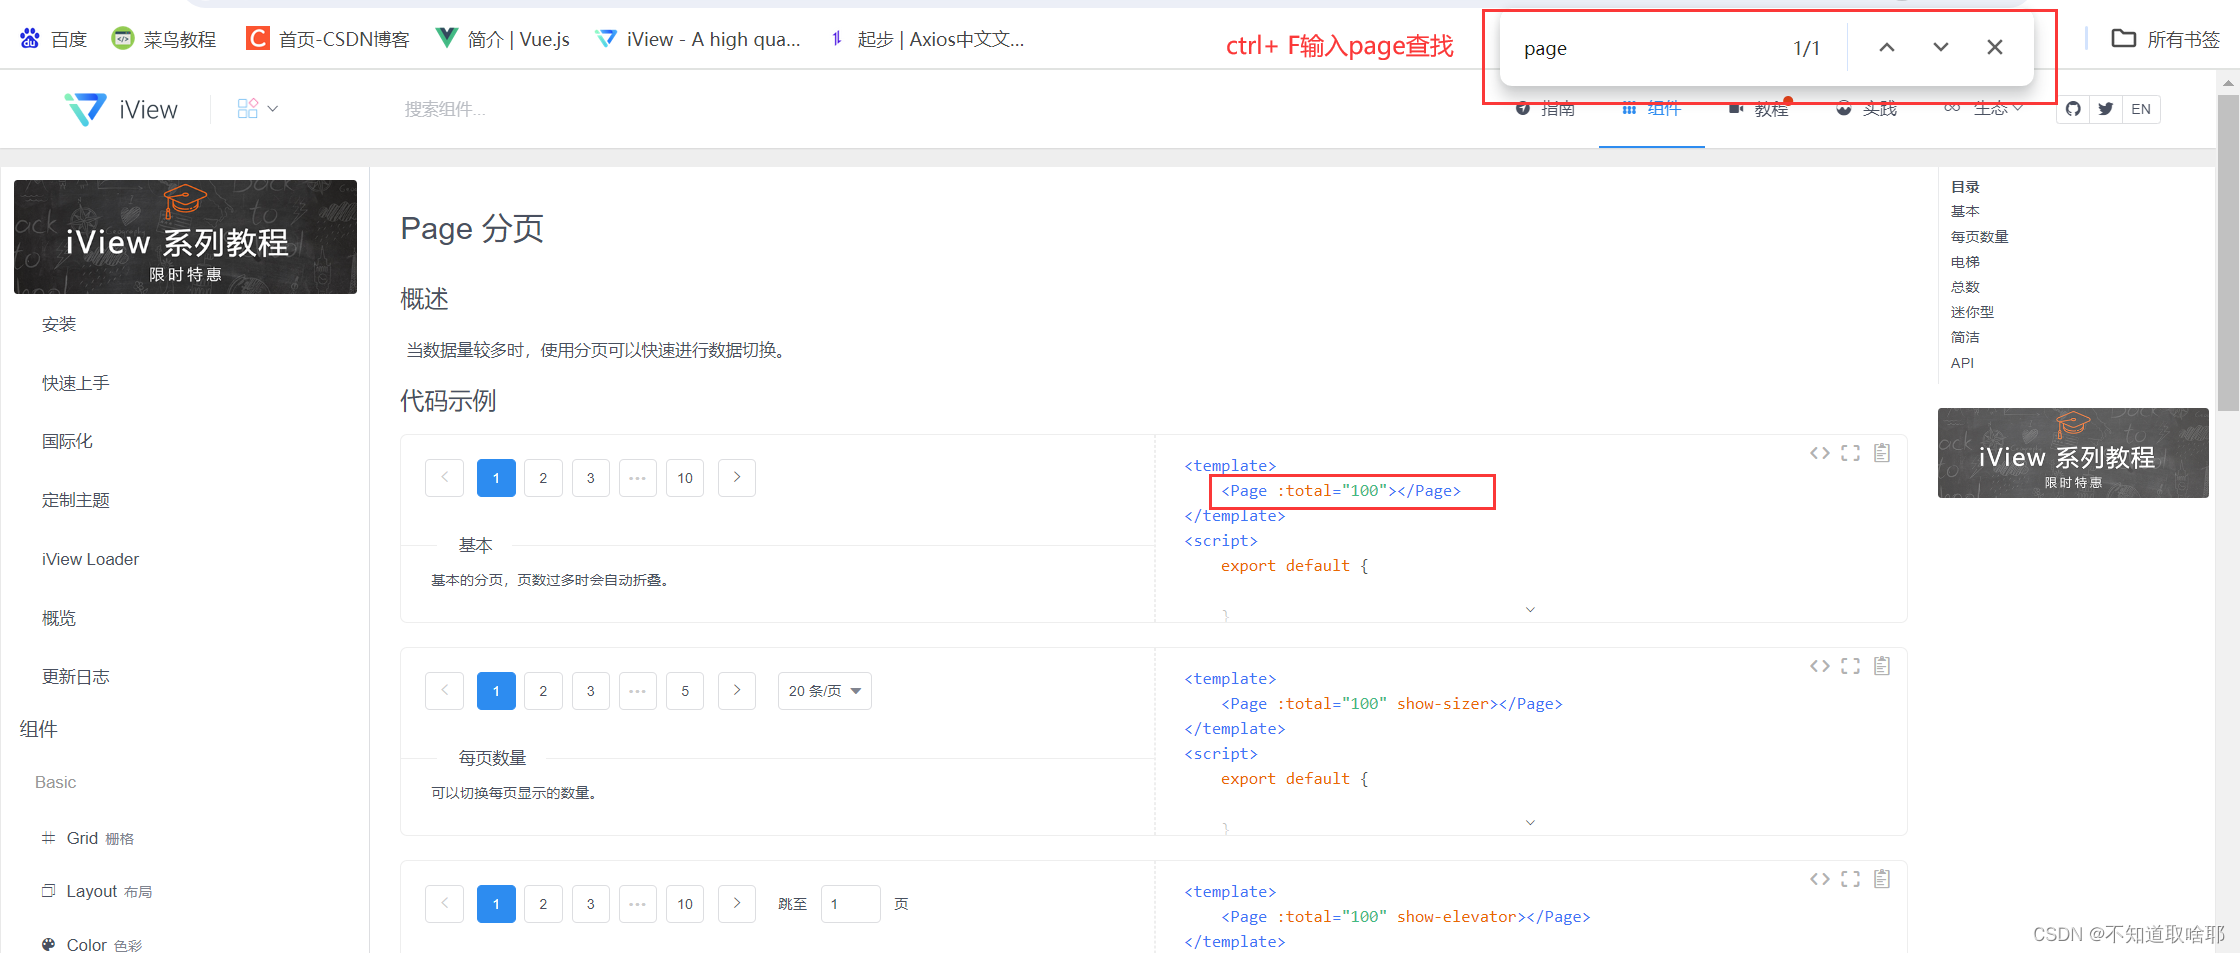
选择一款引入即可
<Page :total="pageInfo.total" :page-size="pageInfo.size" :current="pageInfo.current"
show-total @on-change="currentPage"></Page>
注意位置是在<i-Table>标签之下
- :current="pageInfo.current" 当前页的数字
- show-total 总页数
- :page-size="pageInfo.size" 每页条数
然后在methods中写分页的代码
currentPage(e) {
                this.pageInfo.current = e
                this.getList()
},
在 IDEA 中运行 index.html 文件即可看到实现分页的操作
如果分页失效,则在config层中的MybatisPlusConfig类中添加如下代码即可
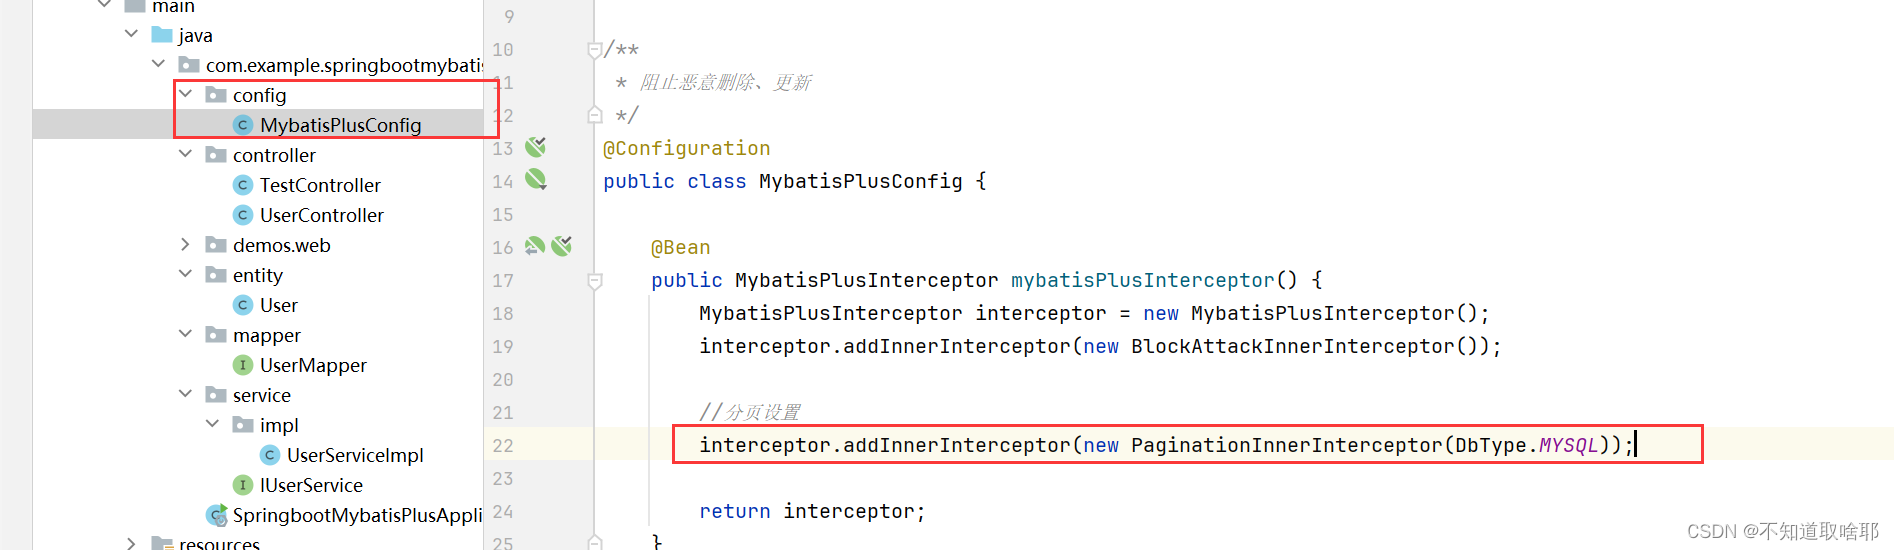
四、增删改查
4.1 模糊查询
添加输入框
<i-input v-model="pageInfo.name" @input="getList" placeholder="请输入用户名" style="width: 200px"></i-input>
- v-model="pageInfo.name" 绑定用户名
- @input="getList" 输入的时候进行查询

4.2 新增和编辑功能
添加增加用户的按钮
<i-Button @click="save('insert')">添加用户</i-Button>添加点击事件,后面编写save方法
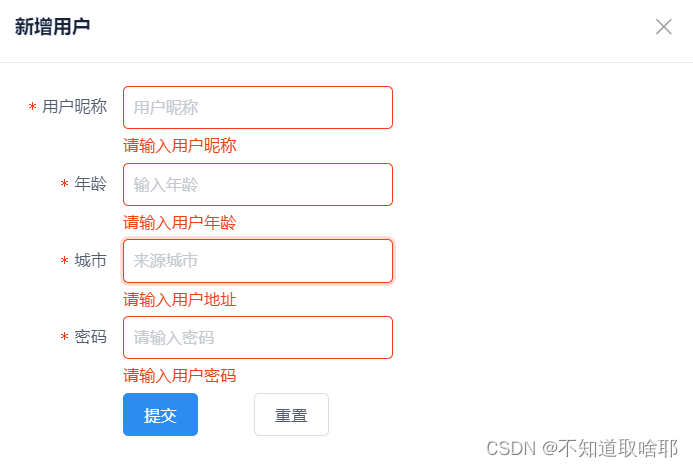
点击添加用户按钮弹出对话框
<Modal v-model="isShowModal" :title="titleModal" :footer-hide="true">
<i-form ref="ruleForm" :model="ruleForm" :rules="rule" :label-width="80">
<form-item label="用户昵称" prop="name">
<i-input style="width:200px" v-model="ruleForm.name" placeholder="用户昵称"></i-input>
</form-item>
<form-item label="年龄" prop="age">
<i-input style="width:200px" v-model="ruleForm.age" placeholder="输入年龄"></i-input>
</form-item>
<form-item label="城市" prop="source">
<i-input style="width:200px" v-model="ruleForm.source" placeholder="来源城市"></i-input>
</form-item>
<form-item label="密码" prop="password">
<i-input style="width:200px" v-model="ruleForm.password" placeholder="请输入密码"></i-input>
</form-item>
<form-item>
<i-button type="primary" @click="save()">提交</i-button>
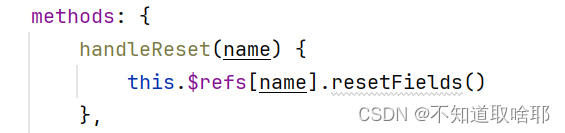
<i-button @click="handleReset('ruleForm')" style="margin-left: 38px">重置</i-button>
</form-item>
</i-form>
</Modal>isShowModal模块框设置为不展示
定义 titleModal 不然会报错
在data() 中编写 ruleForm方法
ruleForm: {
                    name: "",
                    age: "",
                    source: "",
                    password: ""
                },
在data() 中编写rule 验证规则
rule: {
                    name: [
                        {required: true, message: '请输入用户昵称', trigger: 'blur'}
                    ],
                    age: [
                        {required: true, message: '请输入用户年龄', trigger: 'blur'}
                    ],
                    source: [
                        {required: true, message: '请输入用户地址', trigger: 'blur'}
                    ],
                    password: [
                        {required: true, message: '请输入用户密码', trigger: 'blur'}
                    ],
                },
data() 方法

4.2.1 降序排列,新增的数据在第一页,在Service层中编写代码

在methods中定义handleReset方法
4.3 删除功能
添加按钮
<i-Button @click="handleSelectAll(true)">选择全部</i-Button>
<i-Button @click="handleSelectAll(false)">取消全选</i-Button>
<i-Button @click="isConfirmDelete=true" :disabled="delIds.length<=0 ? true:false">批量删除</i-Button>
:disabled="delIds.length<=0 ? true:false" 表示选中的行数,当选中的行大于0时则显示批量删除的按键
创建提示框
<MOdal v-model="isConfirmDelete" width="360">
<p slot="header" style="color: #f60;text-align: center">
<Icon type="ios-information-circle"></Icon>
<span>数据删除</span>
</p>
<div style="text-align: center">
<p>你确定要删除id为{{delIds}}的数据吗</p>
</div>
<div slot="footer">
<i-button type="error" size="large" long @click="delList">确定删除</i-button>
</div>
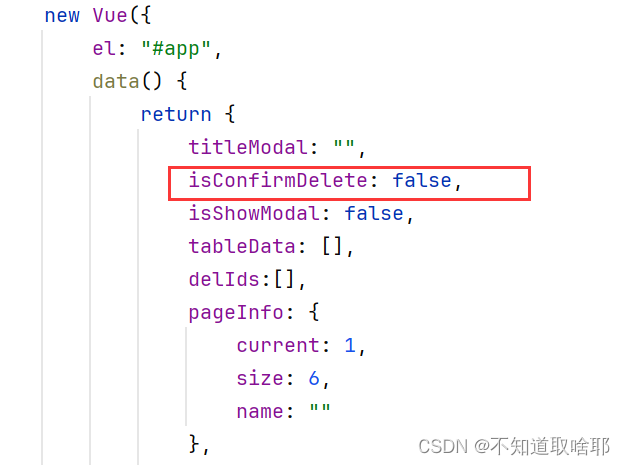
</MOdal>在data() 中定义变量
isConfirmDelete:false在methods中编写delList方法和select方法
delList() {
                this.isConfirmDelete = false
                axios.post('/user/delete', this.delIds)
                    .then(response => {
                        console.log(response);
                        if (!response.data) {
                            this.$Message.error("删除失败")
                        } else {
                            // 重置分页到第一页
                            this.pageInfo.current = 1
                            this.getList()
                        }
                    })
                    .catch(function (error) {
                        console.log(error);
                    });
            },
            select(selection, row) {
                this.delIds = []
                selection.forEach(item => {
                    this.delIds.push(item.id)
                })
                console.log(this.delIds)
            },
在data() 中定义delIds 变量
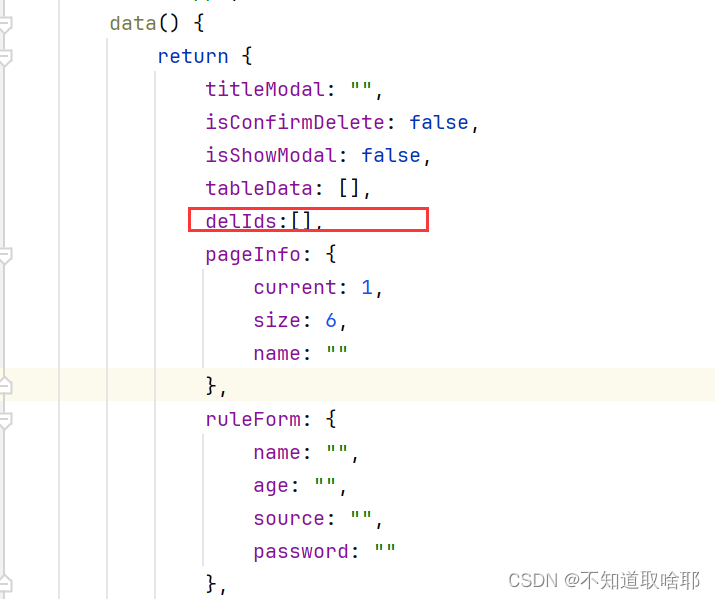
在当前页中若删除了当前页中的所有数据,则应该页数减一并且回到上一页,就是删除后重置当前页到第一页;同理,当前页若已经满,即刚好数量到达展示的行数,则再增加用户就应该到另一页页中
在删除后的操作中添加如下代码:
this.pageInfo.current = 1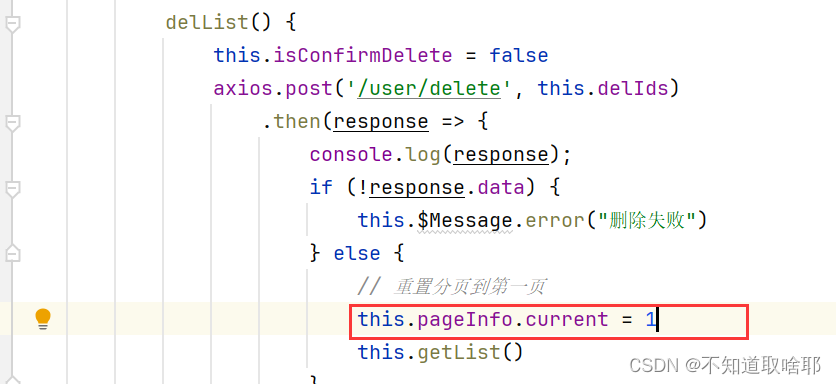
在添加用户中添加如下代码
this.pageInfo.current = 1
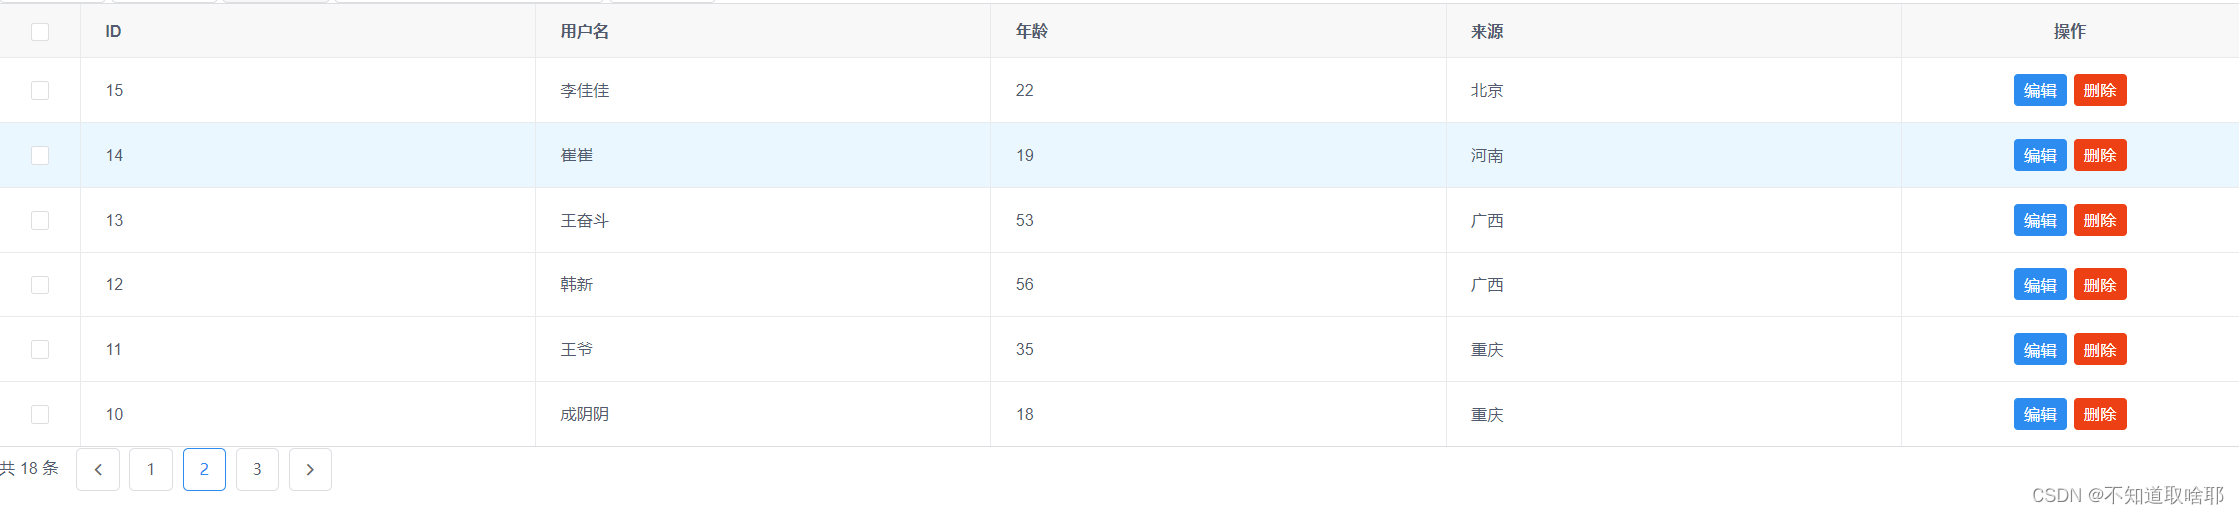
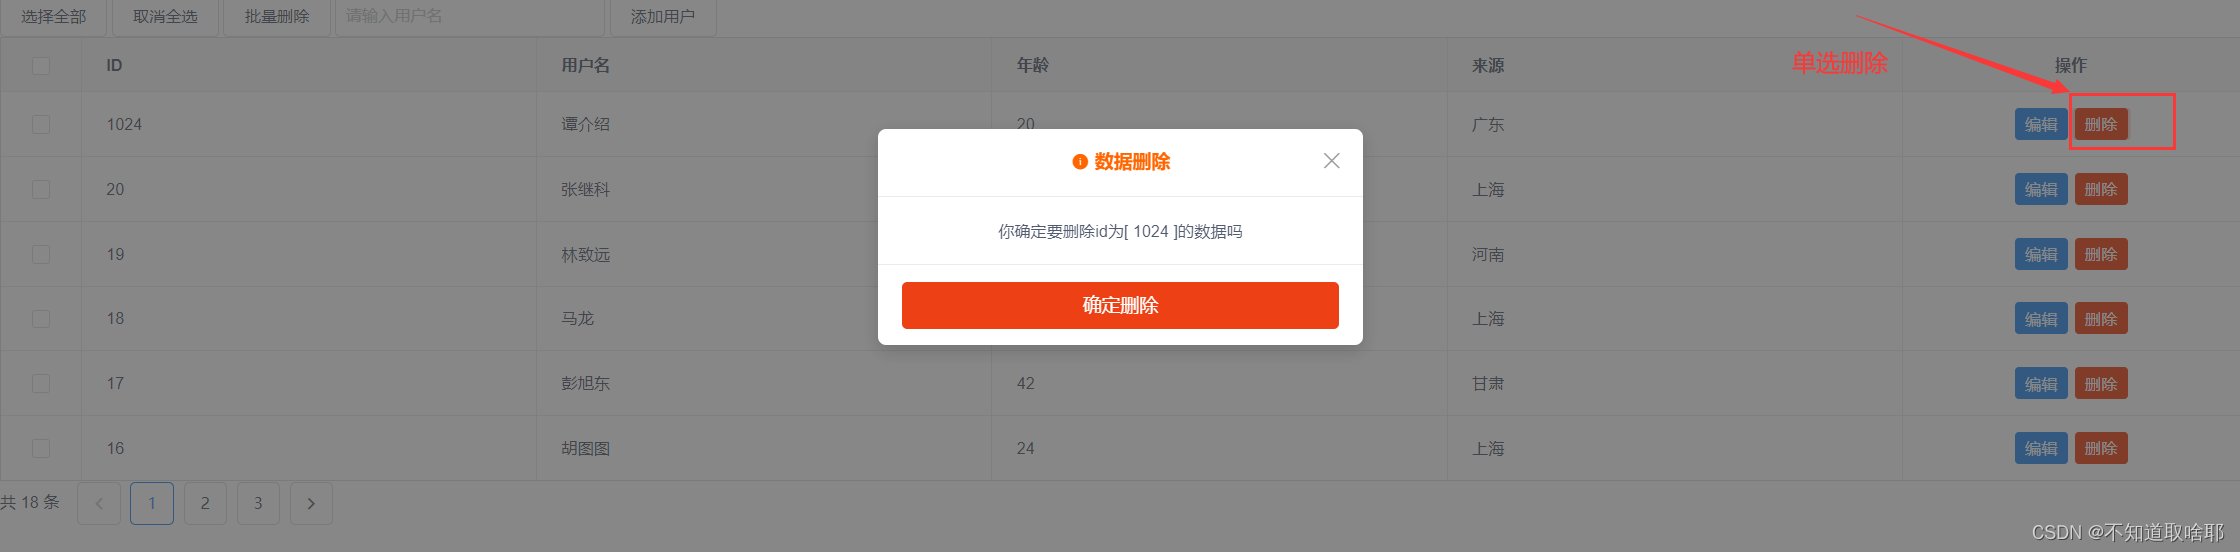
功能展示:
单选删除
批量删除
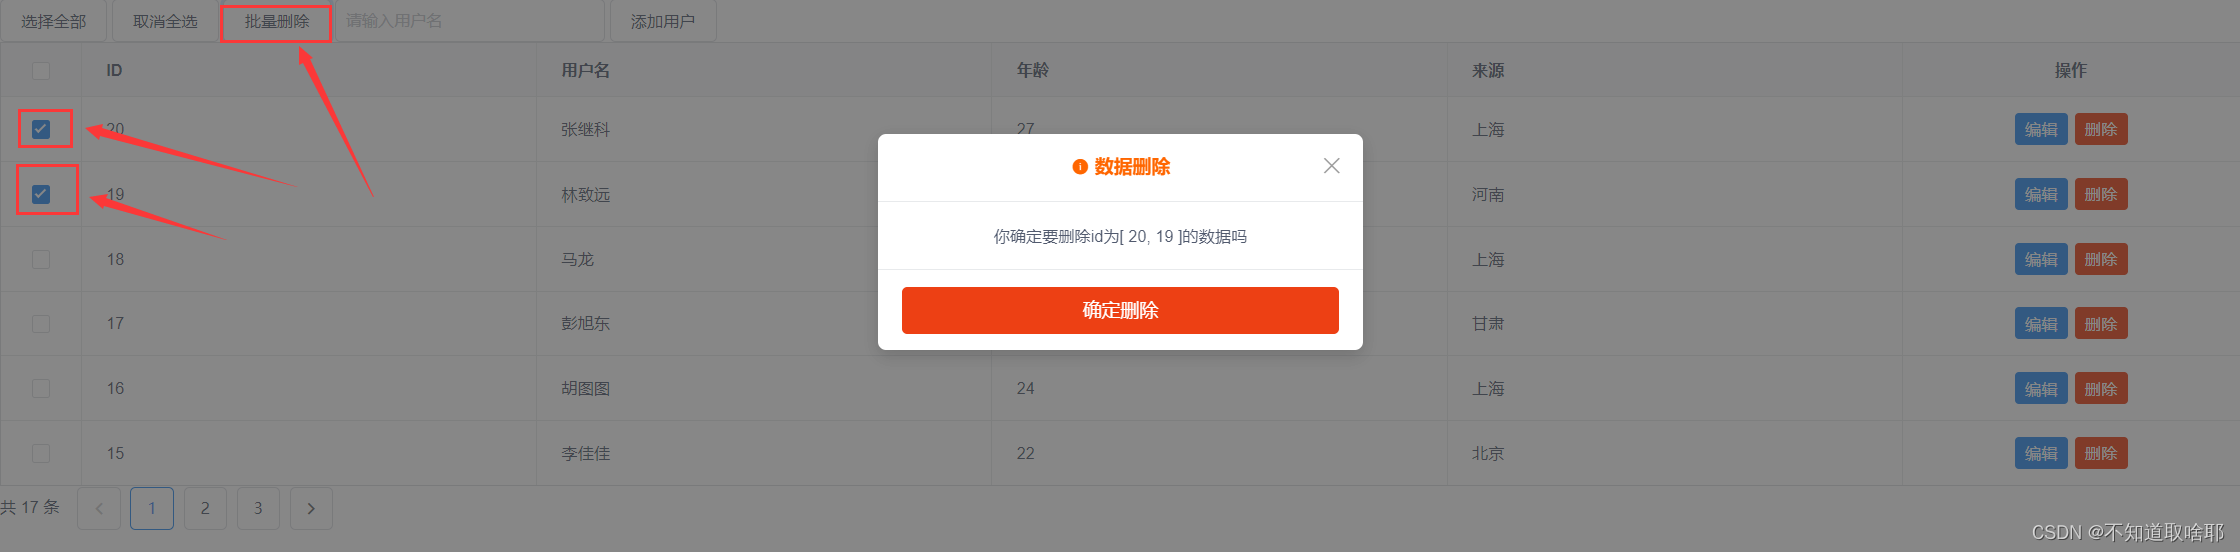
至此,整个增删改查的功能就结束了
总结
该案例作者也是跟着b站的博主一步一步操作的,其中有很多代码的含义我也没能彻底理解
博主视频链接:SpringBoot+Vue前后端分离实现数据增删改查教学(mybatis-plus版)_哔哩哔哩_bilibili
案例涉及的技术 SpringBoot+Mybatis-Plus+Vue+Axios,需要提前学习前端的基础知识,node、js、dom编程等才能深入理解该案例的各代码的具体含义
最后每篇分享:遇见你,就像跋山涉水遇见一轮明月,以后天黑心伤,就问那天借一点月光——《天堂旅行团》


 1767
1767

 被折叠的 条评论
为什么被折叠?
被折叠的 条评论
为什么被折叠?
 到【灌水乐园】发言


