


介绍
在应用开发时,一个应用需要适配多终端的设备,使用Navigation的mode属性来实现一套代码,多终端适配。
效果图预览
使用说明
- 将程序运行在折叠屏手机或者平板上观看适配效果。
实现思路
本例涉及的关键特性和实现方案如下:
1.分屏的使用
首先介绍的是本案例的关键特性Navigation的mode属性,原先采用的是NavigationMode.Stack,导航栏与内容区独立显示,相当于两个页面。 那么使用NavigationMode.Auto,在API version 10及以上:窗口宽度>=600vp时,采用Split模式显示;窗口宽度<600vp时,采用Stack模式显示。
源码参考EntryView.ets
Navigation(this.pageStack) { ... }
  .backgroundColor($r('app.color.main_background_color'))
  .hideTitleBar(true)
  .navBarWidth(this.isFullScreen)
  .navDestination(this.pageMap)
  .mode(NavigationMode.Auto)
2.模块全屏的使用以及Bug解决
在EntryView的Navigation中设置navBarWidth,其值设置为由@Provide装饰器装饰过的变量,默认值为50%,作用是为了适配需要全屏的模块。 目前只有折叠屏音乐播放器案例需要全屏,在对应模块的实现文件声明由@Consume装饰器装饰过的变量,更改变量的值就可以实现与后代组件双向同步的通信,从而改变 EntryView中navBarWidth的宽度。
这只实现了全屏变换,可是原来Navigation更换模块时会有一个动画,会与全屏变换动画冲突,右半屏会出现上一个模块画面一闪而过的bug。这需要更改isNeedFullScreen的值来控制 路由跳转时是否有动画显示。
源码参考:
DynamicsRouter.ets
MusicPlayerInfoComp.ets
EntryView.ets
 // EntryView.ets
 ...
 @Provide('isFullScreen') isFullScreen: string = '50%';
 ...
 Navigation(this.pageStack) { ... }
   .backgroundColor($r('app.color.main_background_color'))
   .hideTitleBar(true)
   .navBarWidth(this.isFullScreen)
   .navDestination(this.pageMap)
   .mode(NavigationMode.Auto)
 ...


 // MusicPlayerInfoComp.ets
 ...
 @Consume('isFullScreen') isFullScreen: string;
 ...
 aboutToAppear(): void {
   ...
   // 隐藏navigation导航栏,设置为全屏。
   animateTo({
     duration: 400,
     curve: Curve.EaseInOut,
   }, () => {
     this.isFullScreen = '0.01%';
   })
   ...
 }
 ...
 build() {
   Flex({ direction: this.curFlexDirection }) {
     Image($r('app.media.ic_public_back'))
       .width($r('app.integer.font_size_music_title'))
       .height($r('app.integer.font_size_music_title'))
       .onClick(() => {
         DynamicsRouter.pop()
         // 呈现navigation导航栏,设置为半屏。
         animateTo({
           duration: 200,
           curve: Curve.EaseInOut,
         }, () => {
           this.isFullScreen = '50%';
         })
       })
       .position({ x: $r('app.integer.image_position_x'), y: $r('app.integer.image_position_y') })
       .fillColor(Color.White)
     ...
   }
 }


 //DynamicsRouter.ets
 public static async push(routerInfo: RouterInfo, param?: string): Promise<void> {
   ...
   // 模块是否需要转场动画
   let isNeedFullScreen: boolean = true;
   // TODO:知识点:通过动态import的方式引入模块,在需要进入页面时才加载模块,可以减少主页面的初始化时间及占用的内存
   await import(moduleName).then((result: ESObject) => {
     ...
     if (FullScreenArray.includes(moduleName)) {
       isNeedFullScreen = false;
     }
   }, (error: ESObject) => {
     // 动态加载模块失败时,打印错误日志
     logger.error(LOGGER_TAG, error);
   });
   if (isImportSucceed) {
     ...
     // 查找到对应的路由栈进行跳转
     DynamicsRouter.getNavPathStack().pushPath({ name: builderName, param: param }, isNeedFullScreen);
     ...
   }
 }
3.主页Navigation弹出路由栈
手机的Navigation采用Stack模式,手势右滑退出会自动pop路由栈,但是采用分栏可以直接点击跳转到下一模块,那么就需要在点击瀑布流的FlowItem的时刻pop上一个路由栈。
源码参考FunctionalScenes.ets。
  @Builder
  methodPoints(listData: SceneModuleInfo) {
    ...
    .onClick(() => {
      DynamicsRouter.pop();
      // 点击瀑布流Item时,根据点击的模块信息,将页面放入路由栈
      DynamicsRouter.push(listData.routerInfo, listData.param);
    })
  }
FAQ
1.页面间共享组件实例模块的适配问题
页面间共享组件实例模块中也写了Navigation组件,想要展示的效果是Stack模式,但是半屏的平板的宽度也大于600,被系统自动认为采用Split模式。
页面间共享组件实例模块中还绑定了半模态,并未设置preferType(半模态页面的样式)。设备宽度小于600vp时,默认显示底部弹窗样式。 设备宽度在600-840vp间时,默认显示居中弹窗样式。设备宽度大于840vp时,默认显示跟手弹窗样式,跟手弹窗显示在bindSheet绑定的节点下方。平板宽度大于840vp,跟手弹窗显示在节点下方导致弹窗不可见。 所以通过设备宽度来设置preferType的样式。
源码参考:
ComponentSharedInPages.ets
TakeTaxiDetailPage.ets
  //ComponentSharedInPages.ets
  build() {
    Stack({alignContent: Alignment.Bottom}) {
      ...
      // 应用主页用NavDestination承载,Navigation为空页面直接跳转到MainPage主页面
      Navigation(this.pageStackForComponentSharedPages) {
      }
      ...
      .mode(NavigationMode.Stack)
    }
    ...
  }


  //TakeTaxiDetailPage.ets
  ...
  @State windowWidth: number = 0;
  readonly componentsWindowWidth: number = 600;
  ...
  /**
   * 获取应用主窗口的宽高
   */
  aboutToAppear() {
    window.getLastWindow(getContext(this), (err: BusinessError, data: window.Window) => {
      let rect: window.Rect = data.getWindowProperties().windowRect;
      this.windowWidth = px2vp(rect.width);
    })
  }
  ...
  build() {
    NavDestination() {
      ...
      // 绑定上半模态页面,用于显示内容
      .bindSheet($$this.isShow, this.taxiContentBuilder(),
        {
          detents: TakeTaxiPageCommonConstants.SHEET_DETENTS,
          preferType: this.windowWidth > this.componentsWindowWidth ? SheetType.CENTER : SheetType.POPUP,
          ...
        }
      )
    }
    ...
  }
2.底部抽屉滑动效果模块的适配问题
底部抽屉滑动效果模块中写了一个Image组件,其资源是一个很大的地图图片,在分栏效果展示时Image图片资源会拦截Navigation导航栏的点击或者拖拽事件,可以采用Column的clip属性将超出Image的图片裁掉。
源码参考:Component.ets。
 build() {
   Column() {
     // 背景地图图片
     Image($r('app.media.map'))
       .id("bg_img")
       .height($r('app.integer.number_2000'))
       .width($r('app.integer.number_2000'))
       .translate({ x: this.offsetX, y: this.offsetY })// 以组件左上角为坐标原点进行移动
       .draggable(false) // 单指操作拖动背景地图
    }.width('100%')
    .height('100%')
    .clip(true) // 地图图片超出页面区域时裁剪掉
    ...
 }
3.适配挖孔屏模块的适配问题
适配挖孔屏模块Image组件采用ImageFit.Cover填充图片,导致图片显示不完整,采用ImageFit.Fill,虽然图片变扁了,但是能完整显示,不影响具体功能。
源码参考:DiggingHoleScreen.ets。
Image($r('app.media.2048game'))
  .objectFit(ImageFit.Fill)
  .width('100%')
  .height('100%')
4.左右拖动切换图片模块的适配问题
左右拖动切换图片模块主要功能要实时记录手势拖动的距离,以此来进行计算,所以宽度和高度要写固定数值,不能使用百分比。但是折叠屏手机折叠后会出现超出屏幕的情况,可采用缩小组件宽度的方式适配。
源码参考:
DragToSwitchPicturesView.ets
Constants.ets
integer.json
// DragToSwitchPicturesView.ets
@State dragRefOffset: number = 0; // 用来记录每次图标拖动的距离
@State imageWidth: number = 160; // 用来记录每次图标拖动完成后左侧Image的width宽度
@State leftImageWidth: number = 160; // 用来记录每次图标拖动时左侧Image的实时width宽度
@State rightImageWidth: number = 160; // 用来记录每次图标拖动时右侧Image的实时width宽度
...
PanGesture({ fingers: CONFIGURATION.PANGESTURE_FINGERS, distance: CONFIGURATION.PANGESTURE_DISTANCE })
  .onActionStart(() => {
    this.dragRefOffset = CONFIGURATION.INIT_VALUE; // 每次拖动开始时将图标拖动的距离初始化。
  })
    // TODO: 性能知识点: 该函数是系统高频回调函数,避免在函数中进行冗余或耗时操作,例如应该减少或避免在函数打印日志,会有较大的性能损耗。
  .onActionUpdate((event: GestureEvent) => {
    // 通过监听GestureEvent事件,实时监听图标拖动距离
    this.dragRefOffset = event.offsetX;
    this.leftImageWidth = this.imageWidth + this.dragRefOffset;
    this.rightImageWidth = CONFIGURATION.IMAGE_FULL_SIZE - this.leftImageWidth;
    if (this.leftImageWidth >= CONFIGURATION.LEFT_IMAGE_RIGHT_LIMIT_SIZE) { // 当leftImageWidth大于等于310vp时,设置左右Image为固定值,实现停止滑动效果。
      this.leftImageWidth = CONFIGURATION.LEFT_IMAGE_RIGHT_LIMIT_SIZE;
      this.rightImageWidth = CONFIGURATION.RIGHT_IMAGE_RIGHT_LIMIT_SIZE;
    } else if (this.leftImageWidth <= CONFIGURATION.LEFT_IMAGE_LEFT_LIMIT_SIZE) { // 当leftImageWidth小于等于30vp时,设置左右Image为固定值,实现停止滑动效果。
      this.leftImageWidth = CONFIGURATION.LEFT_IMAGE_LEFT_LIMIT_SIZE;
      this.rightImageWidth = CONFIGURATION.RIGHT_IMAGE_LEFT_LIMIT_SIZE;
    }
  })
  .onActionEnd((event: GestureEvent) => {
    if (this.leftImageWidth <= CONFIGURATION.LEFT_IMAGE_LEFT_LIMIT_SIZE) {
      this.leftImageWidth = CONFIGURATION.LEFT_IMAGE_LEFT_LIMIT_SIZE;
      this.rightImageWidth = CONFIGURATION.RIGHT_IMAGE_LEFT_LIMIT_SIZE;
      this.imageWidth = CONFIGURATION.LEFT_IMAGE_LEFT_LIMIT_SIZE;
    } else if (this.leftImageWidth >= CONFIGURATION.LEFT_IMAGE_RIGHT_LIMIT_SIZE) {
      this.leftImageWidth = CONFIGURATION.LEFT_IMAGE_RIGHT_LIMIT_SIZE;
      this.rightImageWidth = CONFIGURATION.RIGHT_IMAGE_RIGHT_LIMIT_SIZE;
      this.imageWidth = CONFIGURATION.LEFT_IMAGE_RIGHT_LIMIT_SIZE;
    } else {
      this.leftImageWidth = this.imageWidth + this.dragRefOffset; // 滑动结束时leftImageWidth等于左边原有Width+拖动距离。
      this.rightImageWidth = CONFIGURATION.IMAGE_FULL_SIZE - this.leftImageWidth; // 滑动结束时rightImageWidth等于340-leftImageWidth。
      this.imageWidth = this.leftImageWidth; // 滑动结束时ImageWidth等于leftImageWidth。
    }
  })
5.图片压缩模块的适配问题
图片压缩模块中Text组件的字号在折叠手机屏折叠状态下过大,文本会超出屏幕,可采取缩小字号适配。
源码参考:ImageCompression.ets
6.图片缩放模块的适配问题
图片缩放模块中Image组件的宽度和高度由窗口的宽度和高度决定。由于屏幕宽度大于600vp要分栏,会导致图片过大。所以要判断是否分栏,若分栏则windowWidth的宽度减半。
源码参考:ImageContentView.ets
   ...
   @State windowWidth: number = 0;
   @State windowHeight: number = 0;
   ...
   /**
   * 获取应用主窗口的宽高
   */
  aboutToAppear() {
    window.getLastWindow(getContext(this), (err: BusinessError, data: window.Window) => {
      let rect: window.Rect = data.getWindowProperties().windowRect;
      this.windowWidth = px2vp(rect.width);
      this.windowHeight = px2vp(rect.height);
      if (this.windowWidth > this.componentsWindowWidth) {
        this.windowWidth = this.windowWidth / 2;
      }
      data.on("windowSizeChange", (size: window.Size) => {
        this.windowWidth = px2vp(size.width);
        this.windowHeight = px2vp(size.height);
        if (this.windowWidth > this.componentsWindowWidth) {
          this.windowWidth = this.windowWidth / 2;
        }
      })
    })
  }
  ...
  Image(this.image)
    .width(this.windowWidth * this.imageScale.scaleValue)
    .height(this.windowHeight * this.imageScale.scaleValue)
    ...
7.元素超出List区域模块的适配问题
元素超出List区域模块中使用ListitemGroup组件实现卡片样式,在折叠屏中展开时并未布局满全屏,原因是设置ListItemGroupStyle.CARD时,必须配合ListItem的ListItemStyle.CARD使用。
源码参考:AboutMe.ets
ListItemGroup({ style: ListItemGroupStyle.CARD }) {
  ListItem({ style: ListItemStyle.CARD }) {
    ...
  }.height($r("app.integer.itemoverflow_default_item_height"))
  .toastOnClick($r("app.string.listitem_overflow_toast_no_edit"))

  ListItem({ style: ListItemStyle.CARD }) {
    ...
  }.height($r("app.integer.itemoverflow_default_item_height"))
  .toastOnClick($r("app.string.listitem_overflow_toast_no_edit"))
}
.divider({ strokeWidth: 1, color: $r('app.color.aboubtme_pageBcColor') })

ListItemGroup({ style: ListItemGroupStyle.CARD }) {
  ListItem({ style: ListItemStyle.CARD }) {
    ...
  }.height($r("app.integer.itemoverflow_default_item_height"))
  .toastOnClick($r("app.string.listitem_overflow_toast_no_card"))
}
    ...

ListItemGroup({ style: ListItemGroupStyle.CARD }) {
  ListItem({ style: ListItemStyle.CARD }) {
    ...
  .toastOnClick($r("app.string.listitem_overflow_toast_no_favorite"))

  ListItem({ style: ListItemStyle.CARD }) {
    ...
  }.height($r("app.integer.itemoverflow_default_item_height"))
  .toastOnClick($r("app.string.listitem_overflow_toast_no_settings"))

  ListItem({ style: ListItemStyle.CARD }) {
    ...
  }.height($r("app.integer.itemoverflow_default_item_height"))
  .toastOnClick($r("app.string.listitem_overflow_toast_about"))
}
    ...
8.听歌识曲水波纹特效模块的适配问题
听歌识曲水波纹特效模块中使用Column容器搭配margin进行布局,但是在不同设备中就不适配了。可以使用justifyContent属性设置子组件在垂直方向上的对齐格式,再搭配margin就可适配多种终端。
源码参考:WaterRipples.ets
Column() {
  Text($r('app.string.sound_hound'))
    .fontColor(Color.White)
    .fontSize(18)
    .margin({ top: $r('app.integer.margin_large') })

  ButtonWithWaterRipples({ isListening: this.isListening })

  Text(this.isListening ? $r('app.string.is_listening') : $r('app.string.click_to_listen'))
    .fontColor(Color.White)
    .margin({ bottom: $r('app.integer.margin_large') })
}
.backgroundColor(Color.Black)
.justifyContent(FlexAlign.SpaceBetween)
.width("100%")
.height("100%")
9.模块资源命名重名
模块资源重复导致模块显示错误,修改资源命名,最好在新命名前面加上自己的模块名称。
{
  "name": "navigationparametertransferview_user_name",
  "value": "用户姓名:"
}

{
  "name": "aboubtme_pageBcColor",
  "value": "#fff1f3f5"
}

{
  "name": "customsafekeyboard_placeholder",
  "value": "请输入密码"
}
参考资料
@Provide装饰器和@Consume装饰器:与后代组件双向同步
最后分享一份鸿蒙(HarmonyOS)开发学习指南需要的可以扫码免费领取!!!

《鸿蒙(HarmonyOS)开发学习指南》
第一章 快速入门
1、开发准备
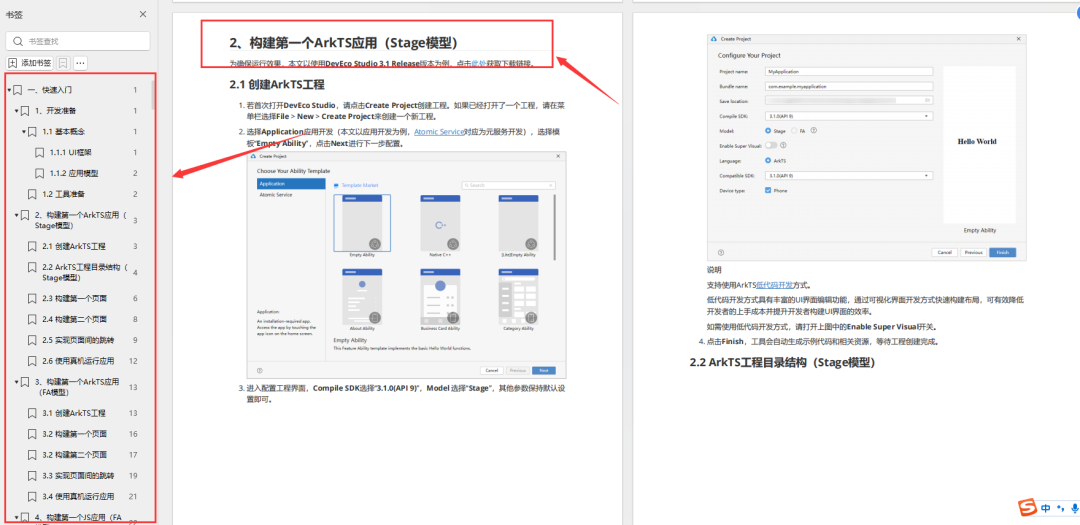
2、构建第一个ArkTS应用(Stage模型)
3、构建第一个ArkTS应用(FA模型)
4、构建第一个JS应用(FA模型)
5、…
第二章 开发基础知识
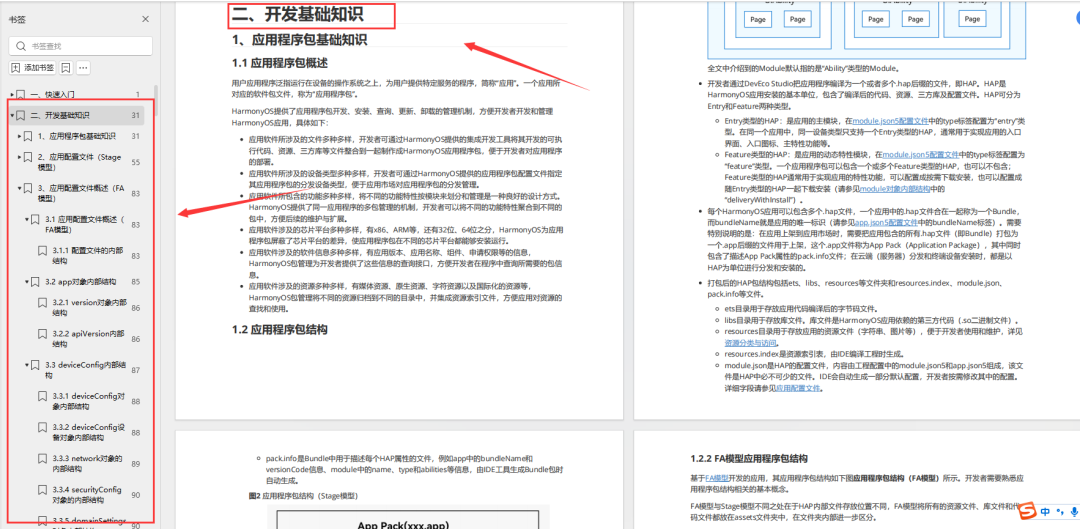
1、应用程序包基础知识
2、应用配置文件(Stage模型)
3、应用配置文件概述(FA模型)
4、…
第三章 资源分类与访问
1、 资源分类与访问
2、 创建资源目录和资源文件
3、 资源访问
4、…

第四章 学习ArkTs语言
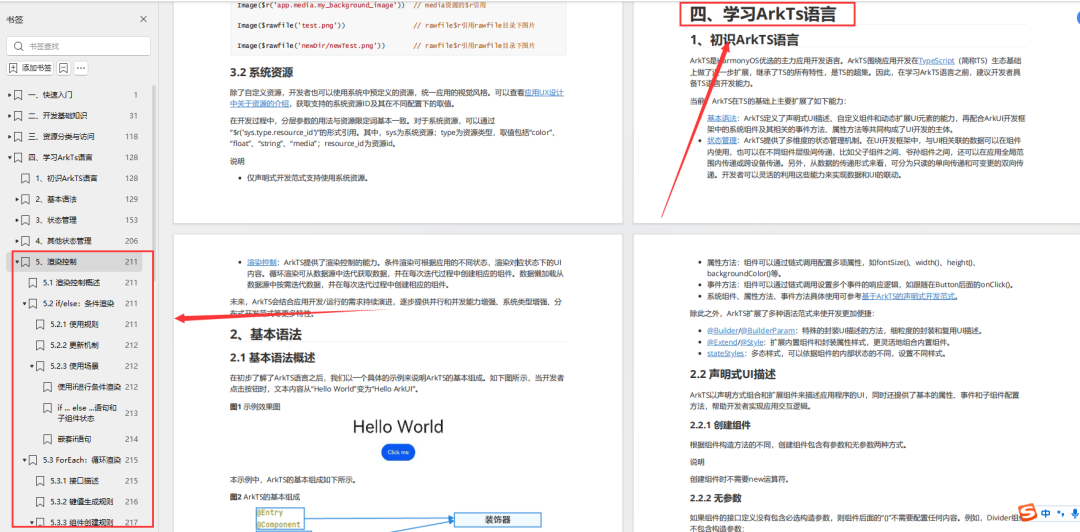
1、初识ArkTS语言
2、基本语法
3、状态管理
4、其他状态管理
5、渲染控制
6、…
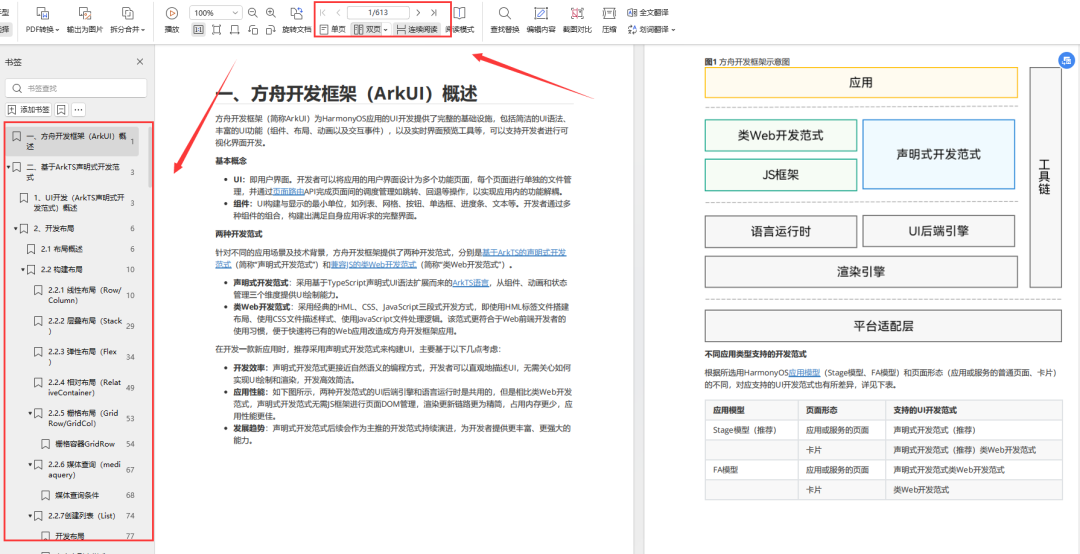
第五章 UI开发
1.方舟开发框架(ArkUI)概述
2.基于ArkTS声明式开发范式
3.兼容JS的类Web开发范式
4…
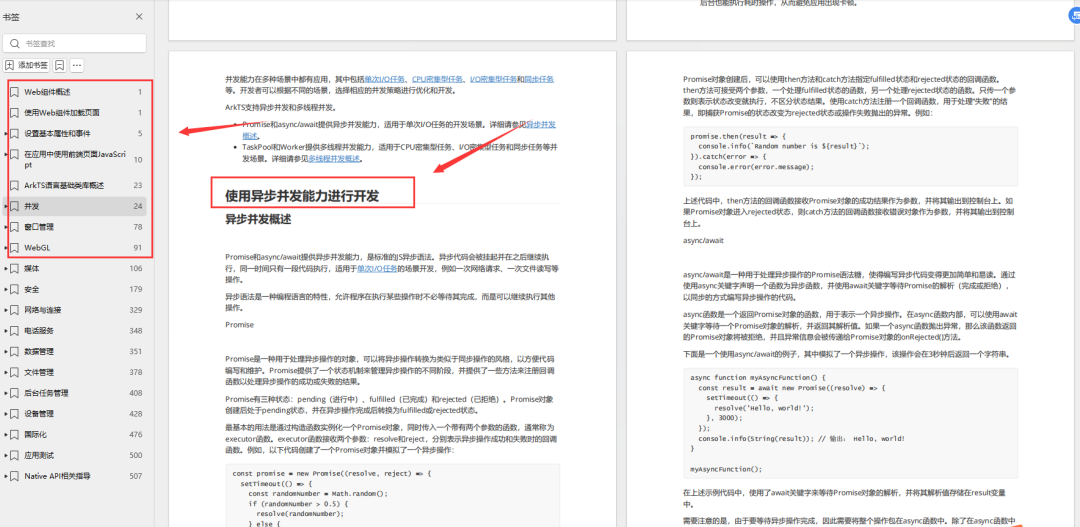
第六章 Web开发
1.Web组件概述
2.使用Web组件加载页面
3.设置基本属性和事件
4.在应用中使用前端页面JavaScript
5.ArkTS语言基础类库概述
6.并发
7…
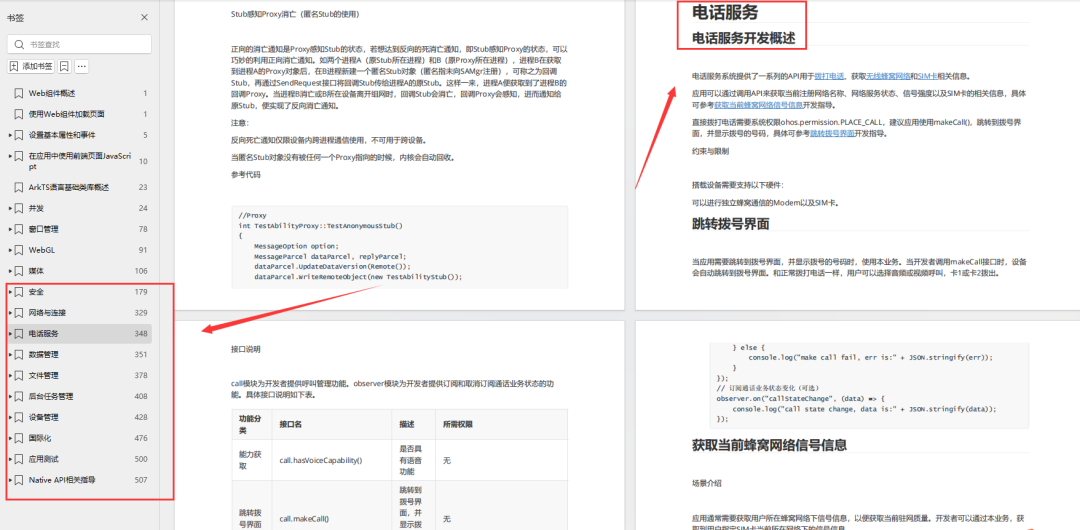
11.网络与连接
12.电话服务
13.数据管理
14.文件管理
15.后台任务管理
16.设备管理
17…
第七章 应用模型
1.应用模型概述
2.Stage模型开发指导
3.FA模型开发指导
4…


 被折叠的 条评论
为什么被折叠?
被折叠的 条评论
为什么被折叠?
 到【灌水乐园】发言


