


本文将介绍Windows系统如何使用Python发送通知。
本文目录
- 介绍
- 实现效果
- 错误解决
- 全部代码
- 结尾
介绍
你有没有想在你的项目中多加一些提示?
你可能会想使用弹出消息或用其他内置函数
如果直接使用通知弹窗呢?
以下是用python做出的通知效果:
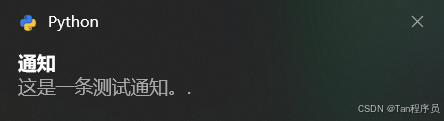
实现效果
那么,如何用Python发出一个通知呢?
首先,我们需要安装 win10toast 第三方库
在终端输入以下内容即可:
pip install win10toast
注:作者未测试Win7 Win8 Win11是否可用,仅Win10已测试
等待安装完成后,我们就可以将它导入到项目,因为我们只需要用它发送通知,所以只导入ToastNotifier就可以了:
from win10toast import ToastNotifier
然后,我们将ToastNotifier实例化:
notifier = ToastNotifier()
如果只想实现一个简单的通知,可以用notifier.show_toast()函数,但也不能不填实参,至少要把前两个填上:
notifier.show_toast('标题', '内容')
效果:

如果想改一下显示的图标,可以在show_toast中加入icon_path。
这个参数中要填上你的图标的路径,再运行一次就会变成你设置的图标啦。

如果你觉得它显示时间太长或太短,还可以加入duration参数,它接受一个数值实参,单位是秒,比如:
notifier.show_toast('标题', '你好!', duration=10)
上面这段代码显示出来的通知会显示十秒钟,十秒钟后,他就会被销毁。
错误解决
有的小伙伴可能通知完后会提示一个错误:

其实这个错误对程序没有什么影响,在通知运行完就会抛出,如果你实在看着不爽,可以这样做:
1.找到"你的python安装路径\Lib\site-packages\win10toast",里面应该有__main__.py和__init__.py两个文件。
2.打开__init__.py找到第144行,如果没错,应该是on_destroy函数的定义这里,可以看到该函数返回None:
   def on_destroy(self, hwnd, msg, wparam, lparam):
        """Clean after notification ended.
        :hwnd:
        :msg:
        :wparam:
        :lparam:
        """
        nid = (self.hwnd, 0)
        Shell_NotifyIcon(NIM_DELETE, nid)
        PostQuitMessage(0)

        return None # 在这里
在https://learn.microsoft.com/en-us/windows/win32/winmsg/wm-destroy#return-value中:
Return value
Type: LRESULT
If an application processes this message, it should return zero.
翻译:
返回值
类型:LRESULT
如果应用程序处理此消息,则应返回零。
所以:
3.将最后的return None,改成return 0,就不会报错了。
注:作者未测试Win7 Win8 Win11是否可用,仅Win10已测试
全部代码
from win10toast import ToastNotifier


def send_notification(t, msg, icon_path=None):
    """显示通知"""
    notifier = ToastNotifier()

    if icon_path:  # 如果制定了图标,就显示,否则不显示
        notifier.show_toast(title=t, msg=msg, icon_path=icon_path, duration=5)
    else:
        notifier.show_toast(title=t, msg=msg, duration=5)


if __name__ == "__main__":
    title = "标题"
    message = "内容"

    send_notification(title, message)
结尾
那么本篇文章到这里就结束了,如果对你有帮助,记得点个赞哦!


彩蛋
你看到这行文字了?等一下,别走!既然你看到了,到我的哔哩哔哩或者抖音上点个关注吧


 2176
2176

 被折叠的 条评论
为什么被折叠?
被折叠的 条评论
为什么被折叠?
 到【灌水乐园】发言


