


最后的话
最近很多小伙伴找我要Linux学习资料,于是我翻箱倒柜,整理了一些优质资源,涵盖视频、电子书、PPT等共享给大家!
资料预览
给大家整理的视频资料:

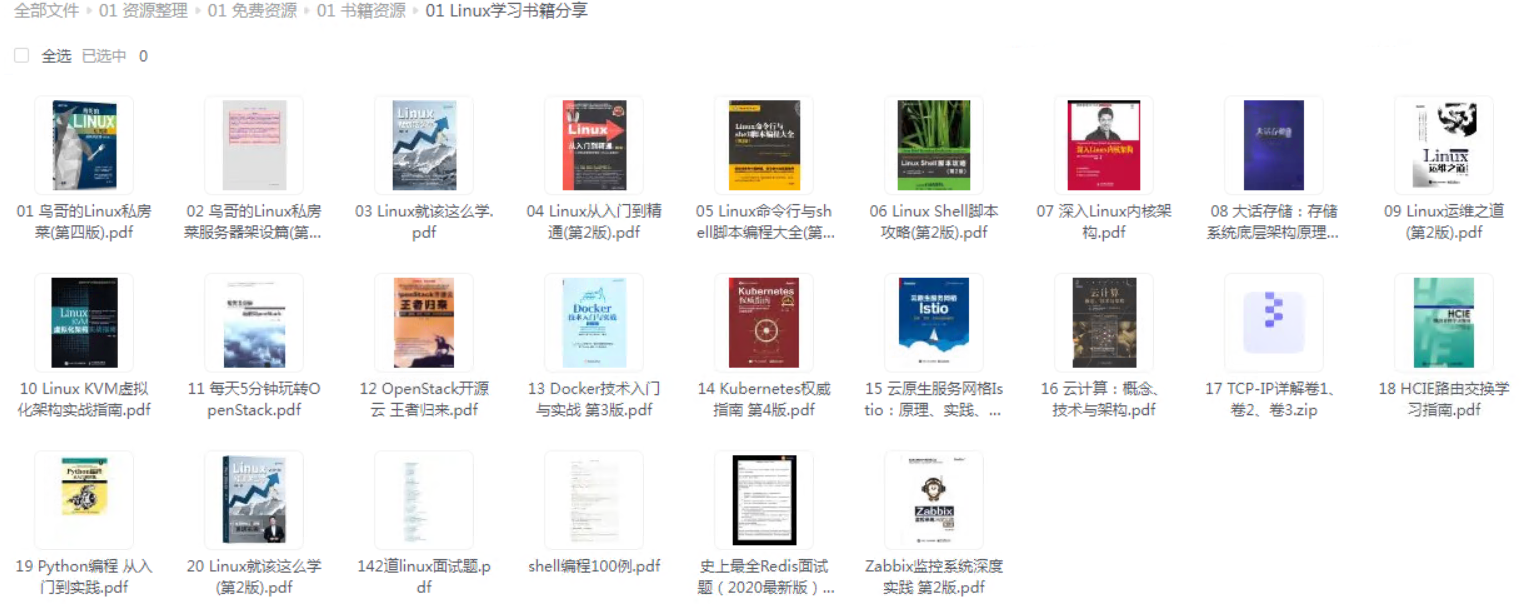
给大家整理的电子书资料:
如果本文对你有帮助,欢迎点赞、收藏、转发给朋友,让我有持续创作的动力!
网上学习资料一大堆,但如果学到的知识不成体系,遇到问题时只是浅尝辄止,不再深入研究,那么很难做到真正的技术提升。
一个人可以走的很快,但一群人才能走的更远!不论你是正从事IT行业的老鸟或是对IT行业感兴趣的新人,都欢迎加入我们的的圈子(技术交流、学习资源、职场吐槽、大厂内推、面试辅导),让我们一起学习成长!
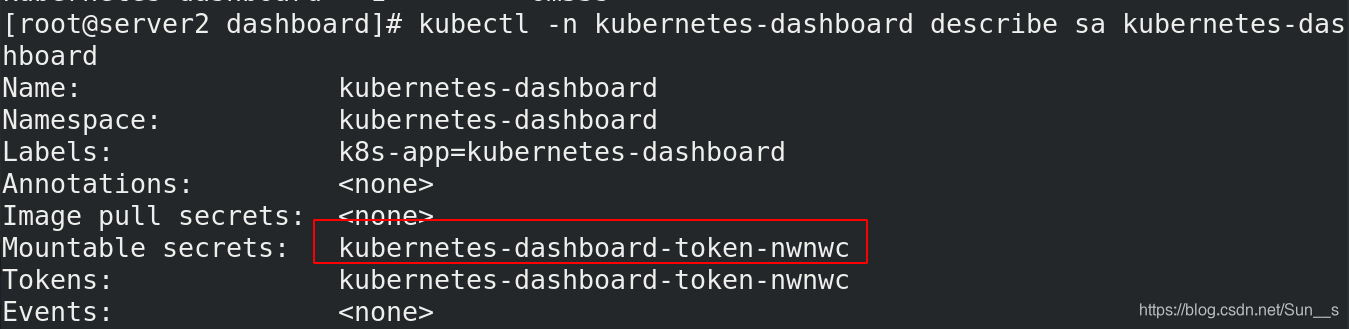
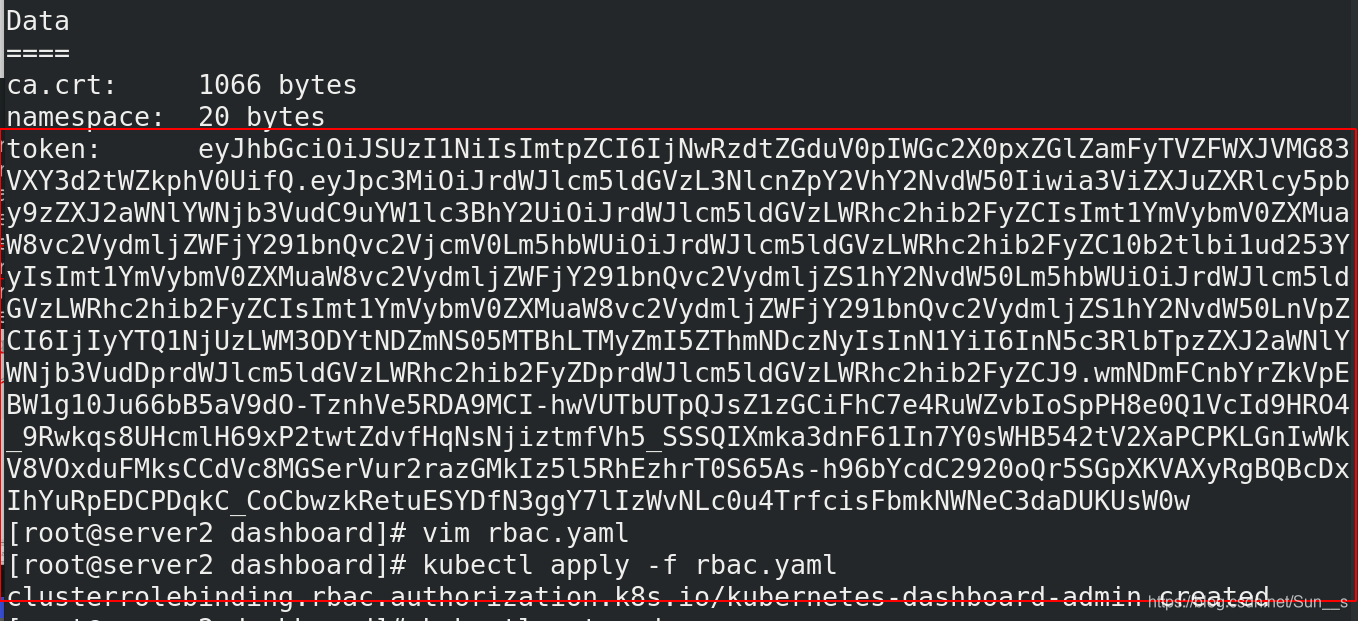
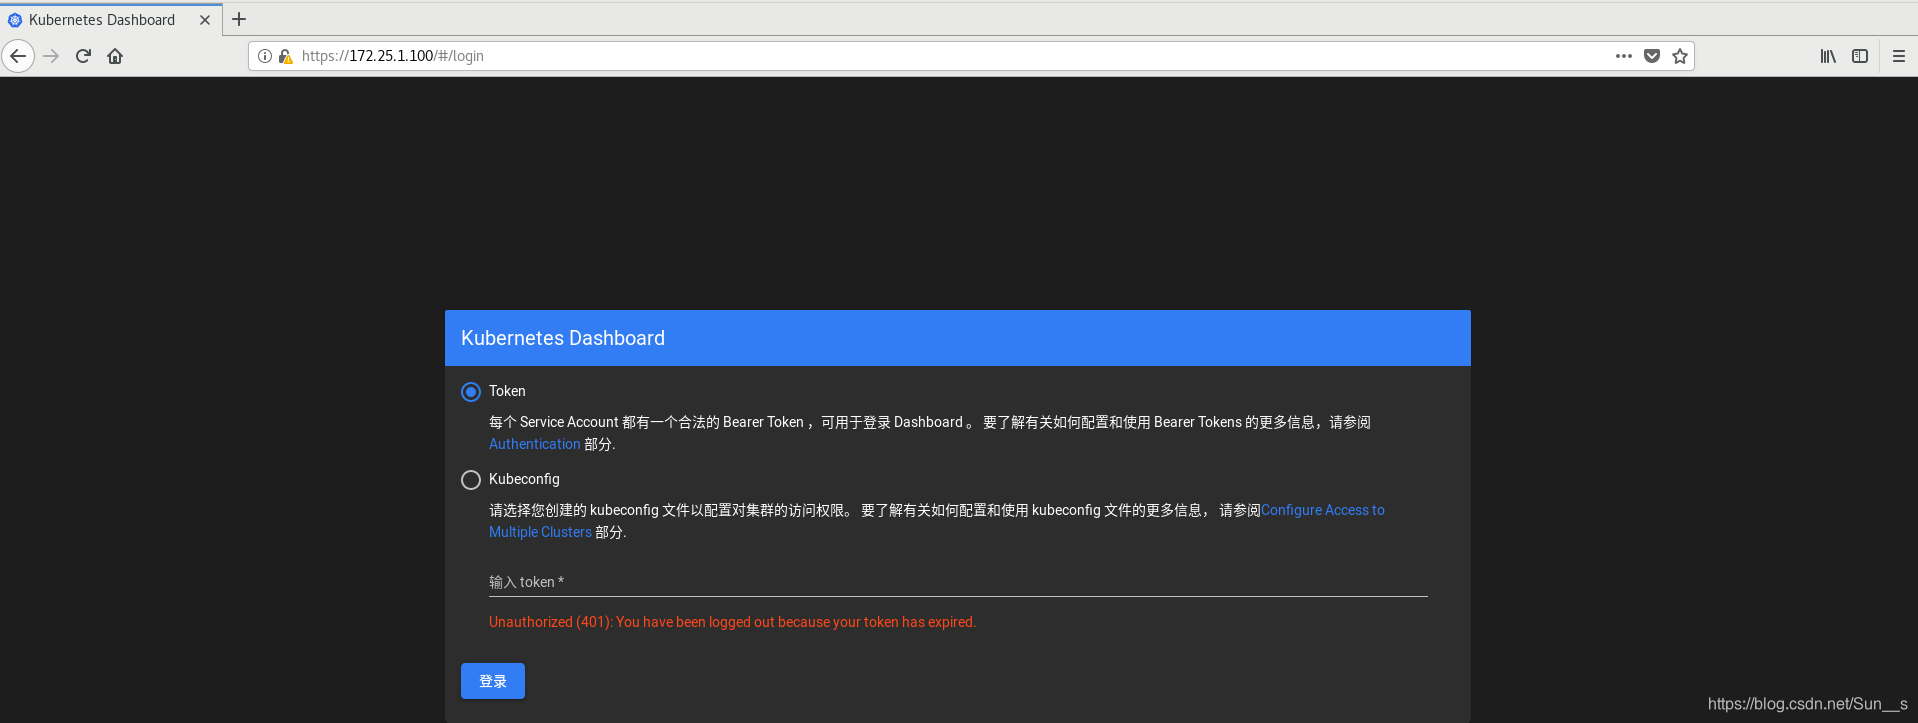
将上面的token输入网址就可以进入

## HPA
官网:https://kubernetes.io/zh/docs/tasks/run-application/horizontal-pod-autoscale-walkthrough/
HPA伸缩过程:
收集HPA控制下所有Pod最近的cpu使用情况(CPU utilization)
对比在扩容条件里记录的cpu限额(CPUUtilization)
调整实例数(必须要满足不超过最大/最小实例数)
每隔30s做一次自动扩容的判断
CPU utilization的计算方法是用cpu usage(最近一分钟的平均值,通过metrics可以直接获取到)除以cpu request(这里cpu request就是我们在创建容器时制定的cpu使用核心数)得到一个平均值,这个平均值可以理解为:平均每个Pod CPU核心的使用占比。
HPA进行伸缩算法:
计算公式:TargetNumOfPods = ceil(sum(CurrentPodsCPUUtilization) / Target)ceil()表示取大于或等于某数的最近一个整数每次扩容后冷却3分钟才能再次进行扩容,而缩容则要等5分钟后。
当前Pod Cpu使用率与目标使用率接近时,不会触发扩容或缩容:
触发条件:avg(CurrentPodsConsumption) / Target >1.1 或 <0.9
[root@server2 ~]# mkdir hpa/
[root@server2 ~]# cd hpa/
[root@server2 hpa]# vim hpa.yaml
apiVersion: apps/v1
kind: Deployment
metadata:
name: php-apache
spec:
selector:
matchLabels:
run: php-apache
replicas: 1
template:
metadata:
labels:
run: php-apache
spec:
containers:
- name: php-apache
image: hpa-example
ports:
- containerPort: 80
resources:
limits:
cpu: 500m
requests:
cpu: 200m
apiVersion: v1
kind: Service
metadata:
name: php-apache
labels:
run: php-apache
spec:
ports:
- port: 80
selector:
run: php-apache
[root@server2 hpa]# kubectl apply -f hpa.yaml
[root@server2 hpa]# kubectl describe svc php-apache
[root@server2 hpa]# curl 10.108.66.200
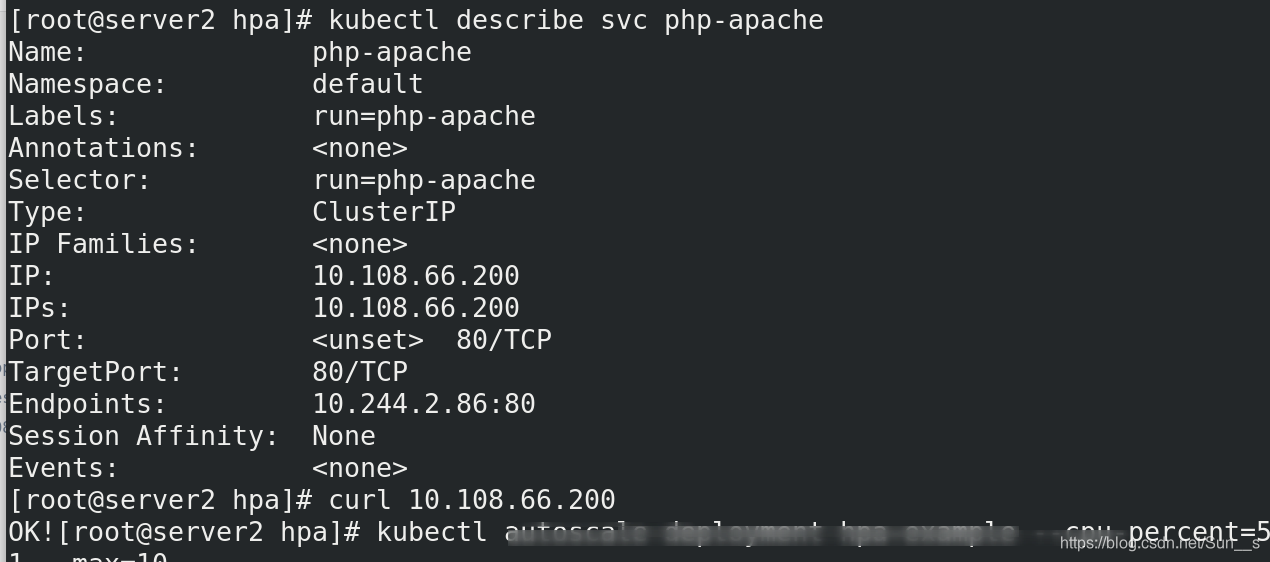
[root@server2 hpa]# kubectl autoscale deployment php-apache --cpu-percent=50 --min=1 --max=10
[root@server2 hpa]# kubectl get hpa

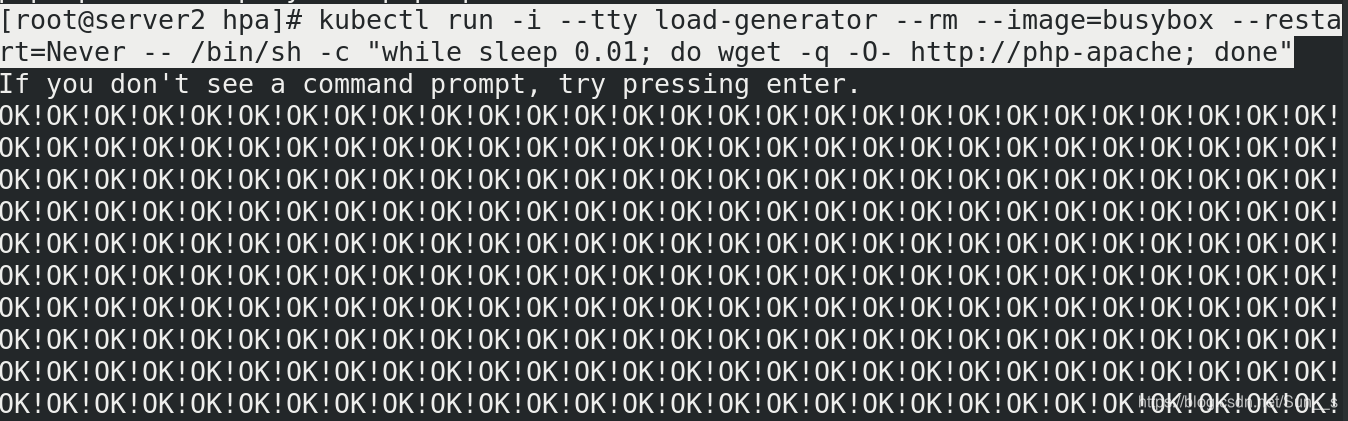
[root@server2 hpa]# kubectl run -i --tty load-generator --rm --image=busybox --restart=Never – /bin/sh -c “while sleep 0.01; do wget -q -O- http://php-apache; done”
[root@server2 hpa]# vim hpa-v2.yaml
apiVersion: autoscaling/v2beta2
kind: HorizontalPodAutoscaler
metadata:
name: php-apache
spec:
maxReplicas: 10
minReplicas: 1
scaleTargetRef:
apiVersion: apps/v1
kind: Deployment
name: php-apache
metrics:
- type: Resource
resource:
name: cpu
target:
averageUtilization: 60
type: Utilization - type: Resource
resource:
name: memory
target:
averageValue: 50Mi
type: AverageValue
[root@server2 hpa]# kubectl apply -f hpa-v2.yaml
[root@server2 hpa]# kubectl get hpa
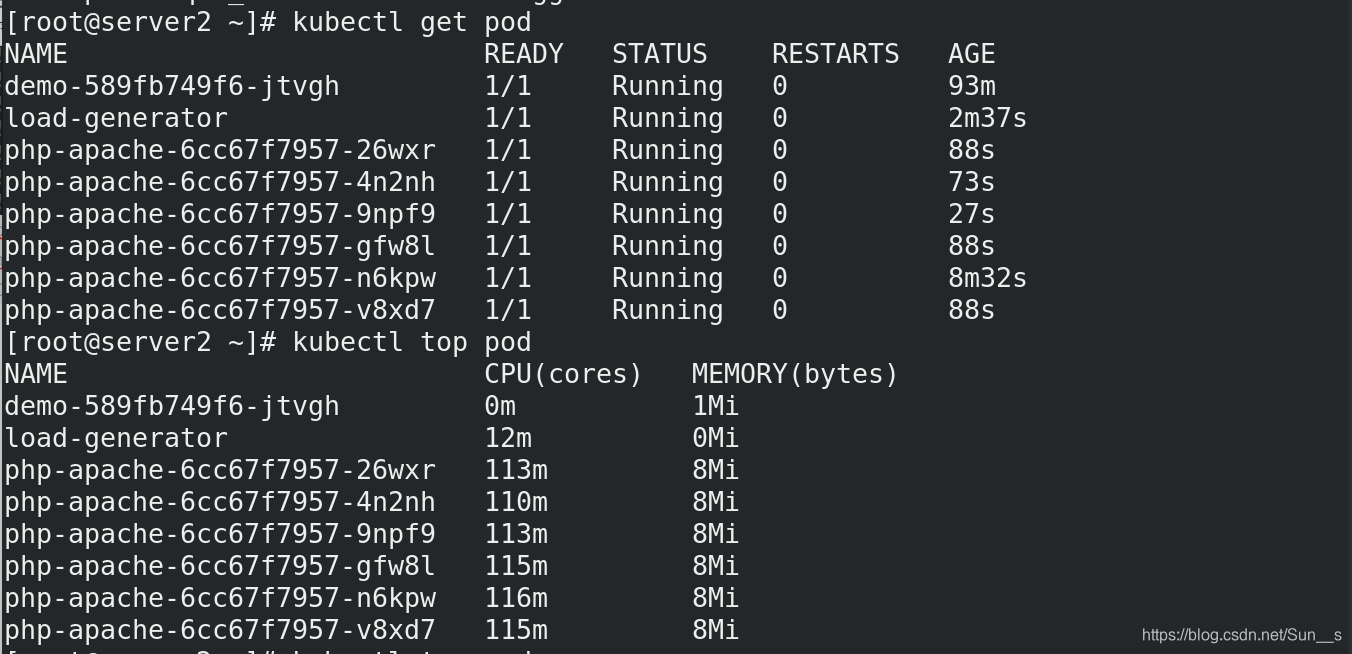
[root@server2 hpa]# kubectl get pod


Hpa会根据Pod的CPU使用率动态调节Pod的数量。
## HELM
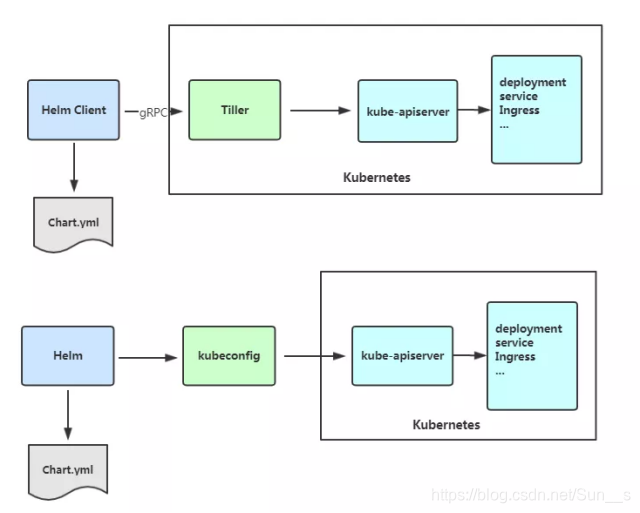
Helm是Kubernetes 应用的包管理工具,主要用来管理 Charts,类似Linux系统的yum。
Helm Chart 是用来封装 Kubernetes 原生应用程序的一系列 YAML 文件。可以在你部署应用的时候自定义应用程序的一些 Metadata,以便于应用程序的分发。
对于应用发布者而言,可以通过 Helm 打包应用、管理应用依赖关系、管理应用版本并发布应用到软件仓库。
对于使用者而言,使用 Helm 后不用需要编写复杂的应用部署文件,可以以简单的方式在 Kubernetes 上查找、安装、升级、回滚、卸载应用程序。
Helm V3 与 V2 最大的区别在于去掉了tiller:
Helm当前最新版本 v3.1.0 官网:https://helm.sh/docs/intro/
### Helm安装:
[root@server2 ~]# mkdir helm
[root@server2 ~]# cd helm/
get helm-v3.4.1-linux-amd64.tar.gz
[root@server2 helm]# tar zxf helm-v3.4.1-linux-amd64.tar.gz
[root@server2 helm]# cd linux-amd64/
[root@server2 linux-amd64]# cp helm /usr/local/bin/
[root@server2 linux-amd64]# helm env
[root@server2 ~]# helm repo add dandydev https://dandydeveloper.github.io/charts
[root@server2 helm]# helm pull dandydev/redis-ha
[root@server2 helm]# tar axf redis-ha-4.12.9.tgz
[root@server2 helm]# cd redis-ha/
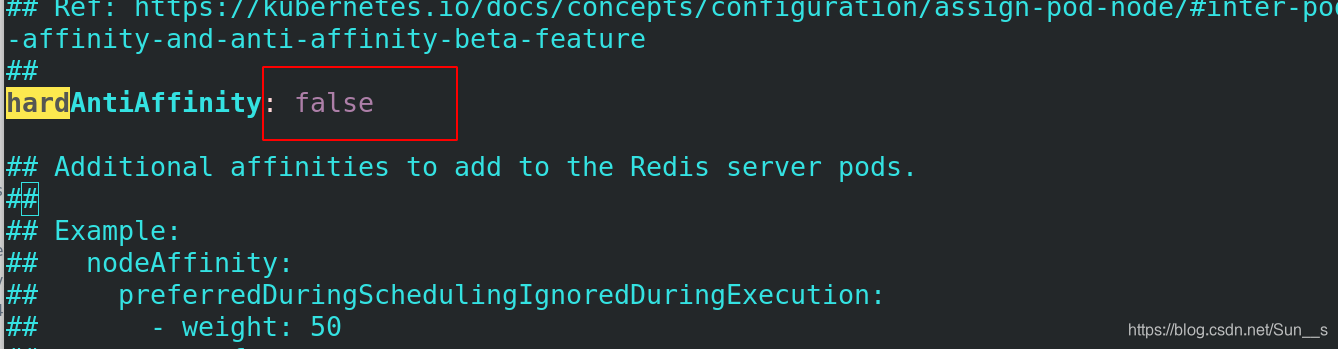
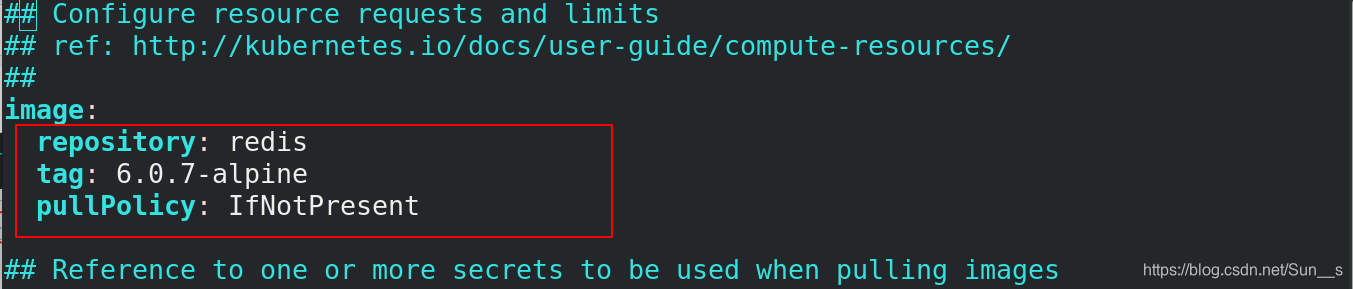
[root@server2 redis-ha]# vim values.yaml
本地仓库里需要的镜像
[root@server1 harbor]# docker pull redis:6.0.7-alpine
[root@server1 harbor]# docker tag redis:6.0.7-alpine reg.westos.org/library/redis:6.0.7-alpine
[root@server1 harbor]# docker push reg.westos.org/library/redis:6.0.7-alpine
将存储位置指向默认分配
[root@server2 redis-ha]# kubectl patch storageclass managed-nfs-storage -p ‘{“metadata”: {“annotations”:{“storageclass.kubernetes.io/is-default-class”:“true”}}}’

[root@server2 redis-ha]# helm install redis-ha .
[root@server2 redis-ha]# kubectl get pod -w
会慢慢运行起来,等待全部运行起来即可

[root@server2 redis-ha]# kubectl exec -it redis-ha-server-0 sh -n default
kubectl exec [POD] [COMMAND] is DEPRECATED and will be removed in a future version. Use kubectl exec [POD] – [COMMAND] instead.
Defaulting container name to redis.
Use ‘kubectl describe pod/redis-ha-server-0 -n default’ to see all of the containers in this pod.
/data $ redis-cli
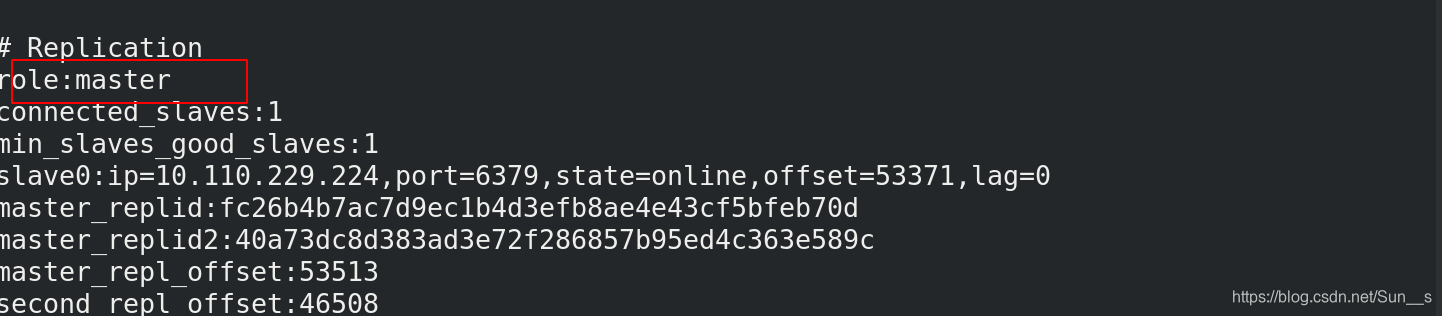
127.0.0.1:6379> info
这里我们看到master是0
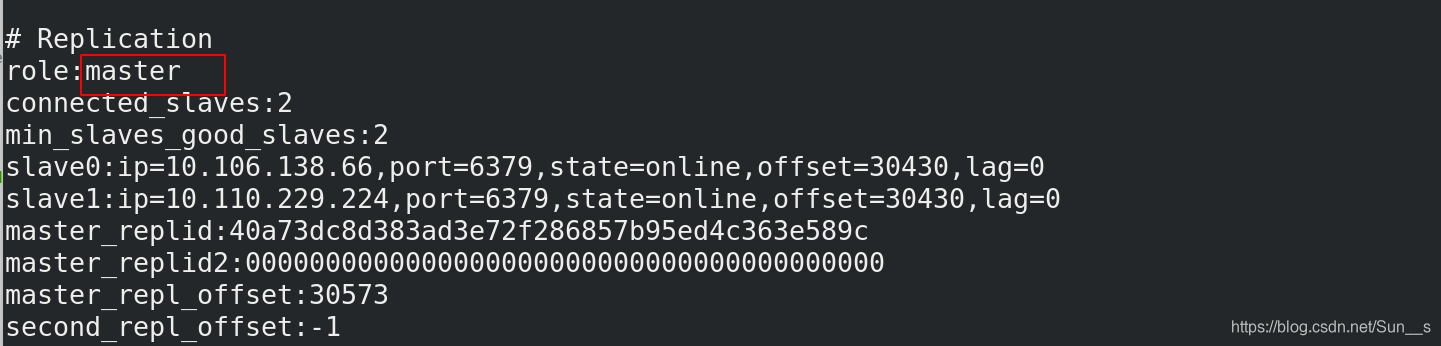
当我们把0的pod删除之后,再次登陆一个查看master会调度到哪一个
[root@server2 redis-ha]# kubectl delete pod redis-ha-server-0
[root@server2 redis-ha]# kubectl exec -it redis-ha-server-1 sh -n default
/data $ redis-cli
127.0.0.1:6379> info
这时我们看到现在1已经成为了master
### 手动创建
[root@server2 ~]# cd helm/
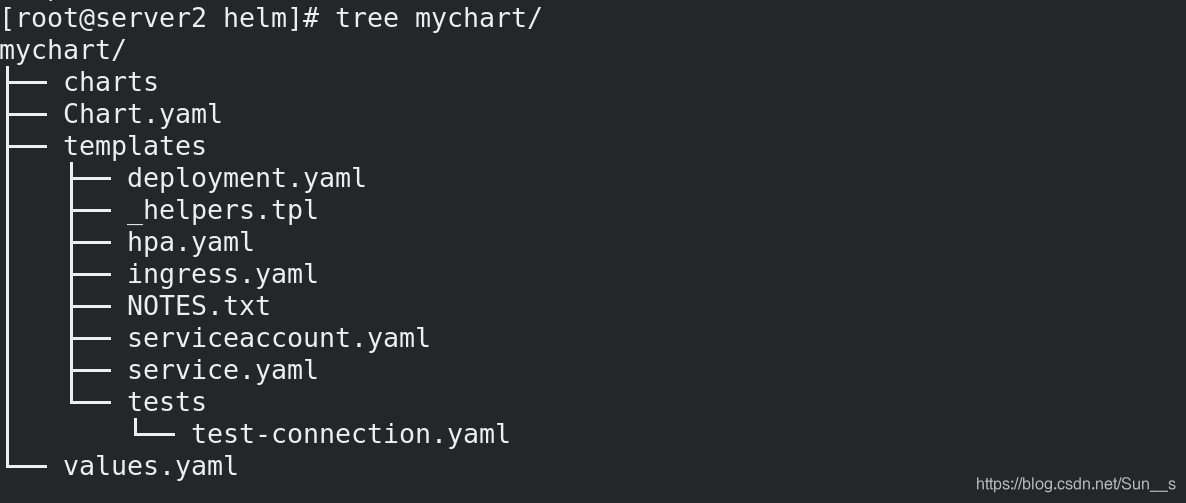
[root@server2 helm]# helm create mychart
[root@server2 helm]# tree mychart/
[root@server2 helm]# cd mychart/
[root@server2 mychart]# vim Chart.yaml
[root@server2 mychart]# vim values.yaml
检测是否有错误
[root@server2 mychart]# cd …
[root@server2 helm]# helm lint mychart/

将应用打包
[root@server2 helm]# helm package mychart/
[root@server2 helm]# helm install demo mychart-0.1.0.tgz

[root@server2 helm]# helm history demo
[root@server2 helm]# kubectl get pod

### 更新
[root@server2 helm]# helm upgrade demo mychart-0.1.0.tgz --set replicaCount=2


### 上传
get helm-push_0.9.0_linux_amd64.tar.gz
[root@server2 helm]# helm env //获取插件目录

安装helm-push插件:
[root@server2 helm]# mkdir /root/.local/share/helm/plugins/push -p
[root@server2 helm]# tar zxf helm-push_0.9.0_linux_amd64.tar.gz -C /root/.local/share/helm/plugins/push
[root@server2 helm]# cd /etc/docker/certs.d/reg.westos.org/
[root@server2 reg.westos.org]# cp ca.crt /etc/pki/ca-trust/source/anchors/
[root@server2 reg.westos.org]# update-ca-trust
[root@server2 reg.westos.org]# cd ~/helm/
[root@server2 helm]# helm repo add sun https://reg.westos.org/chartrepo/charts
[root@server2 helm]# helm repo list

[root@server2 helm]# helm push mychart-0.1.0.tgz sun --insecure -u admin -p westos
[root@server2 helm]# helm repo update
[root@server2 helm]# helm search repo mychart

查看上传的mychart应用:

[root@server2 ~]# helm uninstall demo
[root@server2 ~]# helm install demo sun/mychart --set replicaCount=2

[root@server2 ~]# kubectl get pod
[root@server2 ~]# kubectl get svc

访问 svc分配的ip地址,查看是否负载均衡
[root@server2 ~]# curl 10.106.96.27
[root@server2 ~]# curl 10.106.96.27/hostname.html
demo-mychart-8568b558d7-bsfth
[root@server2 ~]# curl 10.106.96.27/hostname.html
demo-mychart-8568b558d7-ldh25

[root@server2 mychart]# helm upgrade demo sun/mychart --set image.tag=v2
[root@server2 mychart]# curl 10.106.96.27

修改版本信息
[root@server2 mychart]# vim values.yaml
[root@server2 mychart]# vim Chart.yaml


打包:
[root@server2 helm]# helm package mychart/

上传
[root@server2 helm]# helm push mychart-0.2.0.tgz sun --insecure -u admin -p westos
[root@server2 helm]# helm upgrade demo sun/mychart

[root@server2 helm]# kubectl -n ingress-nginx get all

在真机访问的时候需要做好本地解析

[root@Sun_s Desktop]# curl demo.westos.org
[root@Sun_s Desktop]# curl demo.westos.org/hostname.html

[root@server2 helm]# helm upgrade demo sun/mychart --set replicaCount=3
[root@server2 helm]# kubectl get pod

[root@server2 helm]# helm history demo

回滚:
[root@server2 helm]# helm rollback demo 1
[root@server2 helm]# kubectl get svc
[root@server2 helm]# curl 10.106.96.27
Hello MyApp | Version: v1 | Pod Name
[root@server2 helm]# curl 10.106.96.27/hostname.html
回滚成功:

## 部署metrics-server
[root@server1 harbor]# docker pull bitnami/metrics-server:0.4.2-debian-10-r0
[root@server1 harbor]# docker tag bitnami/metrics-server:0.4.2-debian-10-r0 reg.westos.org/bitnami/metrics-server:0.4.2-debian-10-r0
[root@server1 harbor]# docker push reg.westos.org/bitnami/metrics-server:0.4.2-debian-10-r0
[root@server2 ~]# cd metric-server/
[root@server2 metric-server]# kubectl delete -f components.yaml
[root@server2 ~]# cd helm/metrics-server/
[root@server2 metrics-server]# kubectl create namespace metrics-server
[root@server2 metrics-server]# vim values.yaml
[root@server2 metrics-server]# helm install metrics-server . -n metrics-server


[root@server2 metrics-server]# kubectl -n kube-system edit cm coredns

[root@server2 metrics-server]# kubectl -n metrics-server get pod
[root@server2 metrics-server]# kubectl -n metrics-server delete pod metrics-server-777f7bd69b-nc9bs

让它重载以下
[root@server2 metrics-server]# kubectl -n kube-system get pod | grep coredns | awk ‘{system("kubectl -n kube-system delete pod “$1"”)}’
[root@server2 metrics-server]# kubectl -n metrics-server get pod

[root@server2 metrics-server]# kubectl top node
[root@server2 metrics-server]# kubectl -n metrics-server get pod

## 部署kubeapps应用
为Helm提供web UI界面管理:
[root@server2 helm]# helm repo add stable http://mirror.azure.cn/kubernetes/charts/
[root@server2 helm]# helm pull bitnami/kubeapps
[root@server2 helm]# tar zxf kubeapps-5.2.2.tgz
[root@server2 helm]# cd kubeapps/


**网上学习资料一大堆,但如果学到的知识不成体系,遇到问题时只是浅尝辄止,不再深入研究,那么很难做到真正的技术提升。**
**[需要这份系统化的资料的朋友,可以点击这里获取!](https://bbs.csdn.net/topics/618635766)**
**一个人可以走的很快,但一群人才能走的更远!不论你是正从事IT行业的老鸟或是对IT行业感兴趣的新人,都欢迎加入我们的的圈子(技术交流、学习资源、职场吐槽、大厂内推、面试辅导),让我们一起学习成长!**
csdnimg.cn/20210305141838181.png?x-oss-process=image/watermark,type_ZmFuZ3poZW5naGVpdGk,shadow_10,text_aHR0cHM6Ly9ibG9nLmNzZG4ubmV0L1N1bl9fcw==,size_16,color_FFFFFF,t_70)

**网上学习资料一大堆,但如果学到的知识不成体系,遇到问题时只是浅尝辄止,不再深入研究,那么很难做到真正的技术提升。**
**[需要这份系统化的资料的朋友,可以点击这里获取!](https://bbs.csdn.net/topics/618635766)**
**一个人可以走的很快,但一群人才能走的更远!不论你是正从事IT行业的老鸟或是对IT行业感兴趣的新人,都欢迎加入我们的的圈子(技术交流、学习资源、职场吐槽、大厂内推、面试辅导),让我们一起学习成长!**


 271
271


 被折叠的 条评论
为什么被折叠?
被折叠的 条评论
为什么被折叠?
 到【灌水乐园】发言


