/\*\*
 \* list\_for\_each\_prev - iterate over a list backwards
 \* @pos: the &struct list\_head to use as a loop cursor.
 \* @head: the head for your list.
 \*/
#define list\_for\_each\_prev(pos, head) \
 for (pos = (head)->prev; pos != (head); pos = pos->prev)
而且,list.h 中也提供了list_replace(节点替换) list_move(节点移位) ,翻转,查找等接口,这里就不在一一分析了。
五. 宿主结构
1.找出宿主结构 list_entry(ptr, type, member)
上面的所有操作都是基于list_head这个链表进行的,涉及的结构体也都是:
struct list_head {
  struct list_head \*next, \*prev;
};
其实,正如文章一开始所说,我们真正更关心的是包含list_head这个结构体字段的宿主结构体,因为只有定位到了宿主结构体的起始地址,我们才能对对宿主结构体中的其它有意义的字段进行操作。
struct mylist
{
    int type;
    char name[MAX_NAME_LEN];
  struct list_head list;
};
那我们如何根据list这个字段的地址而找到宿主结构node1的位置呢?list.h中定义如下:
/\*\*
 \* list\_entry - get the struct for this entry
 \* @ptr: the &struct list\_head pointer.
 \* @type: the type of the struct this is embedded in.
 \* @member: the name of the list\_head within the struct.
 \*/
#define list\_entry(ptr, type, member) \
 container\_of(ptr, type, member)
list.h中提供了list_entry宏来实现对应地址的转换,但最终还是调用了container_of宏,所以container_of宏的伟大之处不言而喻。
2 container_of
做linux驱动开发的同学是不是想到了LDD3这本书中经常使用的一个非常经典的宏定义!
container\_of(ptr, type, member)
在LDD3这本书中的第三章字符设备驱动,以及第十四章驱动设备模型中多次提到,我觉得这个宏应该是内核最经典的宏之一。那接下来让我们揭开她的面纱:
此宏在内核代码 kernel/include/linux/kernel.h中定义(此处kernel版本为3.10;新版本4.13之后此宏定义改变,但实现思想保持一致)
 而offsetof定义在 kernel/include/linux/stddef.h ,如下:

举个例子,来简单分析一下container_of内部实现机制。
例如:
struct   test
{
    int       a;
    short   b;
    char    c;
};
struct  test  \*p = (struct test \*)malloc(sizeof(struct  test));
test\_function(&(p->b));

int  test\_function(short \*addr_b)
{
      //获取struct test结构体空间的首地址
     struct  test \*addr;
     addr =   container\_of(addr_b,struct test,b);
}
展开container_of宏,探究内部的实现:
typeof (  ( (struct test   \*)0 )->b ) ;                        (1)
typeof (  ( (struct test   \*)0 )->b )   \*__mptr =  addr_b ;    (2)
(struct test \*)( (char \*)__mptr  -  offsetof(struct test,b))   (3)
(1) 获取成员变量b的类型 ,这里获取的就是short 类型。这是GNU_C的扩展语法。
(2) 用获取的变量类型,定义了一个指针变量 __mptr ,并且将成员变量 b的首地址赋值给它
(3) 这里的offsetof(struct test,b)是用来计算成员b在这个struct test 结构体的偏移。__mptr
是成员b的首地址, 现在 减去成员b在结构体里面的偏移值,算出来的是不是这个结构体的
首地址呀 。
3. 宿主结构的遍历
我们可以根据结构体中成员变量的地址找到宿主结构的地址,并且我们可以对成员变量所建立的链表进行遍历,那我们是不是也可以通过某种方法对宿主结构进行遍历呢?
答案肯定是可以的,内核在list.h中提供了下面的宏:
/\*\*
 \* list\_for\_each\_entry - iterate over list of given type
 \* @pos: the type \* to use as a loop cursor.
 \* @head: the head for your list.
 \* @member: the name of the list\_head within the struct.
 \*/
#define list\_for\_each\_entry(pos, head, member) \
 for (pos = list\_first\_entry(head, typeof(\*pos), member); \
 &pos->member != (head); \
 pos = list\_next\_entry(pos, member))
其中,list_first_entry 和 list_next_entry宏都定义在list.h中,分别代表:获取第一个真正的宿主结构的地址;获取下一个宿主结构的地址。它们的实现都是利用list_entry宏。
/\*\*
 \* list\_first\_entry - get the first element from a list
 \* @ptr: the list head to take the element from.
 \* @type: the type of the struct this is embedded in.
 \* @member: the name of the list\_head within the struct.
 \*
 \* Note, that list is expected to be not empty.
 \*/
#define list\_first\_entry(ptr, type, member) \
 list\_entry((ptr)->next, type, member)

/\*\*
 \* list\_next\_entry - get the next element in list
 \* @pos: the type \* to cursor
 \* @member: the name of the list\_head within the struct.
 \*/
#define list\_next\_entry(pos, member) \
 list\_entry((pos)->member.next, typeof(\*(pos)), member)
最终实现了宿主结构的遍历
#define list\_for\_each\_entry(pos, head, member) \
 for (pos = list\_first\_entry(head, typeof(\*pos), member); \
 &pos->member != (head); \
 pos = list\_next\_entry(pos, member))
首先pos定位到第一个宿主结构地址,然后循环获取下一个宿主结构地址,如果查到宿主结构中的member成员变量(宿主结构中struct list_head定义的字段)地址为head,则退出,从而实现了宿主结构的遍历。如果要循环对宿主结构中的其它成员变量进行操作,这个遍历操作就显得特别有意义了。
我们用上面的 nod结构举个例子:
struct my_list \*pos_ptr = NULL ;
list_for_each_entry (pos_ptr, &myhead, list )
{
         printk ("val = %d\n" , pos_ptr->val);
}
实例1 一个简单的链表的实现
为方便起见,本例把内核的list.h文件单独拷贝出来,这样就可以独立于内核来编译测试。
功能描述:
本例比较简单,仅仅实现了单链表节点的创建、删除、遍历。
#include "list.h"
#include <stdio.h>
#include <string.h>

#define MAX\_NAME\_LEN 32
#define MAX\_ID\_LEN 10

struct list_head myhead;

#define I2C\_TYPE 1
#define SPI\_TYPE 2

char \*dev_name[]={
  "none",
  "I2C",
  "SPI"
};

struct mylist
{
    int type;
    char name[MAX_NAME_LEN];
  struct list_head list;
};

void display\_list(struct list_head \*list_head)
{
  int i=0;
  struct list_head \*p;
  struct mylist \*entry;
  printf("-------list---------\n");
  list\_for\_each(p,list_head)
  {
    printf("node[%d]\n",i++);
    entry=list\_entry(p,struct mylist,list);
    printf("\ttype: %s\n",dev_name[entry->type]);
    printf("\tname: %s\n",entry->name);
  }
  printf("-------end----------\n");
}

int main(void)
{

  struct mylist node1;
  struct mylist node2;

  INIT\_LIST\_HEAD(&myhead);

  node1.type = I2C_TYPE;
  strcpy(node1.name,"yikoulinux");

  node2.type = I2C_TYPE;
  strcpy(node2.name,"yikoupeng");

  list\_add(&node1.list,&myhead);
  list\_add(&node2.list,&myhead);

  display\_list(&myhead);

  list\_del(&node1.list);

  display\_list(&myhead);
  return 0;
}
运行结果

实例2 如何在一个链表上管理不同类型的节点
功能描述:
本实例主要实现在同一个链表上管理两个不同类型的节点,实现增删改查的操作。
结构体定义
一个链表要想区分节点的不同类型,那么节点中必须要有信息能够区分该节点类型,为了方便节点扩展,我们参考Linux内核,定义一个统一类型的结构体:
struct device
{
    int type;
    char name[MAX_NAME_LEN];
    struct list_head list;
};
其中成员type表示该节点的类型:
#defineI2C\_TYPE 1
#define SPI\_TYPE 2
有了该结构体,我们要定义其他类型的结构体只需要包含该结构体即可,这个思想有点像面向对象语言的基类,后续派生出新的属性叫子类,说到这,一口君又忍不住想挖个坑,写一篇如何用C语言实现面向对象思想的继承、多态、interface。
下面我们定义2种类型的结构体:
i2c这种类型设备的专用结构体:
struct i2c_node
{
  int data;
  unsigned int reg;
  struct device dev;
};
spi这种类型设备的专用结构体:
struct spi_node
{
  unsigned int reg;
  struct device dev;
};
我特意让两个结构体大小类型不一致。
结构类型
链表头结点定义
structlist_head device_list;
根据之前我们讲解的思想,这个链表链接起来后,应该是以下这种结构:

节点的插入
我们定义的节点要插入链表仍然是要依赖list_add(),既然我们定义了struct device这个结构体,那么我们完全可以参考linux内核,针对不同的节点封装函数,要注册到这个链表只需要调用该函数即可。
实现如下:
设备i2c的注册函数如下:
void i2c\_register\_device(struct device\*dev)
{
  dev.type = I2C_TYPE;
  strcpy(dev.name,"yikoulinux");
  list\_add(&dev->list,&device_list);
}
设备spi的注册函数如下:
void spi\_register\_device(struct device\*dev)
{
  dev.type = SPI_TYPE;
  strcpy(dev.name,"yikoupeng");
  list\_add(&dev->list,&device_list);
}
我们可以看到注册函数功能是填充了struct device 的type和name成员,然后再调用list_add()注册到链表中。这个思想很重要,因为Linux内核中许许多多的设备节点也是这样添加到其他的链表中的。要想让自己的C语言编程能力得到质的提升,一定要多读内核代码,即使看不懂也要坚持看,古人有云:代码读百遍其义自见。
节点的删除
同理,节点的删除,我们也统一封装成函数,同样只传递参数device即可:
void i2c\_unregister\_device(struct device \*device)
{
// struct i2c\_node \*i2c\_device=container\_of(dev, struct i2c\_node, dev);
  list\_del(&device->list);
}
void spi\_unregister\_device(struct device \*device)
{
// struct spi\_node \*spi\_device=container\_of(dev, struct spi\_node, dev);
  list\_del(&device->list);
}
在函数中,可以用container_of提取出了设备节点的首地址,实际使用中可以根据设备的不同释放不同的资源。
宿主结构的遍历
节点的遍历,在这里我们通过设备链表device_list开始遍历,假设该节点名是node,通过list_for_each()可以得到node->dev->list的地址,然后利用container_of 可以得到node->dev、node的地址。
void display\_list(struct list_head \*list_head)
{
  int i=0;
  struct list_head \*p;
  struct device \*entry;

  printf("-------list---------\n");
  list\_for\_each(p,list_head)
  {
    printf("node[%d]\n",i++);
    entry=list\_entry(p,struct device,list);

    switch(entry->type)
    {
      case I2C_TYPE:
                           display\_i2c\_device(entry);
        break;
      case SPI_TYPE:
        display\_spi\_device(entry);
        break;
      default:
        printf("unknown device type!\n");
        break;
    }
    display\_device(entry);
  }
  printf("-------end----------\n");
}
由以上代码可知,利用内核链表的统一接口,找个每一个节点的list成员,然后再利用container_of 得到我们定义的标准结构体struct device,进而解析出节点的类型,调用对应节点显示函数,这个地方其实还可以优化,就是我们可以在struct device中添加一个函数指针,在xxx_unregister_device()函数中可以将该函数指针直接注册进来,那么此处代码会更精简高效一些。如果在做项目的过程中,写出这种面向对象思想的代码,那么你的地址是肯定不一样的。读者有兴趣可以自己尝试一下。
void display\_i2c\_device(struct device \*device)
{
  struct i2c_node \*i2c_device=container\_of(device, struct i2c_node, dev);
  printf("\t i2c\_device->data: %d\n",i2c_device->data);
  printf("\t i2c\_device->reg: %#x\n",i2c_device->reg);
}
void display\_spi\_device(struct device \*device)
{
  struct spi_node \*spi_device=container\_of(device, struct spi_node, dev);
  printf("\t spi\_device->reg: %#x\n",spi_device->reg);
}
上述代码提取出来宿主节点的信息。
实例代码
#include "list.h"
#include <stdio.h>
#include <string.h>

#define MAX\_NAME\_LEN 32
#define MAX\_ID\_LEN 10

struct list_head device_list;

#define I2C\_TYPE 1
#define SPI\_TYPE 2

char \*dev_name[]={
  "none",
  "I2C",
  "SPI"
};

struct device
{
  int type;
  char name[MAX_NAME_LEN];
  struct list_head list;
};

struct i2c_node
{
  int data;
  unsigned int reg;
  struct device dev;
};
struct spi_node
{
  unsigned int reg;
  struct device dev;
};
void display\_i2c\_device(struct device \*device)
{
  struct i2c_node \*i2c_device=container\_of(device, struct i2c_node, dev);

  printf("\t i2c\_device->data: %d\n",i2c_device->data);
  printf("\t i2c\_device->reg: %#x\n",i2c_device->reg);
}
void display\_spi\_device(struct device \*device)
{
  struct spi_node \*spi_device=container\_of(device, struct spi_node, dev);

  printf("\t spi\_device->reg: %#x\n",spi_device->reg);
}
void display\_device(struct device \*device)
{
    printf("\t dev.type: %d\n",device->type);
    printf("\t dev.type: %s\n",dev_name[device->type]);
    printf("\t dev.name: %s\n",device->name);
}
void display\_list(struct list_head \*list_head)
{
  int i=0;
  struct list_head \*p;
  struct device \*entry;

  printf("-------list---------\n");
  list\_for\_each(p,list_head)
  {
    printf("node[%d]\n",i++);
    entry=list\_entry(p,struct device,list);

    switch(entry->type)
    {
      case I2C_TYPE:
        display\_i2c\_device(entry);
        break;
      case SPI_TYPE:
        display\_spi\_device(entry);
        break;
      default:
        printf("unknown device type!\n");
        break;
    }
    display\_device(entry);
  }
  printf("-------end----------\n");
}
void i2c\_register\_device(struct device\*dev)
{
  struct i2c_node \*i2c_device=container\_of(dev, struct i2c_node, dev);

  i2c_device->dev.type = I2C_TYPE;
  strcpy(i2c_device->dev.name,"yikoulinux");

  list\_add(&dev->list,&device_list);
}
void spi\_register\_device(struct device\*dev)
{
  struct spi_node \*spi_device=container\_of(dev, struct spi_node, dev);

  spi_device->dev.type = SPI_TYPE;
  strcpy(spi_device->dev.name,"yikoupeng");

  list\_add(&dev->list,&device_list);
}
void i2c\_unregister\_device(struct device \*device)
{
  struct i2c_node \*i2c_device=container\_of(dev, struct i2c_node, dev);

  list\_del(&device->list);
}
void spi\_unregister\_device(struct device \*device)
{
  struct spi_node \*spi_device=container\_of(dev, struct spi_node, dev);

  list\_del(&device->list);
}
int main(void)
{

  struct i2c_node dev1;
  struct spi_node dev2;

  INIT\_LIST\_HEAD(&device_list);
  dev1.data = 1;
  dev1.reg = 0x40009000;
  i2c\_register\_device(&dev1.dev);
  dev2.reg  = 0x40008000;
  spi\_register\_device(&dev2.dev);
  display\_list(&device_list);
  unregister\_device(&dev1.dev);
  display\_list(&device_list);
  return 0;
}
代码主要功能:
117-118          :定义两个不同类型的节点dev1,dev2;
120                 :初始化设备链表;
121-122、124:初始化节点数据;
123/125          :向链表device_list注册这两个节点;
126                :显示该链表;
127                :删除节点dev1;
128                 :显示该链表。
程序运行截图

读者可以试试如何管理更多类型的节点。
实例3 实现节点在两个链表上自由移动
功能描述:
初始化两个链表,实现两个链表上节点的插入和移动。每个节点维护大量的临时内存数据。
节点创建
节点结构体创建如下:
struct mylist{
  int number;
  char type;
    char \*pmem;  //内存存放地址,需要malloc
  struct list_head list;
};
需要注意成员pmem,因为要维护大量的内存,我们最好不要直定义个很大的数组,因为定义的变量位于栈中,而一般的系统给栈的空间是有限的,如果定义的变量占用空间太大,会导致栈溢出,一口君曾经就遇到过这个bug。
链表定义和初始化
链表定义如下:
structlist_head active_head;
struct list_head free_head;
初始化
INIT\_LIST\_HEAD(&free_head);
INIT\_LIST\_HEAD(&active_head);
这两个链表如下:

关于节点,因为该实例是从实际项目中剥离出来,节点启示是起到一个缓冲去的作用,数量不是无限的,所以在此我们默认最多10个节点。
我们不再动态创建节点,而是先全局创建指针数组,存放这10个节点的地址,然后将这10个节点插入到对应的队列中。
数组定义:
structmylist\*list_array[BUFFER_NUM];
这个数组只用于存放指针,所以定义之后实际情况如下:

初始化这个数组对应的节点:
static ssize_t buffer\_ring\_init()
{
  int i=0;
  for(i=0;i<BUFFER_NUM;i++){
    list_array[i]=malloc(sizeof(struct mylist));
    INIT\_LIST\_HEAD(&list_array[i]->list);
    list_array[i]->pmem=kzalloc(DATA_BUFFER_SIZE,GFP_KERNEL);
  }
  return 0;
}
5:为下标为i的节点分配实际大小为sizeof(structmylist)的内存
6:初始化该节点的链表
7:为pmem成员从堆中分配一块内存
初始化完毕,链表实际情况如下:
节点插入
static ssize_t insert\_free\_list\_all()
{
  int i=0;

  for(i=0;i<BUFFER_NUM;i++){
    list\_add(&list_array[i]->list,&free_head);
  }
  return 0;
}
8:用头插法将所有节点插入到free_head链表中
所有节点全部插入free链表后,结构图如下:

遍历链表
虽然可以通过数组遍历链表,但是实际在操作过程中,在链表中各个节点的位置是错乱的。所以最好从借助list节点来查找各个节点。
show\_list(&free_head);
show\_list(&active_head);
代码实现如下:
void show\_list(struct list_head \*list_head)
{
  int i=0;
  struct mylist\*entry,\*tmp;
  //判断节点是否为空
  if(list\_empty(list_head)==true)
  {
    return;
  }
  list\_for\_each\_entry\_safe(entry,tmp,list_head,list)
  {
    printf("[%d]=%d\t",i++,entry->number);
    if(i%4==0)
    {
      printf("\n");
    }
  }
}
节点移动
将节点从active_head链表移动到free_head链表,有点像生产者消费者模型中的消费者,吃掉资源后,就要把这个节点放置到空闲链表,让生产者能够继续生产数据,所以这两个函数我起名eat、spit,意为吃掉和吐,希望你们不要觉得很怪异。
int eat\_node()
{
  struct mylist\*entry=NULL;

  if(list\_empty(&active_head)==true)
  {
    printf("list active\_head is empty!-----------\n");
  }
  entry=list\_first\_entry(&active_head,struct mylist,list);
  printf("\t eat node=%d\n",entry->number);
  list\_move\_tail(&entry->list,&free_head);
}
节点移动的思路是:
- 利用list_empty判断该链表是否为空
- 利用list_first_entry从active_head链表中查找到一个节点,并用指针entry指向该节点
- 利用list_move_tail将该节点移入到free_head链表,注意此处不能用list_add,因为这个节点我要从原链表把他删除掉,然后插入到新链表。
将节点从free_head链表移动到active_head链表。
spit\_node()
{
  struct mylist\*entry=NULL;

  if(list\_empty(&free_head)==true)
  {
    printf("list free\_head is empty!-----------\n");
  }
  entry=list\_first\_entry(&free_head,struct mylist,list);
  printf("\t spit node=%d\n",entry->number);
  list\_move\_tail(&entry->list,&active_head);
}
大部分功能讲解完了,下面我们贴下完整代码。
代码实例
#include <stdint.h>
#include <stdio.h>
#include <stdlib.h>
#include <unistd.h>
#include <byteswap.h>
#include <string.h>
#include <errno.h>
#include <signal.h>
#include <fcntl.h>
#include <ctype.h>
#include <termios.h>
#include <sys/types.h>
#include <sys/mman.h>
#include <sys/ioctl.h>
#include "list.h" // linux-3.14/scripts/kconfig/list.h
#undef NULL
#define NULL ((void \*)0)
enum {
false = 0,
true = 1
};
#define DATA\_TYPE 0x14
#define SIG\_TYPE 0x15
struct mylist{
int number;
char type;
char \*pmem;
struct list_head list;
};
#define FATAL do { fprintf(stderr, "Error at line %d, file %s (%d) [%s]\n",\_\_LINE\_,\_\_FILE\_\_,errno,strerror(errno));exit(1);}while(0)
struct list_head active_head;
struct list_head free_head;
#define BUFFER\_NUM 10
#define DATA\_BUFFER\_SIZE 512
struct mylist\*list_array[BUFFER_NUM];
int born\_number(int number)
{
struct mylist \*entry=NULL;
if(list\_empty(&free_head)==true)
{
printf("list free\_head is empty!----------------\n");
}
entry = list\_first\_entry(&free_head,struct mylist,list);
entry->type = DATA_TYPE;
entry->number=number;
list\_move\_tail(&entry->list,&active_head);
}
int eat\_node()
{
struct mylist\*entry=NULL;
## 最后
**自我介绍一下,小编13年上海交大毕业,曾经在小公司待过,也去过华为、OPPO等大厂,18年进入阿里一直到现在。**
**深知大多数Java工程师,想要提升技能,往往是自己摸索成长,自己不成体系的自学效果低效漫长且无助。**
**因此收集整理了一份《2024年嵌入式&物联网开发全套学习资料》,初衷也很简单,就是希望能够帮助到想自学提升又不知道该从何学起的朋友,同时减轻大家的负担。**
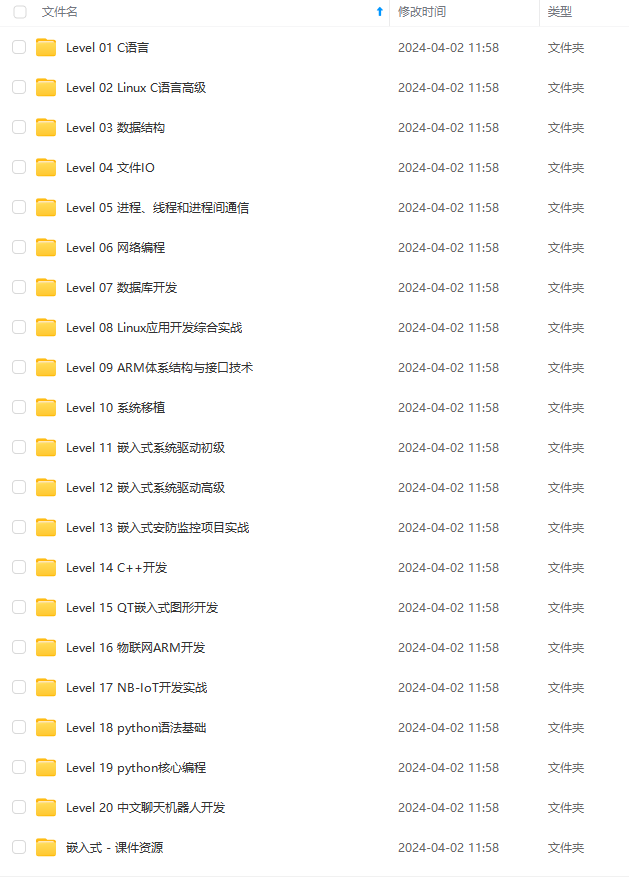
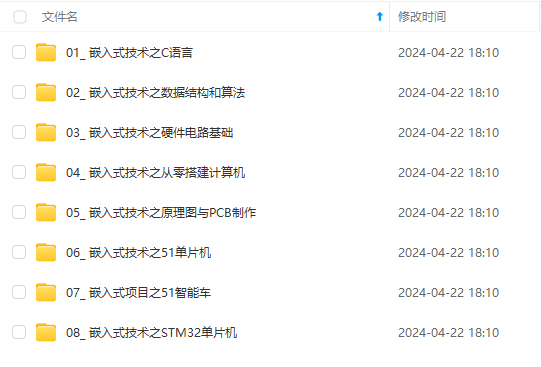


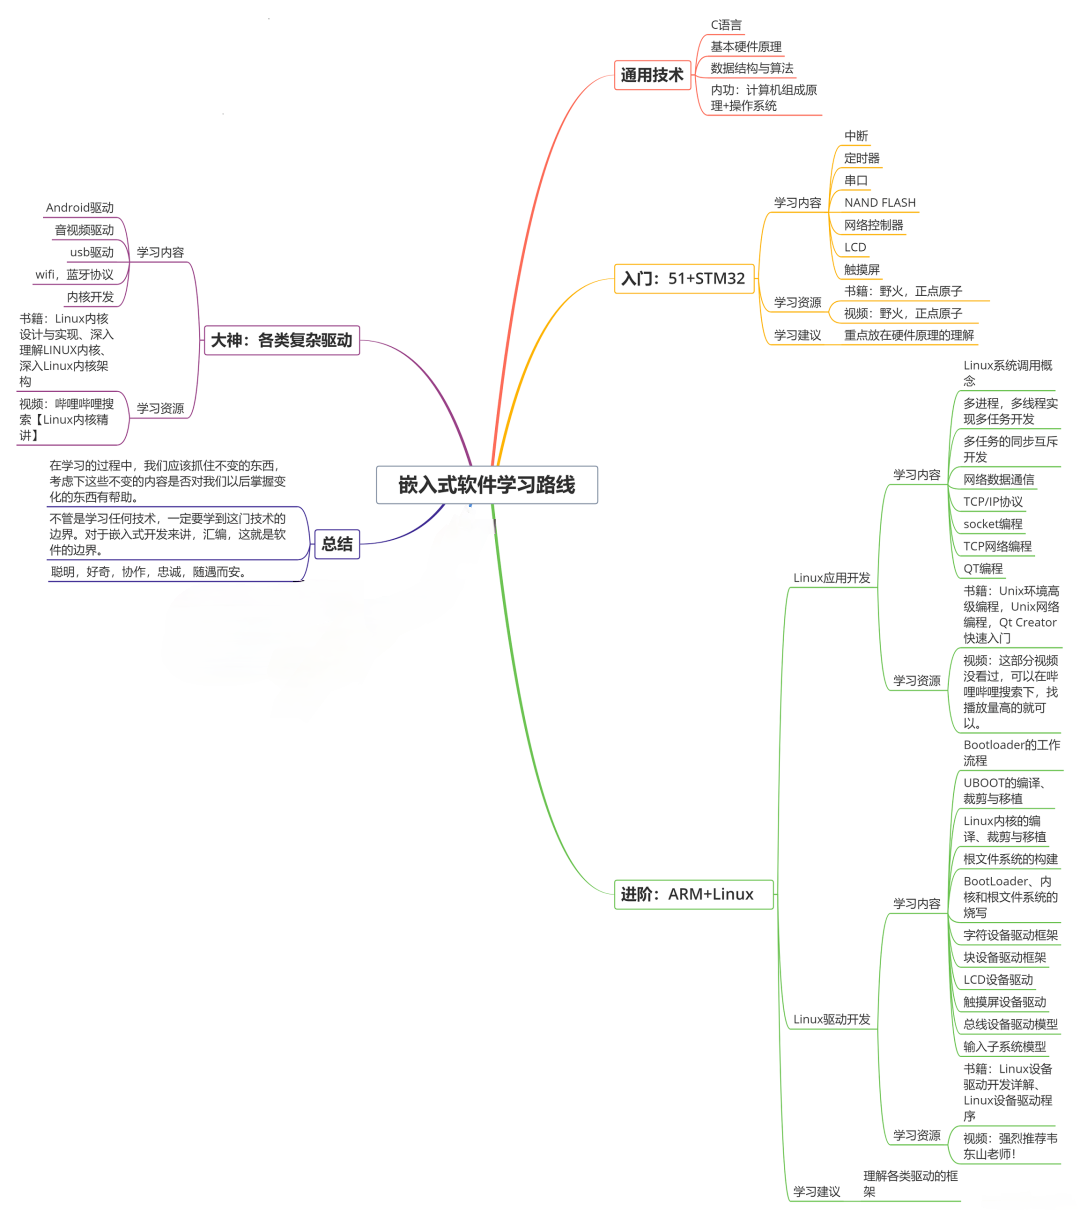
**既有适合小白学习的零基础资料,也有适合3年以上经验的小伙伴深入学习提升的进阶课程,基本涵盖了95%以上嵌入式&物联网开发知识点,真正体系化!**
[**如果你觉得这些内容对你有帮助,需要这份全套学习资料的朋友可以戳我获取!!**](https://bbs.csdn.net/topics/618654289)
**由于文件比较大,这里只是将部分目录大纲截图出来,每个节点里面都包含大厂面经、学习笔记、源码讲义、实战项目、讲解视频,并且后续会持续更新**!!
;
}
entry = list\_first\_entry(&free_head,struct mylist,list);
entry->type = DATA_TYPE;
entry->number=number;
list\_move\_tail(&entry->list,&active_head);
}
int eat\_node()
{
struct mylist\*entry=NULL;
## 最后
**自我介绍一下,小编13年上海交大毕业,曾经在小公司待过,也去过华为、OPPO等大厂,18年进入阿里一直到现在。**
**深知大多数Java工程师,想要提升技能,往往是自己摸索成长,自己不成体系的自学效果低效漫长且无助。**
**因此收集整理了一份《2024年嵌入式&物联网开发全套学习资料》,初衷也很简单,就是希望能够帮助到想自学提升又不知道该从何学起的朋友,同时减轻大家的负担。**
[外链图片转存中...(img-Ce2ImiN9-1715795063214)]
[外链图片转存中...(img-x56VDZMT-1715795063215)]
[外链图片转存中...(img-Lj3VaDLn-1715795063215)]
[外链图片转存中...(img-nZ6OfmeD-1715795063215)]
[外链图片转存中...(img-gz8dqrHf-1715795063216)]
[外链图片转存中...(img-PEIqpAmq-1715795063216)]
[外链图片转存中...(img-1G5DbA1q-1715795063217)]
**既有适合小白学习的零基础资料,也有适合3年以上经验的小伙伴深入学习提升的进阶课程,基本涵盖了95%以上嵌入式&物联网开发知识点,真正体系化!**
[**如果你觉得这些内容对你有帮助,需要这份全套学习资料的朋友可以戳我获取!!**](https://bbs.csdn.net/topics/618654289)
**由于文件比较大,这里只是将部分目录大纲截图出来,每个节点里面都包含大厂面经、学习笔记、源码讲义、实战项目、讲解视频,并且后续会持续更新**!!


 794
794

 被折叠的 条评论
为什么被折叠?


