


目录
需要掌握以下两个知识点
1.Sprite_Enemy.prototype.setBattler 在添加敌人数据时调用
2.Sprite_Enemy.prototype.updateFrame 更新敌人区域是调用 也就是刷新时
正文
1.创建精灵
首先创建一个Sprite 精灵 用于显示文本信息 等 后续要添加新的内容 可以自行修改
//定义精灵
function Enemy_Battler_Information() {
this.initialize.apply(this, arguments)
}
Enemy_Battler_Information.prototype = Object.create(Sprite.prototype);
Enemy_Battler_Information.prototype.constructor = Enemy_Battler_Information;
//==============================
//初始化设置
Enemy_Battler_Information.prototype.initialize = function(width, height) {
Sprite.prototype.initialize.call(this);
this.width = width;
this.height=height;
this.frome_height=48;
this.bitmap = new Bitmap(this.width, this.height);
this.bitmap.fontFace = $gameSystem.mainFontFace();
this.bitmap.fontSize = 18;//$gameSystem.mainFontSize();
this.bitmap.outlineColor = ColorManager.outlineColor();
this.bitmap.textColor = ColorManager.normalColor();
this.bitmap.smooth = true;
this.bitmap.outlineWidth = 3;
this.bitmap.paintOpacity = 255;
this._enemy=null;
this.isClear = false;
}
Enemy_Battler_Information.prototype.refresh = function() {
this.isClear=false;
this.bitmap.clear();
this.bitmap.fillAll(ColorManager.outlineColor());
if(!this._enemy){
return;
}
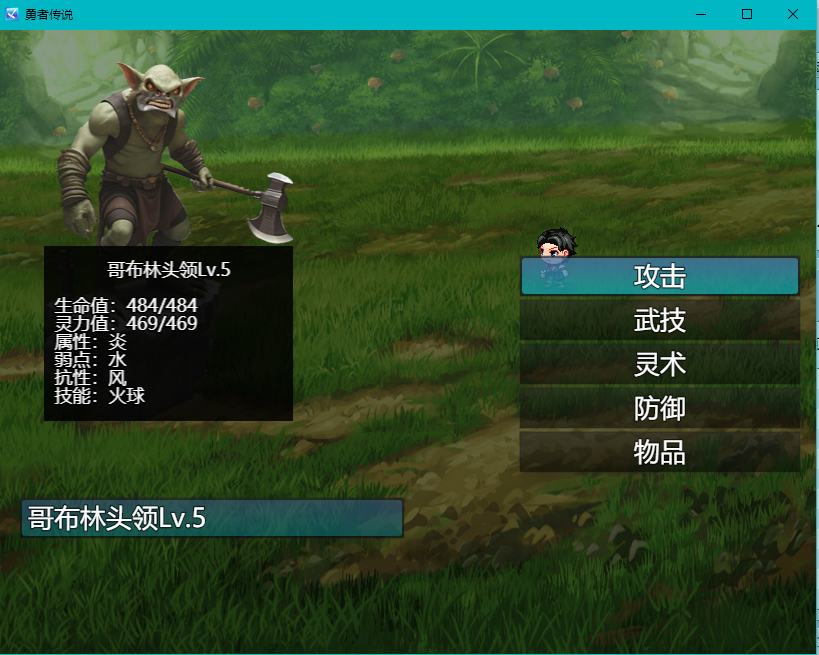
this.bitmap.drawText(this._enemy.name(), 0, 0, this.width, this.frome_height, "center");
this.bitmap.drawText("生命值:" + this._enemy.hp + "/" + this._enemy.mhp, 10, this.bitmap.fontSize*2, this.width, this.frome_height, "left");
this.bitmap.drawText("灵力值:" + this._enemy.mp + "/" + this._enemy.mmp, 10, this.bitmap.fontSize*3, this.width, this.frome_height, "left");
this.datas = this._enemy.enemy().note.split(","); //敌人信息备注
this.bitmap.drawText("属性:" + this.datas[0], 10, this.bitmap.fontSize*4, this.width, this.frome_height, "left");
this.bitmap.drawText("弱点:" + this.datas[1], 10, this.bitmap.fontSize*5, this.width, this.frome_height, "left");
this.bitmap.drawText("抗性:" + this.datas[2], 10, this.bitmap.fontSize*6, this.width, this.frome_height, "left");
this.bitmap.drawText("技能:" + this.datas[3], 10, this.bitmap.fontSize*7, this.width, this.frome_height, "left");
this.move(0-this.width/2, 0-this.height);
}
Enemy_Battler_Information.prototype.setEnemy = function(_enemy) {
this._enemy = _enemy;
}
Enemy_Battler_Information.prototype.setSize = function(width, height){
this.width = width;
this.height = height/2;
this.bitmap.resize(this.width, this.height);
}
Enemy_Battler_Information.prototype.clear = function() {
if(!this.isClear){
this.bitmap.clear();
}
this.isClear = true;
}1. Enemy_Battler_Information.prototype.initialize //这里面初始化了一个Bitmap位图 将要使用它 画出你想要显示的内容
2. Enemy_Battler_Information.prototype.refresh 这是刷新内容的方法 内容要显示时调用它
3. this.isClear=false; 这是一个标记 用于清除内容时只清楚一次 true 清除 false跳过
if(!this._enemy){
            return;
        }
4.这是用于判断 是否为null 如果为空 则 return; 不执行后面的代码
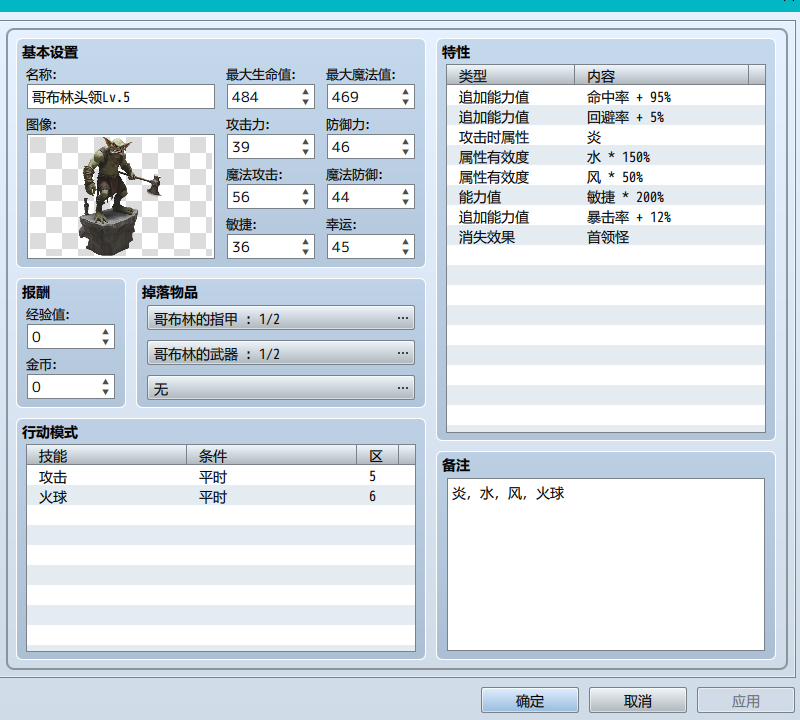
5. this.datas = this._enemy.enemy().note.split(","); //这里是敌人信息页面的 备注信息格式如下 炎,水,风,火球 意思为 怪物属性 炎 克制 水 消弱 风 技能 火球 简单的信息提示
6. this.move(0-this.width/2, 0-this.height); 这段代码是修改精灵的坐标
7. Enemy_Battler_Information.prototype.setSize 修改精灵的尺寸 变为敌人图片大小
8. Enemy_Battler_Information.prototype.clear 清除精灵内容
2. 添加精灵到战斗系统
1. 定义一个 Window_BattleEnemy=null; 引用 后面要判断 是哪个菜单界面
let _Window_BattleEnemy=null;//=============================添加敌人======================================
const _Sprite_Enemy_prototype_setBattler = Sprite_Enemy.prototype.setBattler;
Sprite_Enemy.prototype.setBattler = function(battler) {
_Sprite_Enemy_prototype_setBattler.call(this, battler);
for (const child of this.children) {
            if (child instanceof Enemy_Battler_Information) {
                this.removeChild(child);
           }
        }
this.addChild(new Enemy_Battler_Information(0, 0));
for (const child of this.children) {
            if (child instanceof Enemy_Battler_Information) {
                child.setEnemy(battler);
            }
        }
};由于setBatteler 会多次执行 那么 要清楚掉多余的 精灵
for (const child of this.children) {
if (child instanceof Enemy_Battler_Information) {
this.removeChild(child);
}
}遍历当前的类 的子项 是否为Enemy_Battler_Information 如果是的话 this.removeChild(child); 清除掉
this.addChild(new Enemy_Battler_Information(0, 0));添加自定义的精灵 并且传入默认的宽高 宽度高度后面要动态修改
for (const child of this.children) {
if (child instanceof Enemy_Battler_Information) {
child.setEnemy(battler);
}
}查找子项 是否为 自定义的Enemy_Battler_Information 如果是的话 传入敌人游戏数据battler
//=============================更新可见区域 实时更新======================================
	const _Sprite_Enemy_prototype_updateFrame = Sprite_Enemy.prototype.updateFrame;
	Sprite_Enemy.prototype.updateFrame = function() {
        _Sprite_Enemy_prototype_updateFrame.call(this);
		for (const child of this.children) {
            if (child instanceof Enemy_Battler_Information) {
                if(!_Window_BattleEnemy.active){
			        child.clear();
		            return;
		        }
				child.setSize(this.bitmap.width, 350);
		        child.refresh();
            }
        }
    };
这段代码同样使用了 for循环 遍历 子项
for (const child of this.children) {
            if (child instanceof Enemy_Battler_Information) {
                if(!_Window_BattleEnemy.active){
                    child.clear();
                    return;
                }
                child.setSize(this.bitmap.width, 350);
                child.refresh();
            }
        }
如果子项时 Enemy_Battler_Information的话
if(!_Window_BattleEnemy.active){
                    child.clear();
                    return;
                }
这里判断菜单某功能是否启用 这里的是敌人选择窗口
当你攻击敌人时 或者对敌人使用某物品时 敌人选择没有启动
注意 : 这里是没有启动 返回return;
后面代码不执行
那么当敌人选择 启动了 并且选择了某个敌人
child.setSize(this.bitmap.width, 350); //设置敌人显示区域的宽度和高度//350的意思为我的内容350足够显示了 所以直接写死
child.refresh();//画出来这段代码是 画出自定义精灵的内容
3.重写Window_BattleEnemy 获得引用
下面是重写 Window_BattleEnemy.prototype.initialize 为了得到引用也就是刚才定义的变量
_Window_BattleEnemy=this; 这样就获得了引用
const _Window_BattleEnemy_prototype_initialize = Window_BattleEnemy.prototype.initialize;
	Window_BattleEnemy.prototype.initialize = function(rect) {
        _Window_BattleEnemy_prototype_initialize.call(this, rect);
		_Window_BattleEnemy=this;
    };
_Window_BattleEnemy.active 通过这个代码 判断是否启动 如果启动返回 true 否则返回false
结尾总结
不要忘记插件要这样的格式
(() => {


})();
如此定义的变量等 就与外部不冲突
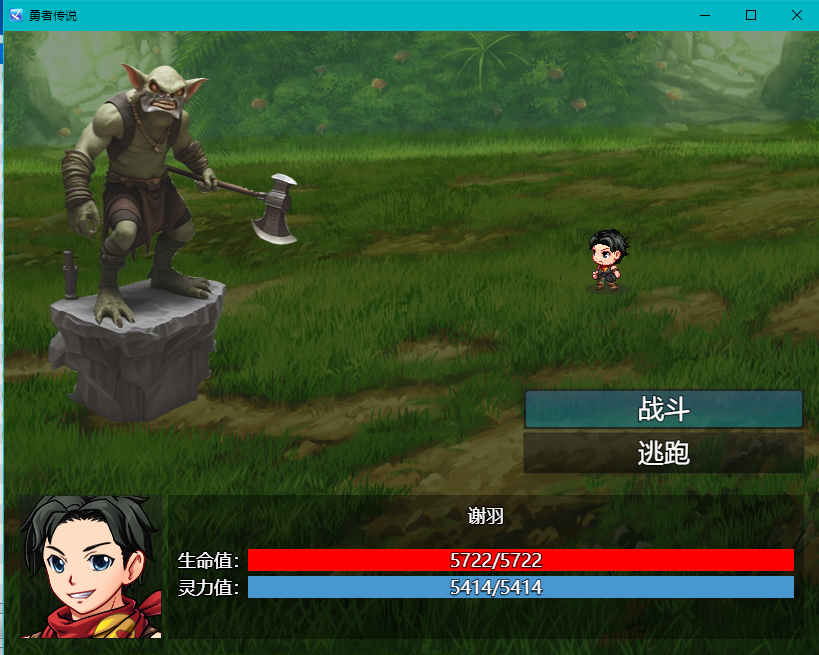
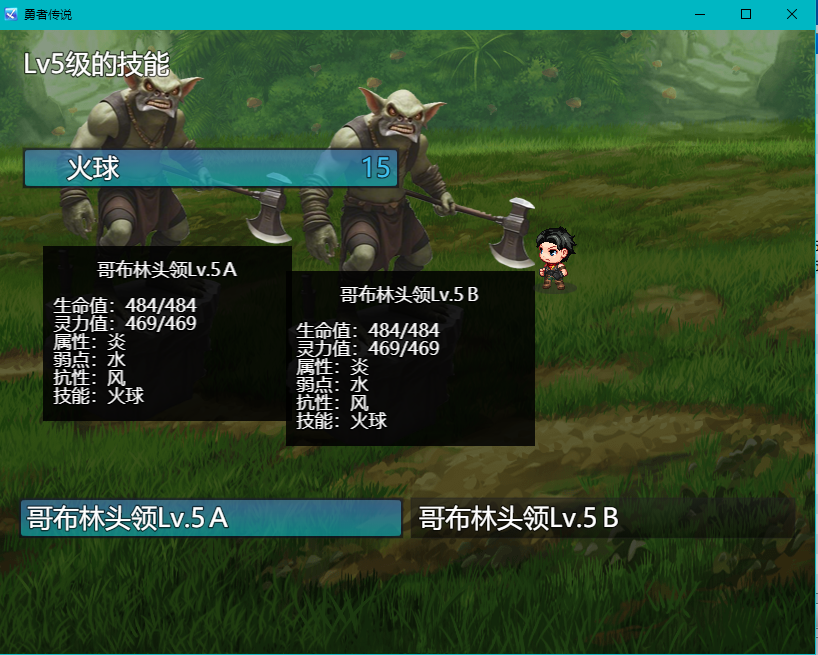
效果图如下
如何美化
那么美化的话 大家可以修改自定义精灵 Enemy_Battler_Information 的显示内容
自己画出想要的效果
想怎么画都可以
结尾总结
请Project1论坛的小圈子 离开


 被折叠的 条评论
为什么被折叠?
被折叠的 条评论
为什么被折叠?
 到【灌水乐园】发言


