


在物联网应用中,MQTT(Message Queuing Telemetry Transport)是一种重要的通信协议,它为设备间的高效数据交换提供了可靠的基础。本文将介绍MQTT是什么以及其基本原理。
MQTT是一种轻量级的发布/订阅协议,旨在解决低带宽、不稳定网络和资源有限设备的通信需求。它采用简单的二进制消息格式,具有协议开销小、带宽消耗低的特点,非常适用于物联网设备,尤其是那些资源有限的设备,如传感器、嵌入式系统和移动设备。
MQTT的基本原理建立在发布/订阅模型上。在MQTT中,设备可以通过发布消息将数据发送到特定的主题(Topic),而其他设备可以通过订阅相应的主题来接收这些消息。这种发布/订阅机制使得设备能够实时地传输和接收数据,实现设备间的实时通信。
在MQTT中,有三个关键角色:发布者(Publisher)、订阅者(Subscriber)和代理服务器(Broker)。发布者负责将数据发布到特定主题,订阅者则订阅感兴趣的主题以接收数据。而代理服务器(也称为Broker)则充当中介,负责接收来自发布者的消息,并将其传递给订阅者。
MQTT的消息质量等级(QoS级别)确保了消息的可靠性和交付顺序。MQTT支持三种QoS级别:
- QoS 0:最多一次交付,消息不进行确认,可能会丢失或重复传输。
- QoS 1:至少一次交付,消息进行确认,确保消息至少传输一次,但可能会重复传输。
- QoS 2:只有一次交付,消息进行确认和去重,确保消息仅传输一次。
MQTT协议的简单性和可靠性使得它成为物联网应用中的首选通信协议。无论是智能家居、工业自动化还是能源管理,MQTT都广泛应用于各种场景。此外,许多物联网平台和服务提供商也提供对MQTT协议的支持,为开发者提供便捷的开发和管理工具。它的低开销、发布/订阅模式和可靠性保证使得MQTT在物联网应用中具有重要的地位和广泛的应用。
代理服务器(Broker):Mosquitto
本项目代理服务器(Broker)选择Mosquitto:
Mosquitto是一款轻量级的开源MQTT(Message Queuing Telemetry Transport)消息代理软件,最初由Eclipse IoT项目提供支持。
MQTT是一种轻量级、高效、基于发布/订阅模式的消息传递协议,广泛应用于物联网(IoT)和机器对机器(M2M)通信领域。Mosquitto提供了一个可扩展的、高性能的MQTT代理服务器,可以帮助开发人员在分布式系统中实现可靠的消息传递。
Mosquitto的特点包括:
- 轻量级和高效:Mosquitto使用C语言编写,占用系统资源非常少,可以在嵌入式系统上运行。同时,它还支持QoS(Quality of Service)服务质量控制,确保消息可靠传递。
- 安全性:Mosquitto支持TLS/SSL传输加密和客户端身份验证,保障消息传递的安全性。
- 易于集成:Mosquitto提供了多种编程语言的客户端库,包括C、Python、Java等,使得开发人员可以方便地将其集成到自己的应用程序中。
- 可扩展性:Mosquitto支持多个订阅者和发布者,并可通过多个代理构建分布式系统。
总之,Mosquitto是一个功能强大的MQTT代理软件,具有高效、可靠、安全、易于集成和可扩展等优点,非常适用于物联网和机器对机器通信领域。
官网地址:http://www.mosquitto.org
MQTT服务器地址:test.mosquitto.org
TCP 端口:1883
TCP/TLS 端口:8883
WebSockets 端口:8080
Websocket/TLS 端口:8081
树莓派接入物联网
关于树莓派初次使用环境搭建可以看我之前的文章:https://blog.csdn.net/HeX_Maker/article/details/130050637
要在树莓派上安装MQTT库,您可以使用Python的pip包管理器。以下是使用pip安装paho-mqtt库的步骤:
- 打开终端或SSH连接到树莓派。
- 确保您的树莓派已连接到互联网。
- 运行以下命令来安装paho-mqtt库:
pip install paho-mqtt
这将自动下载并安装paho-mqtt库及其依赖项。
- 安装完成后,您可以在Python代码中导入paho-mqtt库并开始使用它。以下是一个简单的示例:
import paho.mqtt.client as mqtt
import time

# MQTT连接参数
broker_address = "test.mosquitto.org"
broker_port = 1883
client_id = "ddde89aafe584efb8359eb7e20f69dca"
topic = "time"

# 创建MQTT客户端实例
client = mqtt.Client(client_id)

# 连接到MQTT代理
client.connect(broker_address, broker_port)

# 无限循环,每隔一段时间发送当前时间到MQTT主题
while True:
    # 获取当前时间并转换为字符串
    current_time = time.strftime("%Y-%m-%d %H:%M:%S", time.localtime())

    # 将当前时间发布到MQTT主题
    client.publish(topic, current_time)

    # 等待5秒钟
    time.sleep(5)

# 断开MQTT连接
client.disconnect()
Node-Red接入物联网
在左侧网络里找到“mqtt in”和“mqtt out” 分别代表接收和发送,如下图所示:

把“mqtt in” 拖入工作区后编辑MQTT服务器地址和TCP 端口即可:

树莓派通过物联网发送数
在本项目中树莓派传送的是传感器的温湿度数据,可以先看之前的DHT11连接树莓派教程:https://blog.csdn.net/HeX_Maker/article/details/130119821 以及:https://blog.csdn.net/HeX_Maker/article/details/130795190
import paho.mqtt.client as mqtt
import time
import RPi.GPIO as GPIO

# MQTT连接参数
broker_address = "test.mosquitto.org"
broker_port = 1883
client_id = "ddde89aafe584efb8359eb7e20f69dca"
topic = "time"

# 创建MQTT客户端实例
client = mqtt.Client(client_id)

# 连接到MQTT代理
client.connect(broker_address, broker_port)

def delayMicrosecond(t):
    start,end=0,0
    start=time.time()
    t=(t-3)/1000000
    while end-start<t:
        end=time.time()

tmp0=[]      # Used to store the read data
tmp1=[]
tmp2=[]

data0 = 17   # DHT11 BCM
data1 = 27
data2 = 22

a,b=0,0

def DHT11\_0():
    GPIO.setup(data0, GPIO.OUT)  # GPIO OUTPUT

    GPIO.output(data0,GPIO.HIGH)

    delayMicrosecond(10\*1000)   # delay 10ms
    GPIO.output(data0,GPIO.LOW)

    delayMicrosecond(25\*1000)   # delay 25ms
    GPIO.output(data0,GPIO.HIGH)

    GPIO.setup(data0, GPIO.IN) # GPIO INPUT


    a=time.time()           # Recording cycle start time
    while GPIO.input(data0):
        b=time.time()       # time the record ended
        if (b-a)>0.1:       #Determine whether the cycle time exceeds 0.1 seconds to avoid the program from entering an infinite loop and getting stuck
            break

    a=time.time()
    while GPIO.input(data0)==0:
        b=time.time()
        if (b-a)>0.1:
            break

    a=time.time()
    while GPIO.input(data0):
        b=time.time()
        if (b-a)>=0.1:
            break

    for i in range(40):
        a=time.time()
        while GPIO.input(data0)==0:
            b=time.time()
            if (b-a)>0.1:
                break

        delayMicrosecond(28)    # delay 28 microseconds

        if GPIO.input(data0):    # After more than 28 microseconds, it is judged whether it is still at a high level
            tmp0.append(1)       # Record the received bit as 1

            a=time.time()
            while GPIO.input(data0): # Loop until the input is low
                b=time.time()
                if (b-a)>0.1:
                    break
        else:
            tmp0.append(0)       # Record the received bit as 0
def DHT11\_1():
    GPIO.setup(data1, GPIO.OUT)

    GPIO.output(data1,GPIO.HIGH)

    delayMicrosecond(10\*1000)
    GPIO.output(data1,GPIO.LOW)

    delayMicrosecond(25\*1000)
    GPIO.output(data1,GPIO.HIGH)

    GPIO.setup(data1, GPIO.IN)


    a=time.time()
    while GPIO.input(data1):
        b=time.time()
        if (b-a)>0.1:
            break

    a=time.time()
    while GPIO.input(data1)==0:
        b=time.time()
        if (b-a)>0.1:
            break

    a=time.time()
    while GPIO.input(data1):
        b=time.time()
        if (b-a)>=0.1:
            break

    for i in range(40):
        a=time.time()
        while GPIO.input(data1)==0:
            b=time.time()
            if (b-a)>0.1:
                break

        delayMicrosecond(28)

        if GPIO.input(data1):
            tmp1.append(1)

            a=time.time()
            while GPIO.input(data1):
                b=time.time()
                if (b-a)>0.1:
                    break
        else:
            tmp1.append(0)


def DHT11\_2():
    GPIO.setup(data2, GPIO.OUT)

    GPIO.output(data2,GPIO.HIGH)

    delayMicrosecond(10\*1000)
    GPIO.output(data2,GPIO.LOW)

    delayMicrosecond(25\*1000)
    GPIO.output(data2,GPIO.HIGH)

    GPIO.setup(data2, GPIO.IN)


    a=time.time()
    while GPIO.input(data2):
        b=time.time()
        if (b-a)>0.1:
            break

    a=time.time()
    while GPIO.input(data2)==0:
        b=time.time()
        if (b-a)>0.1:
            break

    a=time.time()
    while GPIO.input(data2):
        b=time.time()
        if (b-a)>=0.1:
            break

    for i in range(40):
        a=time.time()
        while GPIO.input(data2)==0:
            b=time.time()
            if (b-a)>0.1:
                break

        delayMicrosecond(28)

        if GPIO.input(data2):
            tmp2.append(1)

            a=time.time()
            while GPIO.input(data2):
                b=time.time()
                if (b-a)>0.1:
                    break
        else:
            tmp2.append(0)


# 无限循环,每隔一段时间发送当前时间到MQTT主题
while True:
# 获取当前时间并转换为字符串
# current\_time = time.strftime("%Y-%m-%d %H:%M:%S", time.localtime())
    GPIO.setmode(GPIO.BCM)
    GPIO.setwarnings(False)
    del tmp0[0:]                 #delete list
    del tmp1[0:]
    del tmp2[0:]
    time.sleep(1)               # Delay 1 second

    DHT11_0()
    DHT11_1()
    DHT11_2()

    now = time.strftime('%d-%m-%Y %H:%M:%S', time.localtime())

    humidity0_bit=tmp0[0:8]       # Delimited list, bits 0 to 7 are humidity integer data
    humidity0_point_bit=tmp0[8:16]# Humidity Decimals
    temperature0_bit=tmp0[16:24]  # Integer temperature
    temperature0_point_bit=tmp0[24:32]    # temperature decimal
    check0_bit=tmp0[32:40]        # check data

    humidity1_bit=tmp1[0:8]
    humidity1_point_bit=tmp1[8:16]
    temperature1_bit=tmp1[16:24]
    temperature1_point_bit=tmp1[24:32]
    check1_bit=tmp1[32:40]

    humidity2_bit=tmp2[0:8]
    humidity2_point_bit=tmp2[8:16]
    temperature2_bit=tmp2[16:24]
    temperature2_point_bit=tmp2[24:32]
    check2_bit=tmp2[32:40]

    humidity0_int=0
    humidity0_point=0
    temperature0_int=0
    temperature0_point=0

    humidity1_int=0
    humidity1_point=0
    temperature1_int=0
    temperature1_point=0

    humidity2_int=0
    humidity2_point=0
    temperature2_int=0
    temperature2_point=0


    check0=0
    check1=0
    check2=0

    for i in range(8):          # convert binary to decimal
        humidity0_int+=humidity0_bit[i]\*2\*\*(7-i)
        humidity1_int+=humidity1_bit[i]\*2\*\*(7-i)
        humidity2_int+=humidity2_bit[i]\*2\*\*(7-i)

        humidity0_point+=humidity0_point_bit[i]\*2\*\*(7-i)
        humidity1_point+=humidity1_point_bit[i]\*2\*\*(7-i)
        humidity2_point+=humidity2_point_bit[i]\*2\*\*(7-i)

        temperature0_int+=temperature0_bit[i]\*2\*\*(7-i)
        temperature1_int+=temperature1_bit[i]\*2\*\*(7-i)
        temperature2_int+=temperature2_bit[i]\*2\*\*(7-i)

        temperature0_point+=temperature0_point_bit[i]\*2\*\*(7-i)
        temperature1_point+=temperature1_point_bit[i]\*2\*\*(7-i)
        temperature2_point+=temperature2_point_bit[i]\*2\*\*(7-i)

        check0+=check0_bit[i]\*2\*\*(7-i)
        check1+=check1_bit[i]\*2\*\*(7-i)
        check2+=check2_bit[i]\*2\*\*(7-i)

    humidity0=humidity0_int+humidity0_point/10
    temperature0=temperature0_int+temperature0_point/10

    humidity1=humidity1_int+humidity1_point/10
    temperature1=temperature1_int+temperature1_point/10

    humidity2=humidity2_int+humidity2_point/10
    temperature2=temperature2_int+temperature2_point/10

    check0_tmp0=humidity0_int+humidity0_point+temperature0_int+temperature0_point
    check1_tmp1=humidity1_int+humidity1_point+temperature1_int+temperature1_point
    check2_tmp2=humidity2_int+humidity2_point+temperature2_int+temperature2_point


    if check0==check0_tmp0 and temperature0!=0 and temperature0!=0 and check1==check1_tmp1 and temperature1!=0 and temperature1!=0 and check2==check2_tmp2 and temperature2!=0 and temperature2!=0 :  # 判断数据是否正常
        print("Temperature0 is ", temperature0,"C\nHumidity0 is ",humidity0,"%")# Print the temperature and humidity data
        print("Temperature1 is ", temperature1,"C\nHumidity1 is ",humidity1,"%")
        print("Temperature2 is ", temperature2,"C\nHumidity2 is ",humidity2,"%")
        print(now)

        #ser.write(temperature0\_int)
        temperature00 = str(temperature0)
        humidity00 = str(humidity0)
        #th00 = temperature00 + ";" + humidity00
        #ser.write(th00.encode())
        #ser.write(temperature00.encode())

        temperature11 = str(temperature1)
        humidity11 = str(humidity1)
        #th11 = temperature11 + ";" + humidity11
        #ser.write(th11.encode())

        temperature22 = str(temperature2)
        humidity22 = str(humidity2)
        current_th = temperature00 + ";" + humidity00 + ";" + temperature11 + ";" + humidity11 + ";" + temperature22 + ";" + humidity22 + ";" +now
# ser.write(th.encode())
        # 将当前时间发布到MQTT主题
        client.publish(topic, current_th)
    else:
        print("error")

    time.sleep(1)
    GPIO.cleanup()

# 断开MQTT连接
client.disconnect()
Node-Red显示从树莓派发来的数据
把之前教程(https://blog.csdn.net/HeX_Maker/article/details/130795190)中的串口改成mqtt即可:

node-red可以把整个流程用代码的形式导出,复制以下的代码并导入就可以直接生成和上图一样的流程
[
{
"id": "f18286a1ec016066",
"type": "tab",
"label": "MQTT",
"disabled": false,
"info": "",
"env": []
},
{
"id": "f6aeb07f6fc5262f",
"type": "function",
"z": "f18286a1ec016066",
"name": "function 7",
"func": "var inputStr = msg.payload; // 获取输入的字符串\nvar nums = inputStr.split(\";\"); // 使用分号分隔符拆分字符串\nvar num0 = Number(nums[0]); // 将第一个数字字符串转换为数字\nvar num1 = Number(nums[1]); // 将第二个数字字符串转换为数字\nvar num2 = Number(nums[2]); // 将第三个数字字符串转换为数字\nvar num3 = Number(nums[3]);\nvar num4 = Number(nums[4]);\nvar num5 = Number(nums[5]);\nvar num6 = nums[6];\n//msg.payload = \"Number 1: \" + num1 + \" | Number 2: \" + num2; // 将两个数字组合成一个输出字符串\n\nvar msg0 = { payload: num0 };\nvar msg1 = { payload: num1 };\nvar msg2 = { payload: num2 };\nvar msg3 = { payload: num3 };\nvar msg4 = { payload: num4 };\nvar msg5 = { payload: num5 };\nvar msg6 = { payload: num6 };\nreturn [msg0, msg1, msg2, msg3, msg4, msg5, msg6];\n",
"outputs": 7,
"noerr": 0,
"initialize": "",
"finalize": "",
"libs": [],
"x": 400,
"y": 160,
"wires": [
[
"134bc89dda5d30a1",
"183c772091bf631f",
"4e593a1812ab11e6"
],
[
"c04d9587d73ea98a",
"b3ba6aab08db9e4b",
"f40d833e299dff69",
"d5f77bf4cf3d9926"
],
[
"c839cfbedbeb3dd6",
"d34b5feaeebcd14f",
"5ff5f93bdd4c5d85",
"35031f0b4e374e80"
],
[
"6dd0de630ef6d829",
"036f3a5253a8cdd1",
"ee867cdeaec95478",
"fa876b454093c34d"
],
[
"261e6a8833a13749",
"60d1d6d3a982717c",
"602885d958e087c5",
"fdd532709b877ef3"
],
[
"ba4d8082eccf1b3e",
"4b2440884b7feeb7",
"a9bfd3b3ae6441ab",
"eebae5be22fb272f"
],
[
"f2c9c64e6cb8a163",
"87947cb7f6512ab7"
]
]
},
{
"id": "134bc89dda5d30a1",
"type": "debug",
"z": "f18286a1ec016066",
"name": "t0",
"active": false,
"tosidebar": true,
"console": false,
"tostatus": false,
"complete": "payload",
"targetType": "msg",
"statusVal": "",
"statusType": "auto",
"x": 830,
"y": 60,
"wires": []
},
{
"id": "c04d9587d73ea98a",
"type": "debug",
"z": "f18286a1ec016066",
"name": "h0",
"active": false,
"tosidebar": true,
"console": false,
"tostatus": false,
"complete": "payload",
"targetType": "msg",
"statusVal": "",
"statusType": "auto",
"x": 830,
"y": 100,
"wires": []
},
{
"id": "c839cfbedbeb3dd6",
"type": "debug",
"z": "f18286a1ec016066",
"name": "t1",
"active": false,
"tosidebar": true,
"console": false,
"tostatus": false,
"complete": "payload",
"targetType": "msg",
"statusVal": "",
"statusType": "auto",
"x": 830,
"y": 140,
"wires": []
},
{
"id": "b3ba6aab08db9e4b",
"type": "ui\_gauge",
"z": "f18286a1ec016066",
"name": "",
"group": "5283c2abfc1b5a75",
"order": 3,
"width": 0,
"height": 0,
"gtype": "gage",
"title": "humidity0",
"label": "%",
"format": "{{value}}",
"min": "-100",
"max": "100",
"colors": [
"#00b500",
"#e6e600",
"#ca3838"
],
"seg1": "",
"seg2": "",
"diff": false,
"className": "",
"x": 680,
"y": 100,
"wires": []
},
{
"id": "d34b5feaeebcd14f",
"type": "ui\_gauge",
"z": "f18286a1ec016066",
"name": "",
"group": "3e841485a4d36b4a",
"order": 2,
"width": 0,
"height": 0,
"gtype": "gage",
"title": "Temperatur1",
"label": "C",
"format": "{{value}}",
"min": "-10",
"max": "50",
"colors": [
"#00b500",
"#e6e600",
"#ca3838"
],
"seg1": "",
"seg2": "",
"diff": false,
"className": "",
"x": 690,
"y": 140,
"wires": []
},
{
"id": "261e6a8833a13749",
"type": "ui\_gauge",
"z": "f18286a1ec016066",
"name": "",
"group": "6ebeb9ec1ee1d0b6",
"order": 2,
"width": 0,
"height": 0,
"gtype": "gage",
"title": "Temperatur2",
"label": "C",
"format": "{{value}}",
"min": "-10",
"max": "50",
"colors": [
"#00b500",
"#e6e600",
"#ca3838"
],
"seg1": "",
"seg2": "",
"diff": false,
"className": "",
"x": 690,
"y": 220,
"wires": []
},
{
"id": "6dd0de630ef6d829",
"type": "ui\_gauge",
"z": "f18286a1ec016066",
"name": "",
"group": "3e841485a4d36b4a",
"order": 3,
"width": 0,
"height": 0,
"gtype": "gage",
"title": "humidity1",
"label": "%",
"format": "{{value}}",
"min": "-100",
"max": "100",
"colors": [
"#00b500",
"#e6e600",
"#ca3838"
],
"seg1": "",
"seg2": "",
"diff": false,
"className": "",
"x": 680,
"y": 180,
"wires": []
},
{
"id": "ba4d8082eccf1b3e",
"type": "ui\_gauge",
"z": "f18286a1ec016066",
"name": "",
"group": "6ebeb9ec1ee1d0b6",
"order": 3,
"width": 0,
"height": 0,
"gtype": "gage",
"title": "humidity2",
"label": "%",
"format": "{{value}}",
"min": "-100",
"max": "100",
"colors": [
"#00b500",
"#e6e600",
"#ca3838"
],
"seg1": "",
"seg2": "",
"diff": false,
"className": "",
"x": 680,
"y": 260,
"wires": []
},
{
"id": "036f3a5253a8cdd1",
"type": "debug",
"z": "f18286a1ec016066",
"name": "h1",
"active": false,
"tosidebar": true,
"console": false,
"tostatus": false,
"complete": "payload",
"targetType": "msg",
"statusVal": "",
"statusType": "auto",
"x": 830,
"y": 180,
"wires": []
},
{
"id": "60d1d6d3a982717c",
"type": "debug",
"z": "f18286a1ec016066",
"name": "t2",
"active": false,
"tosidebar": true,
"console": false,
"tostatus": false,
"complete": "payload",
"targetType": "msg",
"statusVal": "",
"statusType": "auto",
"x": 830,
"y": 220,
"wires": []
},
{
"id": "4b2440884b7feeb7",
"type": "debug",
"z": "f18286a1ec016066",
"name": "h2",
"active": false,
"tosidebar": true,
"console": false,
"tostatus": false,
"complete": "payload",
"targetType": "msg",
"statusVal": "",
"statusType": "auto",
"x": 830,
"y": 260,
"wires": []
},
{
"id": "183c772091bf631f",
"type": "ui\_gauge",
"z": "f18286a1ec016066",
"name": "",
"group": "5283c2abfc1b5a75",
"order": 2,
"width": 0,
"height": 0,
"gtype": "gage",
"title": "Temperatur0",
"label": "C",
"format": "{{value}}",
"min": "-10",
"max": "50",
"colors": [
"#00b500",
"#e6e600",
"#ca3838"
],
"seg1": "",
"seg2": "",
"diff": false,
"className": "",
"x": 690,
"y": 60,
"wires": []
},
{
"id": "c56155912e1c2231",
"type": "file",
"z": "f18286a1ec016066",
"name": "",
"filename": "D:\\Iot\\MQTT\\DHT11\_mqtt\_00.txt",
"filenameType": "str",
"appendNewline": true,
"createDir": false,
"overwriteFile": "false",
"encoding": "none",
"x": 470,
"y": 360,
"wires": [
[
"f0f889f77af1e892"
]
]
},
{
"id": "f0f889f77af1e892",
"type": "debug",
"z": "f18286a1ec016066",
"name": "text",
"active": false,
"tosidebar": true,
"console": false,
"tostatus": false,
"complete": "payload",
"targetType": "msg",
"statusVal": "",
"statusType": "auto",
"x": 770,
"y": 360,
"wires": []
},
{
"id": "4e593a1812ab11e6",
"type": "ui\_chart",
"z": "f18286a1ec016066",
"name": "",
"group": "5283c2abfc1b5a75",
"order": 2,
"width": 0,
"height": 0,
"label": "",
"chartType": "line",
"legend": "false",
"xformat": "HH:mm:ss",
"interpolate": "linear",
"nodata": "",
"dot": true,
"ymin": "",
"ymax": "",
"removeOlder": 1,
"removeOlderPoints": "",
"removeOlderUnit": "3600",
"cutout": 0,
"useOneColor": false,
"useUTC": false,
"colors": [
"#1f77b4",
"#aec7e8",
"#ff7f0e",
"#2ca02c",
"#98df8a",
"#d62728",
"#ff9896",
"#9467bd",
"#c5b0d5"
],
"outputs": 1,
"useDifferentColor": false,
"className": "",
"x": 1010,
"y": 60,
"wires": [
[
"e286616f8004b8b1"
]
]
},
{
"id": "e286616f8004b8b1",
"type": "debug",
"z": "f18286a1ec016066",
"name": "t0",
"active": false,
"tosidebar": true,
"console": false,
"tostatus": false,
"complete": "payload",
"targetType": "msg",
"statusVal": "",
"statusType": "auto",
"x": 1170,
"y": 60,
"wires": []
},
{
"id": "f2c9c64e6cb8a163",
"type": "ui\_text",
"z": "f18286a1ec016066",
"group": "c9e8ea402253a271",
"order": 0,
"width": 0,
"height": 0,
"name": "time",
"label": "",
"format": "{{msg.payload}}",
"layout": "row-left",
"className": "",
"x": 670,
"y": 300,
"wires": []
},
{
"id": "87947cb7f6512ab7",
"type": "debug",
"z": "f18286a1ec016066",
"name": "time",
"active": false,
"tosidebar": true,
"console": false,
"tostatus": false,
"complete": "payload",
"targetType": "msg",
"statusVal": "",
"statusType": "auto",
"x": 830,
"y": 300,
"wires": []
},
{
"id": "f59767e72bd186f9",
"type": "debug",
"z": "f18286a1ec016066",
"name": "debug 13",
"active": true,
"tosidebar": true,
"console": false,
"tostatus": false,
"complete": "payload",
"targetType": "msg",
"statusVal": "",
"statusType": "auto",
"x": 400,
## 最后
**自我介绍一下,小编13年上海交大毕业,曾经在小公司待过,也去过华为、OPPO等大厂,18年进入阿里一直到现在。**
**深知大多数Java工程师,想要提升技能,往往是自己摸索成长,自己不成体系的自学效果低效漫长且无助。**
**因此收集整理了一份《2024年嵌入式&物联网开发全套学习资料》,初衷也很简单,就是希望能够帮助到想自学提升又不知道该从何学起的朋友,同时减轻大家的负担。**
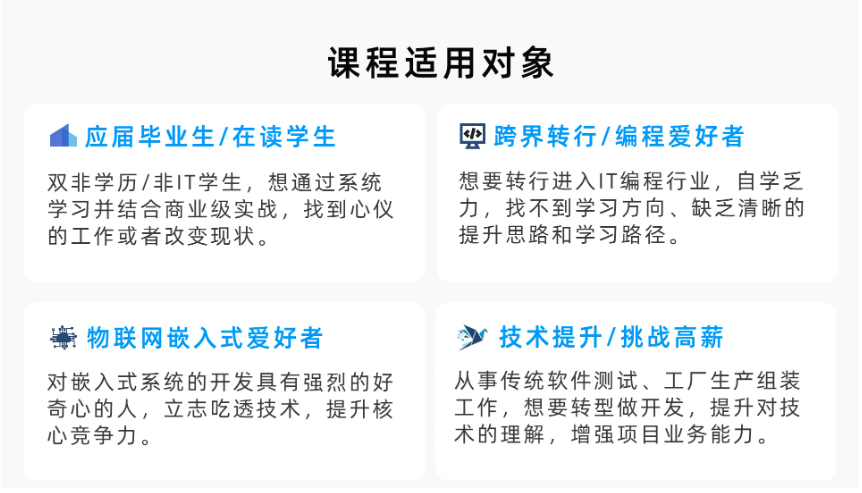
**既有适合小白学习的零基础资料,也有适合3年以上经验的小伙伴深入学习提升的进阶课程,基本涵盖了95%以上嵌入式&物联网开发知识点,真正体系化!**
[**如果你觉得这些内容对你有帮助,需要这份全套学习资料的朋友可以戳我获取!!**](https://bbs.csdn.net/topics/618654289)
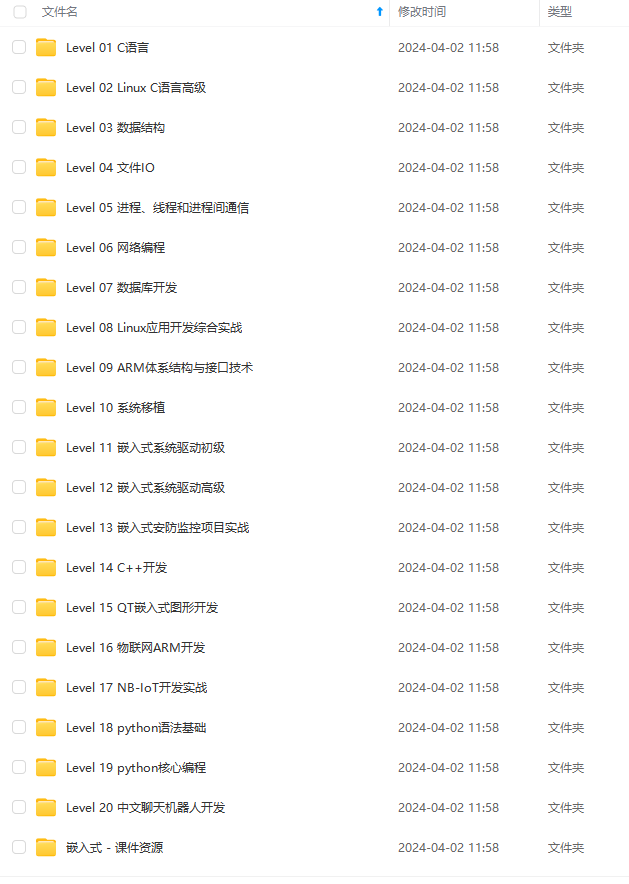
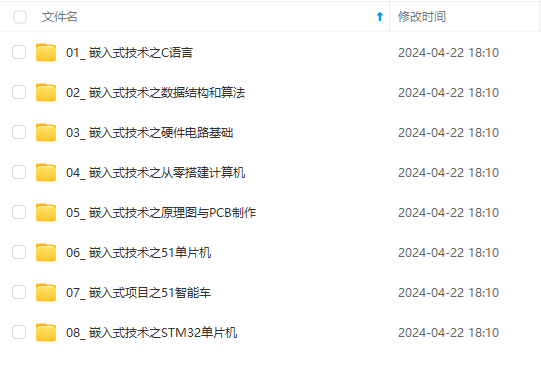
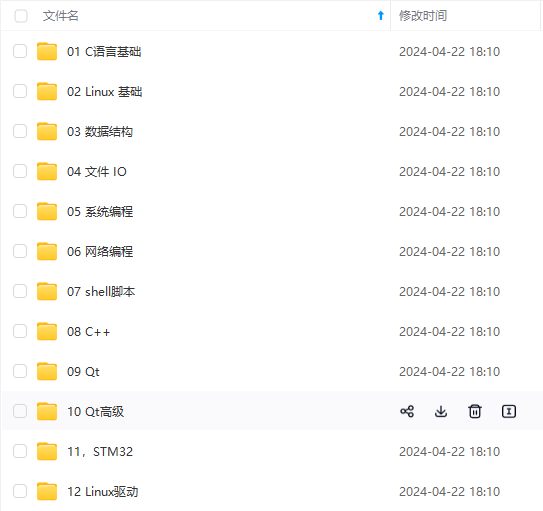
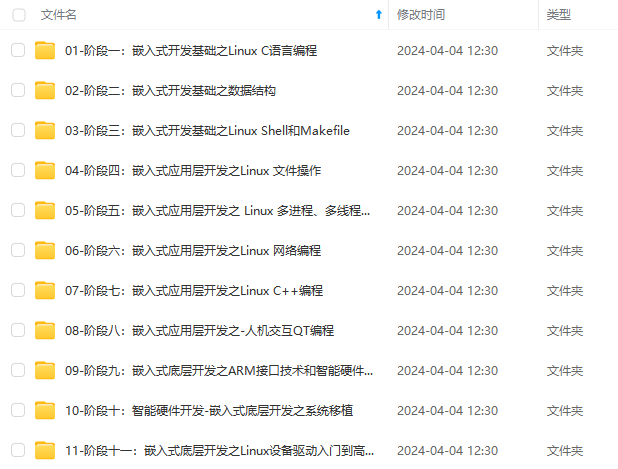
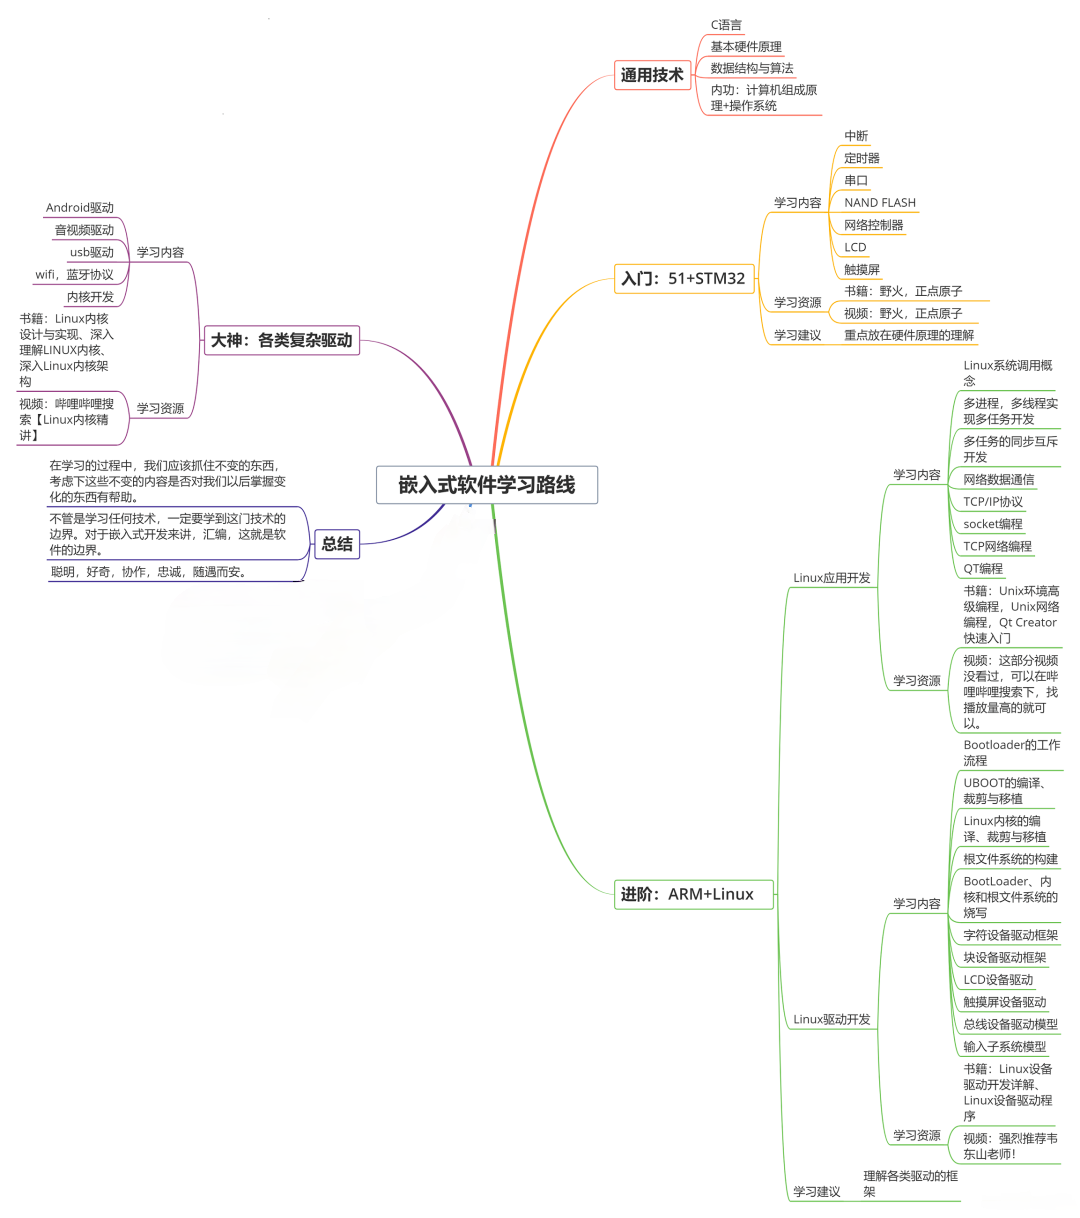
**由于文件比较大,这里只是将部分目录大纲截图出来,每个节点里面都包含大厂面经、学习笔记、源码讲义、实战项目、讲解视频,并且后续会持续更新**!!
tosidebar": true,
"console": false,
"tostatus": false,
"complete": "payload",
"targetType": "msg",
"statusVal": "",
"statusType": "auto",
"x": 400,
## 最后
**自我介绍一下,小编13年上海交大毕业,曾经在小公司待过,也去过华为、OPPO等大厂,18年进入阿里一直到现在。**
**深知大多数Java工程师,想要提升技能,往往是自己摸索成长,自己不成体系的自学效果低效漫长且无助。**
**因此收集整理了一份《2024年嵌入式&物联网开发全套学习资料》,初衷也很简单,就是希望能够帮助到想自学提升又不知道该从何学起的朋友,同时减轻大家的负担。**
[外链图片转存中...(img-7Lp67Y88-1715591937187)]
[外链图片转存中...(img-EDYi1m9L-1715591937188)]
[外链图片转存中...(img-gyop0DOP-1715591937188)]
[外链图片转存中...(img-dwHZEBk9-1715591937189)]
[外链图片转存中...(img-2upmD9nJ-1715591937189)]
[外链图片转存中...(img-39EfPpKV-1715591937190)]
[外链图片转存中...(img-5z67vQSe-1715591937190)]
**既有适合小白学习的零基础资料,也有适合3年以上经验的小伙伴深入学习提升的进阶课程,基本涵盖了95%以上嵌入式&物联网开发知识点,真正体系化!**
[**如果你觉得这些内容对你有帮助,需要这份全套学习资料的朋友可以戳我获取!!**](https://bbs.csdn.net/topics/618654289)
**由于文件比较大,这里只是将部分目录大纲截图出来,每个节点里面都包含大厂面经、学习笔记、源码讲义、实战项目、讲解视频,并且后续会持续更新**!!


 6431
6431

 被折叠的 条评论
为什么被折叠?
被折叠的 条评论
为什么被折叠?
 到【灌水乐园】发言


