


先自我介绍一下,小编浙江大学毕业,去过华为、字节跳动等大厂,目前在阿里
深知大多数程序员,想要提升技能,往往是自己摸索成长,但自己不成体系的自学效果低效又漫长,而且极易碰到天花板技术停滞不前!
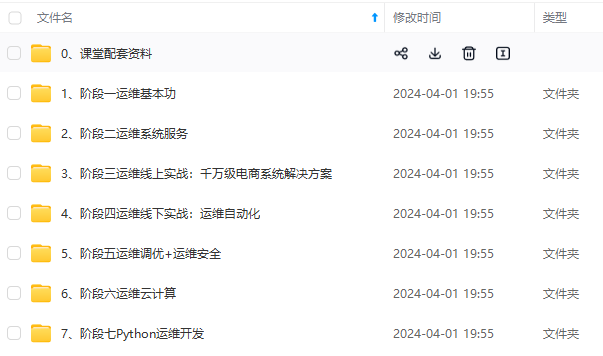
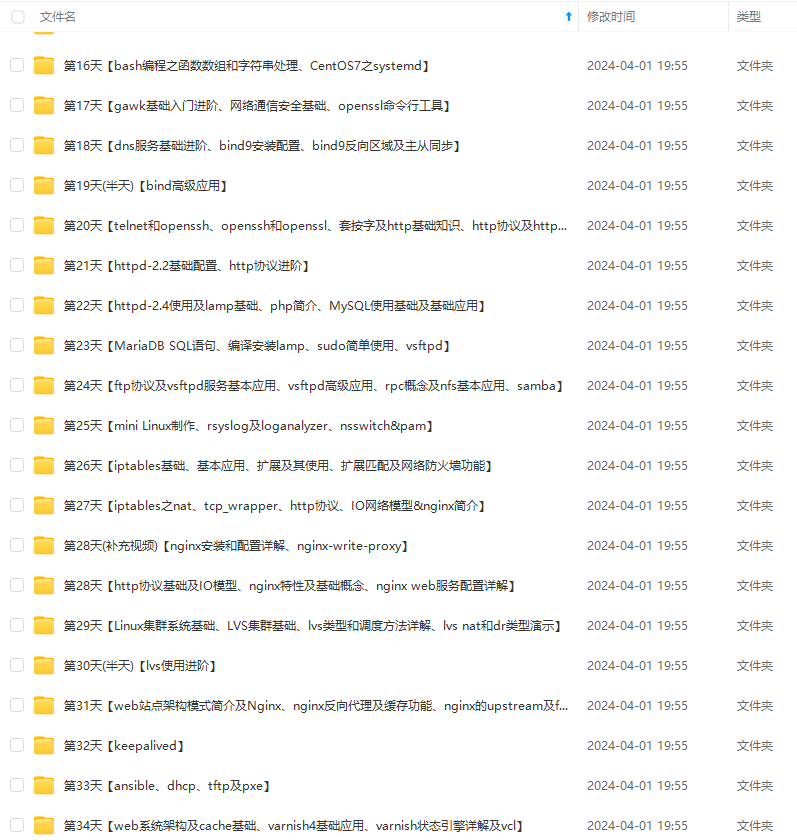
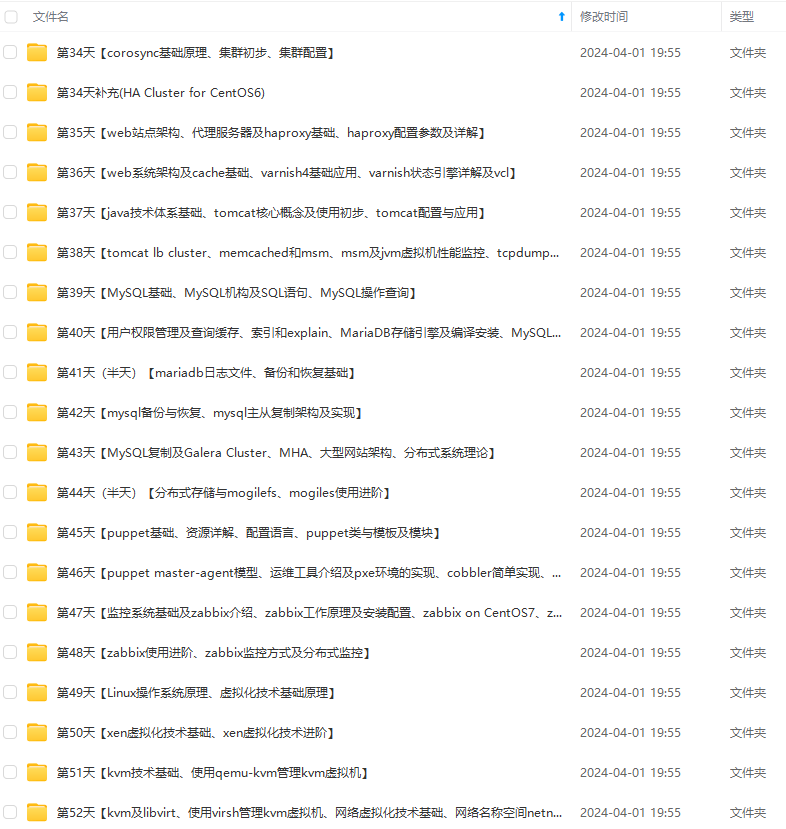
因此收集整理了一份《2024年最新Linux运维全套学习资料》,初衷也很简单,就是希望能够帮助到想自学提升又不知道该从何学起的朋友。


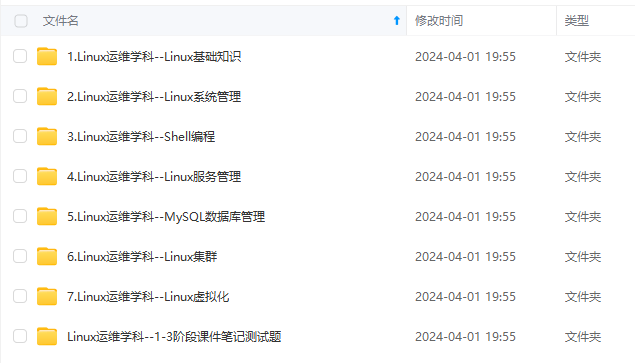


既有适合小白学习的零基础资料,也有适合3年以上经验的小伙伴深入学习提升的进阶课程,涵盖了95%以上运维知识点,真正体系化!
由于文件比较多,这里只是将部分目录截图出来,全套包含大厂面经、学习笔记、源码讲义、实战项目、大纲路线、讲解视频,并且后续会持续更新
前言
本章将会复习网络技术的一些知识,了解网络基础概念,七层模型,五层模型对应的设备和协议
一.网络技术基础复习
1.计算机网络基本概念
网络功能 ( 资源共享 信息传递 提高处理能力 增加可靠性)
- 资源共享:凡是入网用户均能享受网络中各个
先自我介绍一下,小编浙江大学毕业,去过华为、字节跳动等大厂,目前在阿里
深知大多数程序员,想要提升技能,往往是自己摸索成长,但自己不成体系的自学效果低效又漫长,而且极易碰到天花板技术停滞不前!
因此收集整理了一份《2024年最新Linux运维全套学习资料》,初衷也很简单,就是希望能够帮助到想自学提升又不知道该从何学起的朋友。


既有适合小白学习的零基础资料,也有适合3年以上经验的小伙伴深入学习提升的进阶课程,涵盖了95%以上运维知识点,真正体系化!
由于文件比较多,这里只是将部分目录截图出来,全套包含大厂面经、学习笔记、源码讲义、实战项目、大纲路线、讲解视频,并且后续会持续更新
//bbs.csdn.net/forums/4f45ff00ff254613a03fab5e56a57acb)**


 96
96


 被折叠的 条评论
为什么被折叠?
被折叠的 条评论
为什么被折叠?
 到【灌水乐园】发言


