


 本文详细介绍了Java面试中可能涉及的知识点,包括Struts框架配置、Spring全家桶应用、HibernateORM操作,以及MVC架构的实现。内容涵盖了项目结构搭建、配置文件编写、数据库连接、实体生成和JavaBean编写等实战技巧。
《一线大厂Java面试题解析+核心总结学习笔记+最新讲解视频+实战项目源码》,点击传送门,即可获取!
org.apache.struts
struts2-core
2.3.35
org.apache.struts
struts2-spring-plugin
2.3.35
org.apache.struts
struts2-json-plugin
2.3.8
1.4 配置Java EE 坐标依赖
这里可以引入 servlet api,jstl 标签库等一系列工具
javax.servlet
javax.servlet-api
3.1.0
provided
javax.servlet.jsp
javax.servlet.jsp-api
2.3.1
provided
org.projectlombok
lombok
1.18.0
provided
jstl
jstl
1.2
taglibs
standard
1.1.2
1.5 其他工具
json 处理工具
org.jetbrains
annotations-java5
RELEASE
compile
org.json
json
20160810
=======================================================================
2.1 配置文件
使用如下方式创建
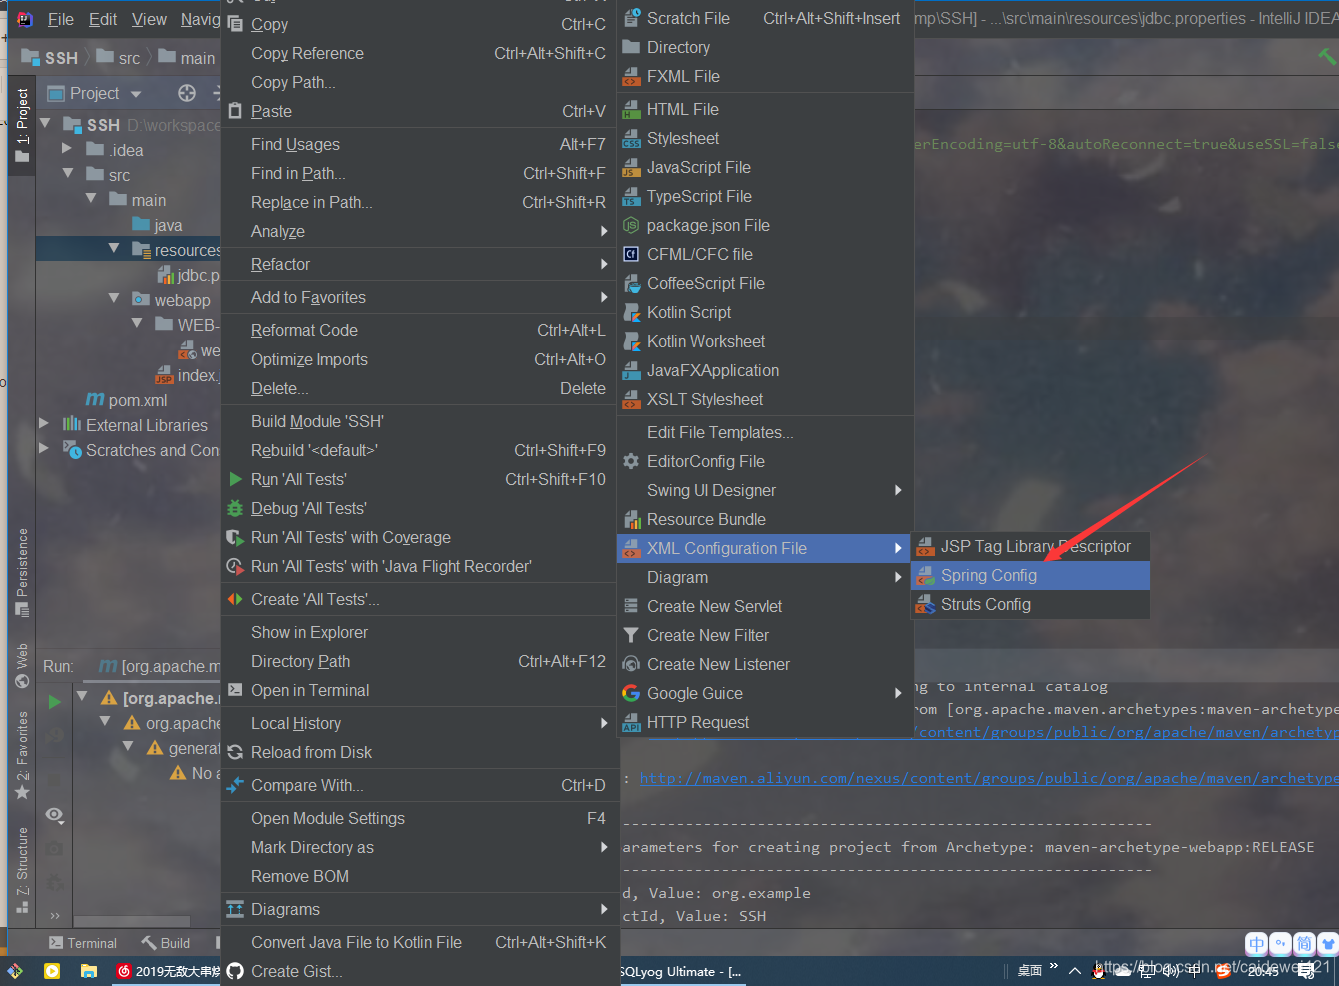
-
applicationContext.xml
-
jdbc.properties
-
struts.xml
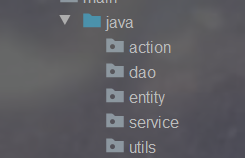
2.2 包结构
创建如下的基本包结构
=======================================================================
3.1 web.xml 文件配置
Archetype Created Web Application
contextConfigLocation
classpath:applicationContext.xml
struts2
org.apache.struts2.dispatcher.ng.filter.StrutsPrepareAndExecuteFilter
struts2
/*
org.springframework.web.context.ContextLoaderListener
3.2 编写 jdbc.properties 文件
这里我们需要自己手动修改数据库的信息配置
jdbc.driverClass=com.mysql.jdbc.Driver
jdbc.jdbcUrl=jdbc:mysql://localhost:3306/hibernate?characterEncoding=utf-8&autoReconnect=true&useSSL=false
jdbc.user=root
jdbc.password=root
#连接池中保留的最小连接数
jdbc.minPoolSize=1
#连接池中保留的最大连接数
jdbc.maxPoolSize=20
#初始化连接数
jdbc.initialPoolSize=1
3.3 编写 applicationContext.xml 配置文件
这里面也包含了数据库的基本配置
<?xml version="1.0" encoding="UTF-8"?><beans xmlns=“http://www.springframework.org/schema/beans”
xmlns:xsi=“http://www.w3.org/2001/XMLSchema-instance” xmlns:tx=“http://www.springframework.org/schema/tx”
xmlns:context=“http://www.springframework.org/schema/context”
xsi:schemaLocation="http://www.springframework.org/schema/beans
http://www.springframework.org/schema/beans/spring-beans.xsd
http://www.springframework.org/schema/tx
http://www.springframework.org/schema/tx/spring-tx.xsd
http://www.springframework.org/schema/context
http://www.springframework.org/schema/context/spring-context.xsd">
<context:property-placeholder location=“classpath:jdbc.properties”/>
<context:component-scan base-package=“dao.,service.”/>
<context:component-scan base-package=“action”/>
context:annotation-config/
org.hibernate.dialect.MySQLDialect
update
thread
true
true
false
<tx:annotation-driven transaction-manager=“txManager”/>
3.4 struts 配置文件
我们还没有编写的具体的 action 服务,所以这里先跳过
========================================================================================
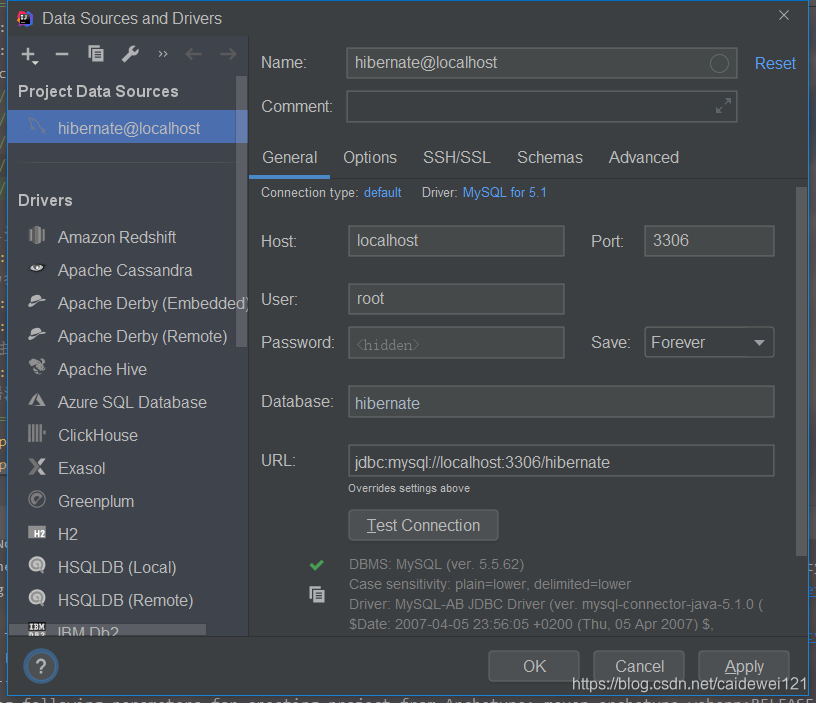
4.1 配置数据库连接信息
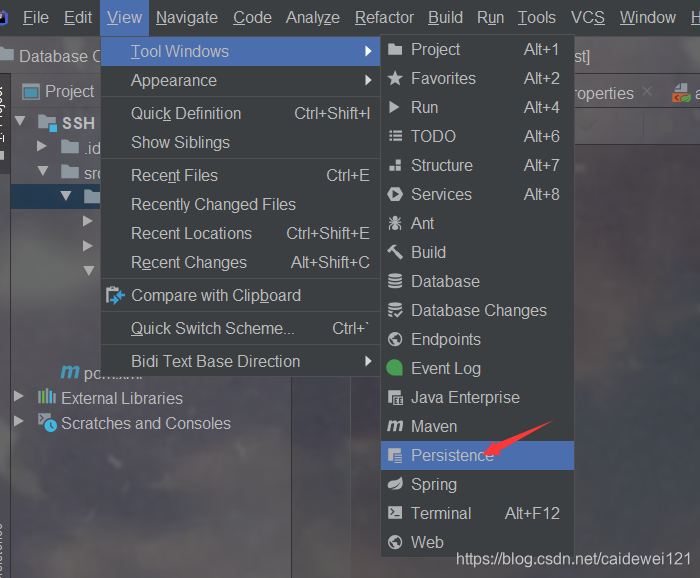
使用 idea 自带的数据库连接的工具
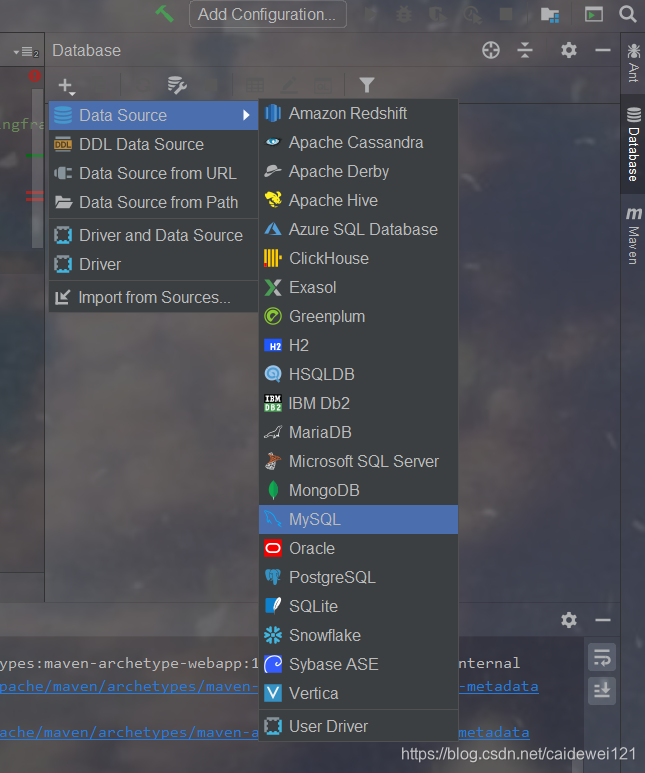
完善基本配置信息
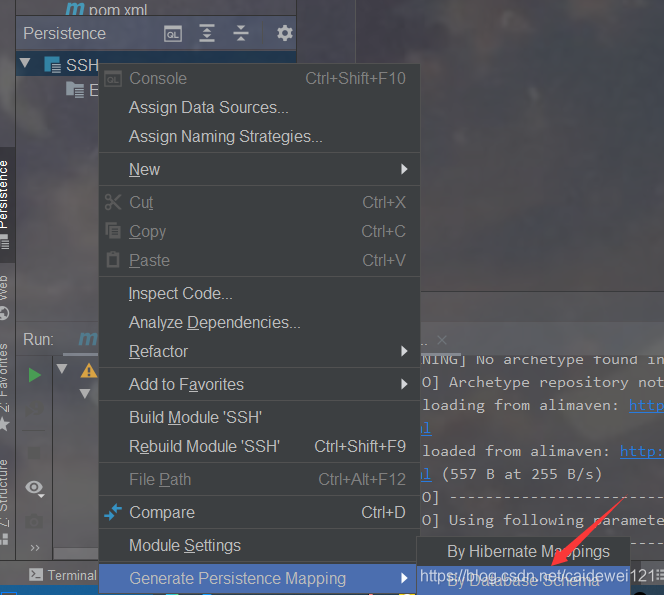
4.2 逆向生成实体类
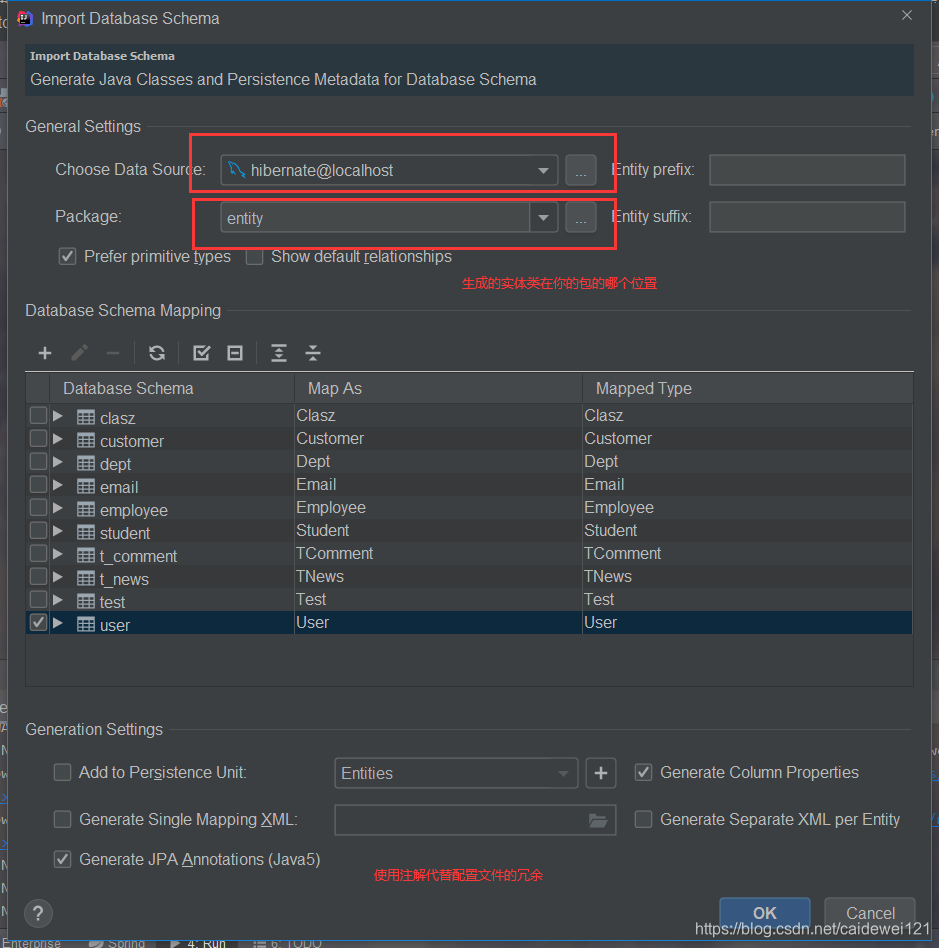
4.3 实体类配置
生成好后可以看到和数据库对应的实体类,我的表很简单,一个简单的用户表,只有 id, username, password 字段
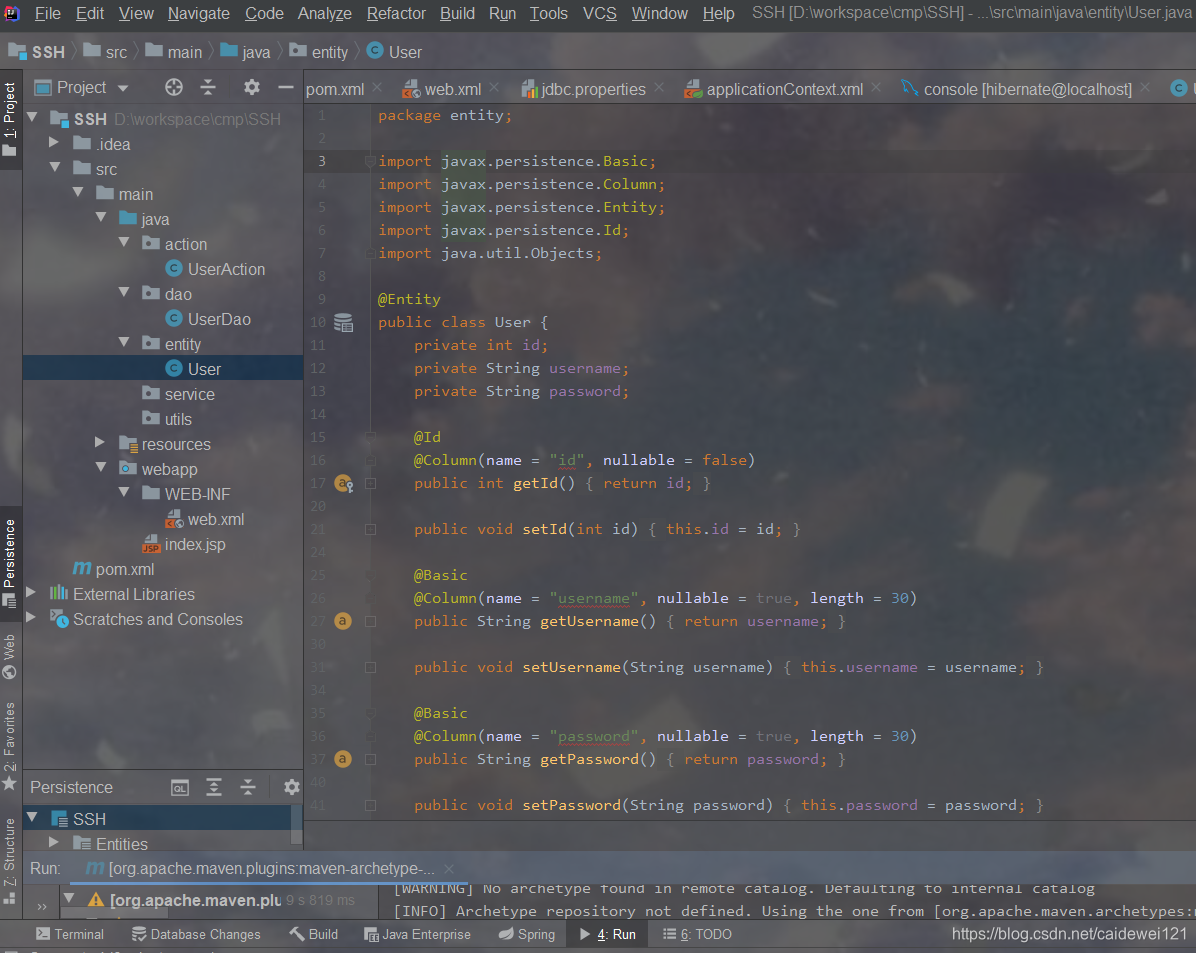
但是我们发现里面的部分内容会爆红,这是因为我们没有指定数据源

选择我们刚才连接的数据库
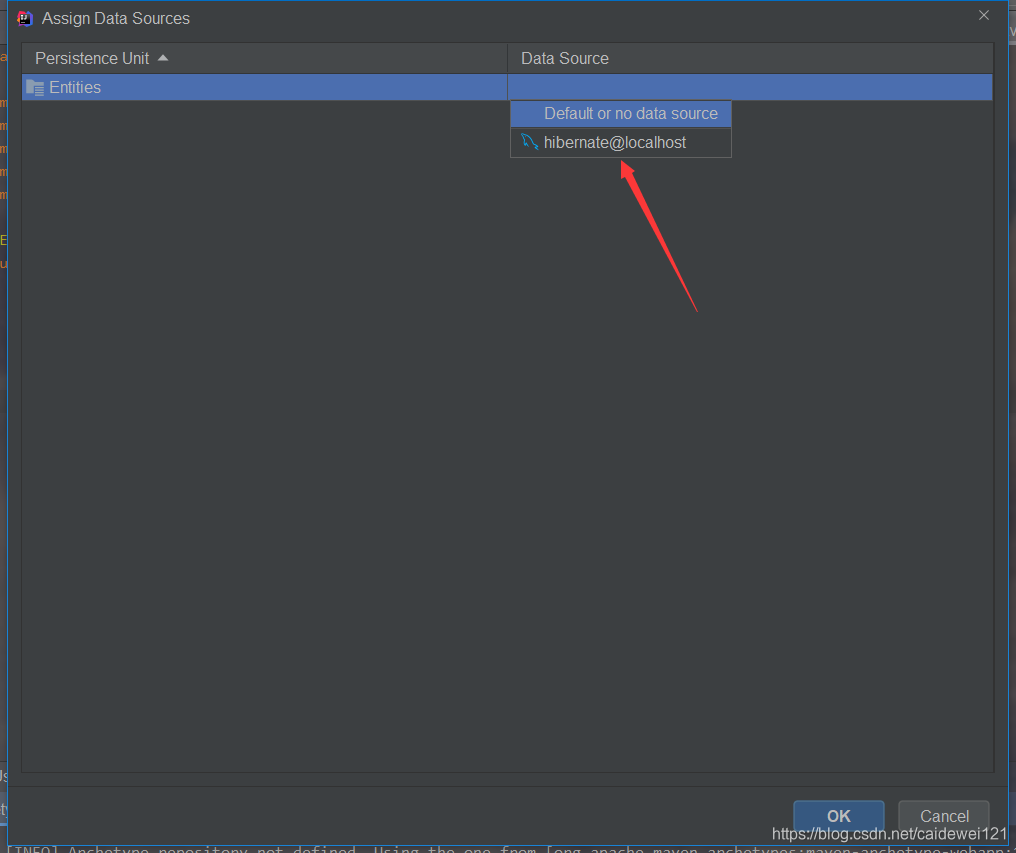
然后就没问题了。
============================================================================
看到包结构,大家应该可以猜出来,我是使用的典型的 MVC 三层架构来编写的
5.1 编写 dao 层
创建 UserDao 以及 它的实现类 UserDaoImpl
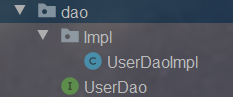
UserDao 编写
package dao;
import entity.User;
public interface UserDao {
// 用户登录验证
public User selectByUsernameAndPassword(String username, String password);
}
UserDaoImpl
package dao.Impl;
import dao.UserDao;
import entity.User;
import org.hibernate.Session;
import org.hibernate.query.Query;
import org.springframework.beans.factory.annotation.Autowired;
import org.springframework.orm.hibernate5.HibernateTemplate;
import org.springframework.stereotype.Repository;
import javax.annotation.Resource;
// 使用 Spring 来接管持久层的所有操作
@Repository
public class UserDaoImpl implements UserDao {
// 使用 Hibernate 提供的模板
@Autowired
@Resource
private HibernateTemplate hibernateTemplate;
// 生成对应的 get 和 set 方法
public HibernateTemplate getHibernateTemplate() {
return hibernateTemplate;
}
public void setHibernateTemplate(HibernateTemplate hibernateTemplate) {
this.hibernateTemplate = hibernateTemplate;
}
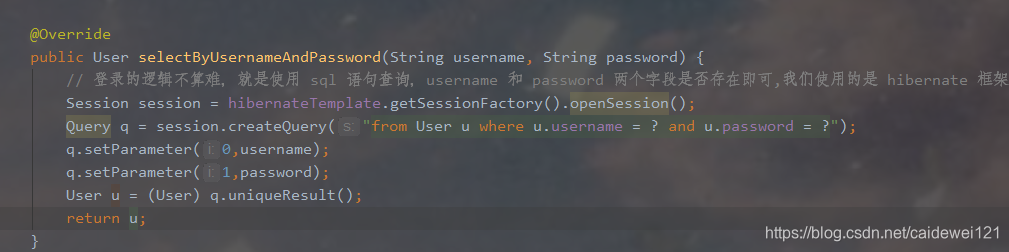
@Override
public User selectByUsernameAndPassword(String username, String password) {
// 登录的逻辑不算难,就是使用 sql 语句查询,username 和 password 两个字段是否存在即可,我们使用的是 hibernate 框架,所以要写 hql 语句
Session session = hibernateTemplate.getSessionFactory().openSession();
Query q = session.createQuery(“from User u where u.username = ? and u.password = ?”);
q.setParameter(0,username);
q.setParameter(1,password);
User u = (User) q.uniqueResult();
return u;
}
}
我们写好了 dao 层,这时候发现出现了爆红的问题,这里我们需要手动添加项目的依赖信息

点击 project structure
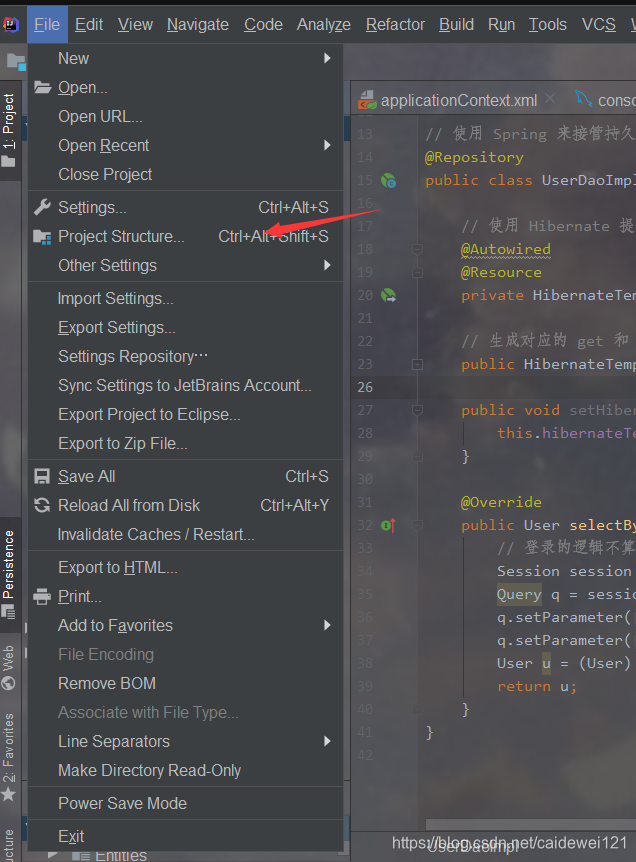
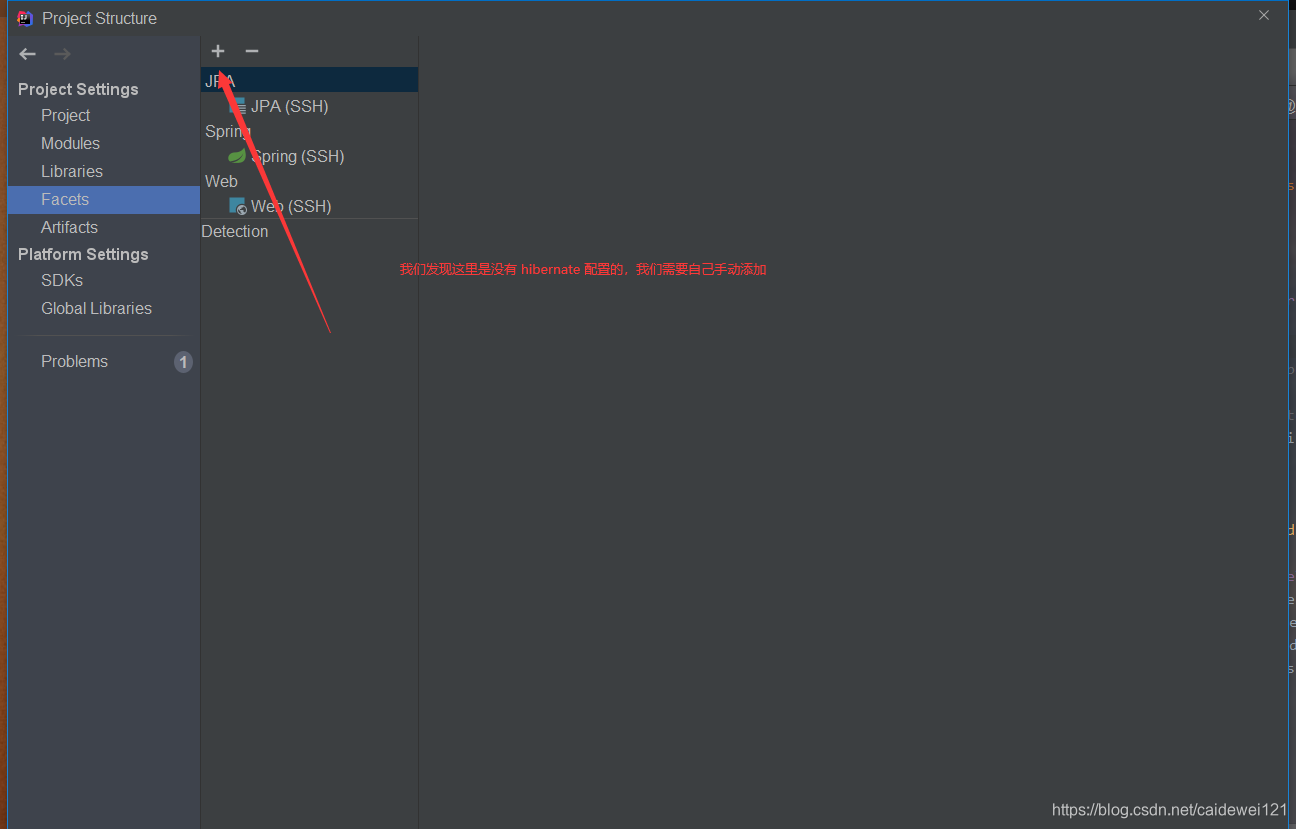
添加这个就可以了,问题就解决了
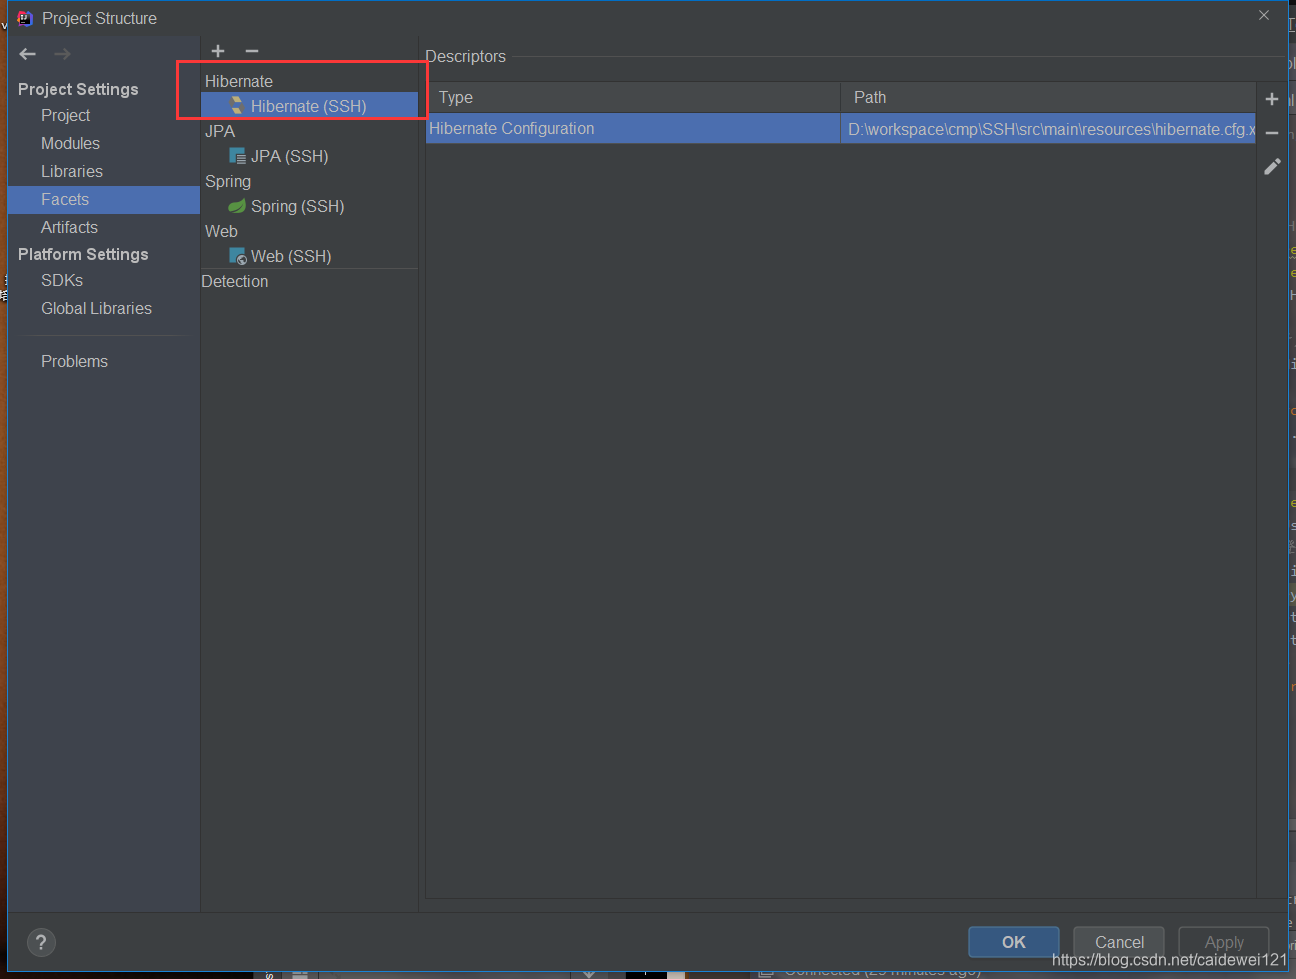
显示正常了
5.2 编写 Service 层
同样,我们创建对应的 UserService 和 对应的 UserServiceImpl 类
有的同学可能会问道,不就是一个简单的登录功能嘛,有必要这么麻烦吗?是的,这么做确实没必要,但是随着项目的越来越大,只有把具体的功能全部分开来做,这样才不至于整个项目太过于乱
编写用户的业务层 接口 UserService
package service;
import entity.User;
public interface UserService {
// 登录验证
User checklogin(String username, String password);
}
编写 业务层对应的实现类 UserServiceImpl
package service.Impl;
import dao.UserDao;
import entity.User;
import org.springframework.beans.factory.annotation.Autowired;
import org.springframework.stereotype.Service;
import service.UserService;
@Service
public class UserServiceImpl implements UserService {
// 这里业务层调用持久层的方法
@Autowired
private UserDao ud;
@Override
public User checklogin(String username, String password) {
return ud.selectByUsernameAndPassword(username,password);
}
}
5.3 编写 Controller 层 (UserAction)
这里的逻辑思路,是 controller 层 调用 service 的方法,service 层调用 dao 层的方法
package action;
import com.opensymphony.xwork2.ActionContext;
import entity.User;
import org.springframework.beans.factory.annotation.Autowired;
import org.springframework.stereotype.Controller;
import service.UserService;
import java.util.Map;
// 使用 Controller 表示这是控制层,使用 ua 表示这个类被 Spring 所管理
@Controller(“ua”)
public class UserAction {
// 编写两个属性,使用 struts2 的 ognl 表达式可以直接接收到前端穿过来的数据,不再需要 request.getParameter(“xxxx”) 接收数据了
private String username;
private String password;
// 调用业务层的方法
@Autowired
private UserService us;
// get 方法可以不要, set 方法必须有,不然前端的数据就无法注入进来
public String getUsername() {
return username;
}
public void setUsername(String username) {
this.username = username;
}
public String getPassword() {
return password;
}
public void setPassword(String password) {
this.password = password;
}
// 编写登录逇控制层方法
public String login() {
System.out.println(username + " " + password); // 打印穿过来的数据
ActionContext ac = ActionContext.getContext();
// 得到 servlet 中的三大域的 session 域,在这里我们要将数据保存至 session,并在前端展示
Map<String,Object> session = ac.getSession(); // 我们可以看到 session 的实质就是一个 map
User user = us.checklogin(username,password); // 登录验证
if ( user!=null ) {
session.put(“user”,username);
return “success”;
} else {
return “error”;
}
}
}
5.4 编写 struts 路由映射
记得在 Project Structure 添加如下配置
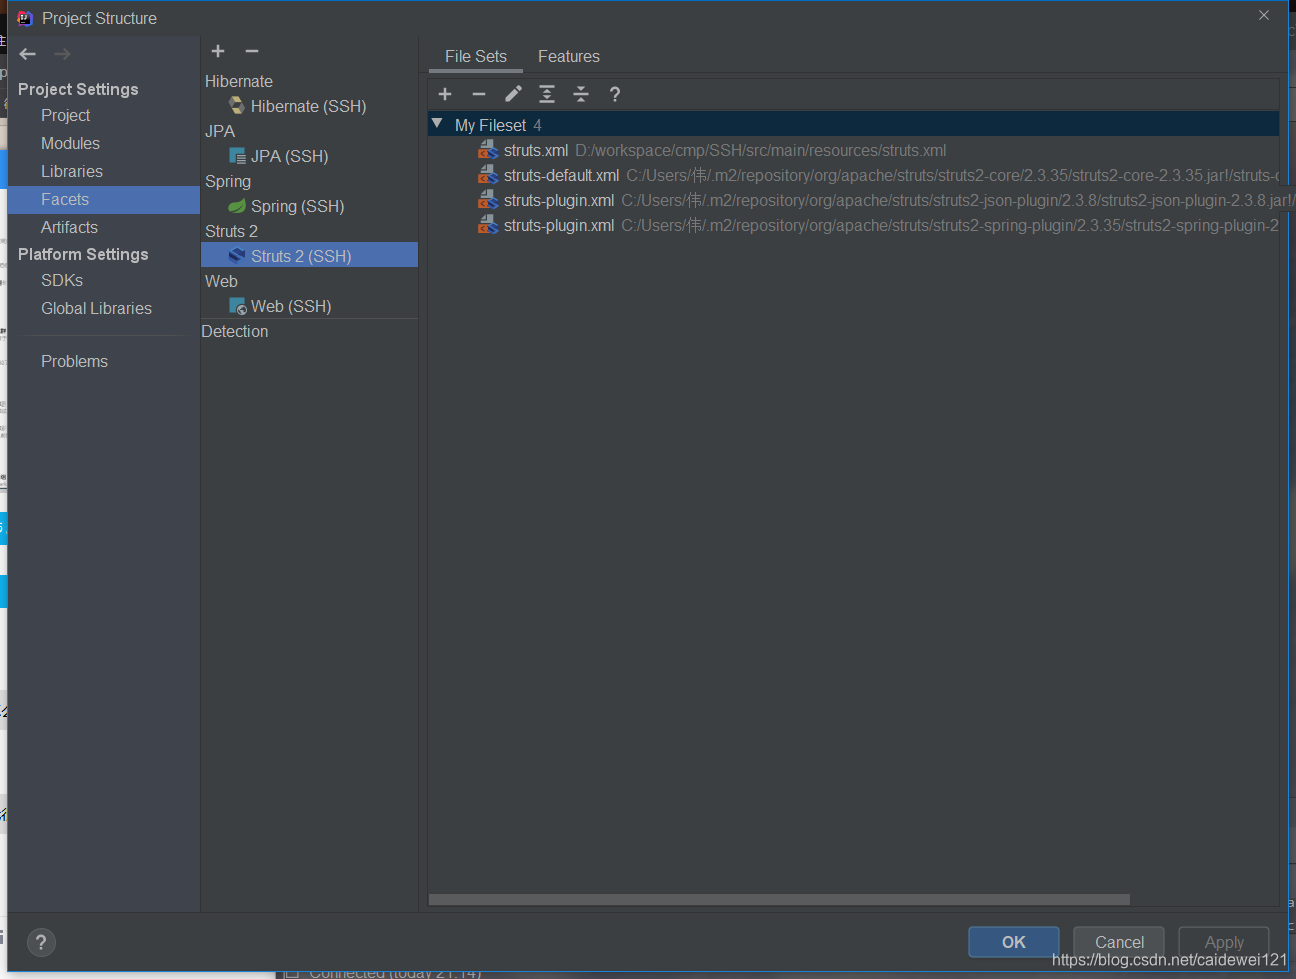
stucts action 配置
<?xml version="1.0" encoding="UTF-8"?>最后
面试前一定少不了刷题,为了方便大家复习,我分享一波个人整理的面试大全宝典
- Java核心知识整理

Java核心知识
- Spring全家桶(实战系列)

- 其他电子书资料

Step3:刷题
既然是要面试,那么就少不了刷题,实际上春节回家后,哪儿也去不了,我自己是刷了不少面试题的,所以在面试过程中才能够做到心中有数,基本上会清楚面试过程中会问到哪些知识点,高频题又有哪些,所以刷题是面试前期准备过程中非常重要的一点。
以下是我私藏的面试题库:

《一线大厂Java面试题解析+核心总结学习笔记+最新讲解视频+实战项目源码》,点击传送门,即可获取!
stucts action 配置
<?xml version="1.0" encoding="UTF-8"?>最后
面试前一定少不了刷题,为了方便大家复习,我分享一波个人整理的面试大全宝典
- Java核心知识整理
[外链图片转存中…(img-WtLRPCz3-1714644800933)]
Java核心知识
- Spring全家桶(实战系列)
[外链图片转存中…(img-arqbjDlW-1714644800934)]
- 其他电子书资料
[外链图片转存中…(img-2JyHEpGl-1714644800934)]
Step3:刷题
既然是要面试,那么就少不了刷题,实际上春节回家后,哪儿也去不了,我自己是刷了不少面试题的,所以在面试过程中才能够做到心中有数,基本上会清楚面试过程中会问到哪些知识点,高频题又有哪些,所以刷题是面试前期准备过程中非常重要的一点。
以下是我私藏的面试题库:
[外链图片转存中…(img-8SOEiQup-1714644800934)]
《一线大厂Java面试题解析+核心总结学习笔记+最新讲解视频+实战项目源码》,点击传送门,即可获取!


 281
281


 被折叠的 条评论
为什么被折叠?
被折叠的 条评论
为什么被折叠?
 到【灌水乐园】发言


