


import {
AppRegistry,
Navigator
} from ‘react-native’
class ReactNativeMobX extends Component {
renderScene (route, navigator) {
return <route.component {…route.passProps} navigator={navigator} />
}
configureScene (route, routeStack) {
if (route.type === ‘Modal’) {
return Navigator.SceneConfigs.FloatFromBottom
}
return Navigator.SceneConfigs.PushFromRight
}
render () {
return (
<Navigator
configureScene={this.configureScene.bind(this)}
renderScene={this.renderScene.bind(this)}
initialRoute={{
component: App,
passProps: {
store: ListStore
}
}} />
)
}
}
AppRegistry.registerComponent(‘ReactNativeMobX’, () => ReactNativeMobX)
在入口文件中我们创建了一个基本的导航状态,并导入了新创建的数组存储器。在 initialRoute 中我们传入数据存储作为属性。我们还把已经创建的组件 App 作为初始路由。App 将会访问属性中的数据存储。
在 configureScene 中,我们检查类型(type)是否是 ‘Modal’,是则返回 floatFromBottom 这个场景配置项,可以把下一个场景也设置为模态的。
现在,我们来创建应用组件。这确是一个大型的组件,还有很多需要完善的地方,但我们创建了一个允许增加和删除列表条目的基本用户界面。调用数据存储的方法来和我们的应用状态交互。app/App.js 的内容:
import React, { Component } from ‘react’
import { View, Text, TextInput, TouchableHighlight, StyleSheet } from ‘react-native’
import {observer} from ‘mobx-react/native’
import NewItem from ‘./NewItem’
@observer
class TodoList extends Component {
constructor () {
super()
this.state = {
text: ‘’,
showInput: false
}
}
toggleInput () {
this.setState({ showInput: !this.state.showInput })
}
addListItem () {
this.props.store.addListItem(this.state.text)
this.setState({
text: ‘’,
showInput: !this.state.showInput
})
}
removeListItem (item) {
this.props.store.removeListItem(item)
}
updateText (text) {
this.setState({text})
}
addItemToList (item) {
this.props.navigator.push({
component: NewItem,
type: ‘Modal’,
passProps: {
item,
store: this.props.store
}
})
}
render() {
const { showInput } = this.state
const { list } = this.props.store
return (
{!list.length ? : null}
{list.map((l, i) => {
return
<Text
style={styles.item}
onPress={this.addItemToList.bind(this, l)}>{l.name.toUpperCase()}
<Text
style={styles.deleteItem}
onPress={this.removeListItem.bind(this, l)}>Remove
})}
<TouchableHighlight
underlayColor=‘transparent’
onPress={
-
this.state.text === ‘’ ? this.toggleInput.bind(this)
- this.addListItem.bind(this, this.state.text)
}
style={styles.button}>
{this.state.text === ‘’ && ‘+ New List’}
{this.state.text !== ‘’ && ‘+ Add New List Item’}
{showInput && <TextInput
style={styles.input}
onChangeText={(text) => this.updateText(text)} />}
);
}
}
const NoList = () => (
)
const styles = StyleSheet.create({
itemContainer: {
borderBottomWidth: 1,
borderBottomColor: ‘#ededed’,
flexDirection: ‘row’
},
item: {
color: ‘#156e9a’,
fontSize: 18,
flex: 3,
padding: 20
},
deleteItem: {
flex: 1,
padding: 20,
color: ‘#a3a3a3’,
fontWeight: ‘bold’,
marginTop: 3
},
button: {
height: 70,
justifyContent: ‘center’,
alignItems: ‘center’,
borderTopWidth: 1,
borderTopColor: ‘#156e9a’
},
buttonText: {
color: ‘#156e9a’,
fontWeight: ‘bold’
},
heading: {
height: 80,
justifyContent: ‘center’,
alignItems: ‘center’,
borderBottomWidth: 1,
borderBottomColor: ‘#156e9a’
},
headingText: {
color: ‘#156e9a’,
fontWeight: ‘bold’
},
input: {
height: 70,
backgroundColor: ‘#f2f2f2’,
padding: 20,
color: ‘#156e9a’
},
noList: {
flex: 1,
justifyContent: ‘center’,
alignItems: ‘center’
},
noListText: {
fontSize: 22,
color: ‘#156e9a’
},
})
export default TodoList
我来解释此文件中可能不明确的地方。如果你有什么还不明白的,请留言,我会更新和回复。
-
从 mobx-react/native 导入 observer;
-
使用 @observer 装饰器描述类,确保相关数组变化后组件独立地重渲染;
-
导入已经创建好的组件 NewItem。这是我们要增加新条目时转向的组件;
-
在 addListItem中,把 this.state.text 传入 this.props.store.addListItem。在与输入框绑定的 updateText 中会更新 this.state.text;
-
在 removeListItem 中调用 this.props.store.removeListItem 并传入条目;
-
在 addItemToList 中调用 this.props.navigator.push,传入条目和数组存储两个参数;
const { list } = this.props.store
- 在 render 方法中,也创建了界面,并绑定了类的方法
最后,创建 NewItem 组件:
import React, { Component } from ‘react’
import { View, Text, StyleSheet, TextInput, TouchableHighlight } from ‘react-native’
class NewItem extends Component {
constructor (props) {
super(props)
this.state = {
newItem: ‘’
}
}
addItem () {
if (this.state.newItem === ‘’) return
this.props.store.addItem(this.props.item, this.state.newItem)
this.setState({
newItem: ‘’
})
}
updateNewItem (text) {
this.setState({
newItem: text
})
}
render () {
const { item } = this.props
return (
<View style={{flex: 1}}>
<Text
onPress={this.props.navigator.pop}
style={styles.closeButton}>×
{!item.items.length && }
{item.items.length ? : }
<View style={{flexDirection: ‘row’}}>
<TextInput
value={this.state.newItem}
onChangeText={(text) => this.updateNewItem(text)}
style={styles.input} />
<TouchableHighlight
onPress={this.addItem.bind(this)}
style={styles.button}>
)
}
}
const NoItems = () => (
)
const Items = ({items}) => (
<View style={{flex: 1, paddingTop: 10}}>
{items.map((item, i) => {
return
})
}
)
const styles = StyleSheet.create({
heading: {
height: 80,
justifyContent: ‘center’,
alignItems: ‘center’,
borderBottomWidth: 1,
borderBottomColor: ‘#156e9a’
},
headingText: {
color: ‘#156e9a’,
fontWeight: ‘bold’
},
input: {
height: 70,
backgroundColor: ‘#ededed’,
padding: 20,
flex: 1
},
button: {
width: 70,
height: 70,
自我介绍一下,小编13年上海交大毕业,曾经在小公司待过,也去过华为、OPPO等大厂,18年进入阿里一直到现在。
深知大多数初中级Android工程师,想要提升技能,往往是自己摸索成长或者是报班学习,但对于培训机构动则近万的学费,着实压力不小。自己不成体系的自学效果低效又漫长,而且极易碰到天花板技术停滞不前!
因此收集整理了一份《2024年Android移动开发全套学习资料》,初衷也很简单,就是希望能够帮助到想自学提升又不知道该从何学起的朋友,同时减轻大家的负担。
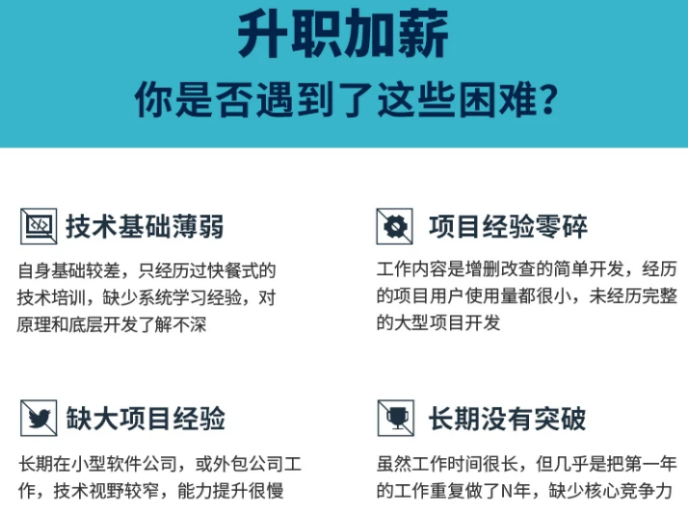


既有适合小白学习的零基础资料,也有适合3年以上经验的小伙伴深入学习提升的进阶课程,基本涵盖了95%以上Android开发知识点,真正体系化!
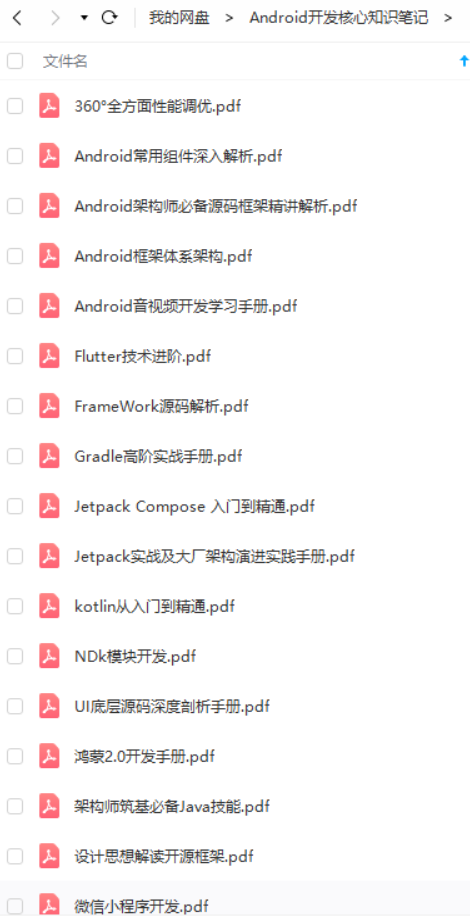
由于文件比较大,这里只是将部分目录截图出来,每个节点里面都包含大厂面经、学习笔记、源码讲义、实战项目、讲解视频,并且会持续更新!
如果你觉得这些内容对你有帮助,可以扫码获取!!(备注:Android)

最后说一下我的学习路线
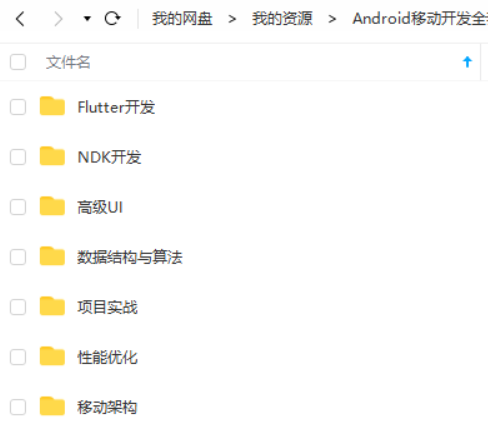
其实很简单就下面这张图,含概了Android所有需要学的知识点,一共8大板块:
- 架构师筑基必备技能
- Android框架体系架构(高级UI+FrameWork源码)
- 360°Androidapp全方位性能调优
- 设计思想解读开源框架
- NDK模块开发
- 移动架构师专题项目实战环节
- 移动架构师不可不学习微信小程序
- 混合开发的flutter

Android学习的资料
我呢,把上面八大板块的分支都系统的做了一份学习系统的资料和视频,大概就下面这些,我就不全部写出来了,不然太长了影响大家的阅读。
330页PDF Android学习核心笔记(内含上面8大板块)

Android学习的系统对应视频
总结
我希望通过我自己的学习方法来帮助大家去提升技术:
-
1、多看书、看源码和做项目,平时多种总结
-
2、不能停留在一些基本api的使用上,应该往更深层次的方向去研究,比如activity、view的内部运行机制,比如Android内存优化,比如aidl,比如JNI等,并不仅仅停留在会用,而要通过阅读源码,理解其实现原理
-
3、同时对架构是有一定要求的,架构是抽象的,但是设计模式是具体的,所以一定要加强下设计模式的学习
-
4、android的方向也很多,高级UI,移动架构师,数据结构与算法和音视频FFMpeg解码,如果你对其中一项比较感兴趣,就大胆的进阶吧!
希望大家多多点赞,转发,评论加关注,你们的支持就是我继续下去的动力!加油!
《互联网大厂面试真题解析、进阶开发核心学习笔记、全套讲解视频、实战项目源码讲义》点击传送门即可获取!
d学习的资料**
我呢,把上面八大板块的分支都系统的做了一份学习系统的资料和视频,大概就下面这些,我就不全部写出来了,不然太长了影响大家的阅读。
330页PDF Android学习核心笔记(内含上面8大板块)
[外链图片转存中…(img-hoRHNWVy-1713512484955)]
Android学习的系统对应视频
总结
我希望通过我自己的学习方法来帮助大家去提升技术:
-
1、多看书、看源码和做项目,平时多种总结
-
2、不能停留在一些基本api的使用上,应该往更深层次的方向去研究,比如activity、view的内部运行机制,比如Android内存优化,比如aidl,比如JNI等,并不仅仅停留在会用,而要通过阅读源码,理解其实现原理
-
3、同时对架构是有一定要求的,架构是抽象的,但是设计模式是具体的,所以一定要加强下设计模式的学习
-
4、android的方向也很多,高级UI,移动架构师,数据结构与算法和音视频FFMpeg解码,如果你对其中一项比较感兴趣,就大胆的进阶吧!
希望大家多多点赞,转发,评论加关注,你们的支持就是我继续下去的动力!加油!
《互联网大厂面试真题解析、进阶开发核心学习笔记、全套讲解视频、实战项目源码讲义》点击传送门即可获取!


 1850
1850


 被折叠的 条评论
为什么被折叠?
被折叠的 条评论
为什么被折叠?
 到【灌水乐园】发言


