


<declare-styleablename=“名称”>
<attrname="focusable"format=“boolean”/>
(2)属性使用:
复制代码代码如下:
<Button
android:layout_width=“42dip”
android:layout_height=“42dip”
android:focusable=“true”
/>
4.dimension:尺寸值。
(1)属性定义:
复制代码代码如下:
<declare-styleablename=“名称”>
<attrname="layout_width"format=“dimension”/>
(2)属性使用:
复制代码代码如下:
<Button
android:layout_width=“42dip”
android:layout_height=“42dip”
/>
5.float:浮点值。
(1)属性定义:
复制代码代码如下:
<declare-styleablename=“AlphaAnimation”>
<attrname="fromAlpha"format=“float”/>
<attrname="toAlpha"format=“float”/>
(2)属性使用:
复制代码代码如下:
<alpha
android:fromAlpha=“1.0”
android:toAlpha=“0.7”
/>
6.integer:整型值。
(1)属性定义:
复制代码代码如下:
<declare-styleablename=“AnimatedRotateDrawable”>
<attrname=“visible”/>
<attrname="frameDuration"format=“integer”/>
<attrname="framesCount"format=“integer”/>
<attrname=“pivotX”/>
<attrname=“pivotY”/>
<attrname=“drawable”/>
(2)属性使用:
复制代码代码如下:
<animated-rotate
xmlns:android=“http://schemas.android.com/apk/res/android”
android:drawable=“@drawable/图片ID”
android:pivotX=“50%”
android:pivotY=“50%”
android:framesCount=“12”
android:frameDuration=“100”
/>
7.string:字符串。
(1)属性定义:
复制代码代码如下:
<declare-styleablename=“MapView”>
<attrname="apiKey"format=“string”/>
(2)属性使用:
复制代码代码如下:
<com.google.android.maps.MapView
android:layout_width=“fill_parent”
android:layout_height=“fill_parent”
android:apiKey=“0jOkQ80oD1JL9C6HAja99uGXCRiS2CGjKO_bc_g”
/>
8.fraction:百分数。
(1)属性定义:
复制代码代码如下:
<declare-styleablename=“RotateDrawable”>
<attrname=“visible”/>
<attrname="fromDegrees"format=“float”/>
<attrname="toDegrees"format=“float”/>
<attrname="pivotX"format=“fraction”/>
<attrname="pivotY"format=“fraction”/>
<attrname=“drawable”/>
(2)属性使用:
复制代码代码如下:
<rotate
xmlns:android=“http://schemas.android.com/apk/res/android”
android:interpolator=“@anim/动画ID”
android:fromDegrees=“0”
android:toDegrees=“360”
android:pivotX=“200%”
android:pivotY=“300%”
android:duration=“5000”
android:repeatMode=“restart”
android:repeatCount=“infinite”
/>
9.enum:枚举值。
(1)属性定义:
复制代码代码如下:
<declare-styleablename=“名称”>
<attrname=“orientation”>
<enumname="horizontal"value=“0”/>
<enumname="vertical"value=“1”/>
(2)属性使用:
复制代码代码如下:
<LinearLayout
xmlns:android=“http://schemas.android.com/apk/res/android”
android:orientation=“vertical”
android:layout_width=“fill_parent”
android:layout_height=“fill_parent”>
10.flag:位或运算。
(1)属性定义:
复制代码代码如下:
<declare-styleablename=“名称”>
<attrname=“windowSoftInputMode”>
<flagname="stateUnspecified"value=“0”/>
<flagname="stateUnchanged"value=“1”/>
<flagname="stateHidden"value=“2”/>
<flagname="stateAlwaysHidden"value=“3”/>
<flagname="stateVisible"value=“4”/>
<flagname="stateAlwaysVisible"value=“5”/>
<flagname="adjustUnspecified"value=“0x00”/>
<flagname="adjustResize"value=“0x10”/>
<flagname="adjustPan"value=“0x20”/>
<flagname="adjustNothing"value=“0x30”/>
(2)属性使用:
复制代码代码如下:
<activity
android:name=“.StyleAndThemeActivity”
android:label=“@string/app_name”
android:windowSoftInputMode=“stateUnspecified|stateUnchanged | stateHidden”>
actionandroid:name=“android.intent.action.MAIN”/
categoryandroid:name=“android.intent.category.LAUNCHER”/
特别要注意:
属性定义时可以指定多种类型值。
(1)属性定义:
复制代码代码如下:
<declare-styleablename=“名称”>
<attrname="background"format=“reference|color”/>
(2)属性使用:
复制代码代码如下:
<ImageView
android:layout_width=“42dip”
android:layout_height=“42dip”
android:background=“@drawable/图片ID|#00FF00”
/>
下面说说AttributeSet与TypedArray在自定义控件中的作用:
AttributeSet的作用就是在控件进行初始化的时候,解析布局文件中该控件的属性(keyeg:background)与该值(valueeg:@drawable/icon)的信息封装在AttributeSet中,传递给该控件(View)的构造函数。对于非Android自带的属性,在View类中处理时是无法识别的,因此需要我们自己解析。所以这就要用到另外一个类TypedArray。在AttributeSet中我们有属性名称,有属性值,但是控件如何知道哪个属性代表什么意思呢?这个工作就由TypedArray来做了。TypedArray对象封装了/values/attrs.xml中的styleable里定义的每个属性的类型信息,通过TypedArray我们就可以知道AttributeSet中封装的值到底是干什么的了,从而可以对这些数据进行应用。
AttributeSet就相当于一盒糖,TypedArray就相当于这盒糖上的标签说明,告诉用户每个糖的口味等。这盒糖有什么口味是由用户自己的styleable文件里面的内容来决定的。
来源: <http://www.jb51.net/article/48962.htm>
二、自定义属性的应用
让我们再来看看布局xml中需要注意的事项。
**首先得声明一下:xmlns:mytool(名字可以任意)=http://schemas.android.com/apk/res/cn.zzm.toolbar (自定义包名)
注意,“mytool”可以换成其他的任何名字,后面的url地址必须最后一部分必须用上自定义组件的包名。自定义属性了,在属性名前加上“mytool”即可。**
**<LinearLayout xmlns:android=“http://schemas.android.com/apk/res/android”
xmlns:CommonText=“http://schemas.android.com/apk/res-auto” //对与自定义属性的引用可以直接使用这个
android:layout_width=“match_parent”
android:layout_height=“match_parent”
android:background=“@drawable/bg”
android:orientation=“vertical” >**
使用自定义的时候,有两种方式 AttributeSet 来获取属性或者 TypedArray
private static final String ATTRS = “http://schemas.android.com/apk/res-auto”;
private TextView tv_setting_update;
public SetItemView(Context context) {
super(context);
}
public SetItemView(Context context, AttributeSet attrs) {
super(context, attrs);
init();
//设置图标
int set_icon = attrs.getAttributeResourceValue(ATTRS, “set_icon”, 0);
//设置内容
String set_content = attrs.getAttributeValue(ATTRS, “set_content”);
//设置更新内容
String set_update = attrs.getAttributeValue(ATTRS, “set_update”);
//设置箭头
int arrow = attrs.getAttributeResourceValue(ATTRS, “set_arrow”, 0);
if (set_icon != 0) {
setIv_icon(set_icon);
}
if (arrow != 0) {
setIv_arrow(arrow);
}
if (!TextUtils.isEmpty(set_update)) {
tv_setting_update.setVisibility(View.VISIBLE);
setTv_setting_update(set_update,false);
}
if (!TextUtils.isEmpty(set_content)) {
setTv_content(set_content);
}
}
public void setIv_icon(int iv_icon) {
this.iv_setting_icon.setBackgroundResource(iv_icon);
}
public void setTv_content(String tv_content) {
this.tv_setting_content.setText(tv_content);
}
…
使用:
<FrameLayout xmlns:android=“http://schemas.android.com/apk/res/android”
xmlns:itemView=“http://schemas.android.com/apk/res-auto”
android:layout_width=“match_parent”
android:layout_height=“match_parent”
android:background=“@drawable/bg_setting”
android:orientation=“vertical”>
<com.xxx.widget.SetItemView
android:id=“@+id/setItem_mapManger”
android:layout_width=“fill_parent”
android:layout_height=“wrap_content”
itemView:set_arrow=“@drawable/img_arrow”
itemView:set_content=“商城地图管理”
itemView:set_icon=“@drawable/icon_setting_0” />
另一种通过TypedArray来实现的
/**
-
属性 参数的配置 自己 到attrs 文件去配置
-
如果 不需要 就不要 get set 自己选择性的 重写
*/
public class MyTextView extends LinearLayout{
private String mTextInfo;
private int mTextColor;
private float mTextSize;
private TextView tv_info;
private TextView tv_num;
private String mTextNum;
public MyTextView(Context context) {
super(context);
自我介绍一下,小编13年上海交大毕业,曾经在小公司待过,也去过华为、OPPO等大厂,18年进入阿里一直到现在。
深知大多数初中级Android工程师,想要提升技能,往往是自己摸索成长或者是报班学习,但对于培训机构动则近万的学费,着实压力不小。自己不成体系的自学效果低效又漫长,而且极易碰到天花板技术停滞不前!
因此收集整理了一份《2024年Android移动开发全套学习资料》,初衷也很简单,就是希望能够帮助到想自学提升又不知道该从何学起的朋友,同时减轻大家的负担。
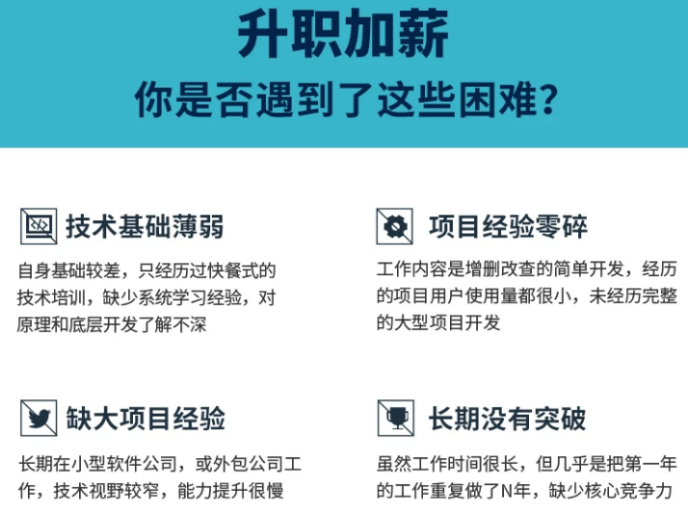
既有适合小白学习的零基础资料,也有适合3年以上经验的小伙伴深入学习提升的进阶课程,基本涵盖了95%以上Android开发知识点,真正体系化!
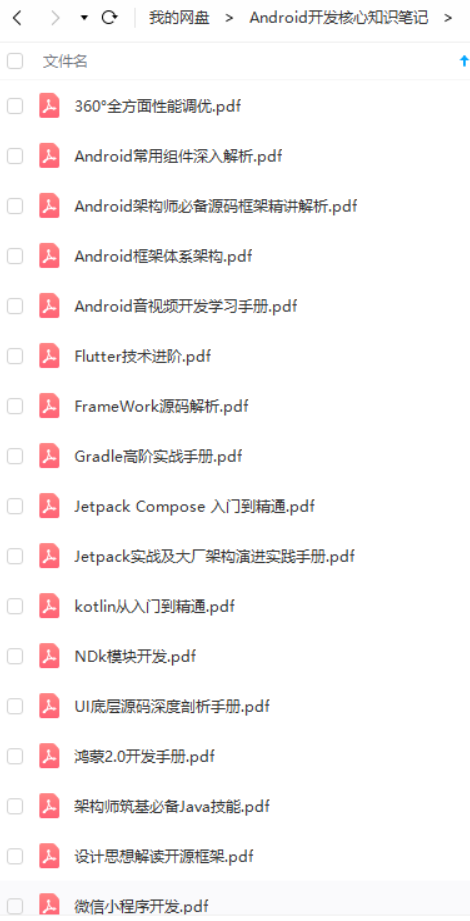
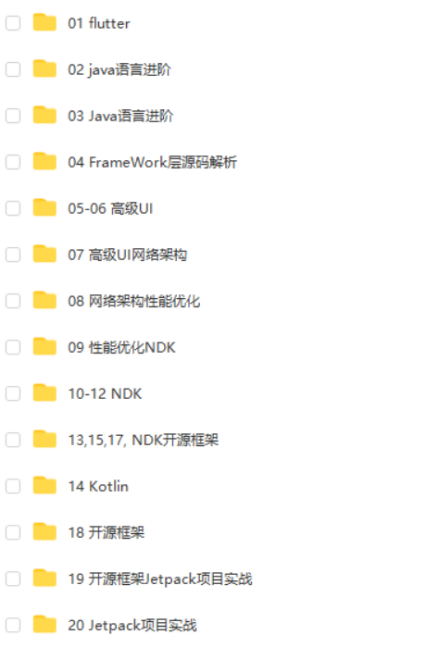
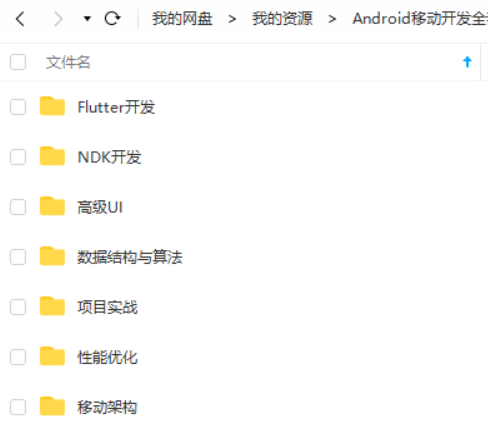
由于文件比较大,这里只是将部分目录截图出来,每个节点里面都包含大厂面经、学习笔记、源码讲义、实战项目、讲解视频,并且会持续更新!
如果你觉得这些内容对你有帮助,可以扫码获取!!(备注:Android)

学习福利
【Android 详细知识点思维脑图(技能树)】

其实Android开发的知识点就那么多,面试问来问去还是那么点东西。所以面试没有其他的诀窍,只看你对这些知识点准备的充分程度。so,出去面试时先看看自己复习到了哪个阶段就好。
虽然 Android 没有前几年火热了,已经过去了会四大组件就能找到高薪职位的时代了。这只能说明 Android 中级以下的岗位饱和了,现在高级工程师还是比较缺少的,很多高级职位给的薪资真的特别高(钱多也不一定能找到合适的),所以努力让自己成为高级工程师才是最重要的。
这里附上上述的面试题相关的几十套字节跳动,京东,小米,腾讯、头条、阿里、美团等公司19年的面试题。把技术点整理成了视频和PDF(实际上比预期多花了不少精力),包含知识脉络 + 诸多细节。
由于篇幅有限,这里以图片的形式给大家展示一小部分。

网上学习 Android的资料一大堆,但如果学到的知识不成体系,遇到问题时只是浅尝辄止,不再深入研究,那么很难做到真正的技术提升。希望这份系统化的技术体系对大家有一个方向参考。
《互联网大厂面试真题解析、进阶开发核心学习笔记、全套讲解视频、实战项目源码讲义》点击传送门即可获取!
…(img-Bc35rr9q-1713768211917)]
学习福利
【Android 详细知识点思维脑图(技能树)】
[外链图片转存中…(img-1u3zyUBP-1713768211918)]
其实Android开发的知识点就那么多,面试问来问去还是那么点东西。所以面试没有其他的诀窍,只看你对这些知识点准备的充分程度。so,出去面试时先看看自己复习到了哪个阶段就好。
虽然 Android 没有前几年火热了,已经过去了会四大组件就能找到高薪职位的时代了。这只能说明 Android 中级以下的岗位饱和了,现在高级工程师还是比较缺少的,很多高级职位给的薪资真的特别高(钱多也不一定能找到合适的),所以努力让自己成为高级工程师才是最重要的。
这里附上上述的面试题相关的几十套字节跳动,京东,小米,腾讯、头条、阿里、美团等公司19年的面试题。把技术点整理成了视频和PDF(实际上比预期多花了不少精力),包含知识脉络 + 诸多细节。
由于篇幅有限,这里以图片的形式给大家展示一小部分。
[外链图片转存中…(img-6kudFuTr-1713768211919)]
网上学习 Android的资料一大堆,但如果学到的知识不成体系,遇到问题时只是浅尝辄止,不再深入研究,那么很难做到真正的技术提升。希望这份系统化的技术体系对大家有一个方向参考。
《互联网大厂面试真题解析、进阶开发核心学习笔记、全套讲解视频、实战项目源码讲义》点击传送门即可获取!


 48
48


 被折叠的 条评论
为什么被折叠?
被折叠的 条评论
为什么被折叠?
 到【灌水乐园】发言


