


} finally {
try {
exceptionStream.reset();
} catch (IOException e) {
if (Log.isLoggable(TAG, Log.WARN)) {
Log.w(TAG, “Cannot reset the input stream”, e);
}
}
}
options.inTempStorage = bytesForOptions;
final int[] inDimens = getDimensions(invalidatingStream, bufferedStream, options);
final int inWidth = inDimens[0];
final int inHeight = inDimens[1];
final int degreesToRotate = TransformationUtils.getExifOrientationDegrees(orientation);
final int sampleSize = getRoundedSampleSize(degreesToRotate, inWidth, inHeight, outWidth, outHeight);
final Bitmap downsampled = downsampleWithSize(invalidatingStream, bufferedStream, options,
pool, inWidth, inHeight, sampleSize, decodeFormat);
// BitmapFactory swallows exceptions during decodes and in some cases when inBitmap is non null, may catch
// and log a stack trace but still return a non null bitmap. To avoid displaying partially decoded bitmaps,
// we catch exceptions reading from the stream in our ExceptionCatchingInputStream and throw them here.
final Exception streamException = exceptionStream.getException();
if (streamException != null) {
throw new RuntimeException(streamException);
}
Bitmap rotated = null;
if (downsampled != null) {
rotated = TransformationUtils.rotateImageExif(downsampled, pool, orientation);
if (!downsampled.equals(rotated) && !pool.put(downsampled)) {
downsampled.recycle();
}
}
return rotated;
} finally {
byteArrayPool.releaseBytes(bytesForOptions);
byteArrayPool.releaseBytes(bytesForStream);
exceptionStream.release();
releaseOptions(options);
}
}
这个函数还蛮长的, 一个片段一个片段看
对象池狂魔
ByteArrayPool典型的对象池的实现, bytesForOptions 赋值给了options.inTempStorage, inTempStorage官方给的解释是解码的时候会用到的缓存, 这里用对象池管理回收,防止内存抖动, 看到此处回收的代码了吗byteArrayPool.releaseBytes(bytesForOptions);- 同理 bytesForStream 也被安排了, RecyclableBufferedInputStream 看名称就很容易能猜到了, 我们知道在解析流的时候, 如果要求这个流可以回溯读取(读过的内容再读取一遍), 一般需要一个Buffer来缓存从流中读出的数据, 而这里就把这个 Buffer 抽象出来交给
ByteArrayPool管理了 - 再来看
ExceptionCatchingInputStream exceptionStream = ExceptionCatchingInputStream.obtain(bufferedStream);这行代码, 是不是联想到 Message.obtain(), 没错这里也是个典型的对象池的概念,exceptionStream.release();在此处回收进入对象池, 这里就不详述了,感兴趣可以自行跟进 ExceptionCatchingInputStream 看看 - 最后, 再来看
final BitmapFactory.Options options = getDefaultOptions();和releaseOptions(options);这一组, 也是一个对象池实现 - 还没有结束
downsampleWithSize(invalidatingStream, bufferedStream, options, pool, inWidth, inHeight, sampleSize, decodeFormat);这行里面的 pool , 就是一个 BitmapPool , 是 Bitmap 的对象池
Android 3.0 之后可以将流中的图像数据解码在一个不用的已创建的 Bitmap 实例里面, 具体参见 Android Bitmap(一), 资源重用
读取图片配置
// DownSampler.decode
RecyclableBufferedInputStream bufferedStream = new RecyclableBufferedInputStream(is, bytesForStream);
ExceptionCatchingInputStream exceptionStream = ExceptionCatchingInputStream.obtain(bufferedStream);
MarkEnforcingInputStream invalidatingStream = new MarkEnforcingInputStream(exceptionStream);
先来三层 InputStream 包装 (设计模式: 装饰者模式),
- 第一层 RecyclableBufferedInputStream 实现流的回溯功能(mark/reset), 暴露 Buffer 方便接入外面的对象池管理;
- 第二层 ExceptionCatchingInputStream 担任异常处理功能;
- 第三层 MarkEnforcingInputStream 这一层是为了防止读取图片头部属性等数据的时候读超了 mark 标记的位数, 之后就无法 reset 了
InputStream mark / reset 方法的解释
mark(int limit) 的作用是标记一段长度为limit的流, 使它可以被重新读取, 而 reset() 就是将当前的读取位置指向之前 mark() 的位置, 但当超限( 例如: readPos_2位置 )时就无法 reset() 了
- 在读取位置是 readPos_0 时 , mark(int limit) 标记当前读取流的位置
- 在读取位置是 readPos_1 时 , 调用 reset 回溯有效( readPos_1 <= limitPos ), 没有超出 limit 的限制, 会回到 markPos 再读一遍流
- 在读取位置是 readPos_2 时, 调用 reset 无效 (readPos_1 > limitPos ), 超出 limit 限制
关于 RecyclableBufferedInputStream 如何实现 mark 和 reset 方法的, 参考Android Glide 3.7.0 源码解析(八) , RecyclableBufferedInputStream 的 mark/reset 实现
// DownSampler.decode
try {
exceptionStream.mark(MARK_POSITION);
int orientation = 0;
try {
orientation = new ImageHeaderParser(exceptionStream).getOrientation();
} catch (IOException e) {
if (Log.isLoggable(TAG, Log.WARN)) {
Log.w(TAG, “Cannot determine the image orientation from header”, e);
}
} finally {
try {
exceptionStream.reset();
} catch (IOException e) {
if (Log.isLoggable(TAG, Log.WARN)) {
Log.w(TAG, “Cannot reset the input stream”, e);
}
}
}
…
}
紧接着就用到了 mark / reset 功能 , 读取头部信息里面存储的方向信息
关于 orientation 值代表的详细含义参考这篇文章: EXIF 方向参数 Orientation
// DownSampler.decode
final int[] inDimens = getDimensions(invalidatingStream, bufferedStream, options);
final int inWidth = inDimens[0];
final int inHeight = inDimens[1];
public int[] getDimensions(MarkEnforcingInputStream is, RecyclableBufferedInputStream bufferedStream,
BitmapFactory.Options options) {
options.inJustDecodeBounds = true;
decodeStream(is, bufferedStream, options);
options.inJustDecodeBounds = false;
return new int[] { options.outWidth, options.outHeight };
}
这里获取了待解析图片的宽高
计算缩放比例
// DownSampler.decode
// 计算图片被旋转的角度
final int degreesToRotate = TransformationUtils.getExifOrientationDegrees(orientation);
final int sampleSize = getRoundedSampleSize(degreesToRotate, inWidth, inHeight, outWidth, outHeight);
private int getRoundedSampleSize(int degreesToRotate, int inWidth, int inHeight, int outWidth, int outHeight) {
int targetHeight = outHeight == Target.SIZE_ORIGINAL ? inHeight : outHeight;
int targetWidth = outWidth == Target.SIZE_ORIGINAL ? inWidth : outWidth;
final int exactSampleSize;
if (degreesToRotate == 90 || degreesToRotate == 270) {
// 90 和 270 度 需要把长宽对调来计算缩放比例
exactSampleSize = getSampleSize(inHeight, inWidth, targetWidth, targetHeight);
} else {
exactSampleSize = getSampleSize(inWidth, inHeight, targetWidth, targetHeight);
}
// 去一个最大的 且 <= exactSampleSize 且 是2的次方
final int powerOfTwoSampleSize = exactSampleSize == 0 ? 0 :
Integer.highestOneBit(exactSampleSize);
// powerOfTwoSampleSize == 0 代表不缩放,也就是返回 1 倍
return Math.max(1, powerOfTwoSampleSize);
}
public static final Downsampler AT_LEAST = new Downsampler() {
@Override
protected int getSampleSize(int inWidth, int inHeight, int outWidth, int outHeight) {
// 按照目标的长宽比判定 至少需要缩放多少倍
return Math.min(inHeight / outHeight, inWidth / outWidth);
}
@Override
public String getId() {
return “AT_LEAST.com.bumptech.glide.load.data.bitmap”;
}
};
public static final Downsampler AT_MOST = new Downsampler() {
@Override
protected int getSampleSize(int inWidth, int inHeight, int outWidth, int outHeight) {
// 按照目标的长宽比判定 至多需要缩放多少倍
int maxIntegerFactor = (int) Math.ceil(Math.max(inHeight / (float) outHeight,
inWidth / (float) outWidth));
int lesserOrEqualSampleSize = Math.max(1, Integer.highestOneBit(maxIntegerFactor));
return lesserOrEqualSampleSize << (lesserOrEqualSampleSize < maxIntegerFactor ? 1 : 0);
}
@Override
public String getId() {
return “AT_MOST.com.bumptech.glide.load.data.bitmap”;
}
};
先根据目标宽高算出整数的缩放比例, 有两种计算方式(但其实查看 3.7.0的代码, 只用到了 AT_LEAST)
- AT_LEAST 取 sampleSize 的最小值, 意思是: 至少需要缩放多少倍
- AT_MOST 取 sampleSize 的最大值 (而且还是 ceil 的方式向上取整) 意思是最多需要缩放多少倍
这步计算我们拿到的 exactSampleSize 却不是最终的 sampleSize, 官文里面有提到, sampleSize 需要是 2 的整数次方 且 大于一, 所以我们需要在exactSampleSize 范围内找一个最大的满足 2 的整数次方的最终 sampleSize , 并且与 1 进行比较
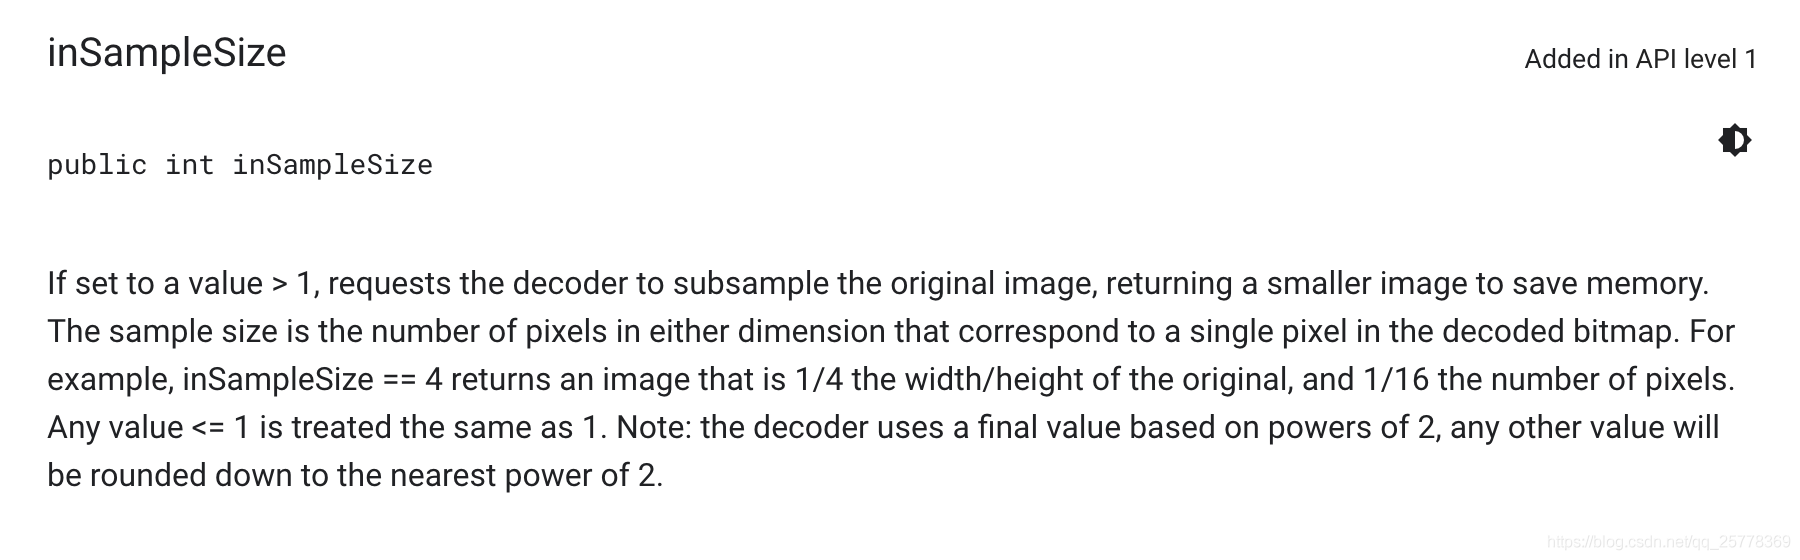
sampleSize == 4 代表缩小 4 倍
缩放比例就计算完了, 下一步
解析原图为对应缩放比例
// DownSampler.decode
final Bitmap downsampled = downsampleWithSize(invalidatingStream, bufferedStream,
options, pool, inWidth, inHeight,
sampleSize,decodeFormat);
private Bitmap downsampleWithSize(MarkEnforcingInputStream is, RecyclableBufferedInputStream bufferedStream,
BitmapFactory.Options options, BitmapPool pool, int inWidth, int inHeight, int sampleSize,
DecodeFormat decodeFormat) {
// 读取 config
Bitmap.Config config = getConfig(is, decodeFormat);
// 初始化 options
options.inSampleSize = sampleSize;
options.inPreferredConfig = config;
// 这里利用 BitmapPool 对象池 和 Bitmap 的重用机制, 做了一个Bitmap内存重用的东东
if ((options.inSampleSize == 1 || Build.VERSION_CODES.KITKAT <= Build.VERSION.SDK_INT) && shouldUsePool(is)) {
int targetWidth = (int) Math.ceil(inWidth / (double) sampleSize);
int targetHeight = (int) Math.ceil(inHeight / (double) sampleSize);
setInBitmap(options, pool.getDirty(targetWidth, targetHeight, config));
}
// 开始解析
return decodeStream(is, bufferedStream, options);
}
private static void setInBitmap(BitmapFactory.Options options, Bitmap recycled) {
if (Build.VERSION_CODES.HONEYCOMB <= Build.VERSION.SDK_INT) {
// 给 options 的 inBitmap 字段赋值, 可以将原始图片资源解析到一个不用的 Bitmap 对象中去
options.inBitmap = recycled;
}
}
private static Bitmap decodeStream(MarkEnforcingInputStream is, RecyclableBufferedInputStream bufferedStream,
BitmapFactory.Options options) {
…
final Bitmap result = BitmapFactory.decodeStream(is, null, options);
…
return result;
}
- 读取 config
- 把 config 和之前算好的 sampleSize 赋值给 options
- 给 options 的 inBitmap 字段赋值, 可以将原始图片资源解析到一个不用的 Bitmap 对象中去
- 利用 Bitmap 的资源重用机制完成对原始图片的解码操作
关于Bitmap的重用机制可以参考, Android Bitmap(一), 资源重用 关于对象池的概念可以参考, Android Glide 3.7.0 源码解析(四) , BitmapPool作用及原理
解码过程分析完毕, 接下来的图形转换就很简单了, 一共就两个函数
三、图形转换 fitCenter
public class FitCenter extends BitmapTransformation {
public FitCenter(Context context) {
super(context);
}
public FitCenter(BitmapPool bitmapPool) {
super(bitmapPool);
}
@Override
protected Bitmap transform(BitmapPool pool, Bitmap toTransform, int outWidth, int outHeight) {
// 关键代码在这里
return TransformationUtils.fitCenter(toTransform, pool, outWidth, outHeight);
}
@Override
public String getId() {
return “FitCenter.com.bumptech.glide.load.resource.bitmap”;
}
}
// TransformationUtils
public static Bitmap fitCenter(Bitmap toFit, BitmapPool pool, int width, int height) {
if (toFit.getWidth() == width && toFit.getHeight() == height) {
if (Log.isLoggable(TAG, Log.VERBOSE)) {
Log.v(TAG, “requested target size matches input, returning input”);
}
return toFit;
}
// 计算缩放比例 2 代表放大 2 倍, 这里去最小值, 意思是保证能放的进去 ImageView 控件
final float widthPercentage = width / (float) toFit.getWidth();
final float heightPercentage = height / (float) toFit.getHeight();
final float minPercentage = Math.min(widthPercentage, heightPercentage);
final int targetWidth = (int) (minPercentage * toFit.getWidth());
final int targetHeight = (int) (minPercentage * toFit.getHeight());
自我介绍一下,小编13年上海交大毕业,曾经在小公司待过,也去过华为、OPPO等大厂,18年进入阿里一直到现在。
深知大多数初中级Android工程师,想要提升技能,往往是自己摸索成长或者是报班学习,但对于培训机构动则近万的学费,着实压力不小。自己不成体系的自学效果低效又漫长,而且极易碰到天花板技术停滞不前!
因此收集整理了一份《2024年Android移动开发全套学习资料》,初衷也很简单,就是希望能够帮助到想自学提升又不知道该从何学起的朋友,同时减轻大家的负担。
既有适合小白学习的零基础资料,也有适合3年以上经验的小伙伴深入学习提升的进阶课程,基本涵盖了95%以上Android开发知识点,真正体系化!
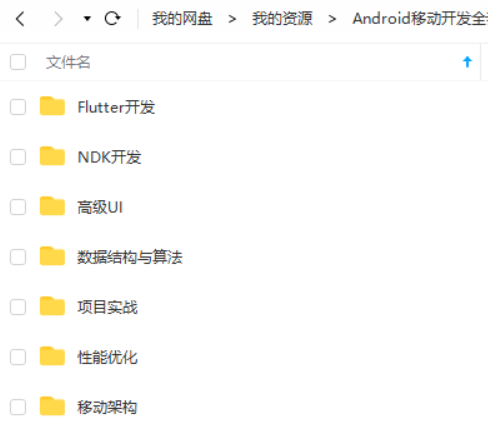
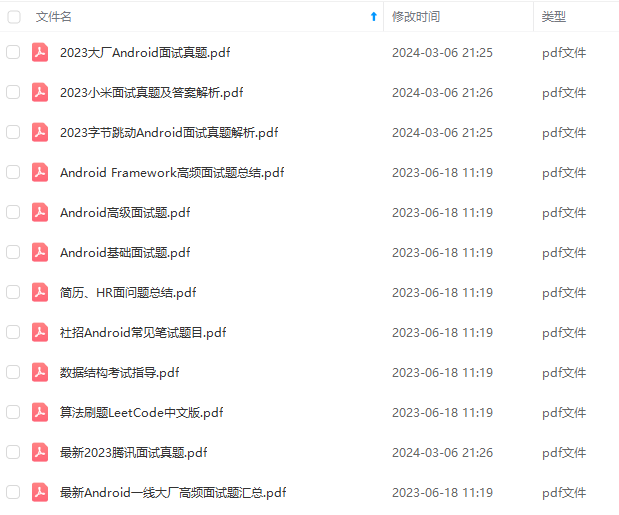
由于文件比较大,这里只是将部分目录截图出来,每个节点里面都包含大厂面经、学习笔记、源码讲义、实战项目、讲解视频,并且会持续更新!
如果你觉得这些内容对你有帮助,可以扫码获取!!(备注:Android)

最后
这里我特地整理了一份《Android开发核心知识点笔记》,里面就包含了自定义View相关的内容

除了这份笔记,还给大家分享 Android学习PDF+架构视频+面试文档+源码笔记,高级架构技术进阶脑图、Android开发面试专题资料,高级进阶架构资料这几块的内容。非常适合近期有面试和想在技术道路上继续精进的朋友。

分享上面这些资源,希望可以帮助到大家提升进阶,如果你觉得还算有用的话,不妨把它们推荐给你的朋友~
喜欢本文的话,给我点个小赞、评论区留言或者转发支持一下呗~
《互联网大厂面试真题解析、进阶开发核心学习笔记、全套讲解视频、实战项目源码讲义》点击传送门即可获取!
DF+架构视频+面试文档+源码笔记**,高级架构技术进阶脑图、Android开发面试专题资料,高级进阶架构资料这几块的内容。非常适合近期有面试和想在技术道路上继续精进的朋友。
[外链图片转存中…(img-UhW9ohsU-1713001977399)]
分享上面这些资源,希望可以帮助到大家提升进阶,如果你觉得还算有用的话,不妨把它们推荐给你的朋友~
喜欢本文的话,给我点个小赞、评论区留言或者转发支持一下呗~
《互联网大厂面试真题解析、进阶开发核心学习笔记、全套讲解视频、实战项目源码讲义》点击传送门即可获取!


 1953
1953

 被折叠的 条评论
为什么被折叠?
被折叠的 条评论
为什么被折叠?
 到【灌水乐园】发言


