


先自我介绍一下,小编浙江大学毕业,去过华为、字节跳动等大厂,目前阿里P7
深知大多数程序员,想要提升技能,往往是自己摸索成长,但自己不成体系的自学效果低效又漫长,而且极易碰到天花板技术停滞不前!
因此收集整理了一份《2024年最新Python全套学习资料》,初衷也很简单,就是希望能够帮助到想自学提升又不知道该从何学起的朋友。


既有适合小白学习的零基础资料,也有适合3年以上经验的小伙伴深入学习提升的进阶课程,涵盖了95%以上Python知识点,真正体系化!
由于文件比较多,这里只是将部分目录截图出来,全套包含大厂面经、学习笔记、源码讲义、实战项目、大纲路线、讲解视频,并且后续会持续更新
如果你需要这些资料,可以添加V获取:vip1024c (备注Python)

正文
func main() {
logger, _ := zap.NewProduction()
defer logger.Sync()
sugar := logger.Sugar()
url := “www.google.com”
sugar.Infow(“failed to fetch URL”,
“url”, url,
“attempt”, 3,
“backoff”, time.Second,
)
}
//output
{“level”:“info”,“ts”:1665669124.251897,“caller”:“a/b.go:20”,“msg”:“failed to fetch URL”,“url”:“www.google.com”,“attempt”:3,“backoff”:1}
Zap 预置了 3 种格式的 Logger:
- zap.NewExample()
- zap.NewDevelopment()
- zap.NewProduction()
这 3 个函数可以传入若干类型为 zap.Option 的选项,从而扩展 Logger 的行为。
选项包括 zap.WithCaller 打印文件、行号、zap.AddStacktrace 打印堆栈信息。
除此之外,我们还可以定制自己的 Logger,提供比预置的 Logger 更灵活的能力。
举一个例子,zap.NewProduction() 实际调用了 NewProductionConfig().Build(),而 NewProductionConfig() 生成的 zap.Config 可以被定制化。
func NewProduction(options …Option) (*Logger, error) {
return NewProductionConfig().Build(options…)
}
修改时间打印格式:
func main() {
loggerConfig := zap.NewProductionConfig()
loggerConfig.EncoderConfig.TimeKey = “timestamp”
loggerConfig.EncoderConfig.EncodeTime = zapcore.TimeEncoderOfLayout(time.RFC3339)
logger, err := loggerConfig.Build()
if err != nil {
log.Fatal(err)
}
sugar := logger.Sugar()
sugar.Info(“Hello from zap logger”)
}
//output
{“level”:“info”,“timestamp”:“2022-10-13T23:12:17+08:00”,“caller”:“a/main.go:169”,“msg”:“Hello from zap logger”}
日志切割
在 Zap 中,我们也可以通过底层的 Zap.New 函数的扩展能力完成更加定制化的操作。例如,指定日志输出的 Writer 行为。
不同的 Writer 可能有不同的写入行为,像是输出到文件还是控制台,是否需要根据时间和文件的大小对日志进行切割等。Zap 将日志切割的能力开放了出来,只要日志切割组件实现了 zapcore.WriteSyncer 接口,就可以集成到 Zap 中。比较常用的日志切割组件为 lumberjack.v2 。下面这个例子将 lumberjack.v2 组件集成到了 Zap 中:
w := &lumberjack.Logger{
Filename: “/var/log/myapp/foo.log”,
MaxSize: 500, // 日志的最大大小,以M为单位
MaxBackups: 3, // 保留的旧日志文件的最大数量
MaxAge: 28, // 保留旧日志文件的最大天数
}
core := zapcore.NewCore(
zapcore.NewJSONEncoder(zap.NewProductionEncoderConfig()),
w,
zap.InfoLevel,
)
logger := zap.New(core)
日志分级
在输出日志时,我们需要根据日志的用途进行分级。目前最佳的实践是将日志级别分为了五类。
- DEBUG : 主要是用来调试的。
通过打印当前程序的调用链,我们可以知道程序运行的逻辑,了解关键分支中详细的变量信息、上下游请求参数和耗时等,帮助开发者调试错误,判断逻辑是否符合预期。
一般用在开发和测试初期。不过,由于太多的 DEBUG 日志会降低线上程序的性能、同时导致成本上升,因此,在生产环境中一般不会打印 DEBUG 日志。 - INFO : 记录了系统中核心的指标。
例如,初始化时配置文件的路径,程序所处集群的环境和版本号,核心指标和状态的变化;
再比如,监听到外部节点数量的变化,或者外部数据库地址的变化。
INFO 信息有助于我们了解程序的整体运行情况,快速排查问题。 - WARNING : 输出程序中预知的,程序目前仍然能够处理的问题。
例如,打车服务中,行程信息会存储在缓存中方便我们快速查找。但是如果在缓存中查不到用户的行程信息,这时我们可以用一些兜底的策略重建行程,继续完成后续的流程。
这种不影响正常流程,但又不太符合预期的情况就适合用 WARNING。WARNING 还可以帮助我们在事后分析异常情况出现的原因。 - ERROR: 针对一些不可预知的问题,例如网络通信或者数据库连接的异常等。
- FATAL : 针对程序遇到的严重问题,意味着需要立即终止程序。
例如遇到了不能容忍的并发冲突时,就应该使用 FATAL 级别的日志。
Zap 日志库在上面五个分级的基础上还增加了 Panic 和 DPanic 级别,如下所示。Panic 级别打印后会触发 panic。而 DPanic 级别比较特殊,它在 development 模式下会 panic,相当于 PanicLevel 级别,而在其他模式下相当于 ErrorLevel 级别。
const (
DebugLevel = zapcore.DebugLevel
InfoLevel = zapcore.InfoLevel
WarnLevel = zapcore.WarnLevel
ErrorLevel = zapcore.ErrorLevel
DPanicLevel = zapcore.DPanicLevel
PanicLevel = zapcore.PanicLevel
FatalLevel = zapcore.FatalLevel
)
日志格式规范
对于打印出来的日志格式,我们希望它尽量符合通用的规范,以便公共的采集通道进行进一步的日志处理。
一个合格的日志至少应该有:
- 具体的时间
- 打印的行号
- 日志级别等重要信息。
同时,在大规模的集群中,还可能包含机器的 IP 地址,调用者 IP 和其他业务信息。规范日志示例如下:
{“level”:“info”,“timestamp”:“2022-10-13T23:29:10+08:00”,“caller”:“a/main.go:168”,“msg”:“data”,“orderid”:1414281843,“traceid”:124111424,“appversion”:“v1.1”,“caller_ip”:“10.8.0.1”,“reason_type”:30}
下面列出一个实际中在使用的日志规范,可以作为一个参考:
- 每一行日志必须至少包含日志 Key、TimeStamp、打印的行号、日志级别字段;
- 单条日志长度在 1MB 以内,单个服务节点每秒的日志量小于 20MB;
- 建议使用 UTF-8 字符集,避免入库时出现乱码;
- Key 为每个字段的字段名,一行示例中的 Key 是唯一的;
- Key 的命名只能包含数字、字母、下划线,且必须以字母开头;
- Key 的长度不可大于 80 个字符;
- Key 中的字母均为小写。
构建项目日志组件
我们把 zapcore.Core 作为一个自定义类型 Plugin ,zapcore.Core 定义了日志的编码格式以及输出位置等核心功能。
作为一个通用的库,下面我们实现了 NewStdoutPlugin、NewStderrPlugin、NewFilePlugin 这三个函数,分别对应了输出日志到 stdout、stderr 和文件中。这三个函数最终都调用了 zapcore.NewCore 函数。
type Plugin = zapcore.Core
func NewStdoutPlugin(enabler zapcore.LevelEnabler) Plugin {
return NewPlugin(zapcore.Lock(zapcore.AddSync(os.Stdout)), enabler)
}
func NewStderrPlugin(enabler zapcore.LevelEnabler) Plugin {
return NewPlugin(zapcore.Lock(zapcore.AddSync(os.Stderr)), enabler)
}
// Lumberjack logger虽然持有File但没有暴露sync方法,所以没办法利用zap的sync特性
// 所以额外返回一个closer,需要保证在进程退出前close以保证写入的内容可以全部刷到磁盘
func NewFilePlugin(
filePath string, enabler zapcore.LevelEnabler) (Plugin, io.Closer) {
var writer = DefaultLumberjackLogger()
writer.Filename = filePath
return NewPlugin(zapcore.AddSync(writer), enabler), writer
}
func NewPlugin(writer zapcore.WriteSyncer, enabler zapcore.LevelEnabler) Plugin {
return zapcore.NewCore(DefaultEncoder(), writer, enabler)
}
NewFilePlugin 中暴露出了两个参数:filePath 和 enabler。
- filePath 表示输出文件的路径
- enabler 代表当前环境中要打印的日志级别。
刚才我们梳理了 Zap 中的七种日志级别,它们是一个整数,按照等级从上到下排列的,等级最低的是 Debug,等级最高的为 Fatal。
在生产环境中,我们并不希望打印 Debug 日志,因此我们可以在生产环境中指定 enabler 参数为 InfoLevel 级别,这样,就只有大于等于 enabler 的日志等级才会被打印了。
const (
DebugLevel = zapcore.DebugLevel
InfoLevel = zapcore.InfoLevel
WarnLevel = zapcore.WarnLevel
ErrorLevel = zapcore.ErrorLevel
DPanicLevel = zapcore.DPanicLevel
PanicLevel = zapcore.PanicLevel
FatalLevel = zapcore.FatalLevel
)
下一步是日志切割,在 NewFilePlugin 中,我们借助 lumberjack.v2 来完成日志的切割。
// 1.不会自动清理backup
// 2.每200MB压缩一次,不按时间切割
func DefaultLumberjackLogger() *lumberjack.Logger {
return &lumberjack.Logger{
MaxSize: 200,
LocalTime: true,
Compress: true,
}
}
最后,我们要暴露一个通用的函数 NewLogger 来生成 logger。
默认的选项会打印调用时的文件与行号,并且只有当日志等级在 DPanic 等级之上时,才输出函数的堆栈信息。
func NewLogger(plugin zapcore.Core, options …zap.Option) *zap.Logger {
return zap.New(plugin, append(DefaultOption(), options…)…)
}
func DefaultOption() []zap.Option {
var stackTraceLevel zap.LevelEnablerFunc = func(level zapcore.Level) bool {
return level >= zapcore.DPanicLevel
}
return []zap.Option{
zap.AddCaller(),
zap.AddStacktrace(stackTraceLevel),
}
}
现在让我们在 main 函数中集成 log 组件,文件名和日志级别现在是写死的,后续我们会统一放入到配置文件中。
func main() {
plugin, c := log.NewFilePlugin(“./log.txt”, zapcore.InfoLevel)
defer c.Close()
logger := log.NewLogger(plugin)
logger.Info(“log init end”)
}
// output
{“level”:“INFO”,“ts”:“2022-10-14T23:59:15.701+0800”,“caller”:“crawler/main.go:17”,“msg”:“log init end”}
slog
前世今生
针对Go标准库log包,Go社区要求改进的声音始终不断,主流声音聚焦在以下几点:
- log包是为了方便人类可读而设计的,不支持便于机器解析的结构化日志(比如像zap那样输出json格式的日志
- 不支持日志级别(log level)
- log包采用专有日志输出格式,又没有提供可供Go社区共同遵循的Logger接口类型,导致Go社区项目使用的log输出格式五花八门,相互之间又难以兼容。
Go社区曾经尝试过合力改进标准库log包,并撰写了Proposal设计初稿,但最终因各种原因都没有被Go核心团队接受。
2022年8月末,Go团队的Jonathan Amsterdam发起discussion,意在和社区讨论为Go标准库添加结构化的、支持日志级别的日志包相关事宜,并形成一个一致的Proposal。
Jonathan Amsterdam将该结构化日志包命名为slog,计划放在log/slog下。他还在golang.org/x/exp下面给出了slog的初始实现,该Proposal正式进入review阶段。至于何时能正式落地到Go正式版本中还不可知。
设计
slog的设计之初对社区目前的一些应用广泛的log包进行了详细调研,比如uber zap、zerolog等,因此slog的设计也算是“站在前人的肩膀上”,尤其是uber zap。
Jonathan Amsterdam为此次slog的设计设定了如下目标(摘自slog的proposal):
- 易用性: 通过对现有日志包的调查发现,程序员们希望有一套简洁且易于理解的logging API。在此proposal中,我们将采用目前最流行的方式来表达键值对,即交替传入键和值。
- 高性能: 该log API的设计将尽量减少内存分配和加锁。它提供了一个交替输入键和值的方法,虽略繁琐,但速度更快
- 可以与运行时跟踪(tracing)集成: Go团队正在开发一个改进的运行时跟踪(runtime tracing)系统。本软件包的日志将可以被无缝集成到这个跟踪系统中,使开发者能够将他们的程序行为与运行时的行为联系起来。

slog从逻辑上分为前端(front)和后端(backend)。
- slog前端就是slog提供给使用者的API,不过,很遗憾slog依旧像log那样没有抽取出Logger接口,而是定义了一个Logger结构体,并提供了如图中的那些方法,这也意味着我们依旧无法在整个Go社区统一前端API;
- 通过前端方法,slog将日志内容以及相关属性信息封装成一个slog.Record类型实例,然后传递给slog的后端。
- 如果你使用的是Go社区的第三方log包的前端方法,比如zap,如果要使用slog后端,你同样需要对zap等进行封装,让其输出slog.Record并传递给slog的后端(目前尚没有这方面示例)。
slog将后端抽象为slog.Handler接口,接口如下:
type Handler interface {
// Enabled reports whether the handler handles records at the given level.
// The handler ignores records whose level is lower.
// It is called early, before any arguments are processed,
// to save effort if the log event should be discarded.
// If called from a Logger method, the first argument is the context
// passed to that method, or context.Background() if nil was passed
// or the method does not take a context.
// The context is passed so Enabled can use its values
// to make a decision.
Enabled(context.Context, Level) bool
// Handle handles the Record.
// It will only be called Enabled returns true.
// The Context argument is as for Enabled.
// It is present solely to provide Handlers access to the context’s values.
// Canceling the context should not affect record processing.
// (Among other things, log messages may be necessary to debug a
// cancellation-related problem.)
//
// Handle methods that produce output should observe the following rules:
// - If r.Time is the zero time, ignore the time.
// - If r.PC is zero, ignore it.
// - If an Attr’s key is the empty string and the value is not a group,
// ignore the Attr.
// - If a group’s key is empty, inline the group’s Attrs.
// - If a group has no Attrs (even if it has a non-empty key),
// ignore it.
Handle(context.Context, Record) error
// WithAttrs returns a new Handler whose attributes consist of
// both the receiver’s attributes and the arguments.
// The Handler owns the slice: it may retain, modify or discard it.
// [Logger.With] will resolve the Attrs.
WithAttrs(attrs []Attr) Handler
// WithGroup returns a new Handler with the given group appended to
// the receiver’s existing groups.
// The keys of all subsequent attributes, whether added by With or in a
// Record, should be qualified by the sequence of group names.
//
// How this qualification happens is up to the Handler, so long as
// this Handler’s attribute keys differ from those of another Handler
// with a different sequence of group names.
//
// A Handler should treat WithGroup as starting a Group of Attrs that ends
// at the end of the log event. That is,
//
// logger.WithGroup(“s”).LogAttrs(level, msg, slog.Int(“a”, 1), slog.Int(“b”, 2))
//
// should behave like
//
// logger.LogAttrs(level, msg, slog.Group(“s”, slog.Int(“a”, 1), slog.Int(“b”, 2)))
//
// If the name is empty, WithGroup returns the receiver.
WithGroup(name string) Handler
}
接口类型的存在,让slog的后端扩展性更强,我们除了可以使用slog提供的两个内置Handler实现:TextHandler和JSONHandler之外,还可以基于第三方log包定义或完全自定义后端Handler的实现。
slog内置两个最常用的Handler:TextHandler和JSONHandler。TextHandler顾名思义,像标准库log包那样将日志以一行文本那样输出;而JSONHandler则是以JSON格式输出log内容与各个属性,我们看一下作者给的例子:
// github.com/bigwhite/experiments/tree/master/slog-examples/demo1/main.go
package main
import (
“net”
“golang.org/x/exp/slog”
)
func main() {
slog.SetDefault(slog.New(slog.NewTextHandler(os.Stderr)))
slog.Info(“hello”, “name”, “Al”)
slog.Error(“oops”, net.ErrClosed, “status”, 500)
slog.LogAttrs(slog.ErrorLevel, “oops”,
slog.Int(“status”, 500), slog.Any(“err”, net.ErrClosed))
}
//outpu
time=2023-03-30T20:43:24.559+08:00 level=INFO msg=hello name=Al
time=2023-03-30T20:43:24.575+08:00 level=ERROR msg=oops status=500 err=“use of closed network connection”
time=2023-03-30T20:43:24.575+08:00 level=ERROR msg=oops status=500 err=“use of closed network connection”
将NewTextHandler改成NewJsonHandler:
{“time”:“2023-03-30T20:45:22.5032552+08:00”,“level”:“INFO”,“msg”:“hello”,“name”:“Al”}
{“time”:“2023-03-30T20:45:22.5204582+08:00”,“level”:“ERROR”,“msg”:“oops”,“status”:500,“err”:“use of closed network connection”}
{“time”:“2023-03-30T20:45:22.5204582+08:00”,“level”:“ERROR”,“msg”:“oops”,“status”:500,“err”:“use of closed network connection”}
去掉SetDefault
2023/03/30 20:46:50 INFO hello name=Al
2023/03/30 20:46:50 ERROR oops status=500 err=“use of closed network connection”
2023/03/30 20:46:50 ERROR oops status=500 err=“use of closed network connection”
新创建的Logger设置为默认Logger,slog会使用defaultHandler,而defaultHandler的output函数就是log.Output:
slog的前端是“固定格式”的,因此没什么可定制的。但后端这块倒是有不少玩法,接下来我们重点看一下后端。
Handler选项(HandlerOptions)
type HandlerOptions struct {
// When AddSource is true, the handler adds a (“source”, “file:line”)
// attribute to the output indicating the source code position of the log
// statement. AddSource is false by default to skip the cost of computing
// this information.
AddSource bool
// Level reports the minimum record level that will be logged.
// The handler discards records with lower levels.
// If Level is nil, the handler assumes LevelInfo.
// The handler calls Level.Level for each record processed;
// to adjust the minimum level dynamically, use a LevelVar.
Level Leveler
// ReplaceAttr is called to rewrite each non-group attribute before it is logged.
// The attribute’s value has been resolved (see [Value.Resolve]).
// If ReplaceAttr returns an Attr with Key == “”, the attribute is discarded.
//
// The built-in attributes with keys “time”, “level”, “source”, and “msg”
// are passed to this function, except that time is omitted
// if zero, and source is omitted if AddSource is false.
//
// The first argument is a list of currently open groups that contain the
// Attr. It must not be retained or modified. ReplaceAttr is never called
// for Group attributes, only their contents. For example, the attribute
// list
//
// Int(“a”, 1), Group(“g”, Int(“b”, 2)), Int(“c”, 3)
//
// results in consecutive calls to ReplaceAttr with the following arguments:
//
// nil, Int(“a”, 1)
// []string{“g”}, Int(“b”, 2)
// nil, Int(“c”, 3)
//
// ReplaceAttr can be used to change the default keys of the built-in
// attributes, convert types (for example, to replace a time.Time with the
// integer seconds since the Unix epoch), sanitize personal information, or
// remove attributes from the output.
ReplaceAttr func(groups []string, a Attr) Attr
}
通过该结构,我们可以为输出的日志添加source信息,即输出日志的文件名与行号,下面就是一个例子:
// github.com/bigwhite/experiments/tree/master/slog-examples/demo2/main.go
package main
import (
“net”
“os”
“golang.org/x/exp/slog”
)
func main() {
opts := slog.HandlerOptions{
AddSource: true,
}
slog.SetDefault(slog.New(opts.NewJSONHandler(os.Stderr)))
slog.Info(“hello”, “name”, “Al”)
slog.Error(“oops”, net.ErrClosed, “status”, 500)
slog.LogAttrs(slog.ErrorLevel, “oops”,
slog.Int(“status”, 500), slog.Any(“err”, net.ErrClosed))
}
文末有福利领取哦~
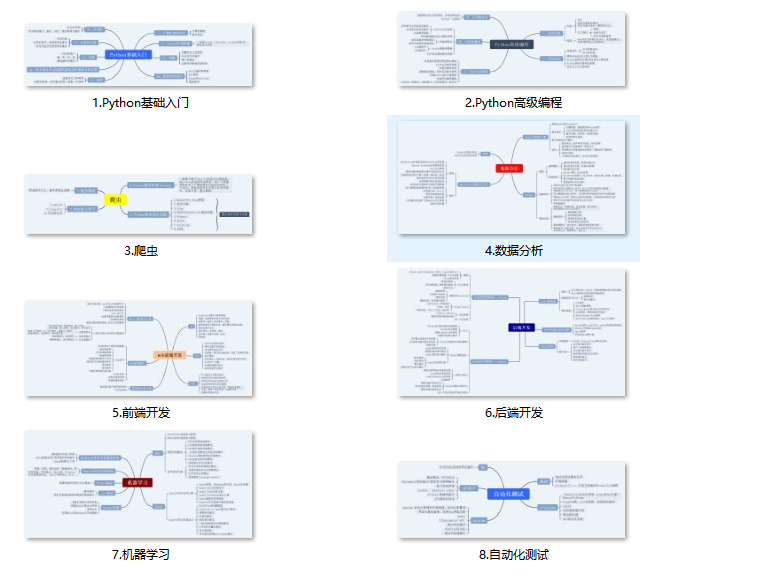
👉一、Python所有方向的学习路线
Python所有方向的技术点做的整理,形成各个领域的知识点汇总,它的用处就在于,你可以按照上面的知识点去找对应的学习资源,保证自己学得较为全面。
👉二、Python必备开发工具

👉三、Python视频合集
观看零基础学习视频,看视频学习是最快捷也是最有效果的方式,跟着视频中老师的思路,从基础到深入,还是很容易入门的。

👉 四、实战案例
光学理论是没用的,要学会跟着一起敲,要动手实操,才能将自己的所学运用到实际当中去,这时候可以搞点实战案例来学习。(文末领读者福利)

👉五、Python练习题
检查学习结果。

👉六、面试资料
我们学习Python必然是为了找到高薪的工作,下面这些面试题是来自阿里、腾讯、字节等一线互联网大厂最新的面试资料,并且有阿里大佬给出了权威的解答,刷完这一套面试资料相信大家都能找到满意的工作。


👉因篇幅有限,仅展示部分资料,这份完整版的Python全套学习资料已经上传
网上学习资料一大堆,但如果学到的知识不成体系,遇到问题时只是浅尝辄止,不再深入研究,那么很难做到真正的技术提升。
需要这份系统化的资料的朋友,可以添加V获取:vip1024c (备注python)

一个人可以走的很快,但一群人才能走的更远!不论你是正从事IT行业的老鸟或是对IT行业感兴趣的新人,都欢迎加入我们的的圈子(技术交流、学习资源、职场吐槽、大厂内推、面试辅导),让我们一起学习成长!
4904270636b8e.png)
👉六、面试资料
我们学习Python必然是为了找到高薪的工作,下面这些面试题是来自阿里、腾讯、字节等一线互联网大厂最新的面试资料,并且有阿里大佬给出了权威的解答,刷完这一套面试资料相信大家都能找到满意的工作。
👉因篇幅有限,仅展示部分资料,这份完整版的Python全套学习资料已经上传
网上学习资料一大堆,但如果学到的知识不成体系,遇到问题时只是浅尝辄止,不再深入研究,那么很难做到真正的技术提升。
需要这份系统化的资料的朋友,可以添加V获取:vip1024c (备注python)
[外链图片转存中…(img-qURNirCp-1713668518863)]
一个人可以走的很快,但一群人才能走的更远!不论你是正从事IT行业的老鸟或是对IT行业感兴趣的新人,都欢迎加入我们的的圈子(技术交流、学习资源、职场吐槽、大厂内推、面试辅导),让我们一起学习成长!


 被折叠的 条评论
为什么被折叠?
被折叠的 条评论
为什么被折叠?
 到【灌水乐园】发言


