


最大内存:如果是低配手机,就每个进程可用的最大内存乘以0.33,否则就每个进程可用的最大内存乘以0.4
//MemorySizeCalculator.java
int screenSize = screenDimensions.getWidthPixels() * screenDimensions.getHeightPixels()
- BYTES_PER_ARGB_8888_PIXEL;(宽高4)
int targetPoolSize = screenSize * BITMAP_POOL_TARGET_SCREENS;(宽高4*4)
int targetMemoryCacheSize = screenSize * MEMORY_CACHE_TARGET_SCREENS;(宽高4*2)
//判断是否超过最大值,否则就等比缩小
if (targetMemoryCacheSize + targetPoolSize <= maxSize) {
memoryCacheSize = targetMemoryCacheSize;
bitmapPoolSize = targetPoolSize;
} else {
int part = Math.round((float) maxSize / (BITMAP_POOL_TARGET_SCREENS + MEMORY_CACHE_TARGET_SCREENS));
memoryCacheSize = part * MEMORY_CACHE_TARGET_SCREENS;
bitmapPoolSize = part * BITMAP_POOL_TARGET_SCREENS;
}
targetPoolSize 和 targetMemoryCacheSize 之和不能超过maxSize 否则就等比缩小
//GlideBuilder.java
memoryCache = new LruResourceCache(calculator.getMemoryCacheSize());
内存缓存用的是targetMemoryCacheSize (即一般是缓存大小是屏幕的宽 * 高 * 4 * 2)
2.BitmapPool 图片池 LruBitmapPool
int size = calculator.getBitmapPoolSize();
bitmapPool = new LruBitmapPool(size);
图片池用的是targetPoolSize(即一般是缓存大小是屏幕的宽*高*4*4)
3.DecodeFormat 图片格式
DecodeFormat DEFAULT = PREFER_RGB_565
默认是RGB_565
4.Engine 引擎类
//GlideBuilder.java
engine = new Engine(memoryCache, diskCacheFactory, diskCacheService, sourceService);
engine 里面主要参数
内存缓存 memoryCache
本地缓存 diskCacheFactory
处理源资源的线程池 sourceService
处理本地缓存的线程池 diskCacheService
(1)memoryCache:内存缓存 LruBitmapPool
上面已经做了介绍
(2)diskCacheFactory:本地缓存 DiskLruCacheFactory
//DiskCache.java
/** 250 MB of cache. */
int DEFAULT_DISK_CACHE_SIZE = 250 * 1024 * 1024;
String DEFAULT_DISK_CACHE_DIR = “image_manager_disk_cache”;
默认大小:250 MB
默认目录:image_manager_disk_cache
(3)sourceService 处理源资源的线程池 (ThreadPoolExecutor的子类)
final int cores = Math.max(1, Runtime.getRuntime().availableProcessors());//获得可用的处理器个数
sourceService = new FifoPriorityThreadPoolExecutor(cores);
线程池的核心线程数量等于获得可用的处理器个数
(4)diskCacheService 处理本地缓存的线程池 (ThreadPoolExecutor的子类)
diskCacheService = new FifoPriorityThreadPoolExecutor(1);
线程池的核心线程数量为1
二.with方法
with方法有很多重载,最后会返回一个RequestManager
//Glide.java
/**
-
@see #with(android.app.Activity)
-
@see #with(android.app.Fragment)
-
@see #with(android.support.v4.app.Fragment)
-
@see #with(android.support.v4.app.FragmentActivity)
-
@param context Any context, will not be retained.
-
@return A RequestManager for the top level application that can be used to start a load.
*/
public static RequestManager with(Context context) {
RequestManagerRetriever retriever = RequestManagerRetriever.get();
return retriever.get(context);
}
就算你传入的是Context ,这里也会根据你Context 实际的类型,走不同的分支
//RequestManagerRetriever.java
public RequestManager get(Context context) {
if (context == null) {
throw new IllegalArgumentException(“You cannot start a load on a null Context”);
} else if (Util.isOnMainThread() && !(context instanceof Application)) {
if (context instanceof FragmentActivity) {
return get((FragmentActivity) context);
} else if (context instanceof Activity) {
return get((Activity) context);
} else if (context instanceof ContextWrapper) {
return get(((ContextWrapper) context).getBaseContext());
}
}
return getApplicationManager(context);
}
这里以FragmentActivity为例,最后会创建一个无界面的Fragment,即SupportRequestManagerFragment ,让请求和你的activity的生命周期同步
//RequestManagerRetriever.java
public RequestManager get(FragmentActivity activity) {
if (Util.isOnBackgroundThread()) {
return get(activity.getApplicationContext());
} else {
assertNotDestroyed(activity);
FragmentManager fm = activity.getSupportFragmentManager();
return supportFragmentGet(activity, fm);
}
}
RequestManager supportFragmentGet(Context context, FragmentManager fm) {
SupportRequestManagerFragment current = getSupportRequestManagerFragment(fm);
RequestManager requestManager = current.getRequestManager();
if (requestManager == null) {
requestManager = new RequestManager(context, current.getLifecycle(), current.getRequestManagerTreeNode());
current.setRequestManager(requestManager);
}
return requestManager;
}
这里需要注意一下,如果你是在子线程调用with方法,或者传入的Context是Application的话,请求是跟你的Application的生命周期同步
//RequestManagerRetriever.java
private RequestManager getApplicationManager(Context context) {
// Either an application context or we’re on a background thread.
if (applicationManager == null) {
synchronized (this) {
if (applicationManager == null) {
// Normally pause/resume is taken care of by the fragment we add to the fragment or activity.
// However, in this case since the manager attached to the application will not receive lifecycle
// events, we must force the manager to start resumed using ApplicationLifecycle.
applicationManager = new RequestManager(context.getApplicationContext(),
new ApplicationLifecycle(), new EmptyRequestManagerTreeNode());
}
}
}
return applicationManager;
}
三.load方法
这里方法也有很多重载
//RequestManager.java
public DrawableTypeRequest load(String string) {
return (DrawableTypeRequest) fromString().load(string);
}
但是最后都会返回一个DrawableTypeRequest (继承了DrawableRequestBuilder)
DrawableRequestBuilder就是支持链式调用的一个类,我们平时有类似的需求的时候也可以模仿这样的处理方式,把一些非必须参数用链式调用的方式来设置
四.into方法
//GenericRequestBuilder.java
public Target into(ImageView view) {
Util.assertMainThread();
if (view == null) {
throw new IllegalArgumentException(“You must pass in a non null View”);
}
if (!isTransformationSet && view.getScaleType() != null) {
switch (view.getScaleType()) {
case CENTER_CROP:
applyCenterCrop();
break;
case FIT_CENTER:
case FIT_START:
case FIT_END:
applyFitCenter();
break;
// C A S E S − O M I T T E D CASES-OMITTED CASES−OMITTED
default:
// Do nothing.
}
}
return into(glide.buildImageViewTarget(view, transcodeClass));
}
这里有三点需要注意的:
1.Util.assertMainThread();这里会检查是否主线程,不是的话会抛出异常,所以into方法必须在主线程中调用.
2.当你没有调用transform方法,并且你的ImageView设置了ScaleType,那么他会根据你的设置,对图片做处理(具体处理可以查看DrawableRequestBuilder的applyCenterCrop或者applyFitCenter方法,我们自己自定义BitmapTransformation也可以参考这里的处理).
3.view在这里被封装成一个Target.
//GenericRequestBuilder.java
public <Y extends Target> Y into(Y target) {
Util.assertMainThread();
if (target == null) {
throw new IllegalArgumentException(“You must pass in a non null Target”);
}
if (!isModelSet) {
throw new IllegalArgumentException(“You must first set a model (try #load())”);
}
Request previous = target.getRequest();
if (previous != null) {
previous.clear();
requestTracker.removeRequest(previous);
previous.recycle();
}
Request request = buildRequest(target);
target.setRequest(request);
lifecycle.addListener(target);
requestTracker.runRequest(request);
return target;
}
这里可以看到控件封装成的Target能够获取自身绑定的请求,当发现之前的请求还在的时候,会把旧的请求清除掉,绑定新的请求,这也就是为什么控件复用时不会出现图片错位的问题(这点跟我在Picasso源码中看到的处理方式很相像).
接着在into里面会调用buildRequest方法来创建请求
//GenericRequestBuilder.java
private Request buildRequest(Target target) {
if (priority == null) {
priority = Priority.NORMAL;
}
return buildRequestRecursive(target, null);
}
//GenericRequestBuilder.java
private Request buildRequestRecursive(Target target, ThumbnailRequestCoordinator parentCoordinator) {
if (thumbnailRequestBuilder != null) {
…
Request fullRequest = obtainRequest(target, sizeMultiplier, priority, coordinator);
…
Request thumbRequest = thumbnailRequestBuilder.buildRequestRecursive(target, coordinator);
…
coordinator.setRequests(fullRequest, thumbRequest);
return coordinator;
} else if (thumbSizeMultiplier != null) {
ThumbnailRequestCoordinator coordinator = new ThumbnailRequestCoordinator(parentCoordinator);
Request fullRequest = obtainRequest(target, sizeMultiplier, priority, coordinator);
Request thumbnailRequest = obtainRequest(target, thumbSizeMultiplier, getThumbnailPriority(), coordinator);
coordinator.setRequests(fullRequest, thumbnailRequest);
return coordinator;
} else {
// Base case: no thumbnail.
return obtainRequest(target, sizeMultiplier, priority, parentCoordinator);
}
}
1.这里就是请求的生成,buildRequestRecursive里面if有三个分支,这里是根据你设置thumbnail的情况来判断的,第一个是设置缩略图为新的请求的情况,第二个是设置缩略图为float的情况,第三个就是没有设置缩略图的情况.
前两个设置了缩略图的是有两个请求的,fullRequest和thumbnailRequest,没有设置缩略图则肯定只有一个请求了.
2.请求都是通过obtainRequest方法生成的(这个简单了解一下就行)
//GenericRequestBuilder.java
private Request obtainRequest(Target target, float sizeMultiplier, Priority priority,
RequestCoordinator requestCoordinator) {
return GenericRequest.obtain(…);
}
REQUEST_POOL是一个队列,当队列中有,那么就从队列中取,没有的话就新建一个GenericRequest
//GenericRequest.java
public static <A, T, Z, R> GenericRequest<A, T, Z, R> obtain(…) {
GenericRequest<A, T, Z, R> request = (GenericRequest<A, T, Z, R>) REQUEST_POOL.poll();
if (request == null) {
request = new GenericRequest<A, T, Z, R>();
}
request.init(…);
return request;
}
回到into方法:当创建了请求后runRequest会调用Request的begin方法,即调用GenericRequest的begin方法
//GenericRequestBuilder.java
public <Y extends Target> Y into(Y target) {
Request request = buildRequest(target);
…
requestTracker.runRequest(request);
…
}
//GenericRequest.java
public void begin() {
…
if (Util.isValidDimensions(overrideWidth, overrideHeight)) {
onSizeReady(overrideWidth, overrideHeight);
} else {
target.getSize(this);
}
…
}
最终会调用Engine的load方法
//GenericRequest.java
public void onSizeReady(int width, int height) {
…
loadStatus = engine.load(signature, width, height, dataFetcher, loadProvider, transformation, transcoder,
priority, isMemoryCacheable, diskCacheStrategy, this);
…
}
我们先看load方法的前面一段:
1.首先会尝试从cache里面取,这里cache就是Glide的构造函数里面的MemoryCache(是一个LruResourceCache),如果取到了,就从cache里面删掉,然后加入activeResources中
2.如果cache里面没取到,就会从activeResources中取,activeResources是一个以弱引用为值的map,他是用于存储使用中的资源.之所以在内存缓存的基础上又多了这层缓存,是为了当内存不足而清除cache中的资源中,不会影响使用中的资源.
//Engine.java
public <T, Z, R> LoadStatus load(…) {
…
EngineResource<?> cached = loadFromCache(key, isMemoryCacheable);
if (cached != null) {
cb.onResourceReady(cached);
if (Log.isLoggable(TAG, Log.VERBOSE)) {
logWithTimeAndKey(“Loaded resource from cache”, startTime, key);
}
return null;
}
EngineResource<?> active = loadFromActiveResources(key, isMemoryCacheable);
if (active != null) {
cb.onResourceReady(active);
if (Log.isLoggable(TAG, Log.VERBOSE)) {
logWithTimeAndKey(“Loaded resource from active resources”, startTime, key);
}
return null;
}
…
}
load方法接着会通过EngineJobFactory创建一个EngineJob,里面主要管理里两个线程池,diskCacheService和sourceService,他们就是Glide构造函数中Engine里面创建的那两个线程池.
//Engine.java
public <T, Z, R> LoadStatus load(…) {
…
EngineJob engineJob = engineJobFactory.build(key, isMemoryCacheable);
…
}
//Engine.java
static class EngineJobFactory {
private final ExecutorService diskCacheService;
private final ExecutorService sourceService;
private final EngineJobListener listener;
public EngineJobFactory(ExecutorService diskCacheService, ExecutorService sourceService,
EngineJobListener listener) {
this.diskCacheService = diskCacheService;
this.sourceService = sourceService;
this.listener = listener;
}
public EngineJob build(Key key, boolean isMemoryCacheable) {
return new EngineJob(key, diskCacheService, sourceService, isMemoryCacheable, listener);
}
}
接着说load方法,前面创建了EngineJob,接着调用EngineJob的start方法,并将EngineRunnable放到diskCacheService(处理磁盘缓存的线程池里面运行),接着线程池就会调用EngineRunnable的run方法.
//Engine.java
public <T, Z, R> LoadStatus load(…) {
…
EngineRunnable runnable = new EngineRunnable(engineJob, decodeJob, priority);
jobs.put(key, engineJob);
engineJob.addCallback(cb);
engineJob.start(runnable);
…
}
//EngineJob.java
public void start(EngineRunnable engineRunnable) {
this.engineRunnable = engineRunnable;
future = diskCacheService.submit(engineRunnable);
}
//EngineRunnable.java
public void run() {
…
try {
resource = decode();
} catch (Exception e) {
if (Log.isLoggable(TAG, Log.VERBOSE)) {
Log.v(TAG, “Exception decoding”, e);
}
exception = e;
}
…
if (resource == null) {
onLoadFailed(exception);
} else {
onLoadComplete(resource);
}
}
run里面调用的是decode()方法,里面会尝试先从磁盘缓存中读取,如果不行就从源资源中读取
//EngineRunnable.java
private Resource<?> decode() throws Exception {
if (isDecodingFromCache()) {
//第一次会走这
return decodeFromCache();//从磁盘缓存中读取
} else {
return decodeFromSource();//从源资源中读取
}
}
我们先来看从磁盘中读取的策略
//EngineRunnable.java
private Resource<?> decodeFromCache() throws Exception {
Resource<?> result = null;
try {
result = decodeJob.decodeResultFromCache();
} catch (Exception e) {
if (Log.isLoggable(TAG, Log.DEBUG)) {
Log.d(TAG, "Exception decoding result from cache: " + e);
}
}
if (result == null) {
result = decodeJob.decodeSourceFromCache();
}
return result;
}
我们可以看到这里先尝试读取处理后的图片(Result),然后再尝试读取原图,但是这里面具体逻辑会根据你设置的磁盘缓存策略来决定是否真的会读取处理图和原图
那么我们再回到EngineRunnable的run()方法中
最后
自我介绍一下,小编13年上海交大毕业,曾经在小公司待过,也去过华为、OPPO等大厂,18年进入阿里一直到现在。
深知大多数初中级Android工程师,想要提升技能,往往是自己摸索成长,自己不成体系的自学效果低效漫长且无助。
因此我收集整理了一份《2024年Android移动开发全套学习资料》,初衷也很简单,就是希望能够帮助到想自学提升又不知道该从何学起的朋友,同时减轻大家的负担。
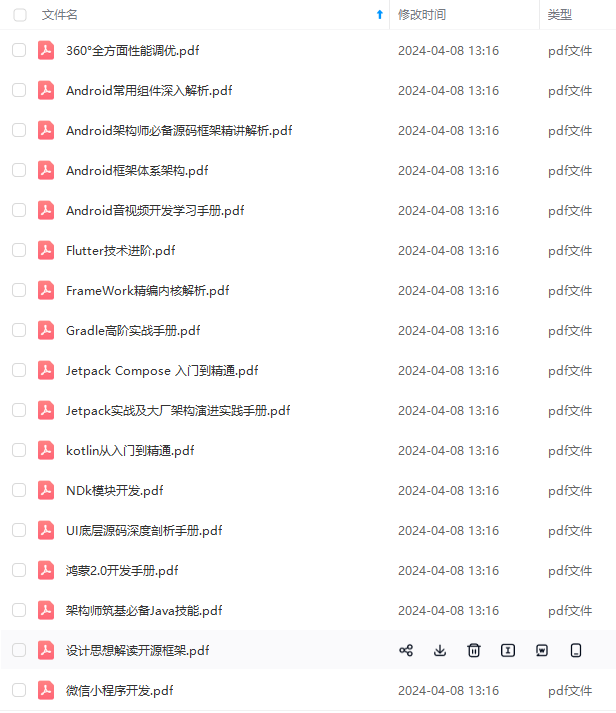


既有适合小白学习的零基础资料,也有适合3年以上经验的小伙伴深入学习提升的进阶课程,基本涵盖了95%以上Android开发知识点!不论你是刚入门Android开发的新手,还是希望在技术上不断提升的资深开发者,这些资料都将为你打开新的学习之门
如果你觉得这些内容对你有帮助,需要这份全套学习资料的朋友可以戳我获取!!
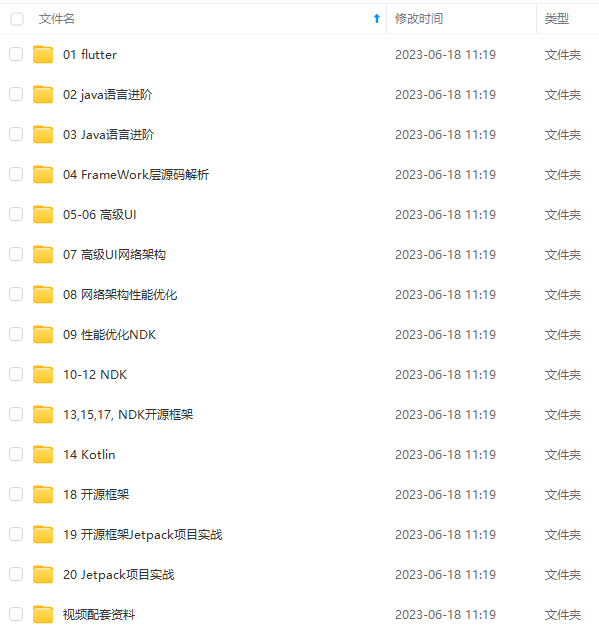
由于文件比较大,这里只是将部分目录截图出来,每个节点里面都包含大厂面经、学习笔记、源码讲义、实战项目、讲解视频,并且会持续更新!
le(TAG, Log.DEBUG)) {
Log.d(TAG, "Exception decoding result from cache: " + e);
}
}
if (result == null) {
result = decodeJob.decodeSourceFromCache();
}
return result;
}
我们可以看到这里先尝试读取处理后的图片(Result),然后再尝试读取原图,但是这里面具体逻辑会根据你设置的磁盘缓存策略来决定是否真的会读取处理图和原图
那么我们再回到EngineRunnable的run()方法中
最后
自我介绍一下,小编13年上海交大毕业,曾经在小公司待过,也去过华为、OPPO等大厂,18年进入阿里一直到现在。
深知大多数初中级Android工程师,想要提升技能,往往是自己摸索成长,自己不成体系的自学效果低效漫长且无助。
因此我收集整理了一份《2024年Android移动开发全套学习资料》,初衷也很简单,就是希望能够帮助到想自学提升又不知道该从何学起的朋友,同时减轻大家的负担。
[外链图片转存中…(img-4Jb105YP-1715619459453)]
[外链图片转存中…(img-7jDh82RC-1715619459455)]
[外链图片转存中…(img-KLajSIs1-1715619459456)]
[外链图片转存中…(img-H8Fy03IS-1715619459456)]
既有适合小白学习的零基础资料,也有适合3年以上经验的小伙伴深入学习提升的进阶课程,基本涵盖了95%以上Android开发知识点!不论你是刚入门Android开发的新手,还是希望在技术上不断提升的资深开发者,这些资料都将为你打开新的学习之门
如果你觉得这些内容对你有帮助,需要这份全套学习资料的朋友可以戳我获取!!
由于文件比较大,这里只是将部分目录截图出来,每个节点里面都包含大厂面经、学习笔记、源码讲义、实战项目、讲解视频,并且会持续更新!


 438
438


 被折叠的 条评论
为什么被折叠?
被折叠的 条评论
为什么被折叠?
 到【灌水乐园】发言


