


<TextView
android:layout_width=“wrap_content”
android:layout_height=“wrap_content”
android:layout_centerVertical=“true”
android:text=“过滤设备名为空的设备”
android:textColor=“@color/black” />
<androidx.appcompat.widget.SwitchCompat
android:id=“@+id/switch_device_name”
android:layout_width=“wrap_content”
android:layout_height=“wrap_content”
android:layout_alignParentEnd=“true”
android:theme=“@style/SwitchStyle”
tools:ignore=“UseSwitchCompatOrMaterialXml” />
<View
android:layout_width=“match_parent”
android:layout_height=“0.5dp”
android:background=“@color/line” />
<LinearLayout
android:layout_width=“match_parent”
android:layout_height=“60dp”
android:gravity=“center_vertical”
android:orientation=“horizontal”
android:padding=“16dp”>
<TextView
android:layout_width=“wrap_content”
android:layout_height=“wrap_content”
android:text=“RSSI:”
android:textColor=“@color/black” />
<androidx.appcompat.widget.AppCompatSeekBar
android:id=“@+id/sb_rssi”
android:layout_width=“0dp”
android:layout_height=“wrap_content”
android:layout_marginStart=“12dp”
android:layout_marginEnd=“12dp”
android:layout_weight=“1”
android:max=“100”
android:min=“40”
android:progress=“100”
android:theme=“@style/SeekBarStyle” />
<TextView
android:id=“@+id/tv_rssi”
android:layout_width=“wrap_content”
android:layout_height=“wrap_content”
android:text=“-100 dBm”
android:textColor=“@color/black” />
<View
android:layout_width=“match_parent”
android:layout_height=“0.5dp”
android:background=“@color/line” />
<TextView
android:id=“@+id/tv_close”
android:layout_width=“match_parent”
android:layout_height=“60dp”
android:foreground=“?attr/selectableItemBackground”
android:gravity=“center”
android:text=“关闭”
android:textColor=“@color/black” />
在styles.xml中增加如下样式:
布局有了,下面进入MainActivity中写代码。增加一个方法:
/**
- 显示扫描过滤弹窗
*/
@SuppressLint(“InflateParams”)
private fun showScanFilterDialog() = BottomSheetDialog(this, R.style.BottomSheetDialogStyle).apply {
setContentView(DialogScanFilterBinding.bind(View.inflate(context, R.layout.dialog_scan_filter, null)).apply {
switchDeviceName.setOnCheckedChangeListener { buttonView, isChecked -> }
sbRssi.setOnSeekBarChangeListener(object : OnSeekBarChangeListener {
override fun onProgressChanged(seekBar: SeekBar, progress: Int, fromUser: Boolean) {}
override fun onStartTrackingTouch(seekBar: SeekBar) {}
override fun onStopTrackingTouch(seekBar: SeekBar) {}
})
tvClose.setOnClickListener { dismiss() }
}.root)
window?.findViewById(R.id.design_bottom_sheet)?.setBackgroundColor(Color.TRANSPARENT)
}.show()
这里面有一个开关一个滑动条,开关用于确定过滤设备名称为null的设备。首先来看这个开关,这里应该要保存开关的状态,每次每一次设置也是比较麻烦的,因此可以用一个本地缓存记录下来,通过也可以记录滑动条的位置,保存信号值强度。
④ 过滤设置缓存
写缓存会用到什么?上下文参数,那么就可以弄一个全局的上下文,怎么弄?自定义Application,在com.llw.blekotlin包下新建一个BleApplication类,代码如下:
open class BleApplication : Application() {
companion object {
@SuppressLint(“StaticFieldLeak”)
lateinit var context: Context
}
override fun onCreate() {
super.onCreate()
context = applicationContext
}
}
很简单的代码,目前来说只有一个上下文,然后我们在AndroidManifest.xml中的application标签中去配置一下。

然后在utils包下新增一个扩展类,用于根据不同的数据类型进行缓存处理。实际上就是一个Kotlin文件,代码如下:
const val NAME = “config”
@SuppressLint(“StaticFieldLeak”)
val context = BleApplication.context
val sp: SharedPreferences = context.getSharedPreferences(NAME, Context.MODE_PRIVATE)
fun Boolean.putBoolean(key: String) = sp.edit().putBoolean(key, this).apply()
fun getBoolean(key: String, result: Boolean = false): Boolean = sp.getBoolean(key, result)
fun String?.putString(key: String) = sp.edit().putString(key, this).apply()
fun getString(key: String, result: String? = null): String? = sp.getString(key, result)
fun Int.putInt(key: String) = sp.edit().putInt(key, this).apply()
fun getInt(key: String, result: Int = 0): Int = sp.getInt(key, result)
fun Long.putLong(key: String) = sp.edit().putLong(key, this).apply()
fun getLong(key: String, result: Long = 0): Long = sp.getLong(key, result)
然后我将包名整理一下:目前的项目目录如下图所示:

应该很清晰吧,下面进行操作,首先是保存记录,因此我需要弄两个常量,就在BleConstant中增加好了。增加如下代码:
/**
- 是否过滤设备名称为Null的设备
*/
const val NULL_NAME = “nullName”
/**
- 过滤信号强度值
*/
const val RSSI = “rssi”
下面回到MainActivity中,首先是对变量的控制,缓存数据也就两种操作方式,存和取。作为一个开关值那么就是true和false。当没有这个缓存的时候默认为false。当然也可以是true,根据实际需求来。那么这个缓存值的设置就在弹窗中的swich的操作时改变。代码如下:

上图中有两处地方用到了这个常量值NULL_NAME,一个是存一个是取,这里还只是针对于弹窗中的设置和显示效果的不同,还没有对实际的扫描结果进行处理的,这个代码应该是很好理解的。下面是RSSI的值的存取。代码如下图所示:

这里当拖动Seekbar时,改变TextView显示的内容,当拖动结束时保存进度值到缓存中,然后处理弹窗这个窗时的页面显示状态,我这里通过getInt(RSSI,100)去获取本地的缓存,如果没有就设置为100,在扩展函数中我设置的缺省值是0,你也可以设置为100,则使用的地方就不需要增加这个默认参数了。例如我上次滑动到50,然后我关闭了弹窗,当我再次打开弹窗时应该也是要显示50的,那么对于本地缓存ui的控制效果演示图如下图所示:

下面就可以对扫描到的设备进行操作了,因为扫描过滤的设置已经没有问题了,开发时要注意的细节很多。
⑤ 扫描设备过滤
开发是循序渐进的,逻辑很重要,先想清楚逻辑再进行编码这会让你事倍功半。下面就是对扫描的结果进行处理,针对于一些结果可以不用添加到设备列表中,因此就不会显示了。这里需要两个临时变量去控制。在MainActivity中增加如下代码:
//当前扫描设备是否过滤设备名称为Null的设备
private var isScanNullNameDevice = false
//当前扫描设备是否过滤设备信号值强度低于目标值的设备
private var rssi = -100
然后对扫描到的设备进行处理

然后是addDeviceList中的代码修改。

这里的代码就是对修改了扫描过滤中数据的处理,然后就是过滤设备列表,这里是一个方法,代码如下:
/**
- 过滤设备列表
*/
private fun filterDeviceList() {
if (mList.size > 0) {
val mIterator = mList.iterator()
while (mIterator.hasNext()) {
val next = mIterator.next()
if ((getBoolean(NULL_NAME) && next.device.name == null) || next.rssi < rssi) {
addressList.remove(next.device.address)
mIterator.remove()
}
}
bleAdapter.notifyDataSetChanged()
}
}
通过迭代的方式对符合清除条件的设备进行移除,同时也要移除地址列表中的地址。
下面运行一下:

这个功能的出发点就在于,当需要操作不同的低功耗蓝牙设备时,对应的设备需要使用对应的服务UUID和特性UUID,因此需要自定义这个服务与特性,做成可以动态设置的,这里依然采用弹窗来设置服务与特性。
① 弹窗设置
首先在layout下新增一个dialog_uuid_edit.xml,布局代码如下:
<?xml version="1.0" encoding="utf-8"?><LinearLayout xmlns:android=“http://schemas.android.com/apk/res/android”
android:orientation=“vertical”
android:layout_width=“match_parent”
android:background=“@drawable/shape_white_top_radius_24”
android:layout_height=“wrap_content”>
<RelativeLayout
android:layout_width=“match_parent”
android:layout_height=“wrap_content”>
<TextView
android:layout_width=“match_parent”
android:layout_height=“60dp”
android:gravity=“center”
android:text=“UUID设置”
android:textColor=“@color/black”
android:textSize=“16sp” />
<TextView
android:id=“@+id/tv_save”
android:padding=“12dp”
android:layout_width=“wrap_content”
android:layout_height=“wrap_content”
android:layout_alignParentEnd=“true”
android:layout_centerVertical=“true”
android:layout_marginEnd=“8dp”
android:text=“保存”
android:textColor=“@color/green”
android:textSize=“16sp” />
<View
android:layout_width=“match_parent”
android:layout_height=“0.5dp”
android:background=“@color/line” />
<com.google.android.material.textfield.TextInputLayout
android:layout_width=“match_parent”
android:layout_height=“50dp”>
<com.google.android.material.textfield.TextInputEditText
android:id=“@+id/et_service_uuid”
android:background=“@color/white”
android:layout_width=“match_parent”
android:layout_height=“match_parent”
android:hint=“SERVICE UUID”
android:inputType=“text|textCapCharacters”
android:textColor=“@color/black”
android:textSize=“12sp” />
</com.google.android.material.textfield.TextInputLayout>
<com.google.android.material.textfield.TextInputLayout
android:layout_width=“match_parent”
android:layout_height=“50dp”>
<com.google.android.material.textfield.TextInputEditText
android:id=“@+id/et_descriptor_uuid”
android:background=“@color/white”
android:layout_width=“match_parent”
android:layout_height=“match_parent”
android:hint=“DESCRIPTOR UUID”
android:inputType=“text|textCapCharacters”
android:textColor=“@color/black”
android:textSize=“12sp” />
</com.google.android.material.textfield.TextInputLayout>
<com.google.android.material.textfield.TextInputLayout
android:layout_width=“match_parent”
android:layout_height=“50dp”>
<com.google.android.material.textfield.TextInputEditText
android:id=“@+id/et_characteristic_write_uuid”
android:background=“@color/white”
android:layout_width=“match_parent”
android:layout_height=“match_parent”
android:hint=“CHARACTERISTIC WRITE UUID”
android:inputType=“text|textCapCharacters”
android:textColor=“@color/black”
android:textSize=“12sp” />
</com.google.android.material.textfield.TextInputLayout>
<com.google.android.material.textfield.TextInputLayout
android:layout_width=“match_parent”
android:layout_height=“50dp”>
<com.google.android.material.textfield.TextInputEditText
android:id=“@+id/et_characteristic_indicate_uuid”
android:background=“@color/white”
android:layout_width=“match_parent”
android:layout_height=“match_parent”
android:hint=“CHARACTERISTIC INDICATE UUID”
android:inputType=“text|textCapCharacters”
android:textColor=“@color/black”
android:textSize=“12sp” />
</com.google.android.material.textfield.TextInputLayout>
<View
android:layout_width=“match_parent”
android:layout_height=“0.5dp”
android:background=“@color/line” />
<TextView
android:id=“@+id/tv_close”
android:layout_width=“match_parent”
android:layout_height=“60dp”
android:foreground=“?attr/selectableItemBackground”
android:gravity=“center”
android:text=“关闭”
android:textColor=“@color/black” />
② 显示弹窗
编辑弹窗代码:
/**
- uuid编辑弹窗
*/
private fun showUuidEditDialog() = BottomSheetDialog(this,R.style.BottomSheetDialogStyle).apply {
setContentView(DialogUuidEditBinding.bind(View.inflate(context, R.layout.dialog_uuid_edit,null)).apply {
tvSave.setOnClickListener {
etServiceUuid.text.toString().apply { if (isNotEmpty()) putString(BleConstant.SERVICE_UUID) }
etDescriptorUuid.text.toString().apply { if (isNotEmpty()) putString(BleConstant.DESCRIPTOR_UUID) }
etCharacteristicWriteUuid.text.toString().apply { if (isNotEmpty()) putString(BleConstant.CHARACTERISTIC_WRITE_UUID) }
etCharacteristicIndicateUuid.text.toString().apply { if (isNotEmpty()) putString(BleConstant.CHARACTERISTIC_INDICATE_UUID) }
dismiss()
}
tvClose.setOnClickListener { dismiss() }
//显示之前设置过的uuid
etServiceUuid.setText(getString(BleConstant.SERVICE_UUID))
etDescriptorUuid.setText(getString(BleConstant.DESCRIPTOR_UUID))
etCharacteristicWriteUuid.setText(getString(BleConstant.CHARACTERISTIC_WRITE_UUID))
etCharacteristicIndicateUuid.setText(getString(BleConstant.CHARACTERISTIC_INDICATE_UUID))
}.root)
window?.findViewById(R.id.design_bottom_sheet)?.setBackgroundColor(Color.TRANSPARENT)
}.show()
③ 添加菜单
这里我会改变之前的菜单,因为考虑到扫描过滤可能是一个常用的菜单,最好的方式就是页面直接可见,而不是先点了菜单键再去找这个扫描过滤菜单。这里会用到一个扫描图标ic_scan_filter.png,可以去我的源码中去找。修改main_menu.xml代码如下所示:
<?xml version="1.0" encoding="utf-8"?>xmlns:app=“http://schemas.android.com/apk/res-auto”
xmlns:tools=“http://schemas.android.com/tools”>
<item
android:id=“@+id/item_scan_filter”
android:title=“扫描过滤”
app:showAsAction=“ifRoom”
android:icon=“@mipmap/ic_scan_filter”
tools:ignore=“HardcodedText” />
<item
android:id=“@+id/item_service_characteristics”
android:title=“服务特性”
app:showAsAction=“never”
tools:ignore=“HardcodedText” />
预览图效果如下,可以看到扫描过滤直接显示一个图标按钮,点击之后就可以显示扫描过滤弹窗了。

下面回到MainActivity中,修改代码如下:

运行效果图如下:

下面修改BleConstant中的常量。

因为现在是动态的设置服务与特性了,就不能再向之前直接写在常量里面了。
自我介绍一下,小编13年上海交大毕业,曾经在小公司待过,也去过华为、OPPO等大厂,18年进入阿里一直到现在。
深知大多数初中级Android工程师,想要提升技能,往往是自己摸索成长或者是报班学习,但对于培训机构动则近万的学费,着实压力不小。自己不成体系的自学效果低效又漫长,而且极易碰到天花板技术停滞不前!
因此收集整理了一份《2024年Android移动开发全套学习资料》,初衷也很简单,就是希望能够帮助到想自学提升又不知道该从何学起的朋友,同时减轻大家的负担。
既有适合小白学习的零基础资料,也有适合3年以上经验的小伙伴深入学习提升的进阶课程,基本涵盖了95%以上Android开发知识点,真正体系化!
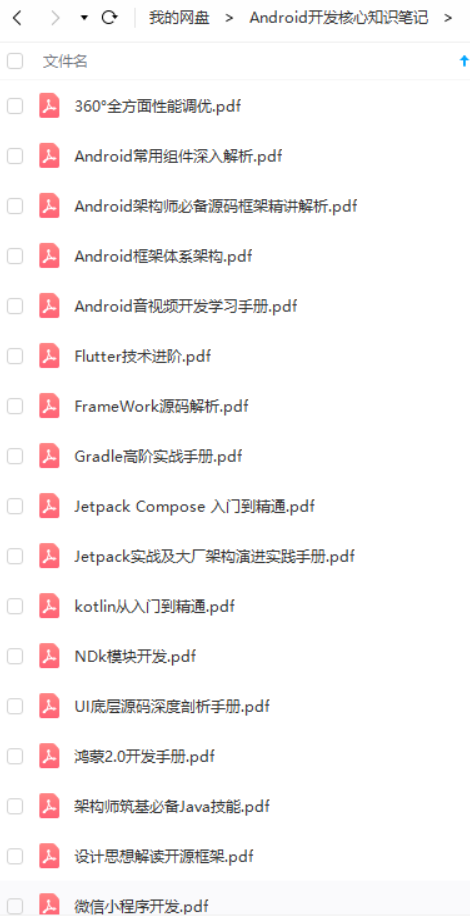
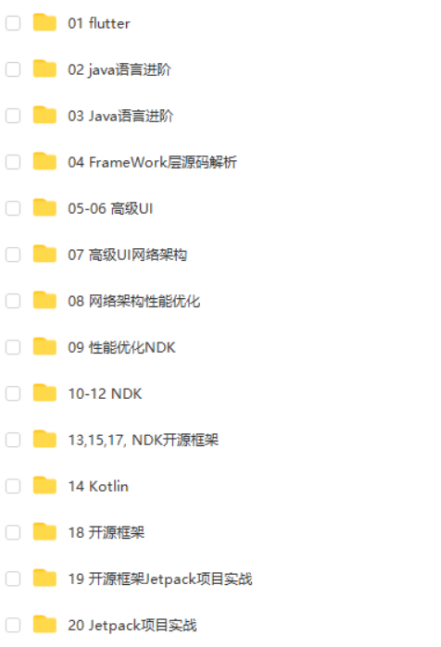
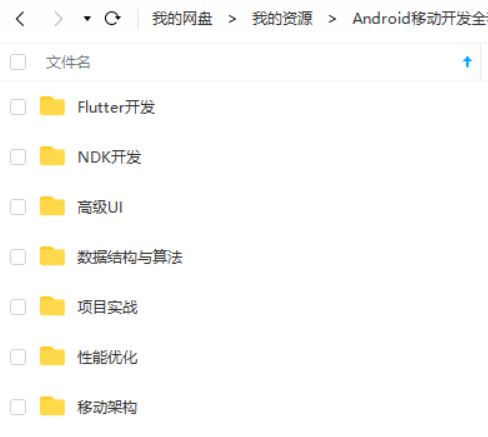
由于文件比较大,这里只是将部分目录截图出来,每个节点里面都包含大厂面经、学习笔记、源码讲义、实战项目、讲解视频,并且会持续更新!
如果你觉得这些内容对你有帮助,可以扫码获取!!(备注:Android)

要如何成为Android架构师?
搭建自己的知识框架,全面提升自己的技术体系,并且往底层源码方向深入钻研。
大多数技术人喜欢用思维脑图来构建自己的知识体系,一目了然。这里给大家分享一份大厂主流的Android架构师技术体系,可以用来搭建自己的知识框架,或者查漏补缺;

对应这份技术大纲,我也整理了一套Android高级架构师完整系列的视频教程,主要针对3-5年Android开发经验以上,需要往高级架构师层次学习提升的同学,希望能帮你突破瓶颈,跳槽进大厂;
最后我必须强调几点:
1.搭建知识框架可不是说你整理好要学习的知识顺序,然后看一遍理解了能复制粘贴就够了,大多都是需要你自己读懂源码和原理,能自己手写出来的。
2.学习的时候你一定要多看多练几遍,把知识才吃透,还要记笔记,这些很重要! 最后你达到什么水平取决你消化了多少知识
3.最终你的知识框架应该是一个完善的,兼顾广度和深度的技术体系。然后经过多次项目实战积累经验,你才能达到高级架构师的层次。
你只需要按照在这个大的框架去填充自己,年薪40W一定不是终点,技术无止境
《互联网大厂面试真题解析、进阶开发核心学习笔记、全套讲解视频、实战项目源码讲义》点击传送门即可获取!
年以上经验的小伙伴深入学习提升的进阶课程,基本涵盖了95%以上Android开发知识点,真正体系化!**
由于文件比较大,这里只是将部分目录截图出来,每个节点里面都包含大厂面经、学习笔记、源码讲义、实战项目、讲解视频,并且会持续更新!
如果你觉得这些内容对你有帮助,可以扫码获取!!(备注:Android)
要如何成为Android架构师?
搭建自己的知识框架,全面提升自己的技术体系,并且往底层源码方向深入钻研。
大多数技术人喜欢用思维脑图来构建自己的知识体系,一目了然。这里给大家分享一份大厂主流的Android架构师技术体系,可以用来搭建自己的知识框架,或者查漏补缺;
[外链图片转存中…(img-oScFkQ5W-1713097853289)]
对应这份技术大纲,我也整理了一套Android高级架构师完整系列的视频教程,主要针对3-5年Android开发经验以上,需要往高级架构师层次学习提升的同学,希望能帮你突破瓶颈,跳槽进大厂;
最后我必须强调几点:
1.搭建知识框架可不是说你整理好要学习的知识顺序,然后看一遍理解了能复制粘贴就够了,大多都是需要你自己读懂源码和原理,能自己手写出来的。
2.学习的时候你一定要多看多练几遍,把知识才吃透,还要记笔记,这些很重要! 最后你达到什么水平取决你消化了多少知识
3.最终你的知识框架应该是一个完善的,兼顾广度和深度的技术体系。然后经过多次项目实战积累经验,你才能达到高级架构师的层次。
你只需要按照在这个大的框架去填充自己,年薪40W一定不是终点,技术无止境
《互联网大厂面试真题解析、进阶开发核心学习笔记、全套讲解视频、实战项目源码讲义》点击传送门即可获取!


 2517
2517


 被折叠的 条评论
为什么被折叠?
被折叠的 条评论
为什么被折叠?
 到【灌水乐园】发言


