


网上学习资料一大堆,但如果学到的知识不成体系,遇到问题时只是浅尝辄止,不再深入研究,那么很难做到真正的技术提升。
一个人可以走的很快,但一群人才能走的更远!不论你是正从事IT行业的老鸟或是对IT行业感兴趣的新人,都欢迎加入我们的的圈子(技术交流、学习资源、职场吐槽、大厂内推、面试辅导),让我们一起学习成长!
4.4.1 添加实体类
先添加用户的实体类:
import lombok.Data;
import java.util.Date;
@Data
public class User {
 private Integer id;
 private String username;
 private String password;
 private String photo;
 private Date createTime;
 private Date updateTime;
}
4.4.2 添加Mapper接口
数据持久层的接口定义:
@Mapper
public interface UserMapper {
    public UserInfo getUserById(@Param("id") Integer id);

    public void add(@RequestBody UserInfo userInfo);
}
4.4.3 添加UserMapper.xml
数据持久层的实现,MyBatis的固定格式:
<?xml version="1.0" encoding="UTF-8"?>
<!DOCTYPE mapper PUBLIC "-//mybatis.org//DTD Mapper 3.0//EN" "http://mybatis.org/dtd/mybatis-3-mapper.dtd">
<mapper namespace="com.example.demo.mapper.UserMapper">
    <select id="getUserById" resultType="com.example.demo.model.UserInfo">
        select * from userinfo where id = #{id}
    </select>
</mapper>
- 标签:需要指定namespace属性,表示命名空间,值为mapper接口的全限定名,包括包名.类名
<select>标签:是用来执行数据库的查询操作的- id:是和interface中定义的方法名称是一样的,表示对接口的具体实现方法
- resultType:是返回的数据类型,也就是开头定义的实体类
4.4.4 添加Service
服务层代码如下:
@Service
public class UserService {
    @Resource
    private UserMapper userMapper;

    public UserInfo getUserById(Integer id) {
        return userMapper.getUserById(id);
    }
}
4.4.5 添加Controller
控制层的代码实现如下:
@Controller
@ResponseBody
public class UserController {
    @Resource
    private UserService userService;

    @RequestMapping("/getuserbyid")
    public UserInfo getUserById(Integer id) {
        return userService.getUserById(id);
    }
}
5. 增、删、改操作
5.1 增加用户的操作
<insert id="add">
    insert into userinfo(username, password, photo) values (#{username}, #{password}, #{photo})
</insert>
<insert id="getId" useGeneratedKeys="true" keyProperty="id" keyColumn="id">
    insert into userinfo(username, password, photo) values (#{username}, #{password}, #{photo})
</insert>
- useGeneratedKeys: 这会令MyBatis使用JDBC的getGeneratedKeys 方法取出由数据库内部生成的主键。(像MySQL和SQL service这样的关系型数据库关系系统自增主键)默认值是:false
- keyColumn: 设置生成建在表中的列名,在某些数据库当中,当主键的列不是第一列的时候,是必须设置的。如果生成列不止一个,可以用逗号分割各个属性名称
- keyProperty:指定能够唯一
5.2 删除用户的操作
<delete id="del">
    delete from userinfo where id = #{id}
</delete>
5.3 修改用户操作
<update id="update">
    update userinfo set username = #{name} where id = #{id}
</update>
6. 查询操作
6.1 单表查询
controller代码如下:
@RequestMapping("/getuserbyid")
public UserInfo getUserById(Integer id) {
    return userService.getUserById(id);
}
Mapper.xml实现代码如下:
<select id="getUserById" resultType="com.example.demo.model.UserInfo">
    select * from userinfo where id = #{id}
</select>
6.1.1 参数占位符 #{} 和 ${}
- #{} :预编译处理
- ${}:字符直接替换
预编译处理是指:MyBatis在处理#{}时,会将SQL中的#{}替换为?,使用statement的set方法来赋值。直接替换:是MyBatis在处理
时,就是把
{}时,就是把
时,就是把{}替换成变量的值
6.1.2 $优点
使用${}可以实现排序查询,而是用#{}就不能实现排序查询,因为当使用#{}查询时,如果传递的值为String则会加引号,就会导致SQL错误。
6.1.3 SQL 注入问题
<select id="isLogin" resultType="com.example.demo.model.User">
	select * from userinfo where username='${name}' and password='${pwd}'
</select>
结论:用于查询的字段,尽量使用#{}预查询的方式
6.1.4 like查询
like使用#{}报错,这个时候不能使用${},可以考虑使用MySQL内置的函数concat()来处理,实现代码如下:
<select id="findUserByName3" resultType="com.example.demo.model.User">
    select * from userinfo where username like concat('%',#{username},'%');
</select>
concat可以连接字符。
6.2 多表查询
如果增、删、改返回影响的行数,那么在mapper.xml中可以不设置返回的类型的。但是即使是最简单的查询,也要设置返回类型否则就会出现错误。
也就是说**对于<select>查询标签,至少存在两个属性:
- id 属性:用于标识实现接口的那个方法
- 结果映射属性:结果映射有两种实现标签:
<resultType和<resultMap
6.2.1 返回类型
绝大多数查询场景可以使用resultType进行返回,如下代码所示:
<select id="getNameById" resultType="java.lang.String">
    select username from userinfo where id=#{id}
</select>
它的优点就是使用方便、直接定义到某个实体类就可以
6.2.2 返回字典映射:resultMap
resultMap使用场景:
- 字段名称和程序中的属性名称不相同的情况,可以使用resultMap配置映射
- 一对一和多对一关系可以使用resultMap映射并查询数据
字段名和属性名不同的情况
<resultMap id="BaseMap" type="com.example.demo.model.User">
    <id column="id" property="id"></id>
    <result column="username" property="username"></result>
    <result column="password" property="pwd"></result>
</resultMap>
<select id="getUserById" resultMap="com.example.demo.mapper.UserMapper.BaseMap">
    select * from userinfo where id=#{id}
</select>
6.2.3 多表查询
在多表查询的时候,如果使用resultMap标签,在一个类中包含了另一个对象是查询不出来包含的对象的。如下图所示:

此时我们就需要使用特殊手段来实现联表查询了。
6.2.3.1 一对一的映射
一对一映射要使用<association>标签,具体实现如下所示:一篇文章只能对应一个作者
<resultMap id="BaseMap" type="com.example.demo.model.ArticleInfo">
    <id column="id" property="id"></id>
    <result column="title" property="title"></result>
    <result column="content" property="content"></result>
    <result column="createtime" property="createtime"></result>
    <result column="updatetime" property="updatetime"></result>
    <result column="uid" property="uid"></result>
    <result column="rcount" property="rcount"></result>
    <result column="state" property="state"></result>
    <association property="userInfo" resultMap="com.example.demo.mapper.UserMapper.BaseMap" columnPrefix="u\_">				</association>
</resultMap>

<select id="getArticleById" resultMap="BaseMap">
    select a.*, u.id u_id, u.username u_username, u.password u_password from articleinfo a left join userinfo u on a.uid = u.id where a.id = #{id}
</select>
以上使用<assciation>标签,表示一对一的结果映射:
- property属性:指定Article中对应的属性,即用户
- resultMap属性:指定关联的结果集映射,将基于该映射配置来组织用户数据
- columnPrefix属性:绑定一对一对象时,是通过columnPrefix+assoction.result.colmn来映射结果集字段
注意:columnPrefix属性不能省略,如果省略当联表中有相同的字段,那么会导致查询出错
6.2.3.2 一对多的映射
一对多需要使用<collection>标签,用法和<association>相同,如下所示:
<resultMap id="BaseMap" type="com.example.demo.model.ArticleInfo">
    <id column="id" property="id"></id>
    <result column="title" property="title"></result>
    <result column="content" property="content"></result>
    <result column="createtime" property="createtime"></result>
    <result column="updatetime" property="updatetime"></result>
    <result column="uid" property="uid"></result>
    <result column="rcount" property="rcount"></result>
    <result column="state" property="state"></result>
    <association property="userInfo" resultMap="com.example.demo.mapper.UserMapper.BaseMap" columnPrefix="u\_">		    </association>
</resultMap>

<select id="getArticleById" resultMap="BaseMap">
    select a.*, u.id u_id, u.username u_username, u.password u_password from articleinfo a left join userinfo u on a.uid = u.id where a.id = #{id}
</select>
7. 复杂情况
动态SQL是MyBatis的强大特性之一,能够完成不同条件下不同的sql拼接
7.1 <if>标签
在注册的时候,我们可能遇到这样一个问题。注册分为两个字段:必填字段和非必传字段,那如果在添加用户的时候又不确定的字段传入,程序应该如何实现?
这个时候我们就需要使用动态标签了。
<insert id="add2">
    insert into userinfo(username, password
    <if test="photo != null">
        ,photo
    </if>) values (#{username}, #{password}
    <if test="photo != null">
        ,#{photo}
    </if>
    );
</insert>
注意test中的,是传入对象的属性,不是数据库字段
7.2 <trim>标签
之前的插入功能,只是有一个字段为可选项,如果所有字段都是非必选项,就需要考虑用标签结合标签,对多个字段都采用动态生成的方式。
标签当中有如下属性:
- prefix: 表示整个语句块,以prefix值为前缀
- suffix:表示整个语句块,以suffix的值为后缀
- prefixOverrides:表示整个语句块要去除的前缀
- suffixOverrides:表示整个语句块要去除的后缀
使用方法如下:
<insert id="add3">
    insert into userinfo
    <trim prefix="(" suffix=")" suffixOverrides=",">
        <if test="username != null">
            username,
        </if>
        <if test="password != null">
            password,
        </if>
        <if test="photo != null">
            photo
        </if>
        values
        <trim prefix="(" suffix=")" suffixOverrides=",">
            <if test="username != null">
                #{username},
            </if>
            <if test="password != null">
                #{password},
            </if>
            <if test="photo != null">
                #{photo}
            </if>
        </trim>
    </trim>
</insert>
以上SQL动态解析时,会将第一个trim部分如下处理:
- 基于
prefix配置,开始加上( - 基于
suffix配置,结束部分加上) - 多个if组织的语句都以, 结尾,在最后拼接好的字符串还会以,结尾会基于
suffixOverrides配置去掉最后一个, - if 中的test是传入对象的属性
7.3 <where>标签
传入对象时,根据属性做where条件查询,用户对象中属性不为null,都为查询条件。
<select id="getUserById" resultMap="BaseMap">
select * from userinfo
<where>
<if test="id != null">
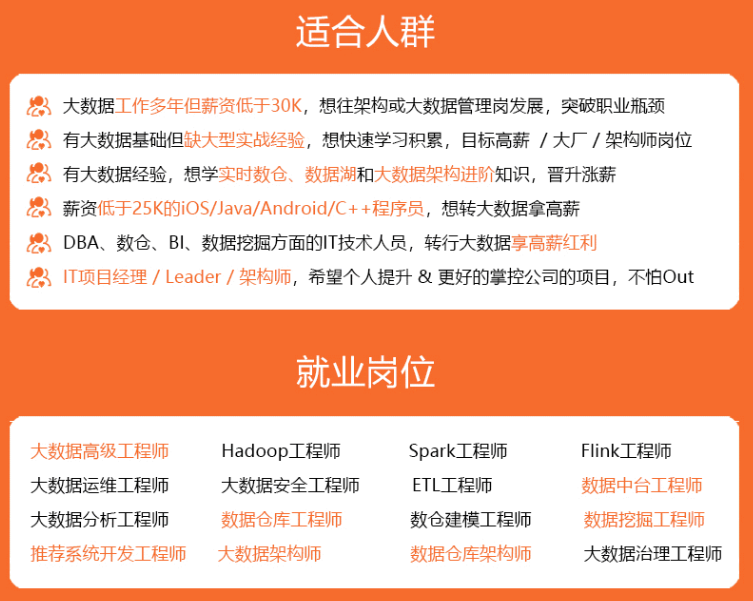

**既有适合小白学习的零基础资料,也有适合3年以上经验的小伙伴深入学习提升的进阶课程,涵盖了95%以上大数据知识点,真正体系化!**
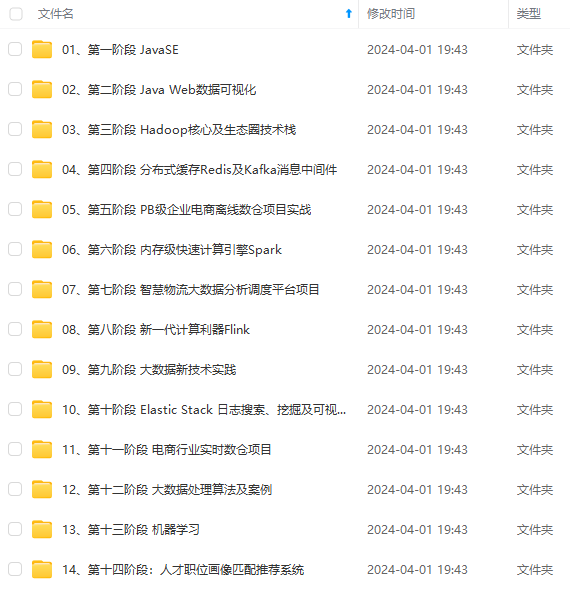
**由于文件比较多,这里只是将部分目录截图出来,全套包含大厂面经、学习笔记、源码讲义、实战项目、大纲路线、讲解视频,并且后续会持续更新**
**[需要这份系统化资料的朋友,可以戳这里获取](https://bbs.csdn.net/topics/618545628)**
询,用户对象中属性不为null,都为查询条件。
[外链图片转存中…(img-YLAyh8vC-1715578661908)]
[外链图片转存中…(img-zyHb7urU-1715578661909)]
[外链图片转存中…(img-sUcHF6k9-1715578661909)]
既有适合小白学习的零基础资料,也有适合3年以上经验的小伙伴深入学习提升的进阶课程,涵盖了95%以上大数据知识点,真正体系化!
由于文件比较多,这里只是将部分目录截图出来,全套包含大厂面经、学习笔记、源码讲义、实战项目、大纲路线、讲解视频,并且后续会持续更新


 680
680

 被折叠的 条评论
为什么被折叠?
被折叠的 条评论
为什么被折叠?
 到【灌水乐园】发言


