


bootstrap.mlockall: true
Make sure that the ES_HEAP_SIZE environment variable is set to about half the memory
available on the system and that the owner of the process is allowed to use this limit.
Elasticsearch performs poorly when the system is swapping the memory.
---------------------------------- Network -----------------------------------
Set the bind adress to a specific IP (IPv4 or IPv6):
network.host: 10.10.2.62
Set a custom port for HTTP:
http.port: 9200
For more information, see the documentation at:
http://www.elastic.co/guide/en/elasticsearch/reference/current/modules-network.html
---------------------------------- Gateway -----------------------------------
Block initial recovery after a full cluster restart until N nodes are started:
gateway.recover_after_nodes: 3
For more information, see the documentation at:
http://www.elastic.co/guide/en/elasticsearch/reference/current/modules-gateway.html
--------------------------------- Discovery ----------------------------------
Elasticsearch nodes will find each other via unicast, by default.
Pass an initial list of hosts to perform discovery when new node is started:
The default list of hosts is [“127.0.0.1”, “[::1]”]
discovery.zen.ping.unicast.hosts: [“es-01”, “es-02”]
Prevent the “split brain” by configuring the majority of nodes (total number of nodes / 2 + 1):
discovery.zen.minimum_master_nodes: 3
For more information, see the documentation at:
http://www.elastic.co/guide/en/elasticsearch/reference/current/modules-discovery.html
---------------------------------- Various -----------------------------------
Disable starting multiple nodes on a single system:
node.max_local_storage_nodes: 1
Require explicit names when deleting indices:
action.destructive_requires_name: true
其它节点的配置,在保证基本存储目录相同的前提下,可以根据需要修改如下几个参数:
node.name
network.host
http.port
最后,在每个节点上分别启动ElasticSearch,执行如下命令:
cd elasticsearch-2.0.0
bin/elasticsearch -d
然后可以查看Web管理界面,需要安装插件elasticsearch-head,后面会介绍,Web管理界面,如下所示:
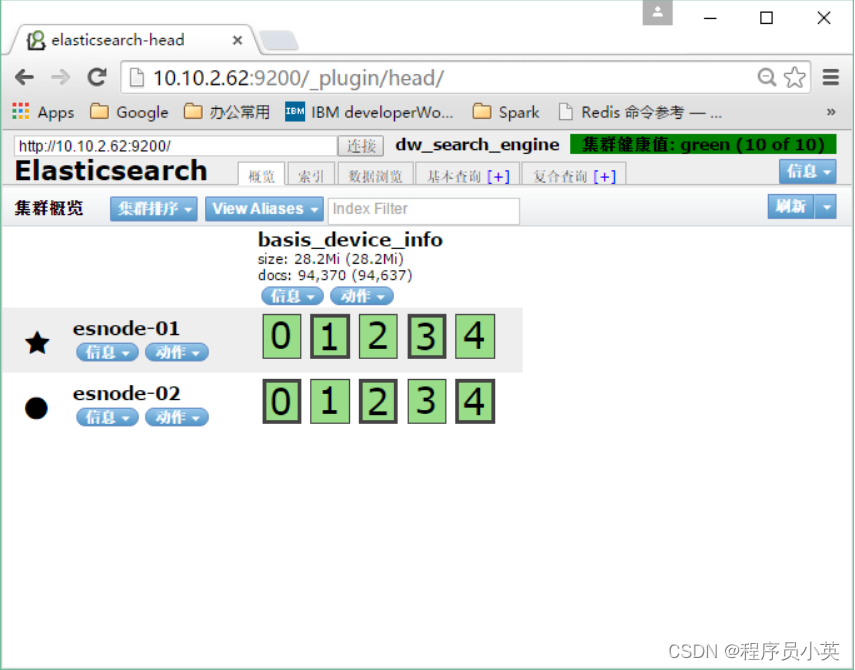
上图中,我们已经创建了一个索引,可以看到节点的状态,及其分片(Shard)的情况。
**RESTful API基本操作**
尤其是在进行搜索的时候,为了使得其他系统能够与ElasticSearch搜索系统很好地解耦合,使用ElasticSearch提供的RESTful API是一种不错的选择。下面,我们介绍RESTful API的基本操作。
* 插件管理
插件的存放目录为
elasticsearch-2.0.0/plugins/,插件都是基于该存储目录进行操作的。安装插件:
bin/plugin install analysis-icu
bin/plugin install mobz/elasticsearch-head
可以从不同的位置安装插件,上面第一个称为Core Elasticsearch plugin,它是Elasticsearch提供的,会从Elasticsearch上下载并安装;上面第一个是从Github上自动下载安装。还有其他的方式安装,如从特定的文件系统等进行安装。列出插件:
bin/plugin list
删除插件:
bin/plugin remove analysis-icu
安装完一个插件,我们可以查看,例如查看elasticsearch\_head插件,查看如下链接:
http://10.10.2.62:9200/_plugin/head/
* 创建索引
curl -XPUT ‘http://10.10.2.62:9200/basis_device_info/’
创建的索引名称为basis\_device\_info,我们也可以不指定一个索引对应的Mappings,而是在索引的时候自动生成Mappings,所以如果没有指定一个索引的Mappings,则这个索引可以支持任何的Mappings。同样可知,一个索引可以自动地增加不同的type,非常灵活。也可以指定索引的基本配置,如分片(Shard)数目、副本(Replica)数目,如下所示:
curl -XPUT ‘http://10.10.2.62:9200/basis_device_info /’ -d ‘{
“settings” : {
“index” : {
“number_of_shards” : 10,
“number_of_replicas” : 1
}
}
}’
默认是5个分片,不进行复制,上面配置表示索引basis\_device\_info有10个分片,每个分片1个副本。下面在创建索引的时候,指定设计的schema,即配置mappings,如下所示:
curl -XPUT ‘http://10.10.2.62:9200/basis_device_info/’ -d ’
{
“mappings”: {
“user”: {
“_all”: { “enabled”: false },
“properties”: {
“installid”: { “type”: “string” },
“appid”: { “type”: “string” },
“channel”: { “type”: “string”, “index”: “analyzed” },
“version”: { “type”: “string” },
“osversion”: { “type”: “string” },
“device_name”: { “type”: “string”, “index”: “analyzed” },
“producer”: { “type”: “string” },
“device_type”: { “type”: “string” },
“resolution”: { “type”: “string”, “index”: “analyzed” },
“screen_size”: { “type”: “string”, “index”: “analyzed” },
“mac”: { “type”: “string”, “index”: “not_analyzed” },
“idfa”: { “type”: “string” },
“idfv”: { “type”: “string”, “index”: “not_analyzed” },
“imei”: { “type”: “string”, “index”: “not_analyzed” },
“create_time”: {
“type”: “date”,
“format”: “yyyy-MM-dd HH:mm:ss”,
“index”: “not_analyzed”
}
}
}
}
}’
上面创建了索引basis\_device\_info,同时type为user,有了mappings,我们就知道需要索引的数据的格式了。


* 删除索引
curl -XDELETE ‘http://10.10.2.62:9200/basis_device_info/’
删除索引basis\_device\_info。


* 索引文档
curl -PUT ‘http://10.10.2.62:9200/basis_device_info/user/CC49E748588490D41BFB89584007B0FA’ -d ‘{
“installid”: “0000000L”,
“appid”: “0”,
“udid”: “CC49E748588490D41BFB89584007B0FA”,
“channel”: “wulei1”,
“version”: “3.1.2”,
“osversion”: “8.1”,
“device_name”: “iPhone Retina4 Simulator”,
“producer”: “apple”,
“device_type”: “1”,
“resolution”: “6401136",
“screen_size”: "320568”,
“mac”: “600308A20C5E”,
“idfa”: “dbbbs-fdsfa-fafda-321saf”,
“idfv”: “4283FAE1-19EB-4FA9-B739-8148F76BC8C3”,
“imei”: “af-sfd0fdsa-fad-ff”,
“create_time”: “2015-01-14 20:32:05”
}’
基于我们前面创建的type为user的索引,索引一个文档,文档\_id为
 CC49E748588490D41BFB89584007B0FA,文档内容为一个用户设备信息,使用JSON格式表示。


* 批量索引


批量索引,可以根据自己熟悉的编程语言或者脚本来实现,ElasticSearch也提供了一些客户端库。下面我们首先根据数据文件,构造成ElasticSearch索引支持的JSON格式,导出文件,然后通过curl工具去进行批量索引,实际上使用的是ElasticSearch提供的bulk API来实现的。首先处理原始带索引数据,代码如下所示:
package org.shirdrn.es;
import java.io.BufferedReader;
import java.io.BufferedWriter;
import java.io.Closeable;
import java.io.File;
import java.io.FileReader;
import java.io.FileWriter;
import net.sf.json.JSONObject;
import com.google.common.base.Throwables;
public class EsIndexingClient {
public static void closeQuietly(Closeable… closeables) {
if(closeables != null) {
for(Closeable closeable : closeables) {
try {
closeable.close();
} catch (Exception e) { }
}
}
}
public static void main(String[] args) {
String f = “C:\Users\yanjun\Desktop\basis_device_info.txt”;
String out = “C:\Users\yanjun\Desktop\basis_device_info.json”;
File in = new File(f);
BufferedReader reader = null;
BufferedWriter writer = null;
try {
writer = new BufferedWriter(new FileWriter(out));
reader = new BufferedReader(new FileReader(in.getAbsoluteFile()));
String line = null;
while((line = reader.readLine()) != null) {
String[] a = line.split(“\t”, -1);
if(a.length == 16) {
String udid = a[2];
JSONObject c = new JSONObject();
c.put(“_index”, “basis_device_info”);
c.put(“_type”, “user”);
c.put(“_id”, udid);
JSONObject index = new JSONObject();
index.put(“index”, c);
JSONObject doc = new JSONObject();
doc.put(“installid”, a[0]);
doc.put(“appid”, a[1]);
doc.put(“udid”, a[2]);
doc.put(“channel”, a[3]);
doc.put(“version”, a[4]);
doc.put(“osversion”, a[5]);
doc.put(“device_name”, a[6]);
doc.put(“producer”, a[7]);
doc.put(“device_type”, a[8]);
doc.put(“resolution”, a[9]);
doc.put(“screen_size”, a[10]);
doc.put(“mac”, a[11]);
doc.put(“idfa”, a[12]);
doc.put(“idfv”, a[13]);
doc.put(“imei”, a[14]);
doc.put(“create_time”, a[15]);
writer.write(index.toString() + “\n”);
writer.write(doc.toString() + “\n”);
}
}
} catch (Exception e) {
throw Throwables.propagate(e);
} finally {
closeQuietly(reader, writer);
}
}
}
运行代码,输出的数据文件为basis\_device\_info.json,该文件的格式了,示例如下所示:
{“index”:{“_index”:“basis_device_info”,“_type”:“user”,“_id”:“1c207122a4b2c9632212ab86bac10f60”}}
{“installid”:“00000002”,“appid”:“0”,“udid”:“1c207122a4b2c9632212ab86bac10f60”,“channel”:“itings”,“version”:“3.1.1”,“osversion”:“4.1.2”,“device_name”:“Lenovo P770”,“producer”:“Lenovo”,“device_type”:“0”,“resolution”:“540960",“screen_size”:“4.59”,“mac”:“d4:22:3f:83:17:06”,“idfa”:“”,“idfv”:“”,“imei”:“861166023335745”,“create_time”:“2015-01-14 19:39:35”}
{“index”:{“_index”:“basis_device_info”,“_type”:“user”,“_id”:“FA6B1B98E6FF4E6994A1505A996F6102”}}
{“installid”:“00000003”,“appid”:“0”,“udid”:“FA6B1B98E6FF4E6994A1505A996F6102”,“channel”:“appstore”,“version”:“3.1.1”,“osversion”:“8.1.2”,“device_name”:“iPhone 6Plus”,“producer”:“apple”,“device_type”:“1”,“resolution”:"6401136”,“screen_size”:“320568",“mac”:“020000000000”,“idfa”:“84018625-A3C9-47A8-88D0-C57C12F80520”,“idfv”:“9D1E2514-9DC8-47A8-ABD0-129FC0FB3171”,“imei”:“”,“create_time”:“2015-01-14 19:41:21”}
{“index”:{“_index”:“basis_device_info”,“_type”:“user”,“_id”:“8c5fe70b2408f184abcbe4f34b8f23c3”}}
{“installid”:“00000004”,“appid”:“0”,“udid”:“8c5fe70b2408f184abcbe4f34b8f23c3”,“channel”:“itings”,“version”:“3.1.1.014”,“osversion”:“4.2.2”,“device_name”:“2014011”,“producer”:“Xiaomi”,“device_type”:“0”,“resolution”:"7201280”,“screen_size”:“4.59”,“mac”:“0c:1d:af:4f:48:9f”,“idfa”:“”,“idfv”:“”,“imei”:“865763025472173”,“create_time”:“2015-01-14 19:46:37”}
奇数编号行的内容为索引的指令信息,包括索引名称(\_index)、类型(\_type)、唯一标识(\_id),偶数编号行的内容为实际待索引的文档数据。然后,通过curl命令来进行批量索引,执行如下命令:
curl -s -XPOST http://10.10.2.62:9200/basis_device_info/_bulk --data-binary “@basis_device_info.json”
* 搜索文档


简单的搜索,可以通过GET方式搜索,如下所示:
http://10.10.2.62:9200/basis_device_info/user/CC49E748588490D41BFB89584007B0FA
http://10.10.2.62:9200/basis_device_info/user/_search?q=channel:B-hicloud
上面第一个根据唯一的\_id进行搜索,结果返回0个或者1个文档;第二个通过指定GET方式参数,其中\_search和q是ElasticSearch内置的接口关键字,通过指定字段名称和搜索关键词的方式进行搜索,结果以JSON格式返回。
**既有适合小白学习的零基础资料,也有适合3年以上经验的小伙伴深入学习提升的进阶课程,涵盖了95%以上大数据知识点,真正体系化!**
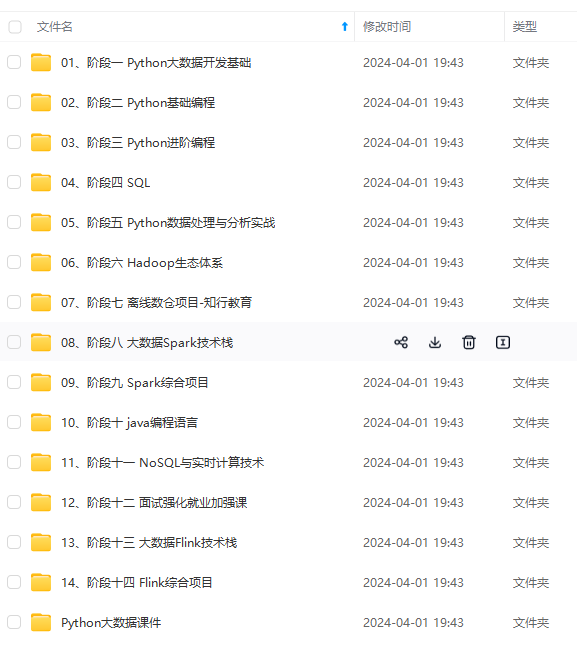
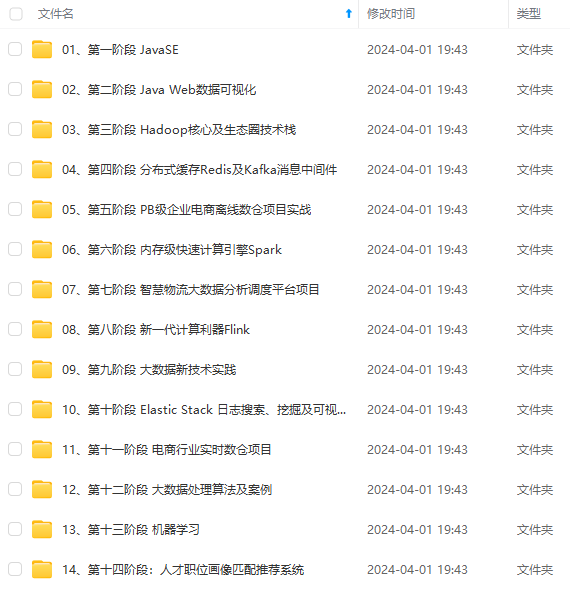
**由于文件比较多,这里只是将部分目录截图出来,全套包含大厂面经、学习笔记、源码讲义、实战项目、大纲路线、讲解视频,并且后续会持续更新**
**[需要这份系统化资料的朋友,可以戳这里获取](https://bbs.csdn.net/topics/618545628)**
键词的方式进行搜索,结果以JSON格式返回。
[外链图片转存中...(img-Xph6vIC2-1714788120673)]
[外链图片转存中...(img-pNS90BcY-1714788120674)]
[外链图片转存中...(img-ESfCtYUL-1714788120674)]
**既有适合小白学习的零基础资料,也有适合3年以上经验的小伙伴深入学习提升的进阶课程,涵盖了95%以上大数据知识点,真正体系化!**
**由于文件比较多,这里只是将部分目录截图出来,全套包含大厂面经、学习笔记、源码讲义、实战项目、大纲路线、讲解视频,并且后续会持续更新**
**[需要这份系统化资料的朋友,可以戳这里获取](https://bbs.csdn.net/topics/618545628)**


 1416
1416


 被折叠的 条评论
为什么被折叠?
被折叠的 条评论
为什么被折叠?
 到【灌水乐园】发言


