


 本文详细介绍了如何使用HBase和Redis数据库进行表创建、数据操作(如添加、查询和修改)以及相应的Java编程实现。包括了使用HBaseAPI插入数据、查询特定字段值和修改记录,以及使用Redis的哈希结构存储学生信息并执行相关操作。
        if(conn!=null)
            try {
                conn.close();
            } catch (SQLException e) {

                e.printStackTrace();
运行结果:
##### HBase 数据库操作
Student 表如表 A-5 所示。
| name | English | Math | Computer |
| --- | --- | --- | --- |
| zhangsan | 60 | 86 | 77 |
| lisi | 55 | 100 | 88 |
###### 根据上面给出的学生表 Student 的信息,执行如下操作:
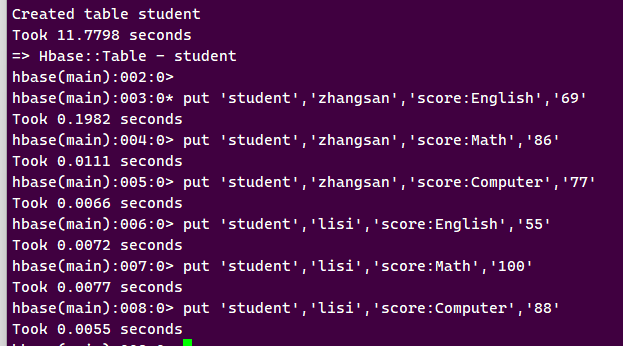
(1)用 Hbase Shell 命令创建学生表 Student
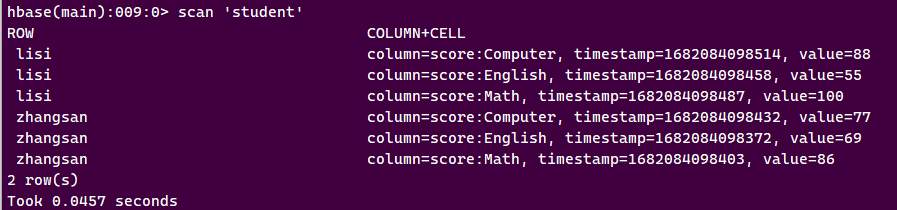
(2)用 scan 指令浏览 Student 表的相关信息
(3)查询 zhangsan 的 Computer 成绩

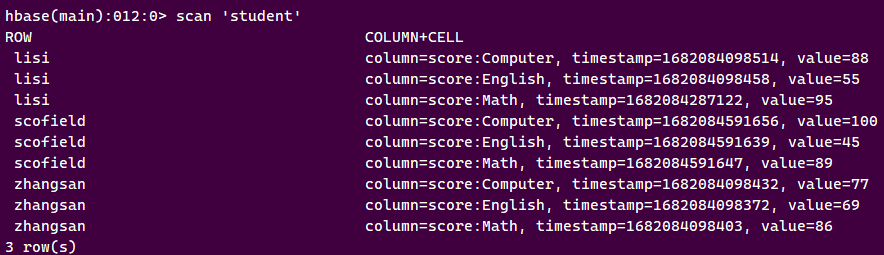
(4)修改 lisi 的 Math 成绩,改为 95

##### 根据上面已经设计出的 Student 表,用 HBase API 编程实现以下操作:
(1)添加数据
| scofield | 45 | 89 | 100 |
| --- | --- | --- | --- |
package Main;
import java.io.IOException;
import org.apache.hadoop.conf.Configuration;
import org.apache.hadoop.hbase.HBaseConfiguration;
import org.apache.hadoop.hbase.TableName;
import org.apache.hadoop.hbase.client.Admin;
import org.apache.hadoop.hbase.client.Connection;
import org.apache.hadoop.hbase.client.ConnectionFactory;
import org.apache.hadoop.hbase.client.Put;
import org.apache.hadoop.hbase.client.Table;
public class main {
public static Configuration configuration;
public static Connection connection;
public static Admin admin;
public static void main(String[] args) {
    // TODO Auto-generated method stub
    configuration  = HBaseConfiguration.create();
    configuration.set("hbase.rootdir","hdfs://127.0.0.1:8020/hbase");
    try{
        connection = ConnectionFactory.createConnection(configuration);
        admin = connection.getAdmin();
    }catch (IOException e){
        e.printStackTrace();
    }
    try {
        insertRow("student","scofield","score","English","45");
        insertRow("student","scofield","score","Math","89");
        insertRow("student","scofield","score","Computer","100");
    } catch (IOException e) {
        // TODO Auto-generated catch block
        e.printStackTrace();
    }
    close();
}
public static void insertRow(String tableName,String rowKey,String colFamily,
                             String col,String val) throws IOException {
    Table table = connection.getTable(TableName.valueOf(tableName));
    Put put = new Put(rowKey.getBytes());
    put.addColumn(colFamily.getBytes(), col.getBytes(), val.getBytes());
    table.put(put);
    table.close();
}
public static void close(){
    try{
        if(admin != null){
            admin.close();
        }
        if(null != connection){
            connection.close();
        }
    }catch (IOException e){
        e.printStackTrace();
    }
}
}
运行结果
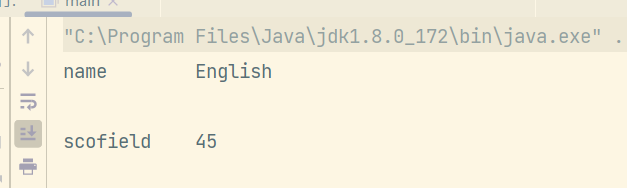
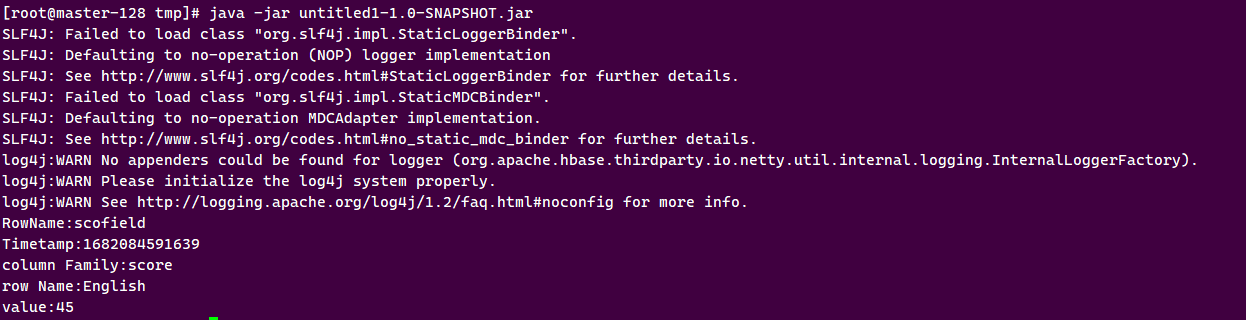
(2)获取 scofield 的 English 成绩信息
package Main;
import java.io.IOException;
import org.apache.hadoop.conf.Configuration;
import org.apache.hadoop.hbase.Cell;
import org.apache.hadoop.hbase.CellUtil;
import org.apache.hadoop.hbase.HBaseConfiguration;
import org.apache.hadoop.hbase.TableName;
import org.apache.hadoop.hbase.client.Admin;
import org.apache.hadoop.hbase.client.Connection;
import org.apache.hadoop.hbase.client.ConnectionFactory;
import org.apache.hadoop.hbase.client.Get;
import org.apache.hadoop.hbase.client.Put;
import org.apache.hadoop.hbase.client.Result;
import org.apache.hadoop.hbase.client.Table;
public class main {
public static Configuration configuration;
public static Connection connection;
public static Admin admin;

public static void main(String[] args) {
    // TODO Auto-generated method stub
    configuration = HBaseConfiguration.create();

    configuration.set("hbase.rootdir", "hdfs://127.0.0.1:8020/hbase");

    try {
        connection = ConnectionFactory.createConnection(configuration);
        admin = connection.getAdmin();
    } catch (IOException e) {
        e.printStackTrace();
    }
    try {
        getData("student", "scofield", "score", "English");
    } catch (IOException e) {
        // TODO Auto-generated catch block
        e.printStackTrace();
    }
    close();
}

public static void getData(String tableName, String rowKey, String colFamily,
                           String col) throws IOException {
    Table table = connection.getTable(TableName.valueOf(tableName));
    Get get = new Get(rowKey.getBytes());
    get.addColumn(colFamily.getBytes(), col.getBytes());
    Result result = table.get(get);
    showCell(result);
    table.close();
}

public static void showCell(Result result) {
    Cell[] cells = result.rawCells();
    for (Cell cell : cells) {
        System.out.println("RowName:" + new String(CellUtil.cloneRow(cell)) + " ");
        System.out.println("Timetamp:" + cell.getTimestamp() + " ");
        System.out.println("column Family:" + new String(CellUtil.cloneFamily(cell)) + " ");
        System.out.println("row Name:" + new String(CellUtil.cloneQualifier(cell)) + " ");
        System.out.println("value:" + new String(CellUtil.cloneValue(cell)) + " ");
    }
}

public static void close() {
    try {
        if (admin != null) {
            admin.close();
        }
        if (null != connection) {
            connection.close();
        }
    } catch (IOException e) {
        e.printStackTrace();
    }
}
}
运行结果
##### Redis 数据库操作
Student 键值对如下:
zhangsan:{
English: 69
Math: 86
Computer: 77
}
lisi:{
English: 55
Math: 100
Computer: 88
}
##### 根据上面给出的键值对,完成如下操作:
(1)用 Redis 的哈希结构设计出学生表 Student(键值可以用 student.zhangsan 和student.lisi 来表示两个键值属于同一个表);

(2)用 hgetall 命令分别输出 zhangsan 和 lisi 的成绩信息;
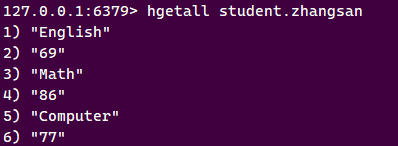
(3)用 hget 命令查询 zhangsan 的 Computer 成绩;

(4)修改 lisi 的 Math 成绩,改为 95

##### 根据上面已经设计出的学生表 Student,用 Redis 的 JAVA 客户端编程(jedis),实现如下操作:
(1)添加数据:English:69 Math:86 Computer:77
scofield:{
English: 69
Math: 86
Computer: 77
}
package Main;
import java.util.Map;
import redis.clients.jedis.Jedis;
public class main {
/\*\*
* @param args
*/
public static void main(String[] args) {
Jedis jedis = new Jedis(“127.0.0.1:6379”);
jedis.hset(“student.scofield”, “English”,“45”);
jedis.hset(“student.scofield”, “Math”,“89”);
jedis.hset(“student.scofield”, “Computer”,“100”);
Map<String,String> value = jedis.hgetAll(“student.scofield”);
for(Map.Entry<String, String> entry:value.entrySet())
{
System.out.println(entry.getKey()+“:”+entry.getValue());
}
}
}
(2)获取 scofield 的 English 成绩信息
package Main;
import java.util.Map;
import redis.clients.jedis.Jedis;
public class main {
/\*\*
* @param args
*/
public static void main(String[] args) {
Jedis jedis = new Jedis(“localhost”);
jedis.hset(“student.scofield”, “English”,“45”);
jedis.hset(“student.scofield”, “Math”,“89”);
jedis.hset(“student.scofield”, “Computer”,“100”);
Map<String,String> value = jedis.hgetAll(“student.scofield”);
for(Map.Entry<String, String> entry:value.entrySet())
{
System.out.println(entry.getKey()+“:”+entry.getValue());
}
}
}
##### (四)MongoDB 数据库操作
Student 文档如下:
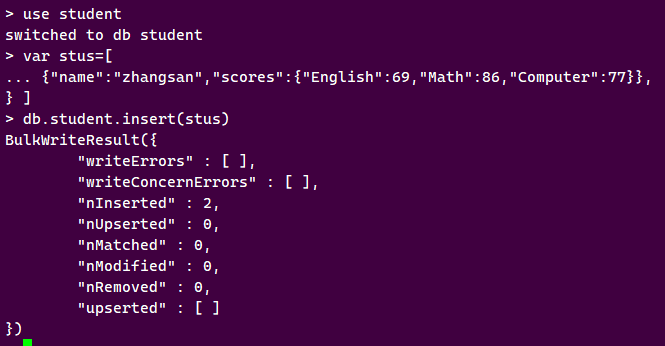
{
“name”: “zhangsan”, “score”: {“English”: 69, “Math”: 86, “Computer”: 77}
}
{
“name”: “lisi”, “score”: {“English”: 55, “Math”: 100,“Computer”: 88}
}
##### 根据上面给出的文档,完成如下操作:
(1)用 MongoDB Shell 设计出 student 集合;
(2)用 find()方法输出两个学生的信息;
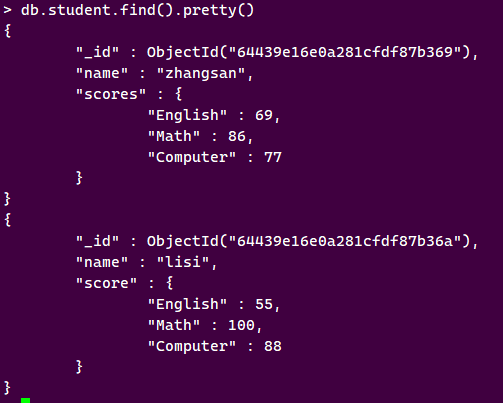
(3)用 find 函数查询 zhangsan 的所有成绩(只显示 score 列)

(4)修改 lisi 的 Math 成绩,改为 95。

##### 根据上面已经设计出的 Student 集合,用 MongoDB 的 Java 客户端编程,实现如下操作:
(1)添加数据:English:45 Math:89 Computer:100
与上述数据对应的文档形式如下:
“name”: “scofield”,
“score”: {“English”: 45,“Math”: 89, “Computer”: 100}
package Main;
import java.util.ArrayList;
import java.util.List;
import org.bson.Document;
import com.mongodb.MongoClient;
import com.mongodb.client.MongoCollection;
import com.mongodb.client.MongoDatabase;
public class main {
public static void main(String[] args) {
网上学习资料一大堆,但如果学到的知识不成体系,遇到问题时只是浅尝辄止,不再深入研究,那么很难做到真正的技术提升。
一个人可以走的很快,但一群人才能走的更远!不论你是正从事IT行业的老鸟或是对IT行业感兴趣的新人,都欢迎加入我们的的圈子(技术交流、学习资源、职场吐槽、大厂内推、面试辅导),让我们一起学习成长!
ain {
public static void main(String[] args) {
[外链图片转存中…(img-lC8pCNHx-1714762037457)]
[外链图片转存中…(img-ZwnGNrP5-1714762037457)]
网上学习资料一大堆,但如果学到的知识不成体系,遇到问题时只是浅尝辄止,不再深入研究,那么很难做到真正的技术提升。
一个人可以走的很快,但一群人才能走的更远!不论你是正从事IT行业的老鸟或是对IT行业感兴趣的新人,都欢迎加入我们的的圈子(技术交流、学习资源、职场吐槽、大厂内推、面试辅导),让我们一起学习成长!


 918
918

 被折叠的 条评论
为什么被折叠?
被折叠的 条评论
为什么被折叠?
 到【灌水乐园】发言


