DeepFace【部署 01】轻量级人脸识别和面部属性分析框架deepface安装使用详解(网盘分享模型文件)_lfw score(1)

本人从事网路安全工作12年,曾在2个大厂工作过,安全服务、售后服务、售前、攻防比赛、安全讲师、销售经理等职位都做过,对这个行业了解比较全面。

最近遍览了各种网络安全类的文章,内容参差不齐,其中不伐有大佬倾力教学,也有各种不良机构浑水摸鱼,在收到几条私信,发现大家对一套完整的系统的网络安全从学习路线到学习资料,甚至是工具有着不小的需求。

最后,我将这部分内容融会贯通成了一套282G的网络安全资料包,所有类目条理清晰,知识点层层递进,需要的小伙伴可以点击下方小卡片领取哦!下面就开始进入正题,如何从一个萌新一步一步进入网络安全行业。

学习路线图

其中最为瞩目也是最为基础的就是网络安全学习路线图,这里我给大家分享一份打磨了3个月,已经更新到4.0版本的网络安全学习路线图。

相比起繁琐的文字,还是生动的视频教程更加适合零基础的同学们学习,这里也是整理了一份与上述学习路线一一对应的网络安全视频教程。

网络安全工具箱

当然,当你入门之后,仅仅是视频教程已经不能满足你的需求了,你肯定需要学习各种工具的使用以及大量的实战项目,这里也分享一份我自己整理的网络安全入门工具以及使用教程和实战。

项目实战

最后就是项目实战,这里带来的是SRC资料&HW资料,毕竟实战是检验真理的唯一标准嘛~

面试题

归根结底,我们的最终目的都是为了就业,所以这份结合了多位朋友的亲身经验打磨的面试题合集你绝对不能错过!

网上学习资料一大堆,但如果学到的知识不成体系,遇到问题时只是浅尝辄止,不再深入研究,那么很难做到真正的技术提升。

需要这份系统化资料的朋友,可以点击这里获取

一个人可以走的很快,但一群人才能走的更远!不论你是正从事IT行业的老鸟或是对IT行业感兴趣的新人,都欢迎加入我们的的圈子(技术交流、学习资源、职场吐槽、大厂内推、面试辅导),让我们一起学习成长!

models.jpg

预训练面部识别模型:

  • VGG-Face 由Visual Geometry Group开发,是一种基于深度卷积神经网络的人脸识别模型。
  • FaceNet (128D, 512D) 由Google开发,是一种基于三维卷积神经网络的人脸识别模型。
  • OpenFace 由Carnegie Mellon University开发,是一种基于深度神经网络的人脸识别模型。
  • DeepID 由香港中文大学开发,是一种基于深度神经网络的人脸识别模型。
  • ArcFace 由中科院自动化所开发,是一种基于深度卷积神经网络的人脸识别模型。

预训练面部特征分析模型:

  • Age
  • Gender
  • Emotion
  • Race / Ethnicity

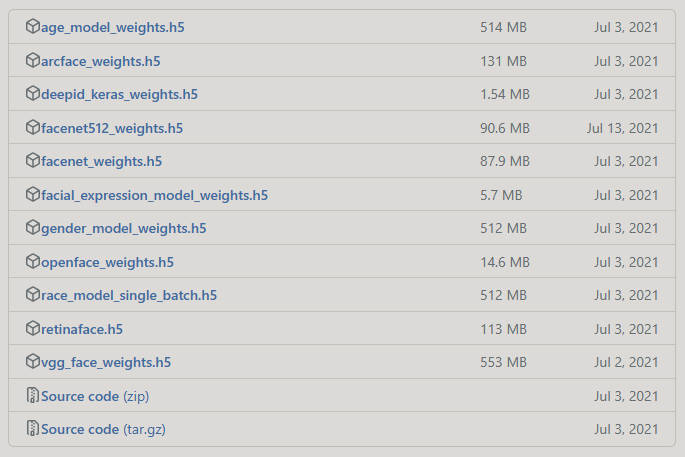
直接使用浏览器的下载速度堪称龟速,还很容易失败,我是用云服务器进行的下载,以下是全部链接:

wget -c https://github.com/serengil/deepface_models/releases/download/v1.0/age_model_weights.h5
wget -c https://github.com/serengil/deepface_models/releases/download/v1.0/arcface_weights.h5
wget -c https://github.com/serengil/deepface_models/releases/download/v1.0/deepid_keras_weights.h5
wget -c https://github.com/serengil/deepface_models/releases/download/v1.0/facenet512_weights.h5
wget -c https://github.com/serengil/deepface_models/releases/download/v1.0/facenet_weights.h5
wget -c https://github.com/serengil/deepface_models/releases/download/v1.0/facial_expression_model_weights.h5
wget -c https://github.com/serengil/deepface_models/releases/download/v1.0/gender_model_weights.h5
wget -c https://github.com/serengil/deepface_models/releases/download/v1.0/openface_weights.h5
wget -c https://github.com/serengil/deepface_models/releases/download/v1.0/race_model_single_batch.h5
wget -c https://github.com/serengil/deepface_models/releases/download/v1.0/retinaface.h5
wget -c https://github.com/serengil/deepface_models/releases/download/v1.0/vgg_face_weights.h5
wget -c https://github.com/serengil/deepface_models/archive/refs/tags/v1.0.zip
wget -c https://github.com/serengil/deepface_models/archive/refs/tags/v1.0.tar.gz

刚开始速度也是很慢,随后就会起飞,如果一分钟还是几K的速度就断开重新开始,速度几M是可以达到的。下载成功后放置到functions.get_deepface_home()目录下【不同设备的目录不同以下仅供参考】:

  • Windows系统C:\Users\Administrator下的/.deepface/weights/目录下。
  • Linux系统/root下的/.deepface/weights/目录下。

执行以下代码获取模型目录:

from deepface.commons import functions

if __name__ == "\_\_main\_\_":
    home = functions.get_deepface_home()
    print(home)

2.2 Facial Recognition

A modern face recognition pipeline consists of 5 common stages: detect, align, normalize, represent and verify. While Deepface handles all these common stages in the background, you don’t need to acquire in-depth knowledge about all the processes behind it. You can just call its verification, find or analysis function with a single line of code.
如今的人脸识别流程包括5个基本阶段:检测、对齐、归一化、表示和验证。Deepface会在后台处理所有这些,因此您不需要深入了解其背后的所有过程。你可以用一行代码调用它的验证、查找或分析函数。

2.3 Face Verification

这个函数验证一对人脸是否是同一个人。它期望输入的是精确的图像路径。也可以传递numpy或base64编码的图像。然后,它将返回一个字典,你只需要检查它的verified键。

result = DeepFace.verify(img1_path = "img1.jpg", img2_path = "img2.jpg")

# 由于测试时【VGG-Face】模型未下载完成故使用【Facenet】
result = DeepFace.verify(img1_path="tests/dataset/img1.jpg", img2_path="tests/dataset/img2.jpg", model_name="Facenet")

结果数据如下:

{
    "detector\_backend": "opencv",
    "distance": 0.24256996744273296,
    "facial\_areas": {
        "img1": {
            "h": 769,
            "w": 769,
            "x": 345,
            "y": 211
        },
        "img2": {
            "h": 512,
            "w": 512,
            "x": 516,
            "y": 192
        }
    },
    "model": "Facenet",
    "similarity\_metric": "cosine",
    "threshold": 0.4,
    "time": 5.93,
    "verified": True
}

由于使用的模型不同,结果跟图片中的不完全一致:
stock-1.jpg
验证函数也可以处理多人脸对的情况。将会比较最相似的面部。测试代码及结果如下:

result = DeepFace.verify(img1_path="tests/dataset/img1.jpg", img2_path="tests/dataset/couple.jpg", model_name="Facenet")

{
    "detector\_backend": "opencv",
    "distance": 0.2260340280992379,
    "facial\_areas": {
        "img1": {
            "h": 769,
            "w": 769,
            "x": 345,
            "y": 211
        },
        "img2": {
            "h": 779,
            "w": 779,
            "x": 318,
            "y": 534
        }
    },
    "model": "Facenet",
    "similarity\_metric": "cosine",
    "threshold": 0.4,
    "time": 5.2,
    "verified": True
}

由于使用的模型不同,结果跟图片中的不完全一致:
verify-many-faces.jpg

2.4 Face recognition

人脸识别需要多次进行人脸验证。在这里,deepface有一个开箱即用的查找函数来处理这个动作。它将在数据库路径中查找输入图像的身份它将返回pandas数据帧列表作为输出。同时,人脸数据库中的人脸嵌入被存储在pickle文件中,以便下次快速搜索。结果将是出现在源图像中的脸的大小。此外,数据库中的目标图像也可以有多个人脸。

dfs = DeepFace.find(img_path = "img1.jpg", db_path = "C:/workspace/my\_db")

# 使用源码里的测试图片
dfs = DeepFace.find(img_path="tests/dataset/img1.jpg", db_path="tests/dataset/", model_name="Facenet")

结果数据,facenet_cosine越小相似度越高:

[                    identity  source_x  ...  source_h  Facenet_cosine
0    tests/dataset//img1.jpg       345  ...       769        0.000000
1   tests/dataset//img11.jpg       345  ...       769        0.184640
2    tests/dataset//img7.jpg       345  ...       769        0.193672
3   tests/dataset//img10.jpg       345  ...       769        0.221339
4  tests/dataset//couple.jpg       345  ...       769        0.226034
5    tests/dataset//img6.jpg       345  ...       769        0.230715
6    tests/dataset//img2.jpg       345  ...       769        0.242570
7    tests/dataset//img4.jpg       345  ...       769        0.246557
8    tests/dataset//img5.jpg       345  ...       769        0.259066

[9 rows x 6 columns]] 

stock-6-v2.jpg

2.5 Embeddings

人脸识别模型基本上是将人脸图像表示为多维向量。有时候,你直接需要这些嵌入向量。DeepFace带有专门的表示函数。标识函数返回嵌入列表。结果将是出现在图像路径中的面的大小。

embedding_objs = DeepFace.represent(img_path = "tests/dataset/img1.jpg")

# 实际测试
embedding_objs = DeepFace.represent(img_path="tests/dataset/img1.jpg", model_name="Facenet")

结果数据,:

[
    {
        "embedding": [
            0.8134615421295166,
            1.0957121849060059,
            1.477981686592102,
            -1.6971195936203003,
            0.49749791622161865,
            -0.6081872582435608...[省略了一些数据]
        ],
        "face\_confidence": 10.068783960014116,
        "facial\_area": {
            "h": 769,
            "w": 769,
            "x": 345,
            "y": 211
        }
    }
]

这个函数返回一个数组作为嵌入。嵌入数组的大小将根据模型名称而有所不同。例如,VGG-Face是默认模型,它将面部图像表示为2622维向量。

embedding = embedding_objs[0]["embedding"]
assert isinstance(embedding, list)
assert model_name = "VGG-Face" and len(embedding) == 2622

# 实际测试
embedding = embedding_objs[0]["embedding"]
assert isinstance(embedding, list)
assert len(embedding) == 128

在这里,嵌入也是用2622个槽水平绘制的。每个槽对应嵌入向量中的一个维度值,维度值在右侧的颜色条中进行说明。与2D条形码类似,垂直维度在插图中不存储任何信息。
image.png

2.6 Face recognition models

Deepface is a hybrid face recognition package. It currently wraps many state-of-the-art face recognition models: VGG-Face,Google FaceNet, OpenFace, Facebook DeepFace, DeepID, ArcFace, DlibandSFace. The default configuration uses VGG-Face model.

models = ["VGG-Face", "Facenet", "Facenet512", "OpenFace", "DeepFace", "DeepID", "ArcFace", "Dlib", "SFace"]

# face verification
result = DeepFace.verify(img1_path = "img1.jpg", 
      img2_path = "img2.jpg", 
      model_name = models[0]
)

# face recognition
dfs = DeepFace.find(img_path = "img1.jpg",
      db_path = "C:/workspace/my\_db", 
      model_name = models[1]
)

# embeddings
embedding_objs = DeepFace.represent(img_path = "img.jpg", 
      model_name = models[2]
)
# 这些跟前边的一样 不再进行实测

FaceNet, VGG-Face, ArcFace and Dlib are overperforming ones based on experiments. You can find out the scores of those models below on both Labeled Faces in the Wild and YouTube Faces in the Wild data sets declared by its creators.

ModelLFW ScoreYTF Score
Facenet51299.65%-
SFace99.60%-
ArcFace99.41%-
Dlib99.38 %-
Facenet99.20%-
VGG-Face98.78%97.40%
Human-beings97.53%-
OpenFace93.80%-
DeepID-97.05%

LFW Score和YTF Score是两种用于评估人脸识别算法性能的指标,分别基于LFW和YTF两个数据集。LFW(Labeled Faces in the Wild)是一个包含超过13,000张带有人名标注的人脸图像的数据集,这些图像来自互联网上不同的人脸图库,涵盖了各种人种、姿态和表情。YTF(YouTube Faces)是一个包含3425个视频的人脸视频数据集,这些视频来自YouTube上1595个不同人的视频,涉及大量的姿态、表情、光照和遮挡变化。LFW Score和YTF Score分别使用LFW和YTF数据集中的匹配对和不匹配对来测试人脸识别算法是否能够正确判断两张人脸是否属于同一个人。一般来说,LFW Score和YTF Score越高,表示人脸识别算法越准确。

2.7 Similarity

人脸识别模型是正则卷积神经网络,它们负责将人脸表示为向量。我们认为同一个人的两张脸应该比不同人的两张脸更相似。相似度可以通过余弦相似度、欧氏距离和L2形式等不同度量来计算。默认配置使用余弦相似度。

metrics = ["cosine", "euclidean", "euclidean\_l2"]

#face verification
result = DeepFace.verify(img1_path = "img1.jpg", 
          img2_path = "img2.jpg", 
          distance_metric = metrics[1]
)

#face recognition
dfs = DeepFace.find(img_path = "img1.jpg", 
          db_path = "C:/workspace/my\_db", 
          distance_metric = metrics[2]
)

# 实际测试
# face verification
result = DeepFace.verify(img1_path="tests/dataset/img1.jpg",
                         img2_path="tests/dataset/img2.jpg",
                         model_name="Facenet",
                         distance_metric=metrics[1]
                         )
# face recognition
dfs = DeepFace.find(img_path="tests/dataset/img1.jpg",
                    db_path="tests/dataset/",
                    model_name="Facenet",
                    distance_metric=metrics[2]
                    )

前面的cosine距离是0.24256996744273296:

{
    "detector\_backend": "opencv",
    "distance": 8.146639638611239,
    "facial\_areas": {
        "img1": {
            "h": 769,
            "w": 769,
            "x": 345,
            "y": 211
        },
        "img2": {
            "h": 512,
            "w": 512,
            "x": 516,
            "y": 192
        }
    },
    "model": "Facenet",
    "similarity\_metric": "euclidean",
    "threshold": 10,
    "time": 4.53,
    "verified": True
}

之前的Facenet_cosineFacenet_euclidean_l2区别还是挺大的:

[                    identity  source_x  ...  source_h  Facenet_euclidean_l2
0    tests/dataset//img1.jpg 345 ... 769 0.000000
1   tests/dataset//img11.jpg 345 ... 769 0.607683
2    tests/dataset//img7.jpg 345 ... 769 0.622369
3   tests/dataset//img10.jpg 345 ... 769 0.665341
4  tests/dataset//couple.jpg 345 ... 769 0.672360
5    tests/dataset//img6.jpg 345 ... 769 0.679286
6    tests/dataset//img2.jpg 345 ... 769 0.696520
7    tests/dataset//img4.jpg 345 ... 769 0.702221
8    tests/dataset//img5.jpg 345 ... 769 0.719814

[9 rows x 6 columns]] 

欧几里得L2形式似乎比余弦和正则欧几里得距离更稳定。但是实际使用,更常用的是cosine因为它的结果是0~1可以换算成相似度100%~0%

2.8 Facial Attribute Analysis

Deepface还配备了强大的面部属性分析模块,包括年龄性别面部表情(包括愤怒,恐惧,中性,悲伤,厌恶,惊喜)和种族(包括亚洲人、白人、中东人、印度人、拉丁裔和黑人)预测。结果将是出现在源图像中的脸的大小。

先自我介绍一下,小编浙江大学毕业,去过华为、字节跳动等大厂,目前阿里P7

深知大多数程序员,想要提升技能,往往是自己摸索成长,但自己不成体系的自学效果低效又漫长,而且极易碰到天花板技术停滞不前!

因此收集整理了一份《2024年最新网络安全全套学习资料》,初衷也很简单,就是希望能够帮助到想自学提升又不知道该从何学起的朋友。
img
img
img
img
img
img

既有适合小白学习的零基础资料,也有适合3年以上经验的小伙伴深入学习提升的进阶课程,涵盖了95%以上网络安全知识点,真正体系化!

由于文件比较多,这里只是将部分目录截图出来,全套包含大厂面经、学习笔记、源码讲义、实战项目、大纲路线、讲解视频,并且后续会持续更新

需要这份系统化资料的朋友,可以点击这里获取

升又不知道该从何学起的朋友。**
[外链图片转存中…(img-VspEAAuM-1715092291905)]
[外链图片转存中…(img-wy6tlwCK-1715092291906)]
[外链图片转存中…(img-tNK0CDGr-1715092291907)]
[外链图片转存中…(img-nd4dCtSE-1715092291907)]
[外链图片转存中…(img-ZOwluzBH-1715092291908)]
[外链图片转存中…(img-zDvXVlwX-1715092291908)]

既有适合小白学习的零基础资料,也有适合3年以上经验的小伙伴深入学习提升的进阶课程,涵盖了95%以上网络安全知识点,真正体系化!

由于文件比较多,这里只是将部分目录截图出来,全套包含大厂面经、学习笔记、源码讲义、实战项目、大纲路线、讲解视频,并且后续会持续更新

需要这份系统化资料的朋友,可以点击这里获取

  • 24
    点赞
  • 18
    收藏
    觉得还不错? 一键收藏
  • 0
    评论

“相关推荐”对你有帮助么?

  • 非常没帮助
  • 没帮助
  • 一般
  • 有帮助
  • 非常有帮助
提交
评论
添加红包

请填写红包祝福语或标题

红包个数最小为10个

红包金额最低5元

当前余额3.43前往充值 >
需支付:10.00
成就一亿技术人!
领取后你会自动成为博主和红包主的粉丝 规则
hope_wisdom
发出的红包
实付
使用余额支付
点击重新获取
扫码支付
钱包余额 0

抵扣说明:

1.余额是钱包充值的虚拟货币,按照1:1的比例进行支付金额的抵扣。
2.余额无法直接购买下载,可以购买VIP、付费专栏及课程。

余额充值