


1.在Module文件夹下新建Profile.js文件:
-
定义Profile数据格式,并向外导出;
-
指定其user字段与users表关联,关联桥梁为对象id(user的id)
-
列举出字符串、字符串数组、json格式的数据写法
const mongoose = require(“mongoose”);
const Schema = mongoose.Schema;
const profileSchema = new Schema({
// 与users关联
user:{
type:Schema.Types.ObjectId,
ref:“users”
},
// 数据格式为:字符串
handle:{
type:String,
require:true
},
status:{
type:String,
require:true
},
// 数据格式为:字符串数组
skills:{
type:[String],
require:true
},
// 数据格式为:json
experience:[{
current:{
type:Boolean,
default:true
},
title:{
type:String,
require:true
},
company:{
type:String,
require:true
},
location:{
type:String
},
from:{
type:String,
require:true
},
to:{
type:String
},
description:{
type:String,
require:true
},
}],
social:{
wechat:{
type:String
},
QQ:{
type:String
},
CSDN:{
type:String
}
},
date:{
type:Date,
default:Date.now()
}
})
module.exports = Profile = mongoose.model(“profile”,profileSchema);
2.在router/api文件夹下新建Profile的路由文件profile.js,先写一个简单的test 案例,测试路由是否正常
const express = require(“express”);
const router = express.Router();
router.get(‘/test’, (req, res) => {
res.json({ msg: “profile works” })
})
3.在index.js文件中引入该路由
const profile = require(“./routes/api/profile”);
app.use(“/api/profile”,profile);
4.路由测试(记得带上没有过期的token)

1.用户输入个人信息。用postman模拟(记得带上未过期的token):

2.在profile.js文件中,把用户输入的信息全部收集存储到profileFields中
//$route POST api/profile/
//@desc add or modify profile msg
//@access private
router.post(“/”, passport.authenticate(“jwt”, { session: false }), (req, res) => {
const errors = {}
const profileFields = {}
profileFields.user = req.user.id;
// 字符串
if (req.body.handle) {
profileFields.handle = req.body.handle;
}
if (req.body.status) {
profileFields.status = req.body.status;
}
// 字符串数组
if (typeof req.body.skills !== “undefined”) {
profileFields.skills = req.body.skills.split(“,”);
}
// 对象-experience
// profileFields.experience = {}
// 此处不用手动创建空对象experience,否则,没有输入experience也会填充current,id,得到无意义数据experience:[{current:true, _id:12345678}]
if (req.body.current) {
profileFields.experience.current = req.body.current;
}
if (req.body.title) {
profileFields.experience.title = req.body.title;
}
if (req.body.company) {
profileFields.experience.company = req.body.company;
}
if (req.body.location) {
profileFields.experience.location = req.body.location;
}
if (req.body.from) {
profileFields.experience.from = req.body.from;
}
if (req.body.to) {
profileFields.experience.to = req.body.to;
}
if (req.body.description) {
profileFields.experience.description = req.body.description;
}
// 对象 social
if (req.body.wechat) {
profileFields.social.wechat = req.body.wechat;
}
if (req.body.QQ) {
profileFields.social.QQ = req.body.QQ;
}
if (req.body.CSDN) {
profileFields.social.CSDN = req.body.CSDN;
}
})
3.如果存在个人信息,则更新信息;如果没有,就新增信息
Profile.findOne({ user: req.user.id })
.then(profile => {
console.log(“profile”,profile);
if (profile) {
//用户信息存在,执行更新方法
Profile.findOneAndUpdate({ user: req.user.id }, { $set: profileFields }, { new: true })
.then(profile => res.json(profile))
} else {
//用户信息不存在,执行创建方法
Profile.findOne({ handle: profileFields.handle }).then(profile => {
new Profile(profileFields).save()
.then(profile => res.json(profile));
});
}
})
.catch(err => { res.status(404).json(err) })
4.postman测试结果
第一次send,由于没有添加过个人信息,因此此次是执行新增操作:

数据库查看:

将handle的值改成"test",再次send,此次是更新个人信息:
最后
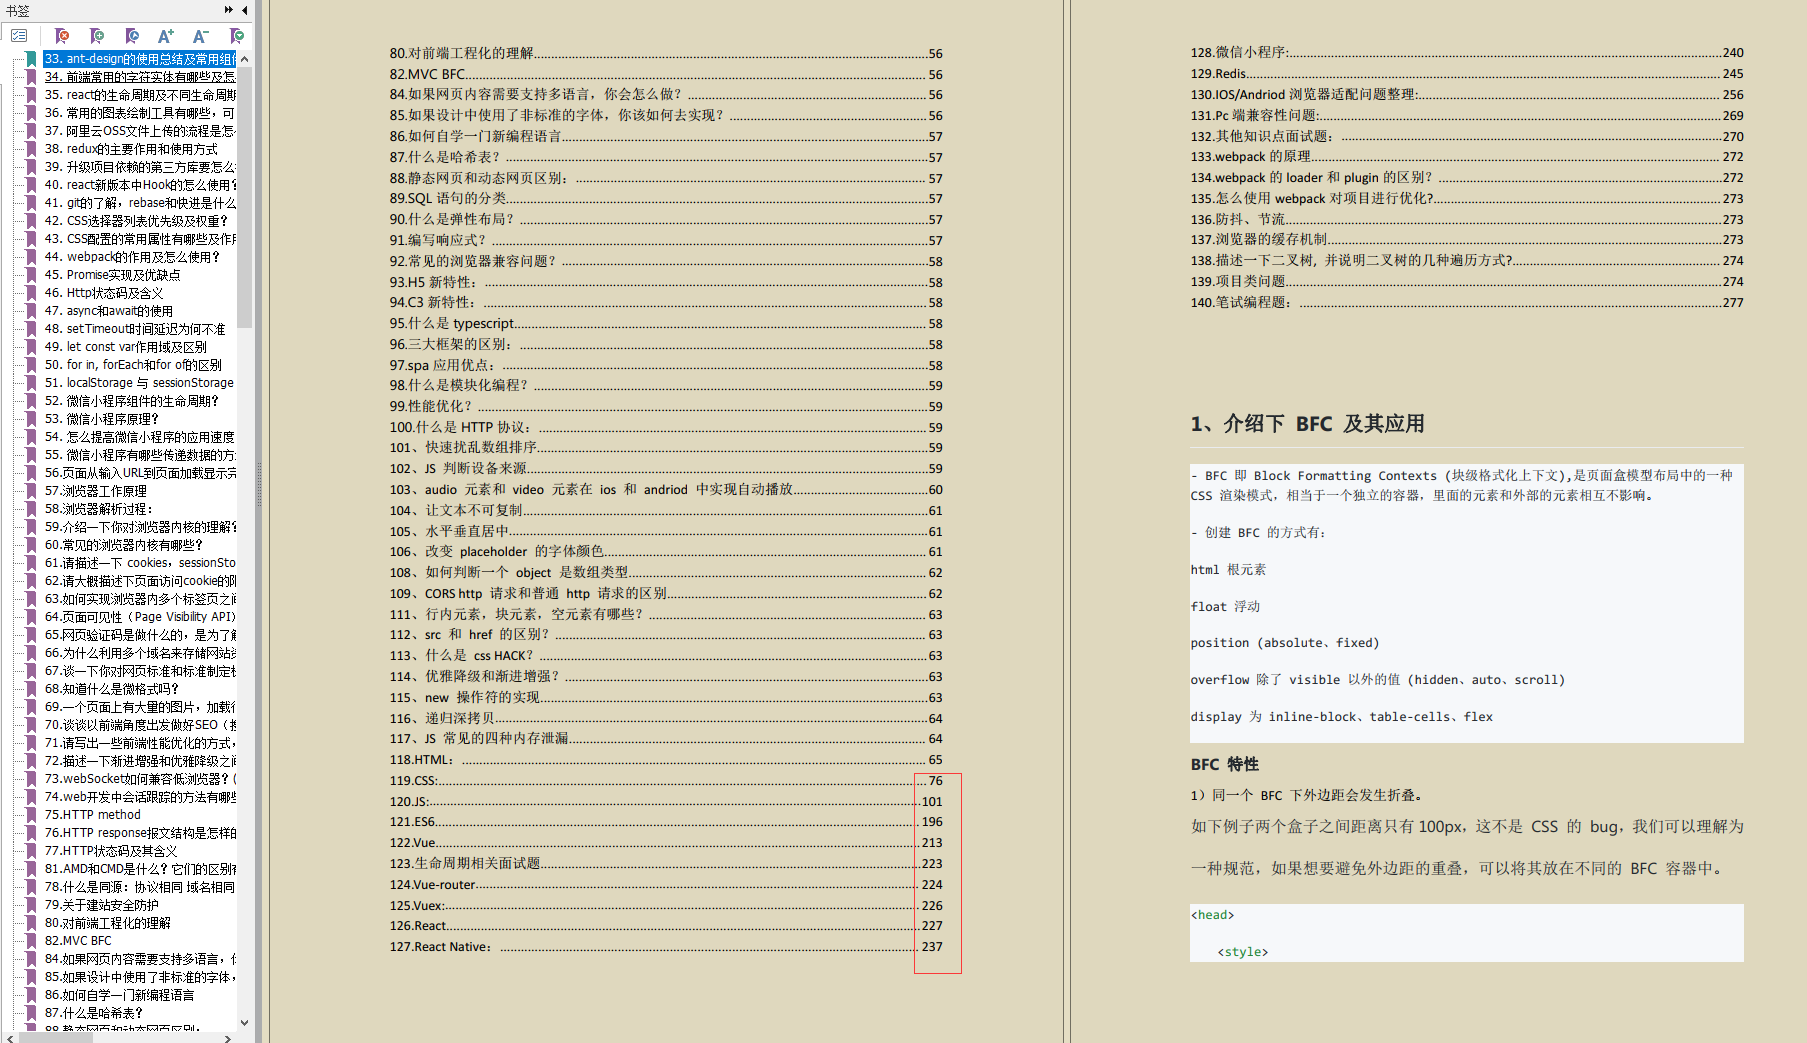
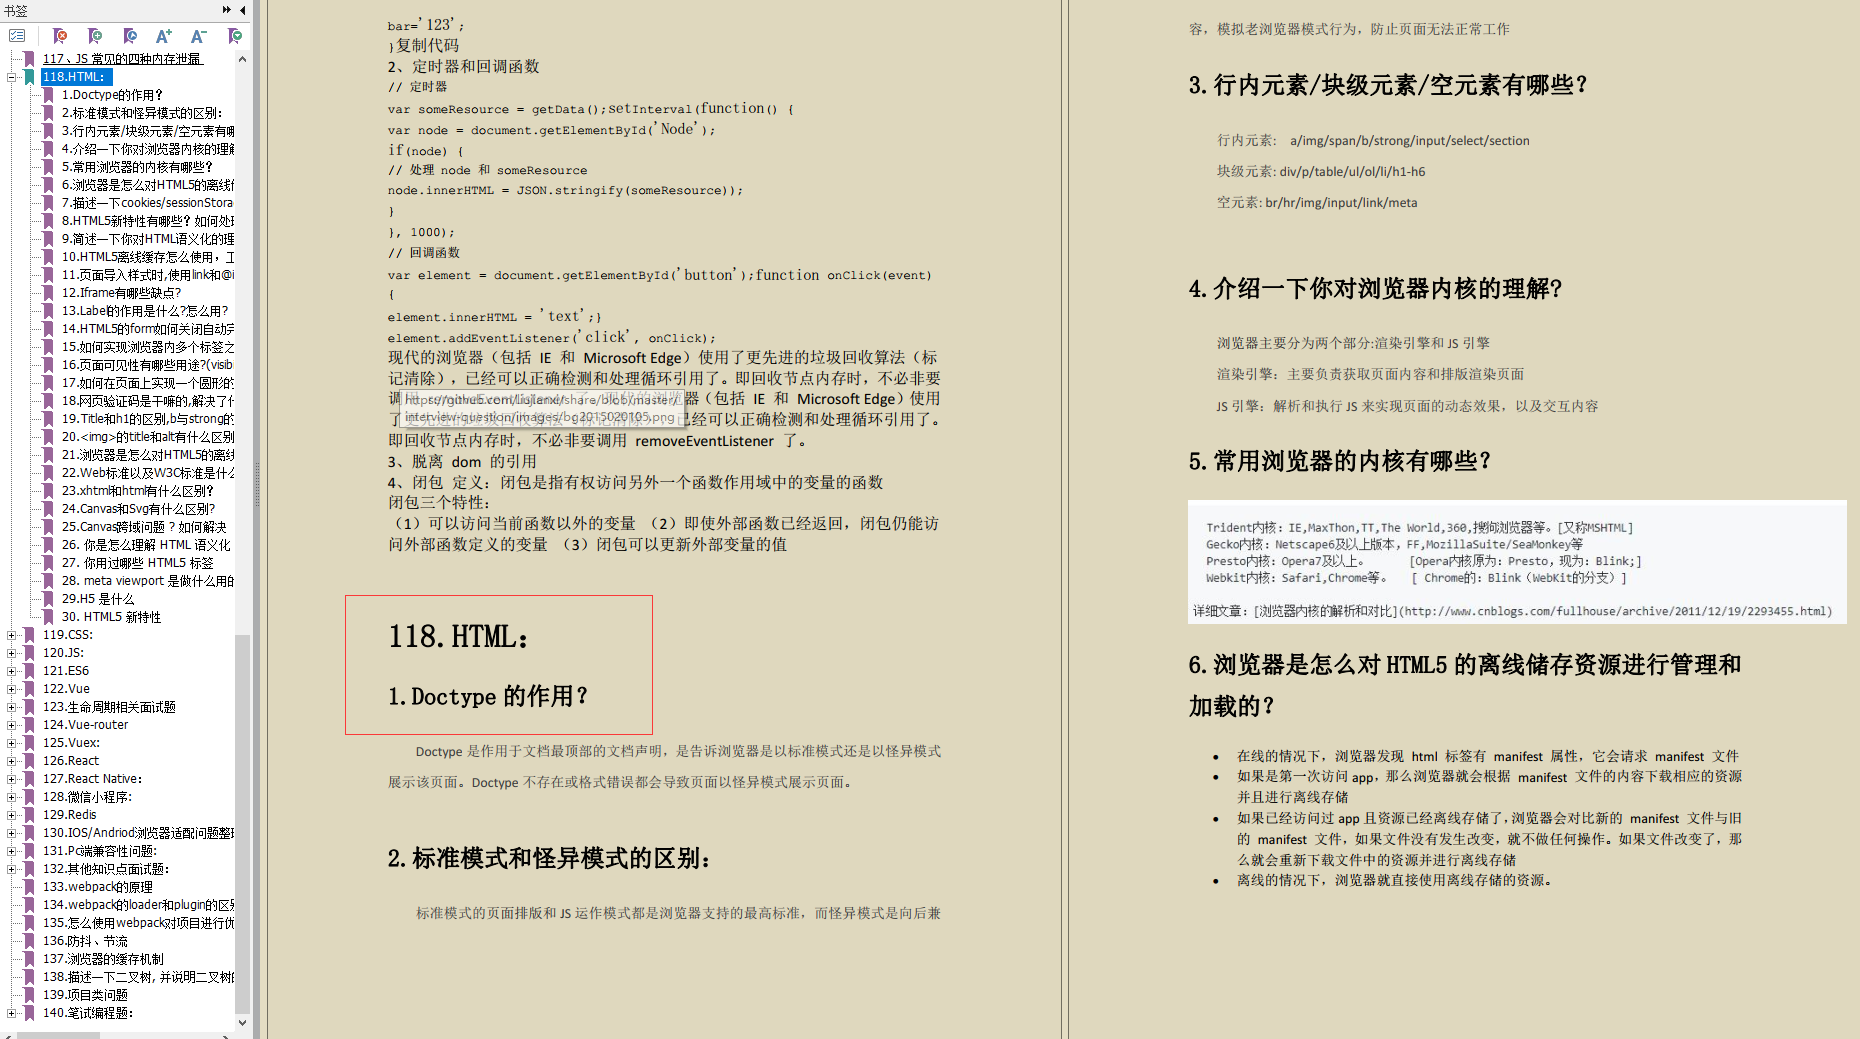
除了简历做到位,面试题也必不可少,整理了些题目,前面有117道汇总的面试到的题目,后面包括了HTML、CSS、JS、ES6、vue、微信小程序、项目类问题、笔试编程类题等专题。


 1075
1075

 被折叠的 条评论
为什么被折叠?
被折叠的 条评论
为什么被折叠?
 到【灌水乐园】发言


