


最后
其实Android开发的知识点就那么多,面试问来问去还是那么点东西。所以面试没有其他的诀窍,只看你对这些知识点准备的充分程度。so,出去面试时先看看自己复习到了哪个阶段就好。
上面分享的腾讯、头条、阿里、美团、字节跳动等公司2019-2021年的高频面试题,博主还把这些技术点整理成了视频和PDF(实际上比预期多花了不少精力),包含知识脉络 + 诸多细节,由于篇幅有限,上面只是以图片的形式给大家展示一部分。
【Android思维脑图(技能树)】
知识不体系?这里还有整理出来的Android进阶学习的思维脑图,给大家参考一个方向。

【Android高级架构视频学习资源】
网上学习资料一大堆,但如果学到的知识不成体系,遇到问题时只是浅尝辄止,不再深入研究,那么很难做到真正的技术提升。
一个人可以走的很快,但一群人才能走的更远!不论你是正从事IT行业的老鸟或是对IT行业感兴趣的新人,都欢迎加入我们的的圈子(技术交流、学习资源、职场吐槽、大厂内推、面试辅导),让我们一起学习成长!
" “shopName”: “OPPO官方旗舰店”,\n" +
" “defaultPic”: “https://img14.360buyimg.com/n0/jfs/t3142/194/4953241722/254855/1651c2b1/585b9021Nf653e48a.jpg”,\n" +
" “productId”: 1,\n" +
" “productName”: “OPPO R9 全网通”,\n" +
" “color”: “蓝色”,\n" +
" “size”: “30X”,\n" +
" “price”: 999,\n" +
" “count”:1\n" +
" }\n" +
" ]\n" +
" }\n" +
“\n” +
" ]\n" +
“}”;
}
这里面就是JSON数据了,下面要做的就是吧这个JSON数据通过Gson成对应CarResponse,然后通过适配器将数据渲染出来形成一个列表展示。当然首先要设计布局。
所有布局绘制完成后的效果图如下所示

那么先从drawable开始吧。
bg_goods_num.xml
<?xml version="1.0" encoding="utf-8"?><stroke android:color=“#000”
android:width=“0.5dp”/>
bg_increase_goods_num.xml
<?xml version="1.0" encoding="utf-8"?><stroke android:color=“#000”
android:width=“0.5dp”/>
<corners android:topRightRadius=“4dp”
android:bottomRightRadius=“4dp” />
bg_reduce_goods_num.xml
<?xml version="1.0" encoding="utf-8"?><stroke android:color=“#000”
android:width=“0.5dp”/>
<corners android:topLeftRadius=“4dp”
android:bottomLeftRadius=“4dp” />
bg_settlement.xml
<?xml version="1.0" encoding="utf-8"?><gradient
android:startColor=“#FF5C13”
android:endColor=“#FC7D0B”
android:angle=“90” />
bg_white_8.xml
<?xml version="1.0" encoding="utf-8"?>ic_check.xml
<?xml version="1.0" encoding="UTF-8" standalone="no"?><vector xmlns:android=“http://schemas.android.com/apk/res/android”
android:width=“24dp”
android:height=“24dp”
android:viewportWidth=“24.0”
android:viewportHeight=“24.0”>
<path
android:pathData=“M12,22.5c-5.79,0 -10.5,-4.71 -10.5,-10.5S6.21,1.5 12,1.5 22.5,6.21 22.5,12 17.79,22.5 12,22.5zM12,3c-4.963,0 -9,4.037 -9,9s4.037,9 9,9 9,-4.037 9,-9S16.963,3 12,3z”
android:fillColor=“#a9b7b7”/>
ic_checked.xml
<?xml version="1.0" encoding="UTF-8" standalone="no"?><vector xmlns:android=“http://schemas.android.com/apk/res/android”
android:width=“24dp”
android:height=“24dp”
android:viewportWidth=“24.0”
android:viewportHeight=“24.0”>
<path
android:fillColor=“#eb4f38”
android:pathData=“M12,1.546c-5.764,0 -10.454,4.69 -10.454,10.454 0,5.765 4.689,10.454 10.454,10.454S22.454,17.765 22.454,12C22.454,6.236 17.765,1.546 12,1.546zM17.044,10.276 L11.039,16.346c-0.001,0.001 -0.005,0.002 -0.006,0.005 -0.002,0.001 -0.002,0.005 -0.005,0.006 -0.048,0.046 -0.107,0.075 -0.163,0.107 -0.028,0.016 -0.05,0.04 -0.08,0.051 -0.09,0.036 -0.185,0.055 -0.28,0.055 -0.096,0 -0.193,-0.019 -0.284,-0.056 -0.03,-0.013 -0.054,-0.038 -0.082,-0.054 -0.056,-0.031 -0.113,-0.059 -0.161,-0.107 -0.001,-0.001 -0.002,-0.005 -0.004,-0.006 -0.001,-0.002 -0.005,-0.002 -0.006,-0.005l-2.954,-3.035c-0.289,-0.297 -0.282,-0.772 0.015,-1.061 0.297,-0.288 0.771,-0.283 1.061,0.015l2.42,2.487 5.467,-5.527c0.291,-0.295 0.767,-0.298 1.061,-0.006C17.333,9.506 17.335,9.981 17.044,10.276z” />
drawable下面的就写完了,下面到这个layout了,首先是activity_main.xml
<?xml version="1.0" encoding="utf-8"?><RelativeLayout xmlns:android=“http://schemas.android.com/apk/res/android”
xmlns:app=“http://schemas.android.com/apk/res-auto”
xmlns:tools=“http://schemas.android.com/tools”
android:layout_width=“match_parent”
android:layout_height=“match_parent”
android:fitsSystemWindows=“true”
android:orientation=“vertical”
tools:context=“.MainActivity”>
<androidx.appcompat.widget.Toolbar
android:id=“@+id/toolbar”
android:layout_width=“match_parent”
android:layout_height=“?attr/actionBarSize”
android:background=“#FFF”>
<TextView
android:layout_width=“wrap_content”
android:layout_height=“wrap_content”
android:layout_gravity=“center”
android:text=“购物车”
android:textColor=“#000”
android:textSize=“18sp” />
<TextView
android:id=“@+id/tv_edit”
android:layout_width=“wrap_content”
android:layout_height=“wrap_content”
android:layout_gravity=“right”
android:layout_marginRight=“12dp”
android:padding=“@dimen/dp_4”
android:text=“编辑”
android:textColor=“#000”
android:textSize=“16sp” />
</androidx.appcompat.widget.Toolbar>
<androidx.recyclerview.widget.RecyclerView
android:id=“@+id/rv_store”
android:layout_width=“match_parent”
android:layout_height=“match_parent”
android:layout_above=“@+id/lay_bottom”
android:layout_below=“@+id/toolbar”
android:padding=“12dp” />
<RelativeLayout
android:id=“@+id/lay_bottom”
android:layout_width=“match_parent”
android:layout_height=“50dp”
android:layout_alignParentBottom=“true”
android:background=“#FFF”
android:paddingLeft=“12dp”>
<ImageView
android:id=“@+id/iv_checked_all”
android:layout_width=“wrap_content”
android:layout_height=“wrap_content”
android:layout_centerVertical=“true”
android:layout_marginRight=“12dp”
android:src=“@drawable/ic_check” />
<TextView
android:id=“@+id/tv_checked_all”
android:layout_width=“wrap_content”
android:layout_height=“wrap_content”
android:layout_centerVertical=“true”
android:layout_toRightOf=“@+id/iv_checked_all”
android:text=“全选”
android:textSize=“16sp” />
<TextView
android:layout_width=“wrap_content”
android:layout_height=“wrap_content”
android:layout_centerVertical=“true”
android:layout_toLeftOf=“@+id/tv_total”
android:text=“合计:”
android:textColor=“#000”
android:textSize=“18sp” />
<TextView
android:id=“@+id/tv_total”
android:layout_width=“wrap_content”
android:layout_height=“wrap_content”
android:layout_centerVertical=“true”
android:layout_marginRight=“8dp”
android:layout_toLeftOf=“@+id/tv_settlement”
android:text=“¥0”
android:textColor=“#DF3B0D”
android:textSize=“14sp” />
<TextView
android:id=“@+id/tv_settlement”
android:layout_width=“120dp”
android:layout_height=“40dp”
android:layout_alignParentRight=“true”
android:layout_centerVertical=“true”
android:layout_marginEnd=“12dp”
android:background=“@drawable/bg_settlement”
android:gravity=“center”
android:text=“结算”
android:textColor=“#FFF”
android:textSize=“16sp” />
<LinearLayout
android:id=“@+id/lay_edit”
android:layout_width=“match_parent”
android:layout_height=“match_parent”
android:layout_marginLeft=“24dp”
android:layout_toRightOf=“@+id/tv_checked_all”
android:background=“#FFF”
android:gravity=“center”
android:orientation=“horizontal”
android:visibility=“gone”>
<TextView
android:id=“@+id/tv_share_goods”
android:layout_width=“0dp”
android:layout_height=“match_parent”
android:layout_weight=“0.3”
android:background=“#f4c600”
android:foreground=“?android:attr/selectableItemBackground”
android:gravity=“center”
android:text=“分享宝贝”
android:textColor=“@android:color/white”
android:textSize=“16sp” />
<TextView
android:id=“@+id/tv_collect_goods”
android:layout_width=“0dp”
android:layout_height=“match_parent”
android:layout_marginStart=“1dp”
android:layout_weight=“0.3”
android:background=“#ea8010”
android:foreground=“?android:attr/selectableItemBackground”
android:gravity=“center”
android:text=“移到收藏夹”
android:textColor=“@android:color/white”
android:textSize=“16sp” />
<TextView
android:id=“@+id/tv_delete_goods”
android:layout_width=“0dp”
android:layout_height=“match_parent”
android:layout_marginStart=“1dp”
android:layout_weight=“0.3”
android:background=“#eb4f38”
android:foreground=“?android:attr/selectableItemBackground”
android:gravity=“center”
android:text=“删除”
android:textColor=“@android:color/white”
android:textSize=“16sp” />
item_good.xml
<?xml version="1.0" encoding="utf-8"?><LinearLayout xmlns:android=“http://schemas.android.com/apk/res/android”
android:layout_width=“match_parent”
android:layout_height=“wrap_content”
android:layout_marginBottom=“12dp”
android:gravity=“center_vertical”
android:orientation=“horizontal”>
<ImageView
android:id=“@+id/iv_checked_goods”
android:layout_width=“wrap_content”
android:layout_height=“wrap_content”
android:layout_marginRight=“12dp”
android:src=“@drawable/ic_check” />
<RelativeLayout
android:layout_width=“match_parent”
android:layout_height=“100dp”>
<ImageView
android:id=“@+id/iv_goods”
android:layout_width=“100dp”
android:layout_height=“100dp”
android:layout_marginRight=“12dp”
android:scaleType=“fitXY”
android:src=“@mipmap/ic_launcher” />
<TextView
android:id=“@+id/tv_good_name”
android:layout_width=“wrap_content”
android:layout_height=“wrap_content”
android:layout_toRightOf=“@+id/iv_goods”
android:text=“商品名”
android:textColor=“#000”
android:textSize=“16sp” />
<TextView
android:id=“@+id/tv_good_color”
android:layout_width=“wrap_content”
android:layout_height=“wrap_content”
android:layout_below=“@+id/tv_good_name”
android:layout_marginTop=“4dp”
android:layout_toRightOf=“@+id/iv_goods”
android:text=“商品颜色”
android:textSize=“14sp” />
<TextView
android:id=“@+id/tv_good_size”
android:layout_width=“wrap_content”
android:layout_height=“wrap_content”
android:layout_below=“@+id/tv_good_name”
android:layout_marginLeft=“6dp”
android:layout_marginTop=“4dp”
android:layout_toRightOf=“@+id/tv_good_color”
android:text=“商品尺寸”
android:textSize=“14sp” />
<TextView
android:id=“@+id/tv_goods_price”
android:layout_width=“wrap_content”
android:layout_height=“wrap_content”
android:layout_alignParentBottom=“true”
android:layout_centerVertical=“true”
android:layout_marginBottom=“4dp”
android:layout_toRightOf=“@+id/iv_goods”
android:lines=“1”
android:text=“¥100000.00”
android:textColor=“#DF550B”
android:textSize=“20sp”
android:textStyle=“bold” />
<RelativeLayout
android:layout_width=“wrap_content”
android:layout_height=“wrap_content”
android:layout_alignParentRight=“true”
android:layout_alignParentBottom=“true”
android:layout_marginTop=“10dp”
android:layout_marginBottom=“4dp”
android:orientation=“horizontal”>
<TextView
android:id=“@+id/tv_reduce_goods_num”
android:layout_width=“24dp”
android:layout_height=“24dp”
android:background=“@drawable/bg_reduce_goods_num”
android:gravity=“center”
android:text=“—”
android:textColor=“#000”
android:textSize=“16sp” />
<TextView
android:id=“@+id/tv_goods_num”
android:layout_width=“40dp”
android:layout_height=“24dp”
android:layout_marginLeft=“-0.5dp”
android:layout_marginRight=“-0.5dp”
android:layout_toRightOf=“@+id/tv_reduce_goods_num”
android:background=“@drawable/bg_goods_num”
android:gravity=“center”
android:text=“1”
android:textColor=“#000”
android:textSize=“16sp” />
<TextView
android:id=“@+id/tv_increase_goods_num”
android:layout_width=“24dp”
android:layout_height=“24dp”
android:layout_toRightOf=“@+id/tv_goods_num”
android:background=“@drawable/bg_increase_goods_num”
android:gravity=“center”
android:text=“+”
android:textColor=“#000”
android:textSize=“16sp” />
item_store.xml
<?xml version="1.0" encoding="utf-8"?><LinearLayout xmlns:android=“http://schemas.android.com/apk/res/android”
android:layout_width=“match_parent”
android:layout_height=“wrap_content”
android:layout_marginBottom=“12dp”
android:background=“@drawable/bg_white_8”
android:orientation=“vertical”
android:padding=“12dp”>
<LinearLayout
android:layout_width=“match_parent”
android:layout_height=“wrap_content”
android:layout_marginBottom=“12dp”
android:gravity=“center_vertical”>
<ImageView
android:id=“@+id/iv_checked_store”
android:layout_width=“wrap_content”
android:layout_height=“wrap_content”
android:layout_marginRight=“12dp”
android:src=“@drawable/ic_check” />
<TextView
android:id=“@+id/tv_store_name”
android:layout_width=“wrap_content”
android:layout_height=“wrap_content”
android:text=“店铺名”
android:textColor=“#000”
android:textSize=“16sp”
android:textStyle=“bold” />
<androidx.recyclerview.widget.RecyclerView
android:id=“@+id/rv_goods”
android:layout_width=“match_parent”
android:layout_height=“wrap_content” />
OK,布局这边就写完了。
配置项目的依赖和网络使用情况,首先在AndroidManifest.xml中增加网络访问权限的配置

然后修改一下styles.xml中的样式

然后就是配置项目的依赖库了,首先在工程的build.gradle下配置
maven { url “https://jitpack.io” }

然后在app下的build.gradle中配置。
//Gson解析
implementation ‘com.google.code.gson:gson:2.8.6’
//RecyclerView
implementation ‘androidx.recyclerview:recyclerview:1.1.0’
//RecyclerView的好搭档
implementation ‘com.github.CymChad:BaseRecyclerViewAdapterHelper:2.9.22’
//热门强大的图片加载器
implementation ‘com.github.bumptech.glide:glide:4.9.0’
annotationProcessor ‘com.github.bumptech.glide:compiler:4.9.0’

配置好之后点击右上角的Sync Now进行同步依赖库。同步好之后进入第四步,渲染数据。
列表的渲染自然是离不开适配器的,那么一个购物车里面可能有多个店铺,一个店铺有多个商品,那么就是两个列表,也需要两个适配器,店铺适配器和商品适配器。
首先是店铺适配器,在com.llw.cart下创建一个adapter包,包下新建一个StoreAdapter类,里面的代码如下:
package com.llw.cart.adapter;
import androidx.annotation.Nullable;
import androidx.recyclerview.widget.LinearLayoutManager;
import androidx.recyclerview.widget.RecyclerView;
import com.chad.library.adapter.base.BaseQuickAdapter;
import com.chad.library.adapter.base.BaseViewHolder;
import com.llw.cart.bean.CarResponse;
import com.llw.cart.R;
import java.util.List;
/**
-
店铺适配器
-
@author llw
*/
public class StoreAdapter extends BaseQuickAdapter<CarResponse.OrderDataBean, BaseViewHolder> {
private RecyclerView rvGood;
public StoreAdapter(int layoutResId, @Nullable List<CarResponse.OrderDataBean> data) {
super(layoutResId, data);
}
@Override
protected void convert(BaseViewHolder helper, CarResponse.OrderDataBean item) {
rvGood = helper.getView(R.id.rv_goods);
helper.setText(R.id.tv_store_name,item.getShopName());
final GoodsAdapter goodsAdapter = new GoodAdapter(R.layout.item_good,item.getCartlist());
rvGood.setLayoutManager(new LinearLayoutManager(mContext));
rvGood.setAdapter(goodAdapter);
}
}
然后是商品适配器,在新建一个GoodsAdapter类,里面的代码如下:
package com.llw.cart.adapter;
import android.widget.ImageView;
import androidx.annotation.Nullable;
import com.bumptech.glide.Glide;
import com.chad.library.adapter.base.BaseQuickAdapter;
import com.chad.library.adapter.base.BaseViewHolder;
import com.llw.cart.bean.CarResponse;
import com.llw.cart.R;
import java.util.List;
/**
-
商品适配器
-
@author llw
*/
public class GoodsAdapter extends BaseQuickAdapter<CarResponse.OrderDataBean.CartlistBean, BaseViewHolder> {
public GoodsAdapter(int layoutResId, @Nullable List<CarResponse.OrderDataBean.CartlistBean> data) {
super(layoutResId, data);
}
@Override
protected void convert(BaseViewHolder helper, CarResponse.OrderDataBean.CartlistBean item) {
helper.setText(R.id.tv_good_name, item.getProductName())
.setText(R.id.tv_good_color,item.getColor())
.setText(R.id.tv_good_size,item.getSize())
.setText(R.id.tv_goods_price,item.getPrice()+“”)
.setText(R.id.tv_goods_num,item.getCount()+“”);
ImageView goodImg = helper.getView(R.id.iv_goods);
Glide.with(mContext).load(item.getDefaultPic()).into(goodImg);
}
}
适配器都写好了,那么该去Activity中去显示数据了。
进入MainActivity,创建一些变量
public static final String TAG = “MainActivity”;
private RecyclerView rvStore;
private List<CarResponse.OrderDataBean> mList = new ArrayList<>();
private StoreAdapter storeAdapter;
然后新建一个initView方法,在这里进行数据的解析,然后赋值,后面设置到适配器中。
/**
- 初始化
*/
private void initView() {
//设置亮色状态栏模式 systemUiVisibility在Android11中弃用了,可以尝试一下。
getWindow().getDecorView().setSystemUiVisibility(View.SYSTEM_UI_FLAG_LAYOUT_FULLSCREEN | View.SYSTEM_UI_FLAG_LIGHT_STATUS_BAR);
rvStore = findViewById(R.id.rv_store);
CarResponse carResponse = new Gson().fromJson(Constant.CAR_JSON, CarResponse.class);
mList.addAll(carResponse.getOrderData());
storeAdapter = new StoreAdapter(R.layout.item_store, mList);
rvStore.setLayoutManager(new LinearLayoutManager(this));
rvStore.setAdapter(storeAdapter);
}
最后在onCreate方法中调用initView方法即可。
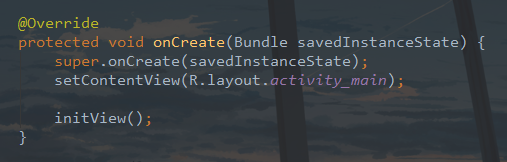
然后可以运行了,效果如下:

现在这个列表就展示出来了,简单的模拟了一下购物车,商品不多,点到为止。
从上面的代码步骤中已经做好了准备工作,下面就要来实现购物车的具体功能了,光看着像是不行的,银样蜡枪头,中看不中用。
① 商品、店铺选中
设置店铺和商品的选中,需要修改一下CarResponse类。

在这个类中的OrderDataBean类下新增加一个变量,用于判断店铺是否选中,同时增加get和set方法。

同时也要在CartlistBean下创建一个变量,用于判断商品是否选中,同时增加get和set方法。
商品选中
修改GoodsAdapter中的代码,在convert中增加如下代码:
ImageView checkedGoods = helper.getView(R.id.iv_checked_goods);
//判断商品是否选中
if (item.isChecked()) {
checkedGoods.setImageDrawable(mContext.getDrawable(R.drawable.ic_checked));
} else {
checkedGoods.setImageDrawable(mContext.getDrawable(R.drawable.ic_check));
}
//添加点击事件
helper.addOnClickListener(R.id.iv_checked_goods)//选中商品
.addOnClickListener(R.id.tv_increase_goods_num)//增加商品
.addOnClickListener(R.id.tv_reduce_goods_num);//减少商品

就是通过之前的那个变量去判断是否为选中,以此改变ImageView的图片资源。然后在StoreAdapter中进行判断监听,在StoreAdapter的convert中增加如下代码
//商品item中的点击事件
goodsAdapter.setOnItemChildClickListener(new OnItemChildClickListener() {
@Override
public void onItemChildClick(BaseQuickAdapter adapter, View view, int position) {
CarResponse.OrderDataBean.CartlistBean goodsBean = item.getCartlist().get(position);
switch (view.getId()) {
case R.id.iv_checked_goods://选中商品
//如果已选中则取消选中,未选中则选中
goodsBean.setChecked(!goodsBean.isChecked());
//刷新适配器
goodsAdapter.notifyDataSetChanged();
break;
case R.id.tv_increase_goods_num://增加商品数量
break;
case R.id.tv_reduce_goods_num://减少商品数量
break;
default:
break;
}
}
});

然后你可以运行试一下看看

这样就实现了商品的选中和未选中效果了,当然这个效果还不是最终的,这里面还涉及到和店铺的交互,以及底部合计价格的变化。
下面来看看店铺的选中效果。要使item可点击,同样要添加点击事件
在StoreAdapter的convert中增加如下代码:
ImageView checkedStore = helper.getView(R.id.iv_checked_store);
if (item.isChecked()) {
checkedStore.setImageDrawable(mContext.getDrawable(R.drawable.ic_checked));
} else {
checkedStore.setImageDrawable(mContext.getDrawable(R.drawable.ic_check));
}
//点击事件
helper.addOnClickListener(R.id.iv_checked_store);//选中店铺

而店铺的点击事件的判断要在MainActivity中。
在MainActivity中的initView方法中增加如下代码:
//店铺点击
storeAdapter.setOnItemChildClickListener(new BaseQuickAdapter.OnItemChildClickListener() {
@Override
public void onItemChildClick(BaseQuickAdapter adapter, View view, int position) {
CarResponse.OrderDataBean storeBean = mList.get(position);
if(view.getId() == R.id.iv_checked_store){
storeBean.setChecked(!storeBean.isChecked());
storeAdapter.notifyDataSetChanged();
}
}
});

运行一下吧。

可以看到,店铺和商品现在的选中和取消选中是没有问题的,当然这样还不够,因为还缺少一些业务,下面来一步一步的增加。
② 单选、多选、全选
在写功能之前,首先来想一个问题,单选、多选、全选之间的关系。单选指的是单个店铺里单个商品选中,该店铺如果所有商品都选中,则店铺自动选中,而直接选中店铺则里面所有商品选中,这是单选也是多选,你选中店铺其实就是多选店铺中的商品。这么解释不知道你好不好理解,下面来说全选,全选就是所有商品或店铺选中,所有商品选中就是所有店铺选中,所有店铺选中就是所有商品选中,两者满足其一都是为全选,而全选也是可以主动和被动,主动就是用户点击这个全选按钮,然后选中所有商品或者店铺,被动就是通过对所有店铺的选中或者所有商品的选中来达成全选。同时全选之后再点击就是取消全选。这段文字看起来是比较的绕,但是我相信你可以理解,你要是从语言上不能理解,你可以实际操作一下,你随便打开一个电商APP,进入购物车试一下就知道了,试的过程中你再想一下这段文字,你会理解的更深。
下面进入编码环节,首先来做商品全部选中,触发店铺选中。
要做到这一点那么你就必须记录该店铺下的选中商品的数量,当选中商品数量等于店铺商品数量时,店铺选中。当数量不等时,店铺不选中。
这里可以写一个接口,在util下新建一个GoodsCallback接口,里面的代码如下:
package com.llw.cart.util;
/**
-
商品回调接口
-
@author llw
*/
public interface GoodsCallback {
/**
-
选中店铺
-
@param shopId 店铺id
-
@param state 是否选中
*/
void checkedStore(int shopId,boolean state);
}
代码比较简单,因为选中商品的操作是在StoreAdapter中,所以要在StoreAdapter中调用这个checkedStore,在MainActivity中通过实现这个GoodsCallback接口,重写回调方法checkedStore里面去选中店铺。
在StoreAdapter中,创建对象。
//商品回调
private GoodsCallback goodsCallback;
然后在StoreAdapter方法中赋值

然后在StoreAdapter中新写一个方法,用于控制是否选中店铺。
/**
- 控制店铺是否选中
*/
private void controlStore(CarResponse.OrderDataBean item) {
int num = 0;
for (CarResponse.OrderDataBean.CartlistBean bean : item.getCartlist()) {
if (bean.isChecked()) {
++num;
}
}
if (num == item.getCartlist().size()) {
//全选中 传递需要选中的店铺的id过去
goodsCallback.checkedStore(item.getShopId(),true);
} else {
goodsCallback.checkedStore(item.getShopId(),false);
}
}
这里先记录选中商品数量,遍历完成之后,判断选中数量是否等于店铺拥有商品数量,然后根据不同情况传递不同的状态值进去即可。
方法写了自然就要有地方去调用,调用地方如下图所示,在选中商品之后调用。

那么现在该去MainActivity了,先实现这个GoodsCallback接口
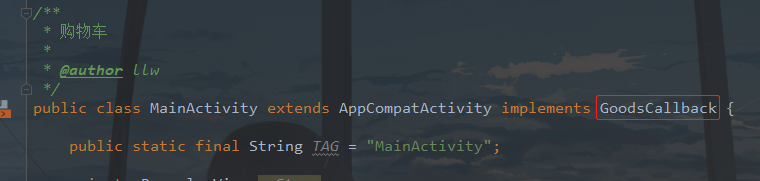
然后示例化StoreAdapter的时候传递进去这个回调。

最后就是重写回调方法了。
/**
-
选中店铺
-
@param shopId 店铺id
*/
@Override
public void checkedStore(int shopId,boolean state) {
for (CarResponse.OrderDataBean bean : mList) {
//遍历
if(shopId == bean.getShopId()){
bean.setChecked(state);
storeAdapter.notifyDataSetChanged();
}
}
}
代码很简单,主要是你的思路是否正确,下面运行一下吧。

嗯,效果是想要的。
那么下面就该通过店铺来控制商品了,当选中店铺时,里面的商品全选,当取消选中店铺时,里面的商品全不选。这个想法你甚至都不需要通过接口了,直接通过MainActivity中调用StoreAdapter的方法即可。
那么可以先在StoreAdapter中写一个方法。不过这个方法还需要一些前置条件,在StoreAdapter中创建对象,并在构造方法中赋值。
//店铺对象
private List<CarResponse.OrderDataBean> storeBean;

然后新增一个方法。
/**
- 控制商品是否选中
*/
public void controlGoods(int shopId, boolean state) {
//根据店铺id选中该店铺下所有商品
for (CarResponse.OrderDataBean orderDataBean : storeBean) {
//店铺id等于传递过来的店铺id 则选中该店铺下所有商品
if (orderDataBean.getShopId() == shopId) {
for (CarResponse.OrderDataBean.CartlistBean cartlistBean : orderDataBean.getCartlist()) {
cartlistBean.setChecked(state);
//刷新
notifyDataSetChanged();
}
}
}
}
之后就是在MainActivity中去调用这个controlGoods方法了。

很简单,那么下面运行一下。

下面就是底部的全选了,而这个全选是在MainActivity的,因此也顺便把MainActivity中的其他控件都实例化一下,有的需要添加点击监听。
在MainActivity中声明一下变量
private TextView tvEdit;//编辑
private ImageView ivCheckedAll;//全选
private TextView tvTotal;//合计价格
private TextView tvSettlement;//结算
private LinearLayout layEdit;//编辑底部布局
private TextView tvShareGoods;//分享商品
private TextView tvCollectGoods;//收藏商品
private TextView tvDeleteGoods;//删除商品
private boolean isEdit = false;//是否编辑
然后在initView()方法中绑定控件,并且添加一些控件的点击监听。
tvEdit = findViewById(R.id.tv_edit);
ivCheckedAll = findViewById(R.id.iv_checked_all);
tvTotal = findViewById(R.id.tv_total);
tvSettlement = findViewById(R.id.tv_settlement);
layEdit = findViewById(R.id.lay_edit);
tvShareGoods = findViewById(R.id.tv_share_goods);
tvCollectGoods = findViewById(R.id.tv_collect_goods);
tvDeleteGoods = findViewById(R.id.tv_delete_goods);
tvEdit.setOnClickListener(this);
ivCheckedAll.setOnClickListener(this);
tvSettlement.setOnClickListener(this);
tvShareGoods.setOnClickListener(this);
tvCollectGoods.setOnClickListener(this);
tvDeleteGoods.setOnClickListener(this);

之后实现View.OnClickListener接口
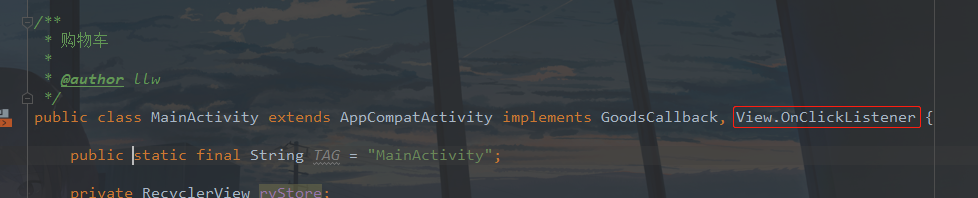
重写onClick方法,然后判断id触发不同的点击事件
/**
-
页面控件点击事件
-
@param v
*/
@Override
public void onClick(View v) {
switch (v.getId()) {
case R.id.tv_edit://编辑
if(isEdit){
tvEdit.setText(“编辑”);
layEdit.setVisibility(View.GONE);
isEdit = false;
}else {
tvEdit.setText(“完成”);
layEdit.setVisibility(View.VISIBLE);
isEdit = true;
}
break;
case R.id.iv_checked_all://全选
showMsg(“点击了全选”);
break;
case R.id.tv_settlement://结算
showMsg(“点击了结算”);
break;
case R.id.tv_delete_goods://删除
showMsg(“点击了删除”);
break;
case R.id.tv_collect_goods://收藏
showMsg(“点击了收藏”);
break;
case R.id.tv_share_goods://分享
showMsg(“点击了分享”);
break;
default:
break;
}
}
再写一个showMsg方法
/**
-
Toast提示
-
@param msg
*/
private void showMsg(String msg) {
Toast.makeText(this,msg,Toast.LENGTH_SHORT).show();
}
然后你可以先运行一下,把相应的控件点击一下,看是否会触发Toast提示,这个比较简单,我就不用图来说明了。
下面该来写这个全选的功能,其实全选就是选中所有店铺,在店铺选中时再选中所有商品,这个是有层次的。
先声明一个变量
private boolean isAllChecked = false;//是否全选
所以可以写一个方法
/**
-
是否全选
-
@param state 状态
*/
private void isSelectAllStore(boolean state) {
//修改背景
ivCheckedAll.setImageDrawable(getDrawable(state ? R.drawable.ic_checked : R.drawable.ic_check));
for (CarResponse.OrderDataBean orderDataBean : mList) {
//商品是否选中
storeAdapter.controlGoods(orderDataBean.getShopId(), state);
//店铺是否选中
checkedStore(orderDataBean.getShopId(), state);
}
isAllCheched = state;
}
然后在点击全选的时候调用即可

运行效果如下:

现在是通过主动点击页面的全选按钮进行全选和取消全选,这个还是比较简单的。下面就是被动去触发这个全选按钮了,被动触发有两种,第一种是一个一个的选中商品,最终所有店铺选中,达成全选。第二种是一个一个选中店铺,最终全选。这里面就一个关键点,那就是选中店铺的数量。这个数量的变化就决定了你是否需要触发全选。
下面来写代码吧。
先创建一个整型列表
private List shopIdList = new ArrayList<>();//店铺列表
然后在MainActivity中的checkedStore方法中,增加如下代码:
//记录选中店铺的shopid,添加到一个列表中。
if (!shopIdList.contains(bean.getShopId()) && state) {
//如果列表中没有这个店铺Id且当前店铺为选中状态
shopIdList.add(bean.getShopId());
}else {
if(shopIdList.contains(bean.getShopId())){
//通过list.indexOf获取属性的在列表中的下标,不过强转Integer更简洁
shopIdList.remove((Integer) bean.getShopId());
}
}
if(shopIdList.size() == mList.size()){
//全选
ivCheckedAll.setImageDrawable(getDrawable(R.drawable.ic_checked));
isAllChecked = true;
}else {
//不全选
ivCheckedAll.setImageDrawable(getDrawable(R.drawable.ic_check));
isAllChecked = false;
}
这里有两段代码,添加的位置如下图所示:

通过第一段代码对店铺id列表进行增减,通过第二段代码控制是否全选的样式和状态。现在通过单击商品就可以达到全选的目的了,通过与页面的全选按钮形成了交互。
下面可以运行一下了。

总结
这次面试问的还是还是有难度的,要求当场写代码并且运行,也是很考察面试者写代码
因为Android知识体系比较庞大和复杂的,涉及到计算机知识领域的方方面面。在这里我和身边一些朋友特意整理了一份快速进阶为Android高级工程师的系统且全面的学习资料。涵盖了Android初级——Android高级架构师进阶必备的一些学习技能。
附上:我们之前因为秋招收集的二十套一二线互联网公司Android面试真题(含BAT、小米、华为、美团、滴滴)和我自己整理Android复习笔记(包含Android基础知识点、Android扩展知识点、Android源码解析、设计模式汇总、Gradle知识点、常见算法题汇总。)

里面包含不同方向的自学编程路线、面试题集合/面经、及系列技术文章等,资源持续更新中…
网上学习资料一大堆,但如果学到的知识不成体系,遇到问题时只是浅尝辄止,不再深入研究,那么很难做到真正的技术提升。
一个人可以走的很快,但一群人才能走的更远!不论你是正从事IT行业的老鸟或是对IT行业感兴趣的新人,都欢迎加入我们的的圈子(技术交流、学习资源、职场吐槽、大厂内推、面试辅导),让我们一起学习成长!
r_FFFFFF,t_70#pic_center)
运行效果如下:
现在是通过主动点击页面的全选按钮进行全选和取消全选,这个还是比较简单的。下面就是被动去触发这个全选按钮了,被动触发有两种,第一种是一个一个的选中商品,最终所有店铺选中,达成全选。第二种是一个一个选中店铺,最终全选。这里面就一个关键点,那就是选中店铺的数量。这个数量的变化就决定了你是否需要触发全选。
下面来写代码吧。
先创建一个整型列表
private List shopIdList = new ArrayList<>();//店铺列表
然后在MainActivity中的checkedStore方法中,增加如下代码:
//记录选中店铺的shopid,添加到一个列表中。
if (!shopIdList.contains(bean.getShopId()) && state) {
//如果列表中没有这个店铺Id且当前店铺为选中状态
shopIdList.add(bean.getShopId());
}else {
if(shopIdList.contains(bean.getShopId())){
//通过list.indexOf获取属性的在列表中的下标,不过强转Integer更简洁
shopIdList.remove((Integer) bean.getShopId());
}
}
if(shopIdList.size() == mList.size()){
//全选
ivCheckedAll.setImageDrawable(getDrawable(R.drawable.ic_checked));
isAllChecked = true;
}else {
//不全选
ivCheckedAll.setImageDrawable(getDrawable(R.drawable.ic_check));
isAllChecked = false;
}
这里有两段代码,添加的位置如下图所示:
通过第一段代码对店铺id列表进行增减,通过第二段代码控制是否全选的样式和状态。现在通过单击商品就可以达到全选的目的了,通过与页面的全选按钮形成了交互。
下面可以运行一下了。
总结
这次面试问的还是还是有难度的,要求当场写代码并且运行,也是很考察面试者写代码
因为Android知识体系比较庞大和复杂的,涉及到计算机知识领域的方方面面。在这里我和身边一些朋友特意整理了一份快速进阶为Android高级工程师的系统且全面的学习资料。涵盖了Android初级——Android高级架构师进阶必备的一些学习技能。
附上:我们之前因为秋招收集的二十套一二线互联网公司Android面试真题(含BAT、小米、华为、美团、滴滴)和我自己整理Android复习笔记(包含Android基础知识点、Android扩展知识点、Android源码解析、设计模式汇总、Gradle知识点、常见算法题汇总。)
[外链图片转存中…(img-weT6kcGK-1715365145835)]
里面包含不同方向的自学编程路线、面试题集合/面经、及系列技术文章等,资源持续更新中…
网上学习资料一大堆,但如果学到的知识不成体系,遇到问题时只是浅尝辄止,不再深入研究,那么很难做到真正的技术提升。
一个人可以走的很快,但一群人才能走的更远!不论你是正从事IT行业的老鸟或是对IT行业感兴趣的新人,都欢迎加入我们的的圈子(技术交流、学习资源、职场吐槽、大厂内推、面试辅导),让我们一起学习成长!


 781
781

 被折叠的 条评论
为什么被折叠?
被折叠的 条评论
为什么被折叠?
 到【灌水乐园】发言


