


首先,我们所探讨的低功耗蓝牙(BLE)连接都是建立在 GATT (Generic Attribute Profile) 协议之上的,GATT是蓝牙传递数据的一个通用规范
我们来了解一些与蓝牙有关的关键词**
UUID: 可以理解为用于区分身份的唯一标识符
Service: 对于每一个Service以及每一个characteristic都有着自己唯一的UUID
Service是蓝牙设备中的服务,一个设备可以拥有多个服务,举例子:小米手环具备好几个服务,比如手环的基本信息、电量信息、心率检测、步数记录等
characteristic: 一个服务中可以存在着多个characteristic,可以将这些characteristic看做一个个独立的数据项,同样用小米手环举例子,在手环的Generic Access模块里存在着多个characteristic如,Device Name、Appearance、Peripheral Preferred Connection Parameter,如果你要向小米手环发送一个心率检测的通知,那么你就需要找到对应的characteristic的UUID,对这个characteristic进行通信
下图是蓝牙调试工具的界面,通过它应该可以对上述所说的几个关键字有更深刻的认识

根据下面的官方图片我们可以看到
Characteristic中含有多个属性,如value、properties、Descriptor,这里做简单的说明
value:特征数据值,比如心率值或者步数
Descriptor:对数据的说明信息,比如数据的单位等
Properties:定义Value如何使用以及Descriptor如何访问

有了以上的知识铺垫我们对蓝牙已经有了一个大致的认识,那么现在我们对安卓开发中连接设备以及读写数据的API做一个认识,代码在这里不是重点,之后的章节会重点讲述,
这里主要是了解API之间的关系以及作用
BluetoothManager:蓝牙管理,用于得到BluetoothAdapter
//调用系统服务获取一个BluetoothManager实例
BluetoothManager bluetoothManager = (BluetoothManager) getSystemService(BLUETOOTH_SERVICE);
bluetoothAdapter = bluetoothManager.getAdapter();
BluetoothAdapter:通过 BluetoothManager 获取,扫描蓝牙设备,回调方法中会将扫描到的蓝牙设备添加进BluetoothDevice中
bluetoothAdapter.startLeScan(callback)
BluetoothDevice:代表了连接的蓝牙设备,获取一些有关它的信息,如设备名称,地址等
//回调
//扫描回调
public BluetoothAdapter.LeScanCallback callback = new BluetoothAdapter.LeScanCallback()
{
@Override
public void onLeScan(final BluetoothDevice bluetoothDevice, int i, byte[] bytes) {
//重复过滤方法,列表中包含不该设备才加入列表中,并刷新列表
if (!deviceList.contains(bluetoothDevice)) {
//将设备加入列表数据中
deviceList.add(bluetoothDevice);
list.setAdapter(new MyAdapter(MainActivity.this, deviceList));
}
}
};
此时我们已经通过上述三个api实现了扫描并生成设备列表的过程,那么理所当然,我们要对列表中的设备进行连接,那么我们就需要用到BluetoothDevice中的connectGatt方法,这个方法与对应的设备连接后可以得到一个BluetoothGatt对象
这里说明connectGatt方法包含三个参数
-
Context上下文
-
autoConnect是否自动重连(Boolean)
-
BluetoothGattCallback 回调方法
BluetoothGatt:实现蓝牙的基本功能,可以重新连接蓝牙设备,发现蓝牙设备的 Service。
BluetoothGattCallback :里面有许多方法,对应着各种操作的回调(比如读写操作以及获取服务),我们按照需要实现即可
BluetoothGattService :通过BluetoothGatt可以得到,对应上文提到的Service,通过这个类我们可以得到所需要的characteristic
==================================================================
了解了以上内容以后,我们就做一个简单的安卓应用,连接上测试用的小米手环。
安卓的蓝牙开发必然要用到真机调试,这里就简单的说明一下,如果真机连接不上可以在网上查找对应的解决办法
1.进入手机的(更多设置中)开发者选项(这里以小米为例,进入设置,在我的设备中找到全部参数,连点MIUI版本处看到下方提示进入开发者选项即可),打开USB调试以及USB安装即可
2.打开andorid studio,将数据线连接上手机,就进入了真机调试。
1.在Manifest文件中添加
这里需要添加以上权限,否则会导致闪退
2.如果程序正常运行,但是扫描不到任何的设备,打开手机,进入手机权限管理,给安装的app定位权限设置为允许,同时保证手机中的位置信息是打开的,这步非常重要,旧版本的安卓系统可以略过,本机为andorid 10版本,如果不操作这步将不能看到任何设备
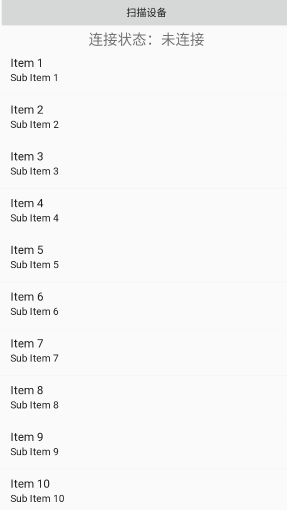
扫描设备主界面
<?xml version="1.0" encoding="utf-8"?><LinearLayout xmlns:android=“http://schemas.android.com/apk/res/android”
xmlns:tools=“http://schemas.android.com/tools”
android:layout_width=“match_parent”
android:layout_height=“match_parent”
android:orientation=“vertical”
tools:context=“com.example.blue_test.MainActivity”>>
<Button
android:id=“@+id/Search_device”
android:layout_width=“match_parent”
android:layout_height=“wrap_content”
android:text=“扫描设备”/>
<TextView
android:id=“@+id/Connection_Status”
android:layout_width=“match_parent”
android:layout_height=“wrap_content”
android:text=“连接状态:未连接”
android:gravity=“center”
android:textSize=“20dp”/>
<ListView
android:layout_width=“wrap_content”
android:layout_height=“wrap_content”
android:id=“@+id/list”
/>
实现效果:
扫描设备信息界面
<?xml version="1.0" encoding="utf-8"?><androidx.constraintlayout.widget.ConstraintLayout
xmlns:android=“http://schemas.android.com/apk/res/android”
xmlns:app=“http://schemas.android.com/apk/res-auto”
xmlns:tools=“http://schemas.android.com/tools”
android:layout_width=“match_parent”
android:layout_height=“match_parent”>
<ImageView
android:id=“@+id/bluetoothicon”
android:layout_width=“37dp”
android:layout_height=“50dp”
android:background=“@drawable/ic_launcher_background”
android:src=“@android:drawable/stat_sys_data_bluetooth”
app:layout_constraintStart_toStartOf=“parent”
app:layout_constraintTop_toTopOf=“parent” />
<TextView
android:id=“@+id/bluetoothname”
android:layout_width=“wrap_content”
android:layout_height=“wrap_content”
android:layout_marginStart=“16dp”
android:text=“name”
android:textColor=“#000000”
android:textSize=“19dp”
app:layout_constraintStart_toEndOf=“@+id/bluetoothicon”
app:layout_constraintTop_toTopOf=“parent” />
<TextView
android:id=“@+id/uuid”
android:layout_width=“wrap_content”
android:layout_height=“wrap_content”
android:layout_marginStart=“16dp”
android:layout_marginTop=“4dp”
android:text=“uuid”
android:textSize=“15dp”
app:layout_constraintStart_toEndOf=“@+id/bluetoothicon”
app:layout_constraintTop_toBottomOf=“@+id/bluetoothname” />
<TextView
android:id=“@+id/status”
android:layout_width=“0dp”
android:layout_height=“13dp”
android:text=“”
android:textColor=“#ff0000”
app:layout_constraintEnd_toEndOf=“parent”
app:layout_constraintHorizontal_bias=“0.0”
app:layout_constraintStart_toEndOf=“@+id/bluetoothname”
app:layout_constraintTop_toTopOf=“parent” />
</androidx.constraintlayout.widget.ConstraintLayout>
创建变量
重新回顾一下之前提到的api
private Button Search_device; //扫描设备按钮
private TextView connection_Status; //连接状态TextView
private ListView list; //设备list
BluetoothAdapter bluetoothAdapter; //蓝牙适配器
BluetoothGatt bluetoothGatt; //连接设备后的操作类
List deviceList = new ArrayList<>(); //存储扫描到的所有设备
List serviceslist = new ArrayList(); //存储连接设备的所有服务的uuid
BluetoothDevice bluetoothDevice; //某个设备
BluetoothGattService bluetoothGattServices; //对应着上文提到的服务
BluetoothGattCharacteristic characteristic_zd, characteristic_jb; //服务下的特征(characteristic)
onCeate方法
@Override
protected void onCreate(Bundle savedInstanceState) {
super.onCreate(savedInstanceState);
setContentView(R.layout.activity_main);
initView();
//蓝牙管理类,通过getSystemService(BLUETOOTH_SERVICE)的方法获取实例
BluetoothManager bluetoothManager = (BluetoothManager) getSystemService(BLUETOOTH_SERVICE);
//通过蓝牙管理实例获取适配器,然后通过扫描方法(scan)获取设备(device)
bluetoothAdapter = bluetoothManager.getAdapter();
}
initView方法代码如下,实现可连接蓝牙设备列表的点击监听
private void initView() {
Search_device = (Button) findViewById(R.id.search_device);
list = (ListView) findViewById(R.id.list);
connection_Status = (TextView) findViewById(R.id.connection_status);
Search_device.setOnClickListener(this);
//item 监听事件
list.setOnItemClickListener(new AdapterView.OnItemClickListener() {
@Override
public void onItemClick(AdapterView<?> adapterView, View view, int i, long l) {
bluetoothDevice = deviceList.get(i);
//根据监听器返回的位置,得到扫描设备列表中对应的设备
//上文提到的,通过bluetoothDevice的connectGatt方法连接设备并返回BluetoothGatt实例
bluetoothGatt = bluetoothDevice.connectGatt(MainActivity.this, false, gattcallback);
connection_Status.setText(“正在连接” + bluetoothDevice.getName() + “中…”);
}
});
}
上文有提到,通过bluetoothDevice的connectGatt方法连接设备返回一个BluetoothGatt实例,如果还有印象的读者应该记得,这里的connectGatt方法需要实现三个参数,
-
上下文,这里是MainActivity.this
-
自动重连,设置为false代表不自动重连,true为自动重连
-
BluetoothGattCallback类(回调),我们这里需要实现回调类的里面的方法,之后我们再看BluetoothGattCallback类的实现
点击扫描设备的监听
public void onClick(View view) {
switch (view.getId()) {
case R.id.search_device:
//开始扫描前开启蓝牙,通过intent发起一个打开蓝牙的通知
Intent Bluetooth_open_request= new Intent(BluetoothAdapter.ACTION_REQUEST_ENABLE);
startActivityForResult(Bluetooth_open_request, 0);
//开启一个扫描线程
Thread scanThread = new Thread(new Runnable() {
@Override
public void run() {
deviceList.clear(); //把之前存储的设备信息清空
bluetoothAdapter.startLeScan(callback); //调用适配器方法扫描
}
});
scanThread.start();
connection_Status.setText(“正在扫描”);
break;
}
}
这里的callback是一个相当于扫描到设备以后,会调用我们实现的callback中的方法,这里我们实现创建一个类实现LeScanCallback的onLeScan方法,使得设备扫描以后将新设备添加进deviceList中。
这里的callback需要和上面的BluetoothGattCallback区分开BluetoothGattCallback是与某个设备连接以后的回调,而callback是扫描设备以后的回调并没有连接设备
//扫描回调
public BluetoothAdapter.LeScanCallback callback = new BluetoothAdapter.LeScanCallback()
{
@Override
public void onLeScan(final BluetoothDevice bluetoothDevice, int i, byte[] bytes) {
//使用contains方法查看当前扫描到的设备是否已经在列表中,如果不在就添加
if (!deviceList.contains(bluetoothDevice)) {
//将设备加入列表中,通过适配器显示
deviceList.add(bluetoothDevice);
list.setAdapter(new BsAdapter(MainActivity.this, deviceList));
}
}
};
这里的BsAdapter是继承BaseAdapter实现的一个适配器类
使用自定义适配器只需要写一个类继承BaseAdpter并实现4个抽象方法即可,这里不过多探讨,自定义适配器使用起来并不困难,如果需要可以自行查阅相关资料
public class BsAdapter extends BaseAdapter {
public List bluetooth_Device_list;
private LayoutInflater Lflater;
public BsAdapter(Context context , List list){
bluetooth_Device_list = list;
Lflater = LayoutInflater.from(context);
}
//获取传入的数组大小
@Override
public int getCount() {
return bluetooth_Device_list.size();
}
//获取第N条数据
@Override
public Object getItem(int i) {
return bluetooth_Device_list.get(i);
}
//获取item id
@Override
public long getItemId(int i) {
return i;
}
最后
分享一份工作1到5年以上的Android程序员架构进阶学习路线体系,希望能对那些还在从事Android开发却还不知道如何去提升自己的,还处于迷茫的朋友!
-
阿里P7级Android架构师技术脑图;查漏补缺,体系化深入学习提升

-
**全套体系化高级架构视频;**七大主流技术模块,视频+源码+笔记

有任何问题,欢迎广大网友一起来交流
网上学习资料一大堆,但如果学到的知识不成体系,遇到问题时只是浅尝辄止,不再深入研究,那么很难做到真正的技术提升。
一个人可以走的很快,但一群人才能走的更远!不论你是正从事IT行业的老鸟或是对IT行业感兴趣的新人,都欢迎加入我们的的圈子(技术交流、学习资源、职场吐槽、大厂内推、面试辅导),让我们一起学习成长!
public Object getItem(int i) {
return bluetooth_Device_list.get(i);
}
//获取item id
@Override
public long getItemId(int i) {
return i;
}
最后
分享一份工作1到5年以上的Android程序员架构进阶学习路线体系,希望能对那些还在从事Android开发却还不知道如何去提升自己的,还处于迷茫的朋友!
-
阿里P7级Android架构师技术脑图;查漏补缺,体系化深入学习提升
[外链图片转存中…(img-mNfBLdZZ-1714611010010)]
-
**全套体系化高级架构视频;**七大主流技术模块,视频+源码+笔记
[外链图片转存中…(img-FvBoB7mK-1714611010011)]
有任何问题,欢迎广大网友一起来交流
网上学习资料一大堆,但如果学到的知识不成体系,遇到问题时只是浅尝辄止,不再深入研究,那么很难做到真正的技术提升。
一个人可以走的很快,但一群人才能走的更远!不论你是正从事IT行业的老鸟或是对IT行业感兴趣的新人,都欢迎加入我们的的圈子(技术交流、学习资源、职场吐槽、大厂内推、面试辅导),让我们一起学习成长!


 1万+
1万+

 被折叠的 条评论
为什么被折叠?
被折叠的 条评论
为什么被折叠?
 到【灌水乐园】发言


