


总结
最后对于程序员来说,要学习的知识内容、技术有太多太多,要想不被环境淘汰就只有不断提升自己,从来都是我们去适应环境,而不是环境来适应我们!
这里附上上述的技术体系图相关的几十套腾讯、头条、阿里、美团等公司2021年的面试题,把技术点整理成了视频和PDF(实际上比预期多花了不少精力),包含知识脉络 + 诸多细节,由于篇幅有限,这里以图片的形式给大家展示一部分。
相信它会给大家带来很多收获:


当程序员容易,当一个优秀的程序员是需要不断学习的,从初级程序员到高级程序员,从初级架构师到资深架构师,或者走向管理,从技术经理到技术总监,每个阶段都需要掌握不同的能力。早早确定自己的职业方向,才能在工作和能力提升中甩开同龄人。
网上学习资料一大堆,但如果学到的知识不成体系,遇到问题时只是浅尝辄止,不再深入研究,那么很难做到真正的技术提升。
一个人可以走的很快,但一群人才能走的更远!不论你是正从事IT行业的老鸟或是对IT行业感兴趣的新人,都欢迎加入我们的的圈子(技术交流、学习资源、职场吐槽、大厂内推、面试辅导),让我们一起学习成长!
Android Studio
鉴于目前Google官方推荐使用 Android Studio 进行Android项目开发,自 V3.4.2 开始,Bmob Android SDK 可以使用Gradle来进行包依赖管理,如果你使用Android Studio来进行基于BmobSDK的项目开发
1.在Project的build.gradle文件中添加如下配置(注意文字说明部分)
buildscript { repositories { jcenter() } dependencies { classpath 'com.android.tools.build:gradle:1.2.3' } } allprojects { repositories { jcenter() //Bmob的maven仓库地址,必须填写 maven { url "https://raw.github.com/bmob/bmob-android-sdk/master" } } }
-
1
-
2
-
3
-
4
-
5
-
6
-
7
-
8
-
9
-
10
-
11
-
12
-
13
-
14
-
15
-
16
-
1
-
2
-
3
-
4
-
5
-
6
-
7
-
8
-
9
-
10
-
11
-
12
-
13
-
14
-
15
-
16
2、在app的build.gradle文件中添加如下配置(注意文字说明部分):
apply plugin: 'com.android.application' android { compileSdkVersion 22 buildToolsVersion '22.0.1' defaultConfig { applicationId "cn.bmob.android" minSdkVersion 14 targetSdkVersion 22 versionCode 1 versionName "1.0" } buildTypes { release { minifyEnabled false proguardFiles getDefaultProguardFile('proguard-android.txt'), 'proguard-rules.pro' } } lintOptions{ abortOnError false } } dependencies { compile fileTree(dir: 'libs', include: ['*.jar']) compile 'com.android.support:appcompat-v7:22.2.0' //以下SDK开发者请根据需要自行选择 //bmob-sdk :Bmob的android sdk包 compile 'cn.bmob.android:bmob-sdk:3.4.5' //bmob-push:Bmob的推送包 compile 'cn.bmob.android:bmob-push:0.6' //bmob-im:bmob的im包,以下两个配置是im功能所需 compile 'cn.bmob.android:bmob-im:1.1.9' compile 'cn.bmob.android:bmob-sdk:3.4.3' //okhttp(选填):为解决弱网情况下SDK请求失败及响应慢的问题,自`V3.4.3版本`开始使用`okhttp`优化SDK的网络框架。 compile 'com.squareup.okhttp:okhttp:2.4.0' compile 'com.squareup.okio:okio:1.4.0' //bmob-sms :Bmob单独为短信服务提供的包 compile 'cn.bmob.android:bmob-sms:1.0.1' }
-
1
-
2
-
3
-
4
-
5
-
6
-
7
-
8
-
9
-
10
-
11
-
12
-
13
-
14
-
15
-
16
-
17
-
18
-
19
-
20
-
21
-
22
-
23
-
24
-
25
-
26
-
27
-
28
-
29
-
30
-
31
-
32
-
33
-
34
-
35
-
36
-
37
-
38
-
39
-
40
-
41
-
42
-
43
-
44
-
45
-
46
-
47
-
48
-
1
-
2
-
3
-
4
-
5
-
6
-
7
-
8
-
9
-
10
-
11
-
12
-
13
-
14
-
15
-
16
-
17
-
18
-
19
-
20
-
21
-
22
-
23
-
24
-
25
-
26
-
27
-
28
-
29
-
30
-
31
-
32
-
33
-
34
-
35
-
36
-
37
-
38
-
39
-
40
-
41
-
42
-
43
-
44
-
45
-
46
-
47
-
48
注:
1、如果你只需要Bmob提供的短信功能,那么你只需单独配置bmob-sms,如果你既需要bmob的数据服务,也需要短信服务,那么你只需要配置bmob-sdk即可。
2、每个版本的im都对应特定版本的bmob-sdk,如果你使用的是1.1.8版本的im,那么配套的bmob-sdk的版本为3.3.5。使用的是1.1.9配套的bmob-sdk的版本为3.4.3.
3、与okhttp有关的配置依赖不是必填项,开发者可以不添加该依赖。
Eclipse
直接拷贝到lib目录下
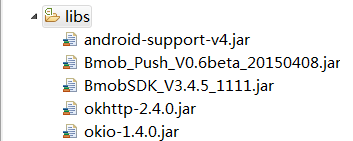
下面的例子均在Eclipse环境下完成
2.添加权限
<uses-permission android:name="android.permission.INTERNET"/> <uses-permission android:name="android.permission.ACCESS_WIFI_STATE"/> <uses-permission android:name="android.permission.ACCESS_NETWORK_STATE"/> <uses-permission android:name="android.permission.READ_PHONE_STATE"/> <uses-permission android:name="android.permission.WRITE_EXTERNAL_STORAGE"/> <uses-permission android:name="android.permission.READ_LOGS"/>
-
1
-
2
-
3
-
4
-
5
-
6
-
1
-
2
-
3
-
4
-
5
-
6
3.初始化BmobSDK
public class MainActivity extends Activity { @Override protected void onCreate(Bundle savedInstanceState) { // TODO Auto-generated method stub super.onCreate(savedInstanceState); // 初始化 Bmob SDK // 使用时请将第二个参数Application ID替换成你在Bmob服务器端创建的Application ID Bmob.initialize(this, "Your Application ID"); } }
-
1
-
2
-
3
-
4
-
5
-
6
-
7
-
8
-
9
-
10
-
1
-
2
-
3
-
4
-
5
-
6
-
7
-
8
-
9
-
10
首先我们把布局添加一下
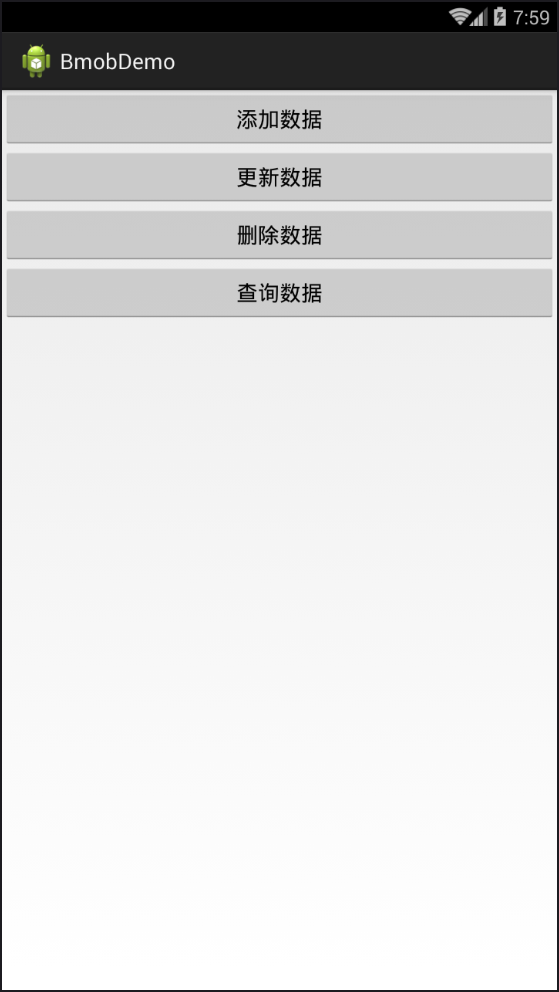
layout_main.xml
<LinearLayout xmlns:android="http://schemas.android.com/apk/res/android" xmlns:tools="http://schemas.android.com/tools" android:layout_width="match_parent" android:layout_height="match_parent" android:orientation="vertical" > <Button android:id="@+id/btn_add" android:layout_width="fill_parent" android:layout_height="wrap_content" android:text="添加数据" /> <Button android:id="@+id/btn_update" android:layout_width="fill_parent" android:layout_height="wrap_content" android:text="更新数据" /> <Button android:id="@+id/btn_delete" android:layout_width="fill_parent" android:layout_height="wrap_content" android:text="删除数据" /> <Button android:id="@+id/btn_query" android:layout_width="fill_parent" android:layout_height="wrap_content" android:text="查询数据" /> </LinearLayout>
-
1
-
2
-
3
-
4
-
5
-
6
-
7
-
8
-
9
-
10
-
11
-
12
-
13
-
14
-
15
-
16
-
17
-
18
-
19
-
20
-
21
-
22
-
23
-
24
-
25
-
26
-
27
-
28
-
29
-
30
-
31
-
1
-
2
-
3
-
4
-
5
-
6
-
7
-
8
-
9
-
10
-
11
-
12
-
13
-
14
-
15
-
16
-
17
-
18
-
19
-
20
-
21
-
22
-
23
-
24
-
25
-
26
-
27
-
28
-
29
-
30
-
31
然后实例化这四个Button
private Button btn_add, btn_update, btn_delete, btn_query;
-
1
-
1
btn_add = (Button) findViewById(R.id.btn_add); btn_add.setOnClickListener(this); btn_update = (Button) findViewById(R.id.btn_update); btn_update.setOnClickListener(this); btn_delete = (Button) findViewById(R.id.btn_delete); btn_delete.setOnClickListener(this); btn_query = (Button) findViewById(R.id.btn_query); btn_query.setOnClickListener(this);
-
1
-
2
-
3
-
4
-
5
-
6
-
7
-
8
-
1
-
2
-
3
-
4
-
5
-
6
-
7
-
8
因为考虑到有四个点击事件,我们直接implements OnClickListener这样也许更直观一点,所以onClick()方法就是这个样子了
@Override public void onClick(View v) { switch (v.getId()) { //添加数据 case R.id.btn_add: break; //更新数据 case R.id.btn_update: break; //删除数据 case R.id.btn_delete: break; //查询数据 case R.id.btn_query: break; } }
-
1
-
2
-
3
-
4
-
5
-
6
-
7
-
8
-
9
-
10
-
11
-
12
-
13
-
14
-
15
-
16
-
17
-
18
-
19
-
20
-
21
-
1
-
2
-
3
-
4
-
5
-
6
-
7
-
8
-
9
-
10
-
11
-
12
-
13
-
14
-
15
-
16
-
17
-
18
-
19
-
20
-
21
准备工作差不多都做完了?No,还有一件非常重要的事情要做
1.创建JavaBean
我们新建一个类继承BmobObject,具体操作看注释
package com.lgl.bmobdemo; import cn.bmob.v3.BmobObject; /** * javabean * * @author lgl * */ public class Bean extends BmobObject { /** * 这个javabean必须视情况而定,也就是你需要你的表上有什么信息你就加什么,当然,前提是,你的表单上有 * 添加表单可以在Bmob应用控制-数据浏览页面操作,后续会讲到 这里,我们假设有三个信息数据,分别是姓名,年龄,分数 */ private String name; private int age; private int score; public String getName() { return name; } public void setName(String name) { this.name = name; } public int getAge() { return age; } public void setAge(int age) { this.age = age; } public int getScore() { return score; } public void setScore(int score) { this.score = score; } }
-
1
-
2
-
3
-
4
-
5
-
6
-
7
-
8
-
9
-
10
-
11
-
12
-
13
-
14
-
15
-
16
-
17
-
18
-
19
-
20
-
21
-
22
-
23
-
24
-
25
-
26
-
27
-
28
-
29
-
30
-
31
-
32
-
33
-
34
-
35
-
36
-
37
-
38
-
39
-
40
-
41
-
42
-
43
-
44
-
45
-
46
-
1
-
2
-
3
-
4
-
5
-
6
-
7
-
8
-
9
-
10
-
11
-
12
-
13
-
14
-
15
-
16
-
17
-
18
-
19
-
20
-
21
-
22
-
23
-
24
-
25
-
26
-
27
-
28
-
29
-
30
-
31
-
32
-
33
-
34
-
35
-
36
-
37
-
38
-
39
-
40
-
41
-
42
-
43
-
44
-
45
-
46
2.添加数据
其实就是调用了Bean的get,set方法
case R.id.btn_add: // new出这个bean Bean bean = new Bean(); // 分别设置相应的信息 bean.setName("刘桂林"); bean.setAge(20); bean.setScore(100); bean.save(this, new SaveListener() { @Override public void onSuccess() { // 成功 Toast.makeText(MainActivity.this, "保存成功", 1) .show(); } @Override public void onFailure(int arg0, String arg1) { // 失败 Toast.makeText(MainActivity.this, "保存失败", Toast.LENGTH_LONG) .show(); } }); break;
-
1
-
2
-
3
-
4
-
5
-
6
-
7
-
8
-
9
-
10
-
11
-
12
-
13
-
14
-
15
-
16
-
17
-
18
-
19
-
20
-
21
-
22
-
23
-
24
-
25
-
1
-
2
-
3
-
4
-
5
-
6
-
7
-
8
-
9
-
10
-
11
-
12
-
13
-
14
-
15
-
16
-
17
-
18
-
19
-
20
-
21
-
22
-
23
-
24
-
25
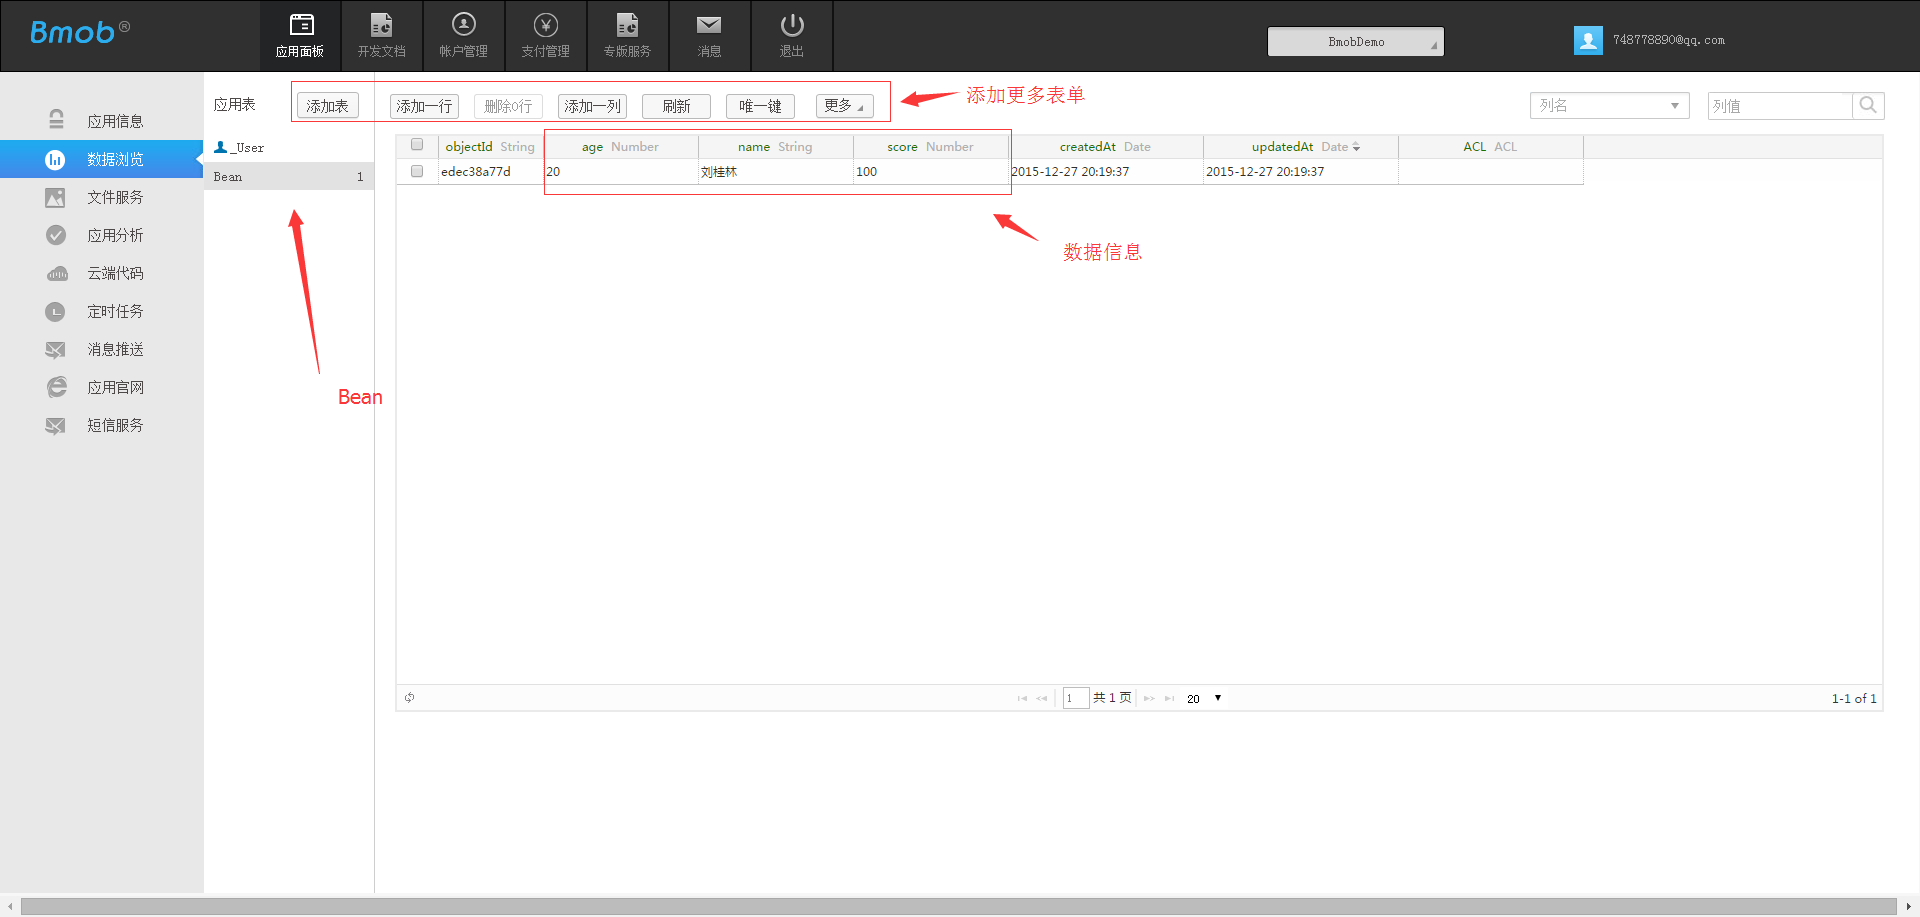
我们运行程序,然后点击添加数据,当弹出Toast说明保存成功后,我们回到Bmob官网,找到我们的项目,点击数据浏览,就会看到已经保存的信息,这个就是我们的后台了
3.更新数据
更新数据,就是更新一条数据的记录,就像你修改个人信息,本来是男,现在要修改成女一样,但是,我们必须知道一点,就是如下图所示的objectid

假设我先现在知道这个id,那我们的操作就可以这样
case R.id.btn_update: bean = new Bean(); bean.setObjectId("edec38a77d"); bean.setName("修改刘桂林"); bean.setScore(30); bean.update(this, new UpdateListener() { @Override public void onSuccess() { // 成功 Toast.makeText(MainActivity.this, "更新成功", 1).show(); } @Override public void onFailure(int arg0, String arg1) { // 失败 Toast.makeText(MainActivity.this, "更新失败", 1).show(); } }); break;
-
1
-
2
-
3
-
4
-
5
-
6
-
7
-
8
-
9
-
10
-
11
-
12
-
13
-
14
-
15
-
16
-
17
-
18
-
19
-
20
-
21
-
1
-
2
-
3
-
4
-
5
-
6
-
7
-
8
-
9
-
10
-
11
-
12
-
13
-
14
-
15
-
16
-
17
-
18
-
19
-
20
-
21
然后我们来运行程序,点击更新数据,然后我们回到后台去查看

4.删除数据
同样的,你要删除一条数据,你还得知道人家的objectid
case R.id.btn_delete: bean = new Bean(); bean.setObjectId("edec38a77d"); bean.delete(this, new DeleteListener() { @Override public void onSuccess() { //成功 Toast.makeText(MainActivity.this, "删除成功", 1).show(); } @Override public void onFailure(int arg0, String arg1) { //失败 Toast.makeText(MainActivity.this, "删除失败", 1).show(); } }); break;
-
1
-
2
-
3
-
4
-
5
-
6
-
7
-
8
-
9
-
10
-
11
-
12
-
13
-
14
-
15
-
16
-
17
-
18
-
19
-
1
-
2
-
3
-
4
-
5
-
6
-
7
-
8
-
9
-
10
-
11
-
12
-
13
-
14
-
15
-
16
-
17
-
18
-
19
然后我们运行程序,点击删除数据后回到后台

可以看到,表明bean还在,但是数据已经被删除了
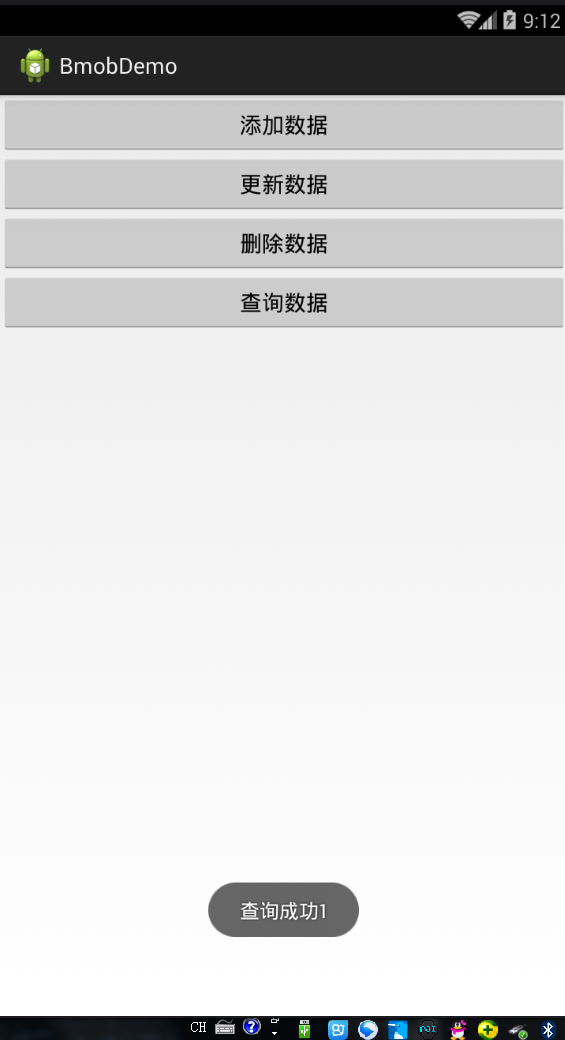
5.查询数据
这几个数据操作,唯一不同的就是查询了,他必须使用到一个查询的类BmobQuery
case R.id.btn_query: // BmobQuery<要查询的数据表> 项目一般不会只有一张表的 BmobQuery<Bean> query = new BmobQuery<Bean>(); query.findObjects(this, new FindListener<Bean>() { @Override public void onSuccess(List<Bean> arg0) { // 成功 Toast.makeText(MainActivity.this, "查询成功"+arg0.size(), 1).show(); } @Override public void onError(int arg0, String arg1) { // 失败 Toast.makeText(MainActivity.this, "查询失败", 1).show(); } }); break;
-
1
-
2
-
3
-
4
-
5
-
6
-
7
-
8
-
9
-
10
-
11
-
12
-
13
-
14
-
15
-
16
-
17
-
18
-
1
-
2
-
3
-
4
-
5
-
6
-
7
-
8
-
9
-
10
-
11
-
12
-
13
-
14
-
15
-
16
-
17
-
18
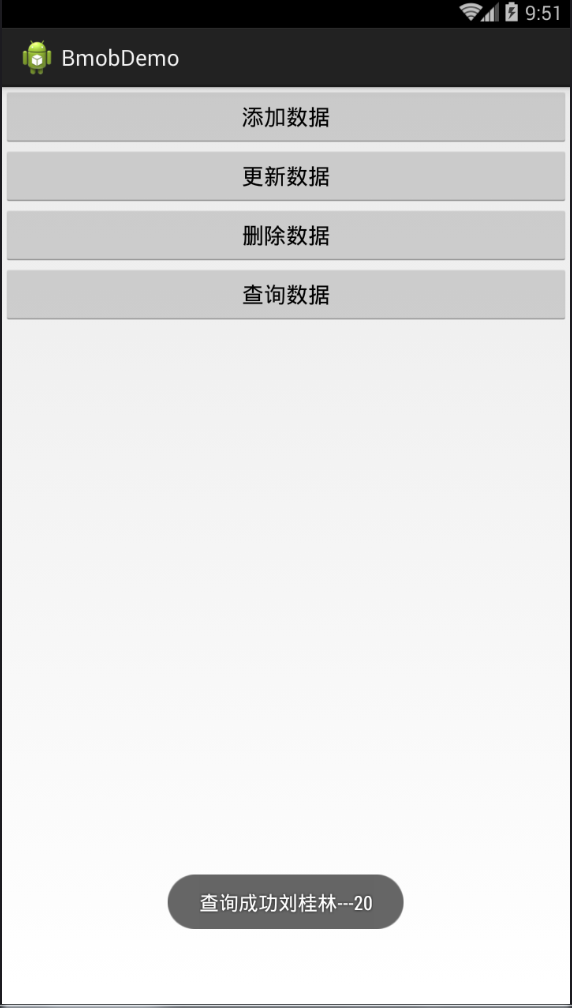
然后我们点击查询之后,他返回的是一个List,这里我们就不详细看List里面有什么了,表里只有一条数据,我们直接Toast他的size
5.1条件查询
跟数据库操作是一样的,你可以根据条件来查询,看代码
case R.id.btn_query: // BmobQuery<要查询的数据表> 项目一般不会只有一张表的 BmobQuery<Bean> query = new BmobQuery<Bean>(); //条件查询 我们查询名称是刘桂林的数据 query.addWhereEqualTo("name", "刘桂林"); query.findObjects(this, new FindListener<Bean>() { @Override public void onSuccess(List<Bean> arg0) { // 成功 // Toast.makeText(MainActivity.this, "查询成功"+arg0.size(), 1).show(); for (Bean bean : arg0) { Toast.makeText(MainActivity.this, "查询成功"+bean.getName()+"---"+bean.getAge(), 1).show(); } } @Override public void onError(int arg0, String arg1) { // 失败 Toast.makeText(MainActivity.this, "查询失败", 1).show(); } }); break;
-
1
-
2
-
3
-
4
-
5
-
6
-
7
-
8
-
9
-
10
-
11
-
12
-
13
-
14
-
15
-
16
-
17
-
18
-
19
-
20
-
21
-
22
-
23
-
1
-
2
-
3
-
4
-
5
-
6
-
7
-
8
-
9
-
10
-
11
-
12
-
13
-
14
-
15
-
16
-
17
-
18
-
19
-
20
-
21
-
22
-
23
运行的结果
5.2单条查询
case R.id.btn_query: // BmobQuery<要查询的数据表> 项目一般不会只有一张表的 BmobQuery<Bean> query = new BmobQuery<Bean>(); // 查询单条数据 query.getObject(this, "9fe91ce9a6", new GetListener<Bean>() { @Override public void onFailure(int arg0, String arg1) { // 失败 Toast.makeText(MainActivity.this, "查询失败", 1).show(); } @Override public void onSuccess(Bean bean) { // 成功 Toast.makeText(MainActivity.this, bean.getName()+","+bean.getAge(), 1).show(); } }); break;
-
1
-
2
-
3
-
4
-
5
-
6
-
7
-
8
-
9
-
10
-
11
-
12
-
13
-
14
-
15
-
16
-
17
-
18
-
19
-
20
-
1
-
2
-
3
-
4
-
5
-
6
-
7
-
8
-
9
-
10
-
11
-
12
-
13
-
14
-
15
-
16
-
17
-
18
-
19
-
20
这里你要单条数据查询的话,你就必须只带objectid才行,这里就不演示了
Demo下载地址:http://download.csdn.net/detail/qq_26787115/9379591
前面废话啰嗦了也有一大堆了,现在来聊聊实际点的东西,Bmob他毕竟是一个后台数据管理的平台,所以前面才说了一堆的数据操作,我们接下来要实现的功能就是用户的注册和登录。
1.注册
Bmob实现登录注册,还有邮箱验证的功能,其实就是利用上面的数据操作,也就是增删查改
我们进入后台会看到用户表单里面有一些字段

这可不是固定的,而是根据我们的需求可以增加或者删除的,默认的是最基本的
我们为了方便,新建一个工程BmobTest,然后把架包放在lib目录下,添加相应的权限以及在onCreate()方法里初始化Bmob,准备工作做完了之后,我们开始写代码:
我们还是用回上面的哪个Bean,因为用户名和密码是不需要复写的,不过这里特别需要注意的是,这次我们不是继承BmobObject,而是继承BmobUser;
**
我们要先搭建一个工程
activity_main.xml
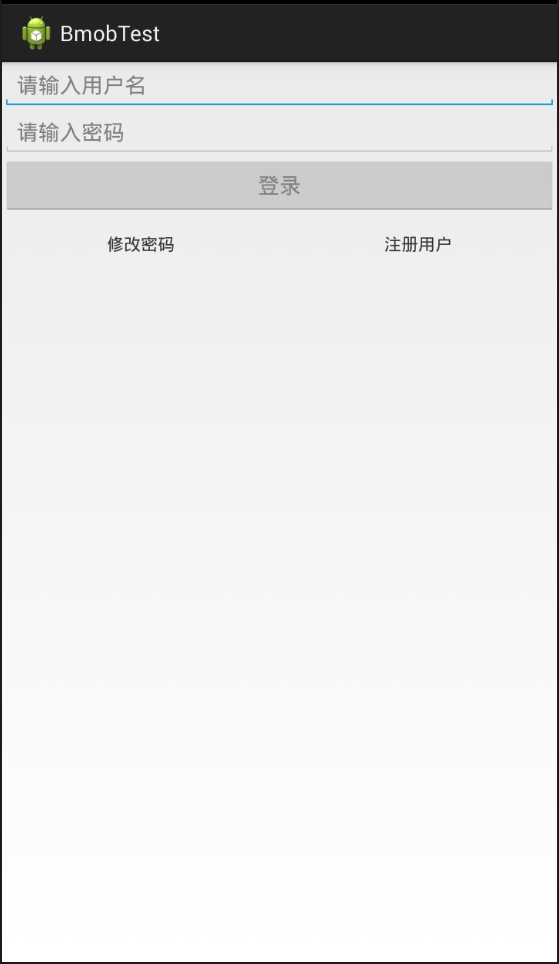
<LinearLayout xmlns:android="http://schemas.android.com/apk/res/android" xmlns:tools="http://schemas.android.com/tools" android:layout_width="match_parent" android:layout_height="match_parent" android:orientation="vertical" > <EditText android:id="@+id/et_name" android:layout_width="match_parent" android:layout_height="wrap_content" android:hint="请输入用户名" /> <EditText android:id="@+id/et_pass" android:layout_width="match_parent" android:layout_height="wrap_content" android:hint="请输入密码" /> <Button android:id="@+id/btn_login" android:layout_width="match_parent" android:layout_height="wrap_content" android:hint="登录" /> <LinearLayout android:layout_width="match_parent" android:layout_height="wrap_content" android:layout_marginTop="15dp" android:orientation="horizontal" > <TextView android:id="@+id/tv_etpass" android:layout_width="wrap_content" android:layout_height="wrap_content" android:layout_weight="1" android:gravity="center" android:text="修改密码" /> <TextView android:id="@+id/tv_register" android:layout_width="wrap_content" android:layout_height="wrap_content" android:layout_weight="1" android:gravity="center" android:text="注册用户" /> </LinearLayout> </LinearLayout>
-
1
-
2
-
3
-
4
-
5
-
6
-
7
-
8
-
9
-
10
-
11
-
12
-
13
-
14
-
15
-
16
-
17
-
18
-
19
-
20
-
21
-
22
-
23
-
24
-
25
-
26
-
27
-
28
-
29
-
30
-
31
-
32
-
33
-
34
-
35
-
36
-
37
-
38
-
39
-
40
-
41
-
42
-
43
-
44
-
45
-
46
-
47
-
48
-
1
-
2
-
3
-
4
-
5
-
6
-
7
-
8
-
9
-
10
-
11
-
12
-
13
-
14
-
15
-
16
-
17
-
18
-
19
-
20
-
21
-
22
-
23
-
24
-
25
-
26
-
27
-
28
-
29
-
30
-
31
-
32
-
33
-
34
-
35
-
36
-
37
-
38
-
39
-
40
-
41
-
42
-
43
-
44
-
45
-
46
-
47
-
48
activity_register.xml
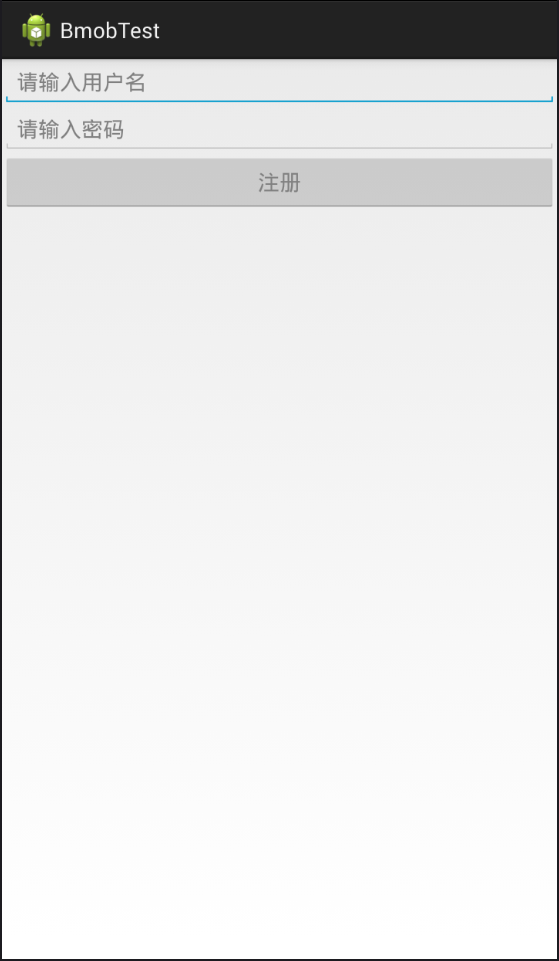
<?xml version="1.0" encoding="utf-8"?> <LinearLayout xmlns:android="http://schemas.android.com/apk/res/android" android:layout_width="match_parent" android:layout_height="match_parent" android:orientation="vertical" > <EditText android:id="@+id/et_name" android:layout_width="match_parent" android:layout_height="wrap_content" android:hint="请输入用户名" /> <EditText android:id="@+id/et_pass" android:layout_width="match_parent" android:layout_height="wrap_content" android:hint="请输入密码" /> <Button android:id="@+id/btn_register" android:layout_width="match_parent" android:layout_height="wrap_content" android:hint="注册" /> </LinearLayout>
-
1
-
2
-
3
-
4
-
5
-
6
-
7
-
8
-
9
-
10
-
11
-
12
-
13
-
14
-
15
-
16
-
17
-
18
-
19
-
20
-
21
-
22
-
23
-
24
-
25
-
26
-
27
-
1
-
2
-
3
-
4
-
5
-
6
-
7
-
8
-
9
-
10
-
11
-
12
-
13
-
14
-
15
-
16
-
17
-
18
-
19
-
20
-
21
-
22
-
23
-
24
-
25
-
26
-
27
布局就是这样,想必跳转的逻辑也不用说了吧,很简单的一个例子,那我们先来注册:
RegisterActivity
package com.lgl.bmobtest; import cn.bmob.v3.listener.SaveListener; import android.app.Activity; import android.os.Bundle; import android.view.View; import android.view.View.OnClickListener; import android.widget.Button; import android.widget.EditText; import android.widget.Toast; public class RegisterActivity extends Activity { private Button btn_register; private EditText et_name, et_pass; @Override protected void onCreate(Bundle savedInstanceState) { // TODO Auto-generated method stub super.onCreate(savedInstanceState); setContentView(R.layout.activity_register); btn_register = (Button) findViewById(R.id.btn_register); et_name = (EditText) findViewById(R.id.et_name); et_pass = (EditText) findViewById(R.id.et_pass); btn_register.setOnClickListener(new OnClickListener() { @Override public void onClick(View v) { Bean bean = new Bean(); // 设置的内容可以不需要,这里为了简便直接写死了 bean.setName("刘桂林"); bean.setAge(20); bean.setScore(100); bean.setUsername(et_name.getText().toString()); bean.setPassword(et_pass.getText().toString()); bean.signUp(RegisterActivity.this, new SaveListener() { @Override public void onSuccess() { // 如果注册成功,就finish()掉,也就是退回主界面 finish(); } @Override public void onFailure(int arg0, String arg1) { Toast.makeText(RegisterActivity.this, "注册失败", Toast.LENGTH_LONG).show(); } }); } }); } }
-
1
-
2
-
3
-
4
-
5
-
6
-
7
-
8
-
9
-
10
-
11
-
12
-
13
-
14
-
15
-
16
-
17
-
18
-
19
-
20
-
21
-
22
-
23
-
24
-
25
-
26
-
27
-
28
最后
有任何问题,欢迎广大网友一起来交流,分享高阶Android学习视频资料和面试资料包~
偷偷说一句:群里高手如云,欢迎大家加群和大佬们一起交流讨论啊!

网上学习资料一大堆,但如果学到的知识不成体系,遇到问题时只是浅尝辄止,不再深入研究,那么很难做到真正的技术提升。
一个人可以走的很快,但一群人才能走的更远!不论你是正从事IT行业的老鸟或是对IT行业感兴趣的新人,都欢迎加入我们的的圈子(技术交流、学习资源、职场吐槽、大厂内推、面试辅导),让我们一起学习成长!
istener; import android.app.Activity; import android.os.Bundle; import android.view.View; import android.view.View.OnClickListener; import android.widget.Button; import android.widget.EditText; import android.widget.Toast; public class RegisterActivity extends Activity { private Button btn_register; private EditText et_name, et_pass; @Override protected void onCreate(Bundle savedInstanceState) { // TODO Auto-generated method stub super.onCreate(savedInstanceState); setContentView(R.layout.activity_register); btn_register = (Button) findViewById(R.id.btn_register); et_name = (EditText) findViewById(R.id.et_name); et_pass = (EditText) findViewById(R.id.et_pass); btn_register.setOnClickListener(new OnClickListener() { @Override public void onClick(View v) { Bean bean = new Bean(); // 设置的内容可以不需要,这里为了简便直接写死了 bean.setName(“刘桂林”); bean.setAge(20); bean.setScore(100); bean.setUsername(et_name.getText().toString()); bean.setPassword(et_pass.getText().toString()); bean.signUp(RegisterActivity.this, new SaveListener() { @Override public void onSuccess() { // 如果注册成功,就finish()掉,也就是退回主界面 finish(); } @Override public void onFailure(int arg0, String arg1) { Toast.makeText(RegisterActivity.this, “注册失败”, Toast.LENGTH_LONG).show(); } }); } }); } }`
-
1
-
2
-
3
-
4
-
5
-
6
-
7
-
8
-
9
-
10
-
11
-
12
-
13
-
14
-
15
-
16
-
17
-
18
-
19
-
20
-
21
-
22
-
23
-
24
-
25
-
26
-
27
-
28
最后
有任何问题,欢迎广大网友一起来交流,分享高阶Android学习视频资料和面试资料包~
偷偷说一句:群里高手如云,欢迎大家加群和大佬们一起交流讨论啊!
[外链图片转存中…(img-ed9CjrTO-1715401690121)]
网上学习资料一大堆,但如果学到的知识不成体系,遇到问题时只是浅尝辄止,不再深入研究,那么很难做到真正的技术提升。
一个人可以走的很快,但一群人才能走的更远!不论你是正从事IT行业的老鸟或是对IT行业感兴趣的新人,都欢迎加入我们的的圈子(技术交流、学习资源、职场吐槽、大厂内推、面试辅导),让我们一起学习成长!


 236
236


 被折叠的 条评论
为什么被折叠?
被折叠的 条评论
为什么被折叠?
 到【灌水乐园】发言


