


言尽于此,完结
无论是一个初级的 coder,高级的程序员,还是顶级的系统架构师,应该都有深刻的领会到设计模式的重要性。
- 第一,设计模式能让专业人之间交流方便,如下:
程序员A:这里我用了XXX设计模式
程序员B:那我大致了解你程序的设计思路了
- 第二,易维护
项目经理:今天客户有这样一个需求…
程序员:明白了,这里我使用了XXX设计模式,所以改起来很快
- 第三,设计模式是编程经验的总结
程序员A:B,你怎么想到要这样去构建你的代码
程序员B:在我学习了XXX设计模式之后,好像自然而然就感觉这样写能避免一些问题
- 第四,学习设计模式并不是必须的
程序员A:B,你这段代码使用的是XXX设计模式对吗?
程序员B:不好意思,我没有学习过设计模式,但是我的经验告诉我是这样写的

从设计思想解读开源框架,一步一步到Spring、Spring5、SpringMVC、MyBatis等源码解读,我都已收集整理全套,篇幅有限,这块只是详细的解说了23种设计模式,整理的文件如下图一览无余!

搜集费时费力,能看到此处的都是真爱!
enabled = false
registry-type = “compact”
multi exporters use comma divided
exporter-list = “prometheus”
exporter-prometheus-port = 9898
}
support {
spring
spring {
auto proxy the DataSource bean
datasource.autoproxy = false
}
}
b.registry.conf修改
registry {
file 、nacos 、eureka、redis、zk、consul、etcd3、sofa
type = “file”
nacos {
serverAddr = “localhost”
namespace = “”
cluster = “default”
}
eureka {
serviceUrl = “http://localhost:8761/eureka”
application = “default”
weight = “1”
}
redis {
serverAddr = “localhost:6379”
db = “0”
}
zk {
cluster = “default”
serverAddr = “127.0.0.1:2181”
session.timeout = 6000
connect.timeout = 2000
}
consul {
cluster = “default”
serverAddr = “127.0.0.1:8500”
}
etcd3 {
cluster = “default”
serverAddr = “http://localhost:2379”
}
sofa {
serverAddr = “127.0.0.1:9603”
application = “default”
region = “DEFAULT_ZONE”
datacenter = “DefaultDataCenter”
cluster = “default”
group = “SEATA_GROUP”
addressWaitTime = “3000”
}
file {
name = “file.conf”
}
}
config {
file、nacos 、apollo、zk、consul、etcd3
type = “file”
nacos {
serverAddr = “localhost”
namespace = “”
}
consul {
serverAddr = “127.0.0.1:8500”
}
apollo {
app.id = “seata-server”
apollo.meta = “http://192.168.1.204:8801”
}
zk {
serverAddr = “127.0.0.1:2181”
session.timeout = 6000
connect.timeout = 2000
}
etcd3 {
serverAddr = “http://localhost:2379”
}
file {
name = “file.conf”
}
}
3.创建seata数据库(mysql) 将seata->conf->db_store.sql放到数据库中运行即可
4.到bin目录下找到seata-server.bat运行即可 如下即为成功运行:

a.下载地址:https://github.com/alibaba/nacos/releases
b.修改application.properties文件(将数据库对应配置注释打开即可)

c.找到startup.cmd编辑里面的将set MODE="cluster"一行改成set MODE=“standalone”
d.点击startup.cmd运行即可,如下即为成功:

e.访问localhost:8848即可 默认账号密码都是:nacos
1.项目结构
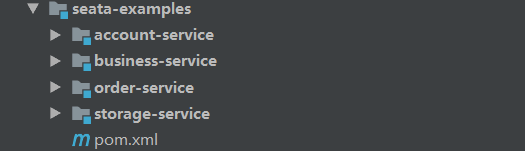
account-service:负责对用户余扣减
business-service:负责完成下单的逻辑,包含 2 个主要的步骤,就是对库存服务和订单服务的远程调用
order-service:负责完成保存用户订单的操作
storage-service:负责完成对库存的扣减
2.各模块主要代码展示:
account-service
@Service
public class AccountServiceImpl implements AccountService {
@Autowired
private AccountTblMapper accountTblMapper ;
private static Logger logger = LoggerFactory.getLogger(AccountServiceImpl.class) ;
@Transactional
@Override
public void debit(String userId, int money) {
logger.info(“开始扣减用户:{}的余额,数量为:{}”,userId ,money);
//1 查询数据库里面的账户
AccountTbl accountTbl = accountTblMapper.selectOne(new LambdaQueryWrapper().
eq(AccountTbl::getUserId, userId));
if(accountTbl==null){
throw new IllegalArgumentException(“此账号不存在”) ;
}
//2 扣减的操作
int idleMoney = accountTbl.getMoney() - money ;
// 3 库存的校验
if(idleMoney<0){
throw new RuntimeException(“库存不足”) ;
}
//4 设置到账户里面
accountTbl.setMoney(idleMoney);
//5 保存到数据库里里面
accountTblMapper.updateById(accountTbl) ;
if(“SXT_USER_2”.equals(userId)){
throw new RuntimeException(“不想成功”) ;
}
}
}
####Pom文件
com.baomidou
mybatis-plus-boot-starter
3.3.0
mysql
mysql-connector-java
business-service
@Service
public class BusinessServiceImpl implements BusinessService {
private static Logger logger = LoggerFactory.getLogger(BusinessServiceImpl.class) ;
@Autowired
private StorageServiceApi storageServiceApi ;
@Autowired
private OrderServiceApi orderServiceApi ;
@Override
public void purchase(String userId, String productNo, int count) {
logger.info(“准备下单,用户{},商品{},数量{}”,userId ,productNo ,count);
// 1 远程调用库存服务–> 库存的扣减f
storageServiceApi.deduct(productNo, count);
// 2 远程调用订单服务–>订单的新增
orderServiceApi.create(userId, productNo, count);
logger.info(“下单成功”);
}
}
####通过feign调用 代码:
OrderServiceApi
@Service
public class OrderServiceApi {
private static Logger logger = LoggerFactory.getLogger(OrderServiceApi.class) ;
// @Autowired
// private RestTemplate restTemplate ;
@Autowired
private OrderServiceFeign orderServiceFeign ;
public void create(String userId ,String productNo ,int count){
// ResponseEntity responseEntity = restTemplate.getForEntity(
// “http://order-service/create/{userId}/{productNo}/{count}”,
// Void.class,
// userId,
// productNo,
// count
// );
ResponseEntity responseEntity = orderServiceFeign.create(userId, productNo, count);
if(responseEntity.getStatusCode()== HttpStatus.OK){
logger.info(“远程调用订单服务成功”);
return;
}
throw new RuntimeException(“远程调用订单服务失败”) ;
}
}
StorageServiceApi
@Service
public class StorageServiceApi {
private static Logger logger = LoggerFactory.getLogger(StorageServiceApi.class) ;
// @Autowired
// private RestTemplate restTemplate ; //ribbon
@Autowired
private StorageServiceFeign storageServiceFeign ;
public void deduct(String productNo ,int count){
// ResponseEntity responseEntity = restTemplate.getForEntity(
// “http://storage-service/deduct/{productNo}/{count}”,
// Void.class,
// productNo,
// count
// );
ResponseEntity responseEntity = storageServiceFeign.deduct(productNo, count);
if(responseEntity.getStatusCode()== HttpStatus.OK){
logger.info(“远程调用库存服务成功”);
return;
}
throw new RuntimeException(“远程调用库存服务失败”);
}
}
###order-service
@Service
public class OrderServiceImpl implements OrderService {
@Autowired
private OrderTblMapper orderTblMapper ;
@Autowired
private AccountServiceApi accountServiceApi ;
private static Logger logger = LoggerFactory.getLogger(OrderServiceImpl.class) ;
@Transactional
@Override
public OrderTbl createOrder(String userId, String productNo, int count) {
logger.info(“开始创建一个订单,用户为{},商品为{},数量为{}”,userId,productNo,count);
// 1 扣减用户的余额 account-service - >rpc
int money = cal(productNo,count) ;
ResponseEntity responseEntity = accountServiceApi.debit(userId, money);
if(responseEntity.getStatusCode()!= HttpStatus.OK){
throw new RuntimeException(“远程扣减用户的余额失败”) ;
}
//2 写本地的订单表
OrderTbl orderTbl = new OrderTbl();
orderTbl.setUserId(userId);
orderTbl.setCommodityCode(productNo);
orderTbl.setCount(count);
orderTblMapper.insert(orderTbl) ;
logger.info(“创建订单成功,用户为{},商品为{},数量{}”,userId,productNo,count);
return orderTbl;
}
/**
-
计算商品的总价格
-
@param productNo
-
@param count
-
@return
*/
最后
2020年在匆匆忙忙慌慌乱乱中就这么度过了,我们迎来了新一年,互联网的发展如此之快,技术日新月异,更新迭代成为了这个时代的代名词,坚持下来的技术体系会越来越健壮,JVM作为如今是跳槽大厂必备的技能,如果你还没掌握,更别提之后更新的新技术了。

更多JVM面试整理:

erTbl.setCount(count);
orderTblMapper.insert(orderTbl) ;
logger.info(“创建订单成功,用户为{},商品为{},数量{}”,userId,productNo,count);
return orderTbl;
}
/**
-
计算商品的总价格
-
@param productNo
-
@param count
-
@return
*/
最后
2020年在匆匆忙忙慌慌乱乱中就这么度过了,我们迎来了新一年,互联网的发展如此之快,技术日新月异,更新迭代成为了这个时代的代名词,坚持下来的技术体系会越来越健壮,JVM作为如今是跳槽大厂必备的技能,如果你还没掌握,更别提之后更新的新技术了。
[外链图片转存中…(img-npcWc6Ql-1715583617892)]
更多JVM面试整理:
[外链图片转存中…(img-LnTK1wsj-1715583617892)]


 3767
3767

 被折叠的 条评论
为什么被折叠?
被折叠的 条评论
为什么被折叠?
 到【灌水乐园】发言


