


既有适合小白学习的零基础资料,也有适合3年以上经验的小伙伴深入学习提升的进阶课程,涵盖了95%以上软件测试知识点,真正体系化!
由于文件比较多,这里只是将部分目录截图出来,全套包含大厂面经、学习笔记、源码讲义、实战项目、大纲路线、讲解视频,并且后续会持续更新
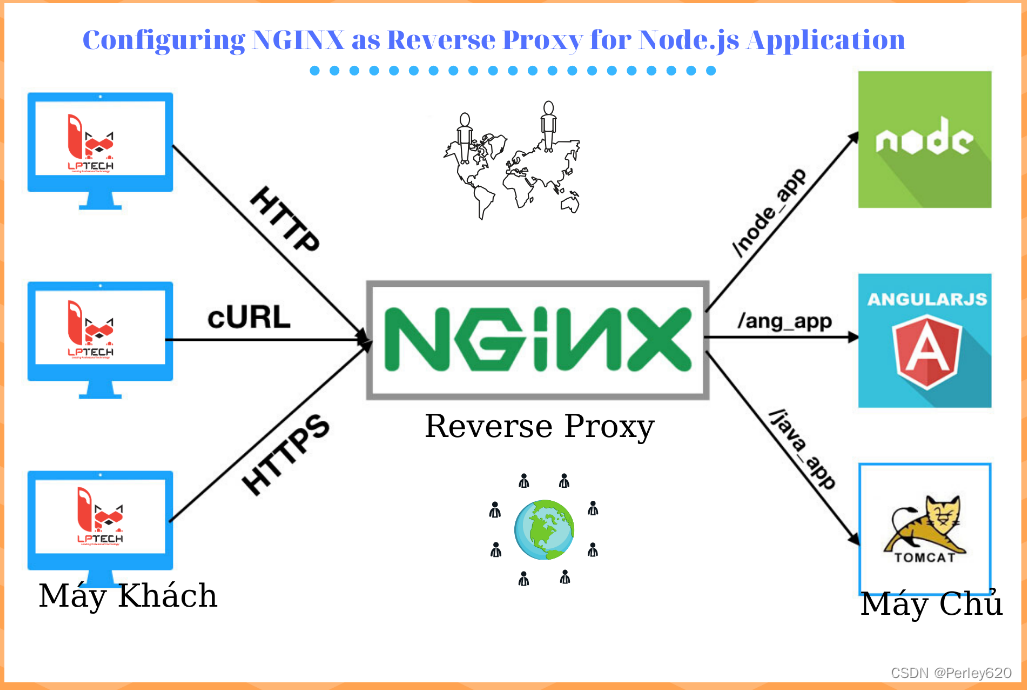
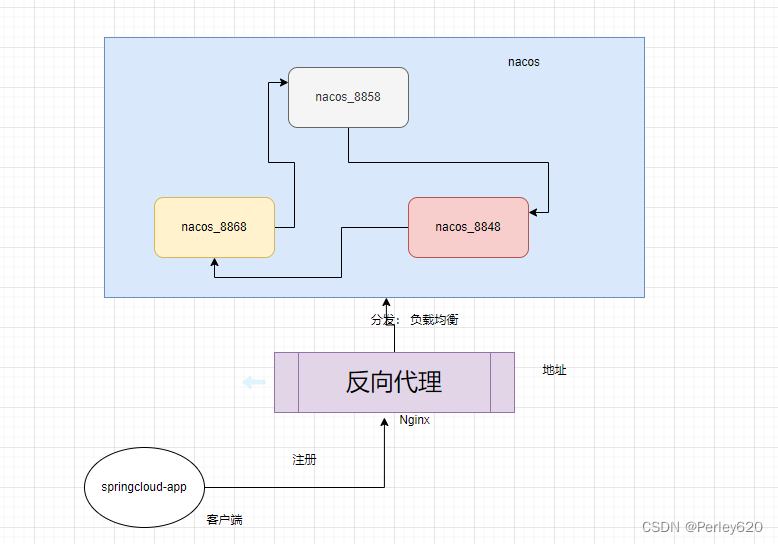
1.Nginx反向代理,代理的概念,正向代理,反向代理;
2.docker版本的nginx配置,挂载启动,开放端口;
3.windows版本的使用,代理多个端口的方式;
4.负载分配的策略,轮询,权重,ip_hash方式;
nginx是啥
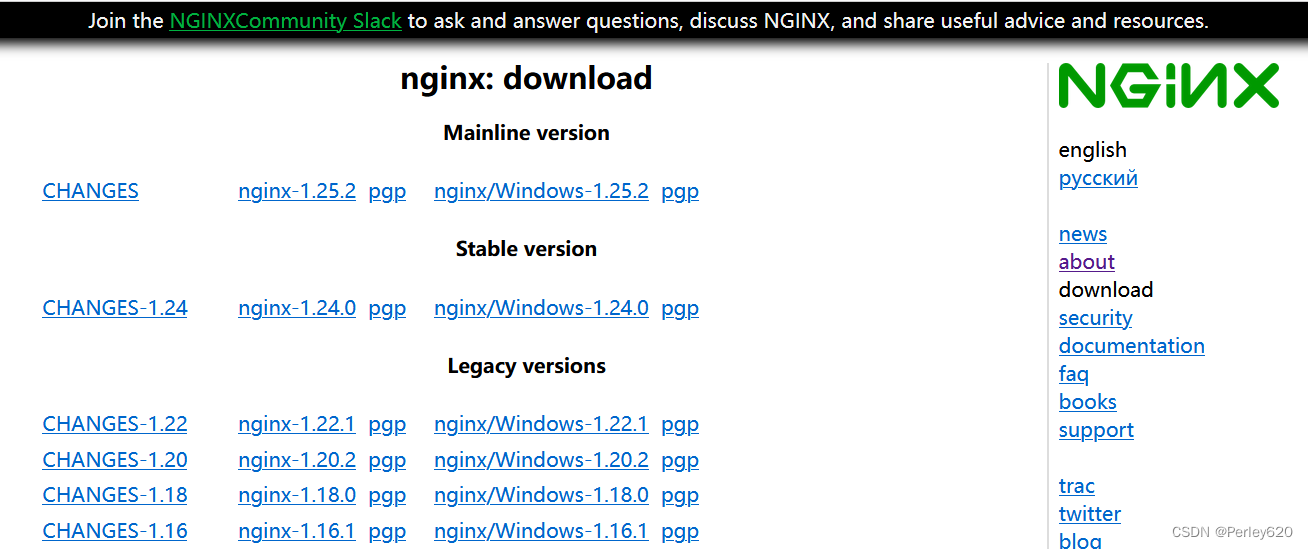
http://nginx.org/en/download.html
Nginx(engine x)是一个高性能的HTTP和反向代理web服务器,同时也提供了IMAP/POP3/SMTP服务。Nginx是由伊戈尔寒索耶夫为俄罗访问量第二的Rambler.ru站点(俄文:PaM6nep)开发的,公开版本1.19.6发布于2020年12月15日。
其将源代码以类[BSD许可证正的形式发布,因它的稳定性、丰富的功能集、简单的配置文件和低系统资源的消耗而闻名。Nginx是一款轻量级的Wb服务器/反向代理服务器及电子邮件(IMAP/POP3)代理服务器,在BSD-ike协议下发行。其特点是占有内存少,并发能力强,事实上ngix的并发能力在同类型的网页服务器中表现较好。
正向代理和反向代理
正向代理
正向代理时,由客户端发送对某一个目标服务器的请求,代理服务器在中间将请求转发给该目标服务器,目标服务器将结果返回给代理服务器,代理服务器再将结果返回给客户端。
正向代理核心:客户端非常明确要访问的服务器地址,客户端是需要配置代理服务的地址、端口、账号密码(如有)等才可使用的。正向代理服务器负责转发客户端的请求到目标服务器。
正向代理主要使用场景是客户端。由于网络不通等物理原因,需要通过正向代理服务器这种转发环节顺利访问目标服务器。当然,也可以通过正向代理对客户端某些信息进行伪装和改变。
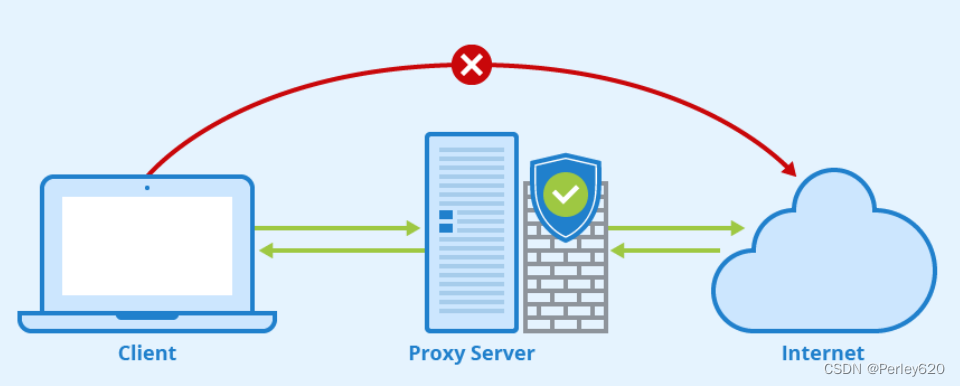
反向代理
反向代理是一种代理服务器的配置模式,它代表服务器向客户端提供服务。客户端发送请求到反向代理服务器,然后反向代理服务器将请求转发到后端的真实服务器上,并将响应返回给客户端。简单理解为用户直接访问反向代理服务器就可以获得目标服务器的资源。这一过程叫反向代理
nginx的安装使用
Docker版本的nginx安装
下载

[root@localhost ~]# docker pull nginx
Using default tag: latest
Trying to pull repository docker.io/library/nginx ...
latest: Pulling from docker.io/library/nginx
a2abf6c4d29d: Already exists
a9edb18cadd1: Pull complete
589b7251471a: Pull complete
186b1aaa4aa6: Pull complete
b4df32aa5a72: Pull complete
a0bcbecc962e: Pull complete
Digest: sha256:0d17b565c37bcbd895e9d92315a05c1c3c9a29f762b011a10c54a66cd53c9b31
Status: Downloaded newer image for docker.io/nginx:latest
[root@localhost ~]#
创建挂载文件
nginx/conf nginx/logs nginx/html
[root@localhost software]# pwd
/usr/local/software
[root@localhost software]# mkdir -p nginx/logs nginx/cof nginx/html
[root@localhost software]# ls
6380  6381  6389  6390  6391  9361  canal  nacos  nginx  postgres  rabbitmq  redis  sentinel
[root@localhost software]# cd nginx/
[root@localhost nginx]# ls
cof  html  logs
[root@localhost nginx]#
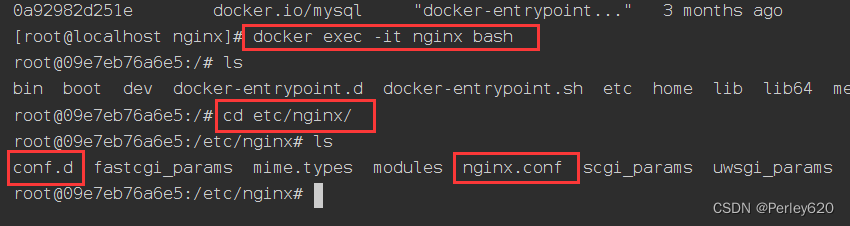
获取配置文件
创建docker容器
[root@localhost nginx]# docker run -it --name nginx -d nginx
09e7eb76a6e54e14f76a85bc5828af34432d57b33e0e976d5e08c219d7450161
拷贝容器中的配置文件
docker cp nginx:/etc/nginx/nginx.conf conf/

[root@localhost nginx]# docker cp nginx:/etc/nginx/nginx.conf conf/
[root@localhost nginx]# cd conf/
[root@localhost conf]# ls
nginx.conf
[root@localhost conf]# docker cp nginx:/etc/nginx/conf.d ./
[root@localhost conf]# ls
conf.d  nginx.conf
[root@localhost conf]# ll
总用量 4
drwxr-xr-x. 2 root root  26 8月  23 21:47 conf.d
-rw-r--r--. 1 root root 648 12月 28 2021 nginx.conf
[root@localhost conf]#
删除容器
[root@localhost conf]# docker stop nginx
nginx
[root@localhost conf]# docker rm nginx
nginx
[root@localhost conf]#
创建运行容器
两个端口:
一个代理http协议
一个代理TCP
docker run -it \
--name nginx \
-p 9999:9999 \
-p 10999:10999 \
--privileged \
-v /etc/localtime:/etc/localtime \
-v /usr/local/software/nginx/conf/nginx.conf:/etc/nginx/nginx.conf \
-v /usr/local/software/nginx/conf/conf.d:/etc/nginx/conf.d \
-v /usr/local/software/nginx/html:/usr/share/nginx/html \
-v /usr/local/software/nginx/logs:/var/log/nginx \
-d nginx
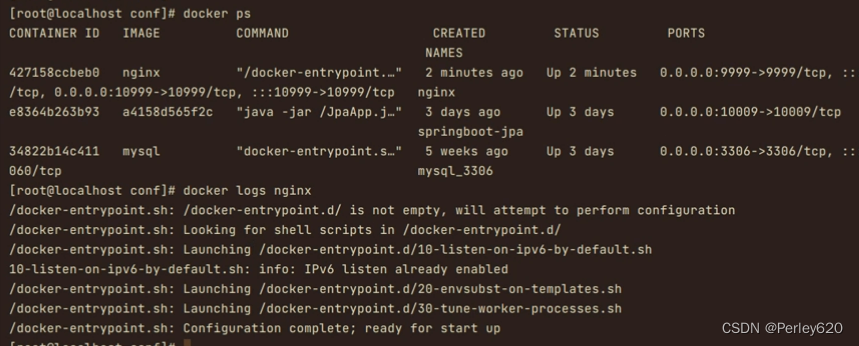
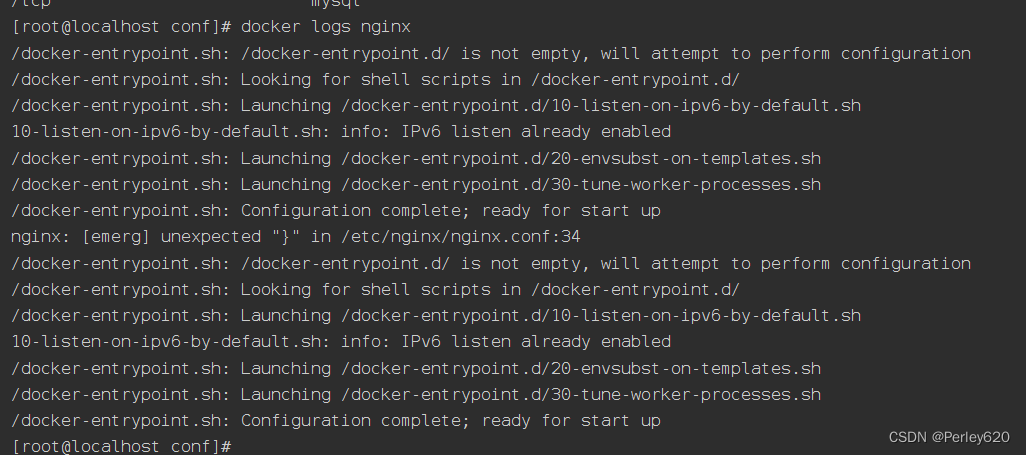
查看日志
开放端口
开放两个端口9999和10999
[root@localhost conf]# firewall-cmd --zone=public --add-port=9999/tcp --permanent
success
[root@localhost conf]# firewall-cmd --zone=public --add-port=10999/tcp --permanent
success
[root@localhost conf]# firewall-cmd --reload
success
[root@localhost conf]# firewall-cmd --zone=public --list-ports
3306/tcp 15672/tcp 5672/tcp 2375/tcp 8848/tcp 9848/tcp 9999/tcp 10999/tcp
[root@localhost conf]#
进行代理和测试
 	server {
        listen 9999;
        location /{
            proxy_pass https://www.bilibili.com;
        }
    }
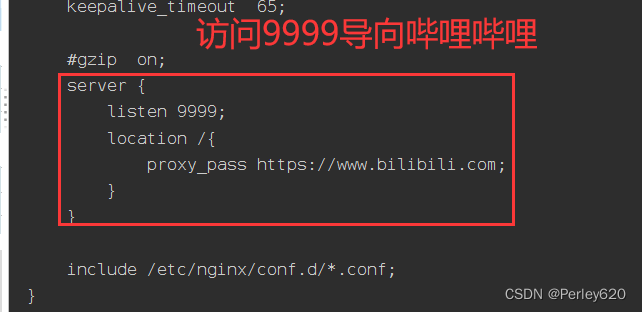
代理百度测试:http://192.168.111.130:9999/
网上学习资料一大堆,但如果学到的知识不成体系,遇到问题时只是浅尝辄止,不再深入研究,那么很难做到真正的技术提升。
一个人可以走的很快,但一群人才能走的更远!不论你是正从事IT行业的老鸟或是对IT行业感兴趣的新人,都欢迎加入我们的的圈子(技术交流、学习资源、职场吐槽、大厂内推、面试辅导),让我们一起学习成长!
-1715063279124)]
[外链图片转存中…(img-shEORIaS-1715063279125)]
网上学习资料一大堆,但如果学到的知识不成体系,遇到问题时只是浅尝辄止,不再深入研究,那么很难做到真正的技术提升。
一个人可以走的很快,但一群人才能走的更远!不论你是正从事IT行业的老鸟或是对IT行业感兴趣的新人,都欢迎加入我们的的圈子(技术交流、学习资源、职场吐槽、大厂内推、面试辅导),让我们一起学习成长!


 901
901


 被折叠的 条评论
为什么被折叠?
被折叠的 条评论
为什么被折叠?
 到【灌水乐园】发言


