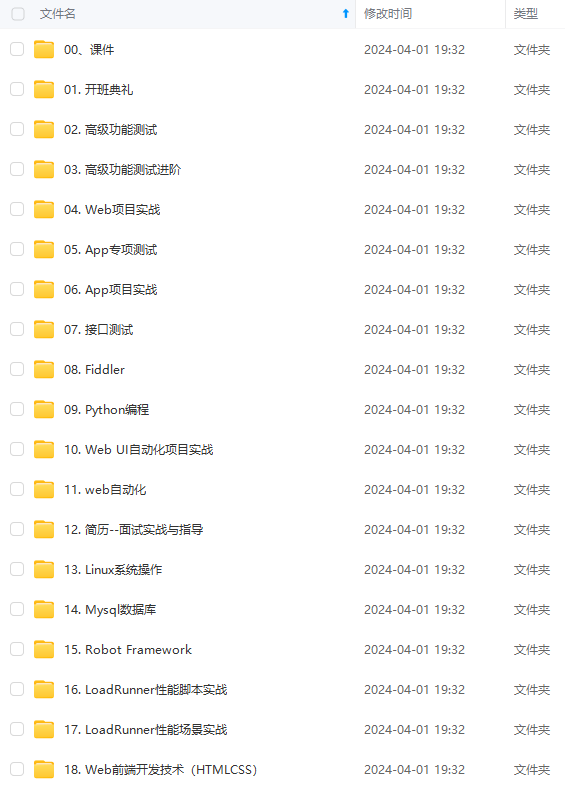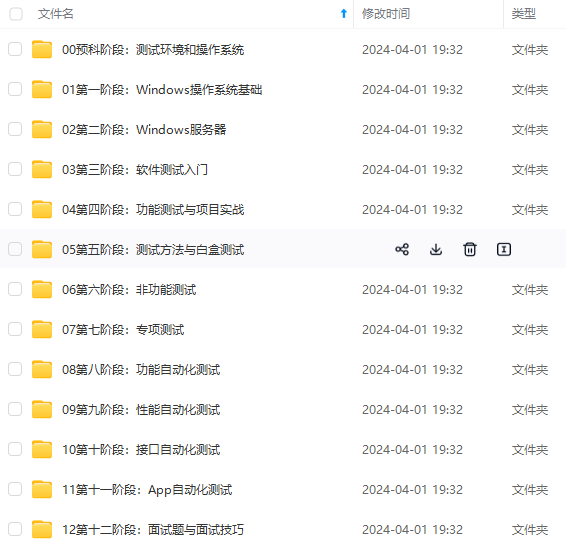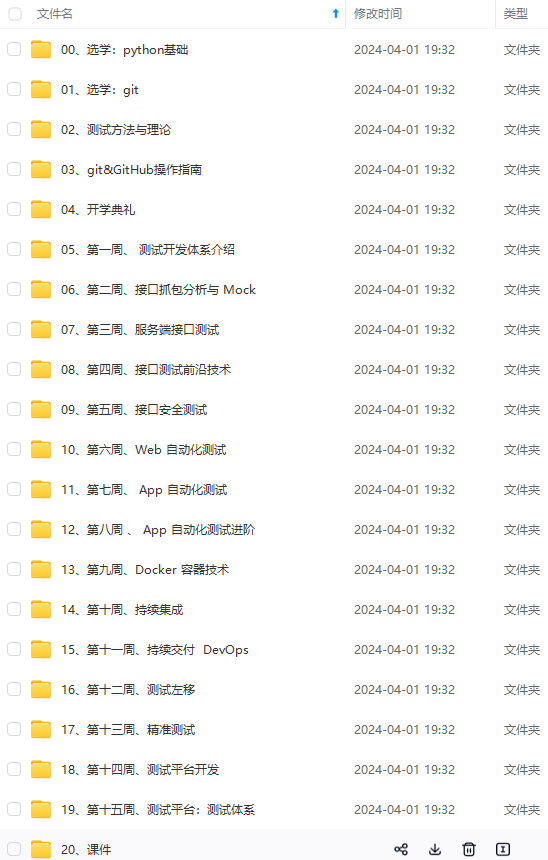


既有适合小白学习的零基础资料,也有适合3年以上经验的小伙伴深入学习提升的进阶课程,涵盖了95%以上软件测试知识点,真正体系化!
由于文件比较多,这里只是将部分目录截图出来,全套包含大厂面经、学习笔记、源码讲义、实战项目、大纲路线、讲解视频,并且后续会持续更新
cd /opt/jumpserver/requirements
yum -y install $(cat rpm_requirements.txt)
# 如果没有任何报错请继续
2.3 安装 Python 库依赖
pip install --upgrade pip setuptools
pip install -r requirements.txt
# 如果下载速度很慢, 可以换国内源
pip install --upgrade pip setuptools -i https://mirrors.aliyun.com/pypi/simple/
pip install -r requirements.txt -i https://mirrors.aliyun.com/pypi/simple/
2.4 安装 Redis, Jumpserver 使用 Redis 做 cache 和 celery broke
yum -y install redis
systemctl enable redis
systemctl start redis
2.5 安装 MySQL
本教程使用 Mysql 作为数据库, 如果不使用 Mysql 可以跳过相关 Mysql 安装和配置
yum -y install mariadb mariadb-devel mariadb-server # centos7下安装的是mariadb
systemctl enable mariadb
systemctl start mariadb
2.6 创建数据库 Jumpserver 并授权
mysql -uroot -e "create database jumpserver default charset 'utf8'; grant all on jumpserver.* to 'jumpserver'@'localhost' identified by '123456'; flush privileges;"
2.7 修改 Jumpserver 配置文件
cd /opt/jumpserver
cp config_example.yml config.yml

SECRET_KEY=`cat /dev/urandom | tr -dc A-Za-z0-9 | head -c 50`  # 生成随机SECRET_KEY
echo "SECRET_KEY=$SECRET_KEY" >> ~/.bashrc
BOOTSTRAP_TOKEN=`cat /dev/urandom | tr -dc A-Za-z0-9 | head -c 16`  # 生成随机BOOTSTRAP_TOKEN
echo "BOOTSTRAP_TOKEN=$BOOTSTRAP_TOKEN" >> ~/.bashrc

sed -i "s/SECRET_KEY:/SECRET_KEY: $SECRET_KEY/g" /opt/jumpserver/config.yml
sed -i "s/BOOTSTRAP_TOKEN:/BOOTSTRAP_TOKEN: $BOOTSTRAP_TOKEN/g" /opt/jumpserver/config.yml
sed -i "s/# DEBUG: true/DEBUG: false/g" /opt/jumpserver/config.yml
sed -i "s/# LOG_LEVEL: DEBUG/LOG_LEVEL: ERROR/g" /opt/jumpserver/config.yml
sed -i "s/# SESSION_EXPIRE_AT_BROWSER_CLOSE: false/SESSION_EXPIRE_AT_BROWSER_CLOSE: true/g" /opt/jumpserver/config.yml
sed -i "s/DB_PASSWORD: /DB_PASSWORD: 123456/g" /opt/jumpserver/config.yml

echo -e "\033[31m 你的SECRET_KEY是 $SECRET_KEY \033[0m"
echo -e "\033[31m 你的BOOTSTRAP_TOKEN是 $BOOTSTRAP_TOKEN \033[0m"
更改后的配置文件内容:
KEY与TOKEN是生成随机的
cat config.yml  # 确认内容有没有错误
# SECURITY WARNING: keep the secret key used in production secret!
# 加密秘钥 生产环境中请修改为随机字符串, 请勿外泄
SECRET_KEY:

# SECURITY WARNING: keep the bootstrap token used in production secret!
# 预共享Token coco和guacamole用来注册服务账号, 不在使用原来的注册接受机制
BOOTSTRAP_TOKEN:

# Development env open this, when error occur display the full process track, Production disable it
# DEBUG 模式 开启DEBUG后遇到错误时可以看到更多日志
DEBUG: false

# DEBUG, INFO, WARNING, ERROR, CRITICAL can set. See https://docs.djangoproject.com/en/1.10/topics/logging/
# 日志级别
LOG_LEVEL: ERROR
# LOG_DIR:

# Session expiration setting, Default 24 hour, Also set expired on on browser close
# 浏览器Session过期时间, 默认24小时, 也可以设置浏览器关闭则过期
# SESSION_COOKIE_AGE: 86400
SESSION_EXPIRE_AT_BROWSER_CLOSE: true

# Database setting, Support sqlite3, mysql, postgres ....
# 数据库设置
# See https://docs.djangoproject.com/en/1.10/ref/settings/#databases

# SQLite setting:
# 使用单文件sqlite数据库
# DB_ENGINE: sqlite3
# DB_NAME:

# MySQL or postgres setting like:
# 使用Mysql作为数据库
DB_ENGINE: mysql
DB_HOST: 127.0.0.1
DB_PORT: 3306
DB_USER: jumpserver
DB_PASSWORD: 123456
DB_NAME: jumpserver

# When Django start it will bind this host and port
# ./manage.py runserver 127.0.0.1:8080
# 运行时绑定端口
HTTP_BIND_HOST: 0.0.0.0
HTTP_LISTEN_PORT: 8080

# Use Redis as broker for celery and web socket
# Redis配置
REDIS_HOST: 127.0.0.1
REDIS_PORT: 6379
# REDIS_PASSWORD:
# REDIS_DB_CELERY: 3
# REDIS_DB_CACHE: 4

# Use OpenID authorization
# 使用OpenID 来进行认证设置
# BASE_SITE_URL: http://localhost:8080
# AUTH_OPENID: false  # True or False
# AUTH_OPENID_SERVER_URL: https://openid-auth-server.com/
# AUTH_OPENID_REALM_NAME: realm-name
# AUTH_OPENID_CLIENT_ID: client-id
# AUTH_OPENID_CLIENT_SECRET: client-secret

# OTP settings
# OTP/MFA 配置
# OTP_VALID_WINDOW: 0
# OTP_ISSUER_NAME: Jumpserver
2.8 运行 Jumpserver
cd /opt/jumpserver
./jms start all -d  # 后台运行使用 -d 参数./jms start all -d
# 新版本更新了运行脚本, 使用方式./jms start|stop|status all 后台运行请添加 -d 参数
运行不报错, 请继续往下操作
三. 安装 SSH Server 和 WebSocket Server: Coco
3.1 下载或 Clone 项目
cd /opt
source /opt/py3/bin/activate
git clone https://github.com/jumpserver/coco.git
3.2 安装依赖
cd /opt/coco/requirements
yum -y install $(cat rpm_requirements.txt)
pip install -r requirements.txt

# 如果下载速度很慢, 可以换国内源
pip install -r requirements.txt -i https://mirrors.aliyun.com/pypi/simple/
3.3 修改配置文件并运行
cd /opt/coco
cp config_example.yml config.yml

sed -i "s/BOOTSTRAP_TOKEN: <PleasgeChangeSameWithJumpserver>/BOOTSTRAP_TOKEN: $BOOTSTRAP_TOKEN/g" /opt/coco/config.yml
sed -i "s/# LOG_LEVEL: INFO/LOG_LEVEL: ERROR/g" /opt/coco/config.yml
cat config.yml
# 项目名称, 会用来向Jumpserver注册, 识别而已, 不能重复
# NAME: {{ Hostname }}

# Jumpserver项目的url, api请求注册会使用
CORE_HOST: http://127.0.0.1:8080

# Bootstrap Token, 预共享秘钥, 用来注册coco使用的service account和terminal
# 请和jumpserver 配置文件中保持一致, 注册完成后可以删除
BOOTSTRAP_TOKEN: <PleasgeChangeSameWithJumpserver>

# 启动时绑定的ip, 默认 0.0.0.0
# BIND_HOST: 0.0.0.0

# 监听的SSH端口号, 默认2222
# SSHD_PORT: 2222

# 监听的HTTP/WS端口号, 默认5000
# HTTPD_PORT: 5000

# 项目使用的ACCESS KEY, 默认会注册, 并保存到 ACCESS_KEY_STORE中,
# 如果有需求, 可以写到配置文件中, 格式 access_key_id:access_key_secret
# ACCESS_KEY: null

# ACCESS KEY 保存的地址, 默认注册后会保存到该文件中
# ACCESS_KEY_STORE: data/keys/.access_key

# 加密密钥
# SECRET_KEY: null

# 设置日志级别 [DEBUG, INFO, WARN, ERROR, FATAL, CRITICAL]
LOG_LEVEL: ERROR

# 日志存放的目录
# LOG_DIR: logs

# SSH白名单
# ALLOW_SSH_USER: all

# SSH黑名单, 如果用户同时在白名单和黑名单, 黑名单优先生效
# BLOCK_SSH_USER:
#   -

# 和Jumpserver 保持心跳时间间隔
# HEARTBEAT_INTERVAL: 5

# Admin的名字, 出问题会提示给用户
# ADMINS: ''

# SSH连接超时时间 (default 15 seconds)
# SSH_TIMEOUT: 15

# 语言 [en, zh]
# LANGUAGE_CODE: zh

# SFTP的根目录, 可选 /tmp, Home其他自定义目录
# SFTP_ROOT: /tmp

# SFTP是否显示隐藏文件
# SFTP_SHOW_HIDDEN_FILE: false
./cocod start -d # 后台运行使用 -d 参数./cocod start -d
# 新版本更新了运行脚本, 使用方式./cocod start|stop|status 后台运行请添加 -d 参数
四. 安装 Web Terminal 前端: Luna
Luna 已改为纯前端, 需要 Nginx 来运行访问
访问(https://github.com/jumpserver/luna/releases)下载对应版本的 release 包, 直接解压不需要编译
4.1 解压 Luna
cd /opt
wget https://github.com/jumpserver/luna/releases/download/1.4.9/luna.tar.gz

# 如果网络有问题导致下载无法完成可以使用下面地址
wget https://demo.jumpserver.org/download/luna/1.4.9/luna.tar.gz

tar xf luna.tar.gz
chown -R root:root luna
五. 安装 Windows 支持组件(如果不需要管理 windows 资产, 可以直接跳过这一步)
5.1 安装依赖
mkdir /usr/local/lib/freerdp/
ln -s /usr/local/lib/freerdp /usr/lib64/freerdp
rpm --import http://li.nux.ro/download/nux/RPM-GPG-KEY-nux.ro
rpm -Uvh http://li.nux.ro/download/nux/dextop/el7/x86_64/nux-dextop-release-0-5.el7.nux.noarch.rpm
yum -y localinstall --nogpgcheck https://download1.rpmfusion.org/free/el/rpmfusion-free-release-7.noarch.rpm https://download1.rpmfusion.org/nonfree/el/rpmfusion-nonfree-release-7.noarch.rpm

yum install -y java-1.8.0-openjdk libtool
yum install -y cairo-devel libjpeg-turbo-devel libpng-devel uuid-devel
yum install -y ffmpeg-devel freerdp-devel freerdp-plugins pango-devel libssh2-devel libtelnet-devel libvncserver-devel pulseaudio-libs-devel openssl-devel libvorbis-devel libwebp-devel ghostscript
5.2 编译安装 guacamole 服务
cd /opt
git clone https://github.com/jumpserver/docker-guacamole.git
cd /opt/docker-guacamole/
tar -xf guacamole-server-0.9.14.tar.gz
cd guacamole-server-0.9.14
autoreconf -fi
./configure --with-init-dir=/etc/init.d
make && make install
cd ..
rm -rf guacamole-server-0.9.14
ldconfig
5.3 配置 Tomcat
mkdir -p /config/guacamole /config/guacamole/lib /config/guacamole/extensions  # 创建 guacamole 目录
ln -sf /opt/docker-guacamole/guacamole-auth-jumpserver-0.9.14.jar /config/guacamole/extensions/guacamole-auth-jumpserver-0.9.14.jar
ln -sf /opt/docker-guacamole/root/app/guacamole/guacamole.properties /config/guacamole/guacamole.properties  # guacamole 配置文件

cd /config
wget http://mirror.bit.edu.cn/apache/tomcat/tomcat-8/v8.5.39/bin/apache-tomcat-8.5.39.tar.gz
tar xf apache-tomcat-8.5.39.tar.gz
rm -rf apache-tomcat-8.5.39.tar.gz
mv apache-tomcat-8.5.39 tomcat8
rm -rf /config/tomcat8/webapps/*
ln -sf /opt/docker-guacamole/guacamole-0.9.14.war /config/tomcat8/webapps/ROOT.war  # guacamole client
sed -i 's/Connector port="8080"/Connector port="8081"/g' /config/tomcat8/conf/server.xml  # 修改默认端口为 8081
sed -i 's/FINE/WARNING/g' /config/tomcat8/conf/logging.properties  # 修改 log 等级为 WARNING

cd /config
wget https://github.com/ibuler/ssh-forward/releases/download/v0.0.5/linux-amd64.tar.gz

# 如果网络有问题导致下载无法完成可以使用下面地址
wget https://demo.jumpserver.org/download/ssh-forward/v0.0.5/linux-amd64.tar.gz

tar xf linux-amd64.tar.gz -C /bin/
chmod +x /bin/ssh-forward
5.4 配置环境变量
export JUMPSERVER_SERVER=http://127.0.0.1:8080  # http://127.0.0.1:8080 指 jumpserver 访问地址
echo "export JUMPSERVER_SERVER=http://127.0.0.1:8080" >> ~/.bashrc

# BOOTSTRAP_TOKEN 为 Jumpserver/config.yml 里面的 BOOTSTRAP_TOKEN
export BOOTSTRAP_TOKEN=$BOOTSTRAP_TOKEN
echo "export BOOTSTRAP_TOKEN=$BOOTSTRAP_TOKEN" >> ~/.bashrc
export JUMPSERVER_KEY_DIR=/config/guacamole/keys
echo "export JUMPSERVER_KEY_DIR=/config/guacamole/keys" >> ~/.bashrc
export GUACAMOLE_HOME=/config/guacamole
echo "export GUACAMOLE_HOME=/config/guacamole" >> ~/.bashrc
5.5 启动 Guacamole
/etc/init.d/guacd start
sh /config/tomcat8/bin/startup.sh
六. 配置 Nginx 整合各组件
6.1 安装 Nginx
yum install yum-utils
vi /etc/yum.repos.d/nginx.repo

[nginx-stable]
name=nginx stable repo
baseurl=http://nginx.org/packages/centos/$releasever/$basearch/
gpgcheck=1
enabled=1
gpgkey=https://nginx.org/keys/nginx_signing.key

yum install -y nginx
rm -rf /etc/nginx/conf.d/default.conf
systemctl enable nginx
6.3 准备配置文件 修改 /etc/nginx/conf.d/jumpserver.conf
vi /etc/nginx/conf.d/jumpserver.conf
server {
    listen 80;  # 代理端口, 以后将通过此端口进行访问, 不再通过8080端口
    # server_name demo.jumpserver.org;  # 修改成你的域名或者注释掉

    client_max_body_size 100m;  # 录像及文件上传大小限制

    location /luna/ {
        try_files $uri / /index.html;
        alias /opt/luna/;  # luna 路径, 如果修改安装目录, 此处需要修改
    }

    location /media/ {
        add_header Content-Encoding gzip;
        root /opt/jumpserver/data/;  # 录像位置, 如果修改安装目录, 此处需要修改
    }

    location /static/ {
        root /opt/jumpserver/data/;  # 静态资源, 如果修改安装目录, 此处需要修改
    }

    location /socket.io/ {
        proxy_pass       http://localhost:5000/socket.io/;  # 如果coco安装在别的服务器, 请填写它的ip
        proxy_buffering off;
        proxy_http_version 1.1;
        proxy_set_header Upgrade $http_upgrade;
        proxy_set_header Connection "upgrade";
        proxy_set_header X-Real-IP $remote_addr;
        proxy_set_header Host $host;
        proxy_set_header X-Forwarded-For $proxy_add_x_forwarded_for;
        access_log off;
    }

    location /coco/ {
        proxy_pass       http://localhost:5000/coco/;  # 如果coco安装在别的服务器, 请填写它的ip
        proxy_set_header X-Real-IP $remote_addr;
        proxy_set_header Host $host;
        proxy_set_header X-Forwarded-For $proxy_add_x_forwarded_for;
        access_log off;
    }

    location /guacamole/ {
        proxy_pass       http://localhost:8081/;  # 如果guacamole安装在别的服务器, 请填写它的ip
        proxy_buffering off;
        proxy_http_version 1.1;
        proxy_set_header Upgrade $http_upgrade;
        proxy_set_header Connection $http_connection;
        proxy_set_header X-Real-IP $remote_addr;
        proxy_set_header Host $host;
        proxy_set_header X-Forwarded-For $proxy_add_x_forwarded_for;
        access_log off;
    }

    location / {
        proxy_pass http://localhost:8080;  # 如果jumpserver安装在别的服务器, 请填写它的ip
        proxy_set_header X-Real-IP $remote_addr;
        proxy_set_header Host $host;
        proxy_set_header X-Forwarded-For $proxy_add_x_forwarded_for;
    }
}
6.3 运行 Nginx
nginx -t # 确保配置没有问题, 有问题请先解决
systemctl start nginx
systemctl enable nginx
6.4 开始使用 Jumpserver
检查应用是否已经正常运行
服务全部启动后, 访问 http://192.168.244.144, 访问nginx代理的端口, 不要再通过8080端口访问
默认账号: admin 密码: admin
到Jumpserver 会话管理-终端管理 检查 Coco Guacamole 等应用的注册。
测试连接
如果登录客户端是 macOS 或 Linux, 登录语法如下


**网上学习资料一大堆,但如果学到的知识不成体系,遇到问题时只是浅尝辄止,不再深入研究,那么很难做到真正的技术提升。**
**[需要这份系统化的资料的朋友,可以戳这里获取](https://bbs.csdn.net/topics/618631832)**
**一个人可以走的很快,但一群人才能走的更远!不论你是正从事IT行业的老鸟或是对IT行业感兴趣的新人,都欢迎加入我们的的圈子(技术交流、学习资源、职场吐槽、大厂内推、面试辅导),让我们一起学习成长!**
er**
检查应用是否已经正常运行
服务全部启动后, 访问 [http://192.168.244.144]( ), 访问nginx代理的端口, 不要再通过8080端口访问
默认账号: admin 密码: admin
到Jumpserver 会话管理-终端管理 检查 Coco Guacamole 等应用的注册。
**测试连接**
如果登录客户端是 macOS 或 Linux, 登录语法如下
[外链图片转存中…(img-C6hCxgO4-1715803761276)]
[外链图片转存中…(img-uhi55Nv4-1715803761277)]
网上学习资料一大堆,但如果学到的知识不成体系,遇到问题时只是浅尝辄止,不再深入研究,那么很难做到真正的技术提升。
一个人可以走的很快,但一群人才能走的更远!不论你是正从事IT行业的老鸟或是对IT行业感兴趣的新人,都欢迎加入我们的的圈子(技术交流、学习资源、职场吐槽、大厂内推、面试辅导),让我们一起学习成长!


 被折叠的 条评论
为什么被折叠?


