


最后
除了简历做到位,面试题也必不可少,整理了些题目,前面有117道汇总的面试到的题目,后面包括了HTML、CSS、JS、ES6、vue、微信小程序、项目类问题、笔试编程类题等专题。
return {
  planTableData: []
}
},
created () {
this.planTableData = [
{ id: 1, createTime: ‘2023-01-01’, event: ‘事件1’ },
{ id: 2, createTime: ‘2023-01-02’, event: ‘事件2’ },
{ id: 3, createTime: ‘2023-01-03’, event: ‘事件3’ }
// …更多测试数据
]
},
mounted () {
this.KaTeX parse error: Expected '}', got 'EOF' at end of input: …onst el = this.el.querySelector(‘.el-table__body-wrapper tbody’)
Sortable.create(el, {
onEnd: (event) => {
const { oldIndex, newIndex } = event
this.updateRowOrder(oldIndex, newIndex)
}
})
})
},
methods: {
updateRowOrder (oldIndex, newIndex) {
const movedItem = this.planTableData.splice(oldIndex, 1)[0]
this.planTableData.splice(newIndex, 0, movedItem)
this.updateOrderOnServer()
},
updateOrderOnServer () {
axios.post(‘/api/update-order’, { newOrder: this.planTableData })
.then(response => {
console.log(‘Order updated:’, response)
})
.catch(error => {
console.error(‘Error updating order:’, error)
// 可能需要回滚操作
})
}
}
}
这段代码演示了如何在 Vue 组件中结合 Element UI 的表格和 `sortablejs` 来实现行拖拽功能。主要步骤包括初始化表格数据、配置 `sortablejs` 来启用拖拽,并在拖拽结束时更新数据和同步到服务器。通过这种方式,您可以创建一个交互式且用户友好的表格界面。


## 代码说明


### 1. 引入依赖和组件结构
* `<template>` 部分定义了组件的 HTML 结构。这里使用了 Element UI 的 `<el-table>` 组件来创建表格。
* `:data="planTableData"` 是一个动态属性(Vue 的 v-bind 简写),它绑定 `planTableData` 数组到表格的数据源。
* `row-key="id"` 用于指定每行数据的唯一键值,这里假设每个数据项都有一个唯一的 `id` 字段。该属性是必填的,否则表格无法立即显示排序后的结果。
* `import Sortable from 'sortablejs'` 引入 `sortablejs` 库,它用于实现拖拽功能。
* `import axios from 'axios'` 引入 `axios` 库,用于发送 HTTP 请求。


### 2. 组件数据和生命周期
export default {
name: ‘PlanTableDraggable’,
data () {
return {
planTableData: []
}
},
created () {
this.planTableData = [/* 初始数据 */]
},
mounted () {
this.KaTeX parse error: Expected '}', got 'EOF' at end of input: …onst el = this.el.querySelector(‘.el-table__body-wrapper tbody’)
Sortable.create(el, {/* 配置项 */})
})
},
// …
}
* `data()` 函数返回组件的响应式数据,这里是 `planTableData` 数组,用于存储表格数据。
* `created()` 生命周期钩子用于初始化 `planTableData`。这里可以替换为从服务器加载数据。
* `mounted()` 钩子在组件被挂载到 DOM 后执行。这里使用 `this.$nextTick` 确保所有的子组件也被渲染。
* 在 `mounted` 内部,我们通过 `this.$el.querySelector` 获取表格的 DOM 元素,并使用 `Sortable.create` 初始化拖拽功能。


### 3. 实现拖拽功能
Sortable.create(el, {
onEnd: (event) => {
const { oldIndex, newIndex } = event
this.updateRowOrder(oldIndex, newIndex)
}
})
* `Sortable.create` 接受两个参数:要应用拖拽的元素和配置对象。
* `onEnd` 是一个事件处理器,当拖拽操作完成时触发。
* `event` 参数提供了拖拽操作的详情,包括原始索引 `oldIndex` 和新索引 `newIndex`。
* `this.updateRowOrder` 是一个自定义方法,用于更新数组中元素的顺序。


### 4. 更新数据和服务器同步
methods: {
updateRowOrder (oldIndex, newIndex) {
const movedItem = this.planTableData.splice(oldIndex, 1)[0]
this.planTableData.splice(newIndex, 0, movedItem)
this.updateOrderOnServer()
},
updateOrderOnServer () {
axios.post(‘/api/update-order’, { newOrder: this.planTableData })
.then(response => {
console.log(‘Order updated:’, response)
})
.catch(error => {
console.error(‘Error updating order:’, error)
})
}
}
* `updateRowOrder` 通过数组的 `splice` 方法调整 `planTableData` 中元素的位置。
* `updateOrderOnServer` 使用 `axios` 发送一个 POST 请求到服务器,以同步更新后的顺序。这里的 ‘/api/update-order’ 是示例 API 端点,需要根据实际后端服务进行调整。
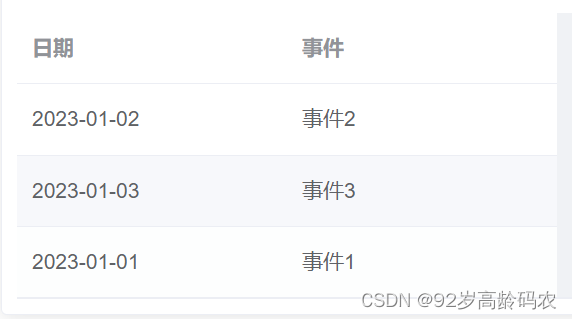
## 运行效果
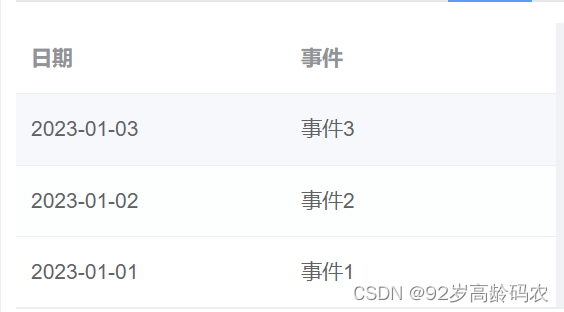
### 最后
**[开源分享:【大厂前端面试题解析+核心总结学习笔记+真实项目实战+最新讲解视频】](https://bbs.csdn.net/topics/618166371)**
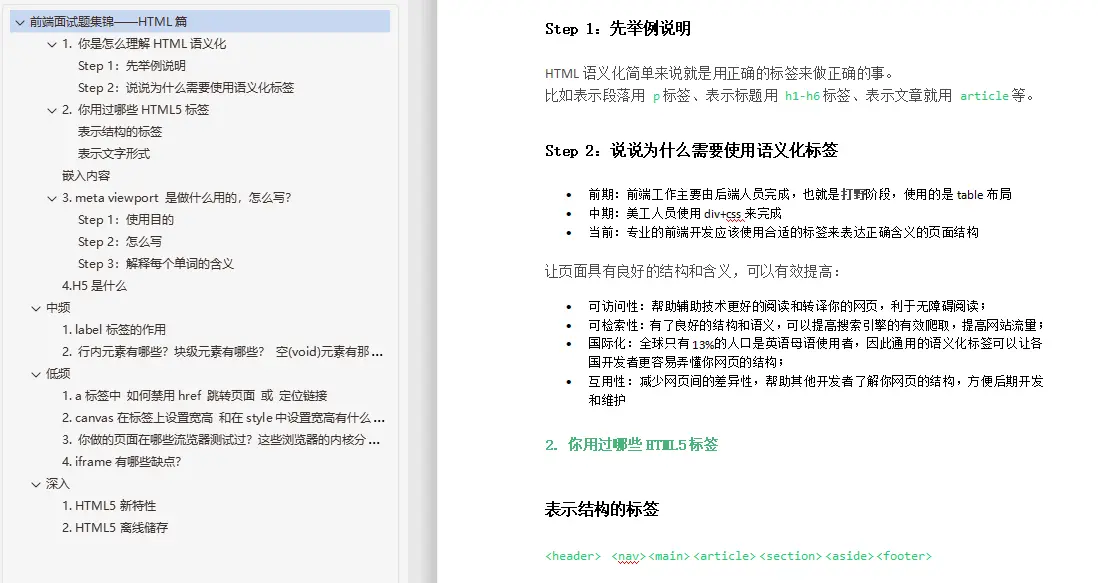
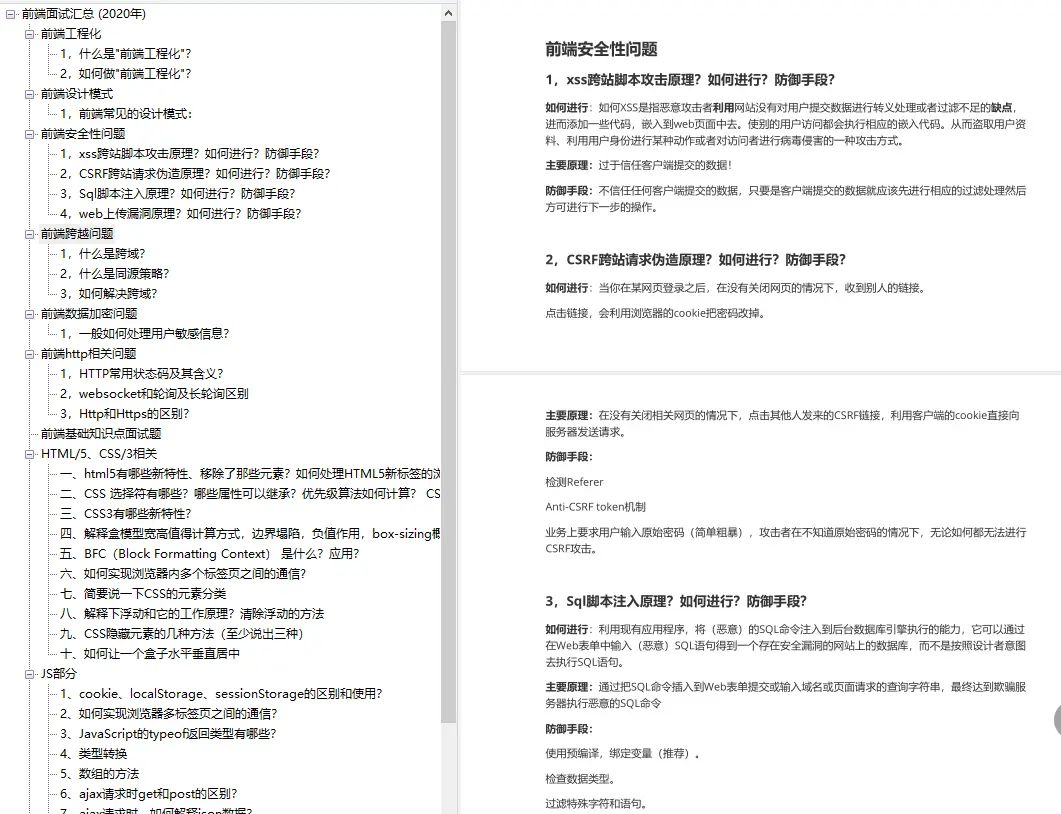
**给大家分享一些关于HTML的面试题。**
前端面试题解析+核心总结学习笔记+真实项目实战+最新讲解视频】](https://bbs.csdn.net/topics/618166371)**
**给大家分享一些关于HTML的面试题。**
[外链图片转存中...(img-NVoIB2Mj-1715159619563)]
[外链图片转存中...(img-eo2kE8gG-1715159619564)]


 2578
2578

 被折叠的 条评论
为什么被折叠?
被折叠的 条评论
为什么被折叠?
 到【灌水乐园】发言


