既有适合小白学习的零基础资料,也有适合3年以上经验的小伙伴深入学习提升的进阶课程,涵盖了95%以上软件测试知识点,真正体系化!
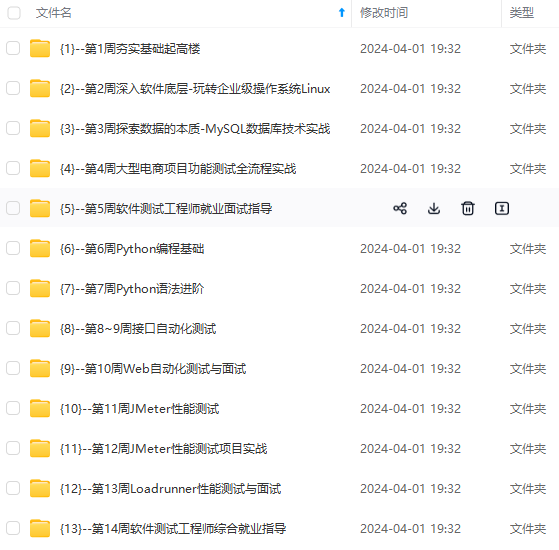
由于文件比较多,这里只是将部分目录截图出来,全套包含大厂面经、学习笔记、源码讲义、实战项目、大纲路线、讲解视频,并且后续会持续更新
Elasticsearch是不需要编译的,解压就可以使用
备份配置文件
[root@elk ~]# cp /data/application/elasticsearch-6.01/config/elasticsearch.yml{,.ori}
#找到以下几行修改
[root@elk config]# vi elasticsearch.yml
path.data: /data/shuju ----》存放数据路径
path.logs: /data/logs -----》日志路径
network.host: 0.0.0.0 -----》根据自己的ip修改
http.port: 9200
bootstrap.memory_lock: false
bootstrap.system_call_filter: false
#创建los,shuju
[root@elk config]#mkdir /data/{shuju,logs}
#修改elasticsearch权限
[root@elk ~]#chown -R elk.elk /data/application/elasticsearch-6.0.1./
[root@elk ~]#chown -R elk.elk /data/{shuju,logs}
[root@elk ~]# su – elk
#在前台显示下效果
[elk@elk ~]$/data/application/elasticsearch-6.0.1/bin/elasticsearch
#测试是否成功
[root@elk ~]# curl 192.168.10.243:9200
{
“name” : “z8htm2J”,
“cluster_name” : “elasticsearch”,
“cluster_uuid” : “wEbF7BwgSe-0vFyHb1titQ”,
“version” : {
"number" : "6.0.1",

"build\_hash" : "3adb13b",

"build\_date" : "2017-03-23T03:31:50.652Z",

"build\_snapshot" : false,

"lucene\_version" : "6.4.1"
},
“tagline” : “You Know, for Search”
}
启动elasticsearch出现如下错误
1.问题:最大线程数,打开的太低,需要增加线程数
max number of threads [1024] for user [elasticsearch] likely toolow, increase to at least [2048]
解决:
vi /etc/security/limits.d/90-nproc.conf
* soft nproc 2048
2.问题:打开虚拟内存的个数太少需要增加
max virtual memory areas vm.max_map_count [65530] likely toolow, increase to at least [262144]
解决:
[root@elk ~]#vi /etc/sysctl.conf
vm.max_map_count=655360
[root@elk ~]#sysctl -p
注:
vm.max_map_count文件允许max_map_count限制虚拟内存的数量
3.max file descriptors [4096] for elasticsearch process is too low, increase to at least [65536]
#临时修改
[root@elk ~]# ulimit -SHn 65536
注:
-S 设置软件资源限制
-H 设置硬件资源限制
-n 设置内核可以同时可以打开文件描述符
[root@elk ~]# ulimit -n
65536
注:
修改这个原因,启动elasticsearch 会出现这个情况too many open files,导致启动失败
#永久修改
#在文件最后添加
[root@elk ~]# vi /etc/security/limits.conf
* soft nofile 65536
* hard nofile 131072
* soft nproc 2048
* hard nproc 4096
注:
文件格式:username|@groupname type resource limit
分为3中类型type(有 soft,hard 和 -)
soft是指当前系统生效的设置值
hard 系统设置的最大值
[if !supportLists]- [endif]同时设置了soft和hard的值
nofile - 打开文件的最大数目
noproc - 进程的最大数目
soft<=hard soft的限制不能比hard限制高
#需要重启系统才会生效
## 五.安装logstash
#解压
[root@elk elk_pack]# tar zxvf logstash-6.0.1tar.gz -C /data/application/
注:
Logstash是不需要编译的,解压就可以使用
#测试能否使用
[root@elk ~]# /data/application/logstash-6.0.1/bin/logstash -e ‘input { stdin { } } output {stdout {} }’
Sending Logstash’s logs to /data/application/logstash-5.2.0/logs which is now configured via log4j2.properties
The stdin plugin is now waiting for input:
[2017-04-12T11:54:10,457][INFO ][logstash.pipeline ] Starting pipeline {“id”=>“main”, “pipeline.workers”=>1, “pipeline.batch.size”=>125, “pipeline.batch.delay”=>5, “pipeline.max_inflight”=>125}
[2017-04-12T11:54:10,481][INFO ][logstash.pipeline ] Pipeline main started
[2017-04-12T11:54:10,563][INFO ][logstash.agent ] Successfully started Logstash API endpoint {:port=>9600}
hello world ---->输入hell world,随便输入什么,能输出就证明可以使用
2017-04-12T03:54:40.278Z localhost.localdomain hello world ---->输出hello world
/data/application/logstash-5.2.0/vendor/bundle/jruby/1.9/gems/logstash-patterns-core-4.0.2/patterns
## 六、安装Kibana


#解压
[root@elk elk_pack]# tar zxvf kibana-6.0.1-linux-x86_64.tar.gz -C /data/application/
注:


Kibana是不需要编译的,解压就可以使用


#修改配置kibana.yml文件
#cd kibana这个目录
[root@elk ~]# cd /data/application/kibana-6.0.1/config/
#找到以下几行修改
[root@elk config]# egrep -v “$|[#]” kibana.yml
server.port: 5601 #kibana的端口
server.host: “0.0.0.0” #访问kibana的ip地址
elasticsearch.url: “http://192.168.10.243:9200” #elasticsearch的ip地址
kibana.index: “.kibana” #创建索引
#测试是否启动成功
[root@192 ~]# /data/application/kibana-6.0.1/bin/kibana
log [06:22:02.940] [info][status][plugin:kibana@5.2.0] Status changed from uninitialized to green - Ready
log [06:22:03.106] [info][status][plugin:elasticsearch@5.2.0] Status changed from uninitialized to yellow - Waiting for Elasticsearch
log [06:22:03.145] [info][status][plugin:console@5.2.0] Status changed from uninitialized to green - Ready
log [06:22:03.193] [warning] You’re running Kibana 5.2.0 with some different versions of Elasticsearch. Update Kibana or Elasticsearch to the same version to prevent compatibility issues: v5.3.0 @ 192.168.10.243:9200 (192.168.201.135)
log [06:22:05.728] [info][status][plugin:timelion@5.2.0] Status changed from uninitialized to green - Ready
log [06:22:05.744] [info][listening] Server running at http://192.168.10.243:5601
log [06:22:05.746] [info][status][ui settings] Status changed from uninitialized to yellow - Elasticsearch plugin is yellow
log [06:22:08.263] [info][status][plugin:elasticsearch@5.2.0] Status changed from yellow to yellow - No existing Kibana index found
log [06:22:09.446] [info][status][plugin:elasticsearch@5.2.0] Status changed from yellow to green - Kibana index ready
log [06:22:09.447] [info][status][ui settings] Status changed from yellow to green – Ready
#证明启动成功


#查看port
[root@elk shuju]# lsof -i:5601
COMMAND PID USER FD TYPE DEVICE SIZE/OFF NODE NAME
node 4690 root 13u IPv4 40663 0t0 TCP 192.168.10.243:esmagent (LISTEN)
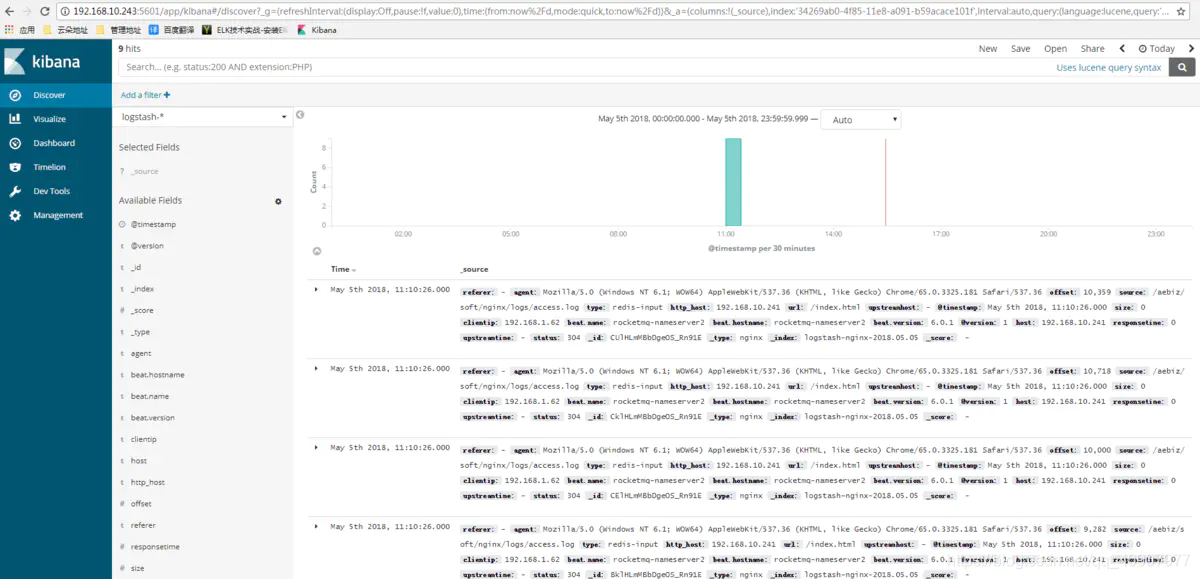
通过web访问
>
> http://192.168.10.243:5601
>
>
>
## 七.客户端安装filebeat收集nginx日志
1)安装nginx
安装依赖包
[root@www ~]# yum -y install gcc gcc-c++ make libtool zlib zlib-devel pcre pcre-devel openssl openssl-devel
下载nginx的源码包:http://nginx.org/download
[root@www ~]# tar zxf nginx-1.10.2.tar.gz
[root@www ~]# cd nginx-1.10.2/
[root@www ~]# groupadd www#添加www组
[root@www ~]# useradd -g www www -s /sbin/nologin#创建nginx运行账户www并加入到www组,不允许www用户直接登录系统
[root@www nginx-1.10.2]# ./configure --prefix=/usr/local/nginx1.10 --with-http_dav_module --with-http_stub_status_module --with-http_addition_module --with-http_sub_module --with-http_flv_module --with-http_mp4_module --with-pcre --with-http_ssl_module --with-http_gzip_static_module --user=www --group=www
[root@www nginx-1.10.2]# make&& make install
修改日志类型为json
[root@rocketmq-nameserver2 soft]# vim nginx/conf/nginx.conf
#添加如下内容
log_format json ‘{“@timestamp”:“$time_iso8601”,’
            '"host":"$server\_addr",'

            '"clientip":"$remote\_addr",'

            '"size":$body\_bytes\_sent,'

            '"responsetime":$request\_time,'

            '"upstreamtime":"$upstream\_response\_time",'

            '"upstreamhost":"$upstream\_addr",'

            '"http\_host":"$host",'

            '"url":"$uri",'

            '"referer":"$http\_referer",'

            '"agent":"$http\_user\_agent",'

            '"status":"$status"}';

access_log  logs/access.log  json;
\*\* 2)安装部署Filebeat\*\*
tar xf filebeat-6.0.1-linux-x86_64.tar.gz
cd filebeat-6.0.1-linux-x86_64
编写收集文件:
filebeat.prospectors:
-
input_type: log
paths:
- /var/log/*.log
-
input_type: log
paths:
- /aebiz/soft/nginx/logs/*.log
encoding: utf-8
document_type: my-nginx-log
scan_frequency: 10s
harvester_buffer_size: 16384
max_bytes: 10485760
tail_files: true
output.redis:
enabled: true
hosts: [“192.168.10.243”]
port: 6379
key: filebeat
db: 0
worker: 1
timeout: 5s
max_retries: 3
启动
[root@~ filebeat-6.0.1-linux-x86_64]# ./filebeat -c filebeat2.yml
后台启动
[root@~ filebeat-6.0.1-linux-x86_64]# nohup ./filebeat -c filebeat2.yml &
## 八.收集端编写logstash文件
[root@bogon config]# vim 02-logstash.conf
input {
redis {

  host => "192.168.10.243"
port => “6379”
  data_type => "list"

  key => "filebeat"

  type => "redis-input"

}
}
filter {
json {

  source => "message"

  remove_field => "message"

}
}
output {
elasticsearch {

  hosts => ["192.168.10.243:9200"]

  index => "logstash-nginx-%{+YYYY.MM.dd}"

  document_type => "nginx"

  # template => "/usr/local/logstash-2.3.2/etc/elasticsearch-template.json"

  workers => 1
}
}
启动前检查 -t 参数
[root@bogon config]# /data/application/logstash-6.0.1/bin/logstash -t -f /data/application/logstash-6.0.1/config/02-logstash.conf
Configuration OK[2018-05-06T14:11:26,442][INFO ][logstash.runner ] Using config.test_and_exit mode. Config Validation Result: OK. Exiting Logstash
启动
[root@bogon config]# /data/application/logstash-6.0.1/bin/logstash-f /data/application/logstash-6.0.1/config/02-logstash.conf
[2018-05-06T14:12:06,694][INFO ][logstash.agent ] Successfully started Logstash API endpoint {:port=>9600}[2018-05-06T14:12:07,317][WARN ][logstash.outputs.elasticsearch] You are using a deprecated config setting “document_type” set in elasticsearch. Deprecated settings will continue to work, but are scheduled for removal from logstash in the future. Document types are being deprecated in Elasticsearch 6.0, and removed entirely in 7.0. You should avoid this feature If you have any questions about this, please visit the #logstash channel on freenode irc. {:name=>“document_type”, :plugin=>[“192.168.10.243:9200”], index=>“logstash-nginx-%{+YYYY.MM.dd}”, document_type=>“nginx”, workers=>1, id=>“a8773a7416ee72eecc397e30d8399a5da417b6c3dd2359fc706229ad8186d12b”>} …
后台启动
[root@bogon config]# nohup /data/application/logstash-6.0.1/bin/logstash -t -f /data/application/logstash-6.0.1/config/02-logstash.conf &
## 九,启动各组件

网上学习资料一大堆,但如果学到的知识不成体系,遇到问题时只是浅尝辄止,不再深入研究,那么很难做到真正的技术提升。
一个人可以走的很快,但一群人才能走的更远!不论你是正从事IT行业的老鸟或是对IT行业感兴趣的新人,都欢迎加入我们的的圈子(技术交流、学习资源、职场吐槽、大厂内推、面试辅导),让我们一起学习成长!
oot@bogon config]# nohup /data/application/logstash-6.0.1/bin/logstash -t -f /data/application/logstash-6.0.1/config/02-logstash.conf &
## 九,启动各组件
[外链图片转存中…(img-dqE2dqRV-1715407315033)]
[外链图片转存中…(img-CB2gF8eJ-1715407315034)]
网上学习资料一大堆,但如果学到的知识不成体系,遇到问题时只是浅尝辄止,不再深入研究,那么很难做到真正的技术提升。
一个人可以走的很快,但一群人才能走的更远!不论你是正从事IT行业的老鸟或是对IT行业感兴趣的新人,都欢迎加入我们的的圈子(技术交流、学习资源、职场吐槽、大厂内推、面试辅导),让我们一起学习成长!


 2027
2027


 被折叠的 条评论
为什么被折叠?


