


return true;
}
put方法首先调用了sizeof方法,该方法则是返回指定Bitmap的字节大小,之后size +=,总缓存量增加,之后调用trimToSize该方法则是进行缓存容量判断的。
private void trimToSize(int maxSize) {
while (true) {
String key;
Bitmap value;
synchronized (this) {
if (size < 0 || (map.isEmpty() && size != 0)) {
throw new IllegalStateException(getClass().getName() + “.sizeOf() is reporting inconsistent results!”);
}
if (size <= maxSize || map.isEmpty()) {
break;
}
Map.Entry<String, Bitmap> toEvict = map.entrySet().iterator().next();
if (toEvict == null) {
break;
}
key = toEvict.getKey();
value = toEvict.getValue();
map.remove(key);
size -= sizeOf(key, value);
}
}
}
如果加入后的size 缓存容量 <= maxSize 最大缓存容量,则直接break,不用进行判定处理。
如果大于的话,则直接移除最久未使用的。
大家肯定有疑问,它到底怎么判断最久未使用的?没看到相关代码呀?
相信知道LinkedHashMap的话可能就知道。
LinkedHashMap自身已经实现了顺序存储,默认情况下是按照元素的添加顺序存储,也可以启用按照访问顺序存储,即最近读取的数据放在最前面,最早读取的数据放在最后面,然后它还有一个判断是否删除最老数据的方法,默认是返回false,即不删除数据。大家常见也就是按顺序存储,很少忘了它还可以根据最近未使用的方法。
//LinkedHashMap的一个构造函数,当参数accessOrder为true时,即会按照访问顺序排序,最近访问的放在最前,最早访问的放在后面
public LinkedHashMap(int initialCapacity, float loadFactor, boolean accessOrder) {
super(initialCapacity, loadFactor);
this.accessOrder = accessOrder;
}
//LinkedHashMap自带的判断是否删除最老的元素方法,默认返回false,即不删除老数据
//我们要做的就是重写这个方法,当满足一定条件时删除老数据
protected boolean removeEldestEntry(Map.Entry<K,V> eldest) {
return false;
}
回看我们前面LinkedHashMap的创建
this.map = new LinkedHashMap<String, Bitmap>(0, 0.75f, true);
再举个使用例子
就比较明了了。
BaseMemoryCache
BaseMemoryCache同样也是实现了MemoryCache方法,不过它还是一个抽象类。
它是一个内存缓存的基类,实现了内存缓存中常用的方法,只不过它里面提供了一个非强引用的Reference作为扩展,方便GC的回收,避免OOM.
public abstract class BaseMemoryCache implements MemoryCache {
/** Stores not strong references to objects */
private final Map<String, Reference> softMap = Collections.synchronizedMap(new HashMap<String, Reference>());
@Override
public Bitmap get(String key) {
Bitmap result = null;
Reference reference = softMap.get(key);
if (reference != null) {
result = reference.get();
}
return result;
}
@Override
public boolean put(String key, Bitmap value) {
softMap.put(key, createReference(value));
return true;
}
@Override
public Bitmap remove(String key) {
Reference bmpRef = softMap.remove(key);
return bmpRef == null ? null : bmpRef.get();
}
/** Creates {@linkplain Reference not strong} reference of value */
protected abstract Reference createReference(Bitmap value);
}
代码也比较简单,内存持有一个Map<String, Reference<Bitmap>> softMap来保存非强引用对象,具体的引用类型则看它实现的抽象方法createReference。
WeakMemoryCache
我们看它的一个子类WeakMemoryCache则是继承与BaseMemory,实现createReference
public class WeakMemoryCache extends BaseMemoryCache {
@Override
protected Reference createReference(Bitmap value) {
return new WeakReference(value);
}
}
很明显是来保存弱引用对象的。
LimitedMemoryCache
我们看它的另外一个子类LimitedMemoryCache,但它并没有实现BaseMemoryCache里的createReference方法,它也是一个抽象类,在BaseMemoryCache基础上封装了个抽象方法
protected abstract Bitmap removeNext();用来处理当缓存容量不足时的情况。
public abstract class LimitedMemoryCache extends BaseMemoryCache {
…
//当前保存的Bitmap,用来统计缓存数
private final List hardCache = Collections.synchronizedList(new LinkedList());
…
@Override
public boolean put(String key, Bitmap value) {
boolean putSuccessfully = false;
// Try to add value to hard cache
int valueSize = getSize(value);
int sizeLimit = getSizeLimit();
int curCacheSize = cacheSize.get();
if (valueSize < sizeLimit) {
while (curCacheSize + valueSize > sizeLimit) {
Bitmap removedValue = removeNext();
if (hardCache.remove(removedValue)) {
curCacheSize = cacheSize.addAndGet(-getSize(removedValue));
}
}
hardCache.add(value);
cacheSize.addAndGet(valueSize);
putSuccessfully = true;
}
// Add value to soft cache
super.put(key, value);
return putSuccessfully;
}
@Override
public Bitmap remove(String key) {
Bitmap value = super.get(key);
if (value != null) {
if (hardCache.remove(value)) {
cacheSize.addAndGet(-getSize(value));
}
}
return super.remove(key);
}
…
protected abstract int getSize(Bitmap value);
protected abstract Bitmap removeNext();
}
可以看到在 LimitedMemoryCache里面又有一个List<Bitmap>保存的是强引用,而在BaseMemoryCache里面也有个Map<String, Reference<Bitmap>> softMap来保存Bitmap,为什么要这样。
这主要是因为在BaseMemoryCache里面并没有做缓存限制处理,它只是封装实现了基本的Bitmap的put,get。而当面对缓存容量有限的情况下,则需要交给子类去处理。
我们看下这里的put方法,关键在
while (curCacheSize + valueSize > sizeLimit) {
Bitmap removedValue = removeNext();
if (hardCache.remove(removedValue)) {
curCacheSize = cacheSize.addAndGet(-getSize(removedValue));
}
}
当超过容量时,调用抽象方法removeNext由子类自行实现,之后hardCache移除,但此时并没有调用softMap的移除。
也就是对于List<Bitmap>来说,当它的缓存容量超过的时候,它会移除第一个对象来缓解容量,但是保存在Map<String, Reference<Bitmap>> softMap里面的Bitmap并没有被移除。
如果这样下去softMap岂不是会无限大?
这是因为在Map<String, Reference<Bitmap>> softMap里面保存的Bitmap是弱引用的存在,而在List<Bitmap>里面保存的是强引用,当内存不足的时候,GC则会先清除softMap里面的对象。
FIFOLimitedMemoryCache
我们看下LimitedMemoryCache的一个子类FIFOLimitedMemoryCache,看到FIFO也就是先进先出了。
public class FIFOLimitedMemoryCache extends LimitedMemoryCache {
private final List queue = Collections.synchronizedList(new LinkedList());
…
@Override
public boolean put(String key, Bitmap value) {
if (super.put(key, value)) {
queue.add(value);
return true;
} else {
return false;
}
}
@Override
public Bitmap remove(String key) {
Bitmap value = super.get(key);
if (value != null) {
queue.remove(value);
}
return super.remove(key);
}
…
@Override
protected Bitmap removeNext() {
return queue.remove(0);
}
@Override
protected Reference createReference(Bitmap value) {
return new WeakReference(value);
}
}
可以看到同样的这里也有个List<Bitmap> queue来保存记录,而在removeNext那里,返回的正是队列的第一个元素,符合FIFO。
LRULimitedMemoryCache
再来看一个另外一个子类LRULimitedMemoryCache也就是最近未使用删除。
public class LRULimitedMemoryCache extends LimitedMemoryCache {
/** Cache providing Least-Recently-Used logic */
private final Map<String, Bitmap> lruCache = Collections.synchronizedMap(new LinkedHashMap<String, Bitmap>(INITIAL_CAPACITY, LOAD_FACTOR, true));
…
@Override
protected Bitmap removeNext() {
Bitmap mostLongUsedValue = null;
synchronized (lruCache) {
Iterator<Entry<String, Bitmap>> it = lruCache.entrySet().iterator();
if (it.hasNext()) {
Entry<String, Bitmap> entry = it.next();
mostLongUsedValue = entry.getValue();
it.remove();
}
}
return mostLongUsedValue;
}
@Override
protected Reference createReference(Bitmap value) {
return new WeakReference(value);
}
}
可以看到,这里的LRU处理则是使用LinkedHashMap,在它的构造方法中第三个参数为true表示使用LRU,之后再removeNext返回那个Bitmap。
同理其他子类也如下,就不一一列举。
MemoryCache小结
1. 只使用的是强引用缓存
- LruMemoryCache(这个类就是这个开源框架默认的内存缓存类,缓存的是bitmap的强引用)
2.使用强引用和弱引用相结合的缓存有
-
UsingFreqLimitedMemoryCache(如果缓存的图片总量超过限定值,先删除使用频率最小的bitmap)
-
LRULimitedMemoryCache(这个也是使用的lru算法,和LruMemoryCache不同的是,他缓存的是bitmap的弱引用)
-
FIFOLimitedMemoryCache(先进先出的缓存策略,当超过设定值,先删除最先加入缓存的bitmap)
-
LargestLimitedMemoryCache(当超过缓存限定值,先删除最大的bitmap对象)
-
LimitedAgeMemoryCache(当 bitmap加入缓存中的时间超过我们设定的值,将其删除)
3.只使用弱引用缓存
- WeakMemoryCache(这个类缓存bitmap的总大小没有限制,唯一不足的地方就是不稳定,缓存的图片容易被回收掉)
二.DiskCache硬盘缓存
同样先来看个结构
DiskCache的设计其实和MemoryCache一样,对于基类DiskCache,它同样是一个接口
public interface DiskCache {
//返回硬盘缓存的根目录
File getDirectory();
File get(String imageUri);
boolean save(String imageUri, InputStream imageStream, IoUtils.CopyListener listener) throws IOException;
boolean save(String imageUri, Bitmap bitmap) throws IOException;
boolean remove(String imageUri);
void close();
void clear();
}
同样一个个看
LruDiskCache
LruDiskCache则是直接实现了DiskCache接口,采用LRU算法来进行缓存处理。
再理解LruDiskCache前,先理解另一个类DiskLruCache
final class DiskLruCache implements Closeable {
static final String JOURNAL_FILE = “journal”;
static final String JOURNAL_FILE_TEMP = “journal.tmp”;
static final String JOURNAL_FILE_BACKUP = “journal.bkp”;
static final String MAGIC = “libcore.io.DiskLruCache”;
…
private final LinkedHashMap<String, Entry> lruEntries =
new LinkedHashMap<String, Entry>(0, 0.75f, true);
…
final ThreadPoolExecutor executorService =
new ThreadPoolExecutor(0, 1, 60L, TimeUnit.SECONDS, new LinkedBlockingQueue());
…
public static DiskLruCache open(File directory, int appVersion, int valueCount, long maxSize, int maxFileCount)
throws IOException {
…
}
…
public synchronized Snapshot get(String key) throws IOException {
…
}
…
private synchronized Editor edit(String key, long expectedSequenceNumber) throws IOException {
…
}
/** A snapshot of the values for an entry. */
public final class Snapshot implements Closeable {
private final String key;
private final long sequenceNumber;
private File[] files;
private final InputStream[] ins;
private final long[] lengths;
…
}
…
public final class Editor {
private final Entry entry;
private final boolean[] written;
private boolean hasErrors;
private boolean committed;
…
}
…
private final class Entry {
private final String key;
private final long[] lengths;
private boolean readable;
private Editor currentEditor;
private long sequenceNumber;
…
}
这个DiskLruCache比较长也比较复杂,它是LruDiskCache的一个文件工具类。这里的缓存数据存储在文件系统上的一个目录。
同时也注意到这里的一个成员变量
private final LinkedHashMap<String, Entry> lruEntries =new LinkedHashMap<String, Entry>(0, 0.75f, true);
可以知道这是用来处理LRU的。
同时这里的value则是Entry,Entry则是封装了当前文件的编辑情况Ediotr以及key。
而这里Editor封装了文件的写入情况OutputStream,Snapshot封装了文件的读取情况InputStream。
回头看回LruDiskCache
public class LruDiskCache implements DiskCache {
protected DiskLruCache cache;
private File reserveCacheDir;
protected final FileNameGenerator fileNameGenerator;
…
public LruDiskCache(File cacheDir, File reserveCacheDir, FileNameGenerator fileNameGenerator, long cacheMaxSize,
int cacheMaxFileCount) throws IOException {
…
this.reserveCacheDir = reserveCacheDir;
this.fileNameGenerator = fileNameGenerator;
initCache(cacheDir, reserveCacheDir, cacheMaxSize, cacheMaxFileCount);
}
private void initCache(File cacheDir, File reserveCacheDir, long cacheMaxSize, int cacheMaxFileCount)
…
cache = DiskLruCache.open(cacheDir, 1, 1, cacheMaxSize, cacheMaxFileCount);
…
}
@Override
public File get(String imageUri) {
DiskLruCache.Snapshot snapshot = null;
try {
snapshot = cache.get(getKey(imageUri));
return snapshot == null ? null : snapshot.getFile(0);
}
…
}
@Override
public boolean save(String imageUri, Bitmap bitmap) throws IOException {
DiskLruCache.Editor editor = cache.edit(getKey(imageUri));
…
OutputStream os = new BufferedOutputStream(editor.newOutputStream(0), bufferSize);
boolean savedSuccessfully = false;
try {
savedSuccessfully = bitmap.compress(compressFormat, compressQuality, os);
}
…
return savedSuccessfully;
}
首先LruDiskCache内部成员变量带有DiskLruCache还有文件的保存目录等,在它的构造方法中调用DiskLruCache.open方法创建了DiskLruCache对象,而在它的open方法里,则根据文件的目录情况创建了对应的文件系统。
再看它的save方法,先调用getKey方法将uri转换为对应的key,而在cache,edit中
private synchronized Editor edit(String key, long expectedSequenceNumber) throws IOException {
…
Entry entry = lruEntries.get(key);
if (expectedSequenceNumber != ANY_SEQUENCE_NUMBER && (entry == null
|| entry.sequenceNumber != expectedSequenceNumber)) {
return null; // Snapshot is stale.
}
if (entry == null) {
entry = new Entry(key);
lruEntries.put(key, entry);
} else if (entry.currentEditor != null) {
return null; // Another edit is in progress.
}
Editor editor = new Editor(entry);
entry.currentEditor = editor;
…
return editor;
}
则是根据指定的key先判断缓存文件中有没有相应的key,如果没有则创建一个Entry对象持有它,之后保存在lruEntries之后,创建一个当前Entry的编辑对象Editor,以便之后写入到文件中。
s之后调用了
OutputStream os = new BufferedOutputStream(editor.newOutputStream(0), bufferSize);
在editor.newOutputStream则是根据当前目录和key创建出一个文件,之后打开这个文件的一个输出流情况,获取到之后就进行Bitmap的写入。
同理,看下LruDiskCache的get方法
@Override
public File get(String imageUri) {
DiskLruCache.Snapshot snapshot = null;
try {
snapshot = cache.get(getKey(imageUri));
return snapshot == null ? null : snapshot.getFile(0);
}
…
}
调用了cache,get
public synchronized Snapshot get(String key) throws IOException {
。。。
Entry entry = lruEntries.get(key);
…
File[] files = new File[valueCount];
InputStream[] ins = new InputStream[valueCount];
try {
File file;
for (int i = 0; i < valueCount; i++) {
file = entry.getCleanFile(i);
files[i] = file;
ins[i] = new FileInputStream(file);
}
}
…
return new Snapshot(key, entry.sequenceNumber, files, ins, entry.lengths);
}
在get方法中,先根据key拿到对应的Entry,再拿到对应的文件打开输入流,之后传入到Snapshot,
而在snapshot.getFile中
/** Returns file with the value for {@code index}. */
public File getFile(int index) {
return files[index];
}
返回的则是对应的文件。
BaseDiskCache
BaseDiskCache同样也是直接实现了DiskCache方法,实现的方法也比较简单
public abstract class BaseDiskCache implements DiskCache {
…
protected final File cacheDir;
protected final File reserveCacheDir;
protected final FileNameGenerator fileNameGenerator;
public BaseDiskCache(File cacheDir, File reserveCacheDir, FileNameGenerator fileNameGenerator) {
…
this.cacheDir = cacheDir;
this.reserveCacheDir = reserveCacheDir;
this.fileNameGenerator = fileNameGenerator;
}
@Override
public boolean save(String imageUri, Bitmap bitmap) throws IOException {
File imageFile = getFile(imageUri);
File tmpFile = new File(imageFile.getAbsolutePath() + TEMP_IMAGE_POSTFIX);
OutputStream os = new BufferedOutputStream(new FileOutputStream(tmpFile), bufferSize);
boolean savedSuccessfully = false;
try {
savedSuccessfully = bitmap.compress(compressFormat, compressQuality, os);
} finally {
IoUtils.closeSilently(os);
if (savedSuccessfully && !tmpFile.renameTo(imageFile)) {
savedSuccessfully = false;
}
if (!savedSuccessfully) {
tmpFile.delete();
}
}
bitmap.recycle();
return savedSuccessfully;
}
@Override
public File get(String imageUri) {
return getFile(imageUri);
}
protected File getFile(String imageUri) {
String fileName = fileNameGenerator.generate(imageUri);
File dir = cacheDir;
if (!cacheDir.exists() && !cacheDir.mkdirs()) {
if (reserveCacheDir != null && (reserveCacheDir.exists() || reserveCacheDir.mkdirs())) {
dir = reserveCacheDir;
}
}
return new File(dir, fileName);
}
比较简单,根据对应的文件去打开获取。它的两个子类LimitedAgeDiskCache和UnlimitedDiskCache也都不一一扩展开了。
三、Universal-Image-Loader解析之源代码解析
===================================================================================================
当我们配置好ImageConfiguration和ImageLoader后,我们就会开始调用
ImageLoader.getInstance().loadImage(…);
ImageLoader.getInstance().displayImage(…);
这两个方法其中一个来显示图片。
先看loadImage
public void loadImage(String uri, ImageSize targetImageSize, DisplayImageOptions options,
ImageLoadingListener listener, ImageLoadingProgressListener progressListener) {
checkConfiguration();
if (targetImageSize == null) {
targetImageSize = configuration.getMaxImageSize();
}
if (options == null) {
options = configuration.defaultDisplayImageOptions;
}
NonViewAware imageAware = new NonViewAware(uri, targetImageSize, ViewScaleType.CROP);
displayImage(uri, imageAware, options, listener, progressListener);
}
首先调用了checkConfiguration用来判断是否有初始化ImageLoaderConfiguration
如果有设置ImageView的大小,则设置,没则默认Configuration的大小。
如果没有设置DisplayImageOptions,则设置上一个默认的options
之后创建了个NonViewAware,再调用displayImage。
也就是说,loadImage最终还是调用到了displayImage。
ImageAware
这里的NonViewAware实现了ImageAware接口。先来看个结构图
ImageAware是一个接口,内部提供了一系列操作图片的一些方法。
对于NonViewAware来说,它内部只是简单的保存图片一些必要的数据,比如图片大小尺寸,URI,ScaleType这些。主要封装成ImageAware来给displayImage调用。
看下displayImage的使用
public void displayImage(String uri, ImageView imageView) {
displayImage(uri, new ImageViewAware(imageView), null, null, null);
}
这里把ImageView封装成ImageViewAware再去调用displayImage这个就跟loadImage一样。
而这里ImageViewAware继承与ViewAware,ViewAware则实现了ImageAware接口。
与NonViewAware不同的是ViewAware内部持有一个Reference<View> viewRef的成员变量,它是用来保存当前ImageView的一个弱引用,以便之后来直接设置显示图片。
ViewAware很多方法都是依赖于这个View
@Override
public boolean setImageDrawable(Drawable drawable) {
if (Looper.myLooper() == Looper.getMainLooper()) {
View view = viewRef.get();
if (view != null) {
setImageDrawableInto(drawable, view);
return true;
}
} else {
L.w(WARN_CANT_SET_DRAWABLE);
}
return false;
}
之后就可以在ImageViewAware中设置显示。
好了回过头看他们最终调用的方法。
这个方法有点长,我们拆分成一部分一部分来看
public void displayImage(String uri, ImageAware imageAware, DisplayImageOptions options,
ImageSize targetSize, ImageLoadingListener listener, ImageLoadingProgressListener progressListener) {
checkConfiguration();
if (imageAware == null) {
throw new IllegalArgumentException(ERROR_WRONG_ARGUMENTS);
}
if (listener == null) {
listener = defaultListener;
}
if (options == null) {
options = configuration.defaultDisplayImageOptions;
}
if (TextUtils.isEmpty(uri)) {
engine.cancelDisplayTaskFor(imageAware);
listener.onLoadingStarted(uri, imageAware.getWrappedView());
if (options.shouldShowImageForEmptyUri()) {
imageAware.setImageDrawable(options.getImageForEmptyUri(configuration.resources));
} else {
imageAware.setImageDrawable(null);
}
listener.onLoadingComplete(uri, imageAware.getWrappedView(), null);
return;
}
…//下一部分看
}
首先先检查是否有初始化设置ImageLoaderConfiguration没则抛出异常,没设置listener和DisplayImageOptions则设置一个默认值。
之后调用TextUtils.isEmpty(uri)判断是否当前的uri为空,则调用
engine.cancelDisplayTaskFor(imageAware);
之后则用listener通知开始和结束,也比较好理解,主要是这个engine。
这个engine就是ImageLoaderEngine,主要用来负责显示加载图片的一个类。
ImageLoaderEngine中存在一个HashMap,用来记录正在加载的任务,加载图片的时候会将ImageView的id和图片的url加上尺寸加入到HashMap中,加载完成之后会将其移除。
接着看下面
public void displayImage(String uri, ImageAware imageAware, DisplayImageOptions options,
ImageSize targetSize, ImageLoadingListener listener, ImageLoadingProgressListener progressListener) {
…//前一部分
if (targetSize == null) {
targetSize = ImageSizeUtils.defineTargetSizeForView(imageAware, configuration.getMaxImageSize());
}
String memoryCacheKey = MemoryCacheUtils.generateKey(uri, targetSize);
engine.prepareDisplayTaskFor(imageAware, memoryCacheKey);
listener.onLoadingStarted(uri, imageAware.getWrappedView());
Bitmap bmp = configuration.memoryCache.get(memoryCacheKey);
if (bmp != null && !bmp.isRecycled()) {
L.d(LOG_LOAD_IMAGE_FROM_MEMORY_CACHE, memoryCacheKey);
if (options.shouldPostProcess()) {
ImageLoadingInfo imageLoadingInfo = new ImageLoadingInfo(uri, imageAware, targetSize, memoryCacheKey,
options, listener, progressListener, engine.getLockForUri(uri));
ProcessAndDisplayImageTask displayTask = new ProcessAndDisplayImageTask(engine, bmp, imageLoadingInfo,
defineHandler(options));
if (options.isSyncLoading()) {
displayTask.run();
} else {
engine.submit(displayTask);
}
} else {
options.getDisplayer().display(bmp, imageAware, LoadedFrom.MEMORY_CACHE);
listener.onLoadingComplete(uri, imageAware.getWrappedView(), bmp);
}
}
…//下一部分
}
当URI不为空的时候来加载显示。首先根据uri获取对应uri对应唯一的一个Key,之后调用engine.prepareDisplayTaskFor(imageAware, memoryCacheKey);来记录当前加载的任务,开启listener的start回调,接着调用Bitmap bmp = configuration.memoryCache.get(memoryCacheKey);来获取内存缓存中的图片,这里默认的内存缓存是LruMemoryCache,前篇文章有分析到。
如果缓存中存在相应的Bitmap的话,进入到if里面
我们如果在DisplayImageOptions中设置了postProcessor就进入true逻辑,不过默认postProcessor是为null的,BitmapProcessor接口主要是对Bitmap进行处理,这个框架并没有给出相对应的实现,如果我们有自己的需求的时候可以自己实现BitmapProcessor接口(比如将图片设置成圆形的).
然后到了27行
将Bitmap设置到ImageView上面,这里我们可以在DisplayImageOptions中配置显示需求displayer,默认使用的是SimpleBitmapDisplayer,直接将Bitmap设置到ImageView上面,我们可以配置其他的显示逻辑, 他这里提供了FadeInBitmapDisplayer(透明度从0-1)RoundedBitmapDisplayer(4个角是圆弧)等, 然后回调到ImageLoadingListener接口。
我们知道loadImage和displayImage的区别在于loadImage依靠返回的Bitmap进行设置显示,而displayImage则是直接显示。而loadImage最终也是调用了displayImage,原因就在于这个display和imageAware
public final class SimpleBitmapDisplayer implements BitmapDisplayer {
@Override
public void display(Bitmap bitmap, ImageAware imageAware, LoadedFrom loadedFrom) {
imageAware.setImageBitmap(bitmap);
}
}
loadImage的ImageAware是NonImageAware并没有处理setImageBitmap的方法,而displayImage的ImageViewAware则有处理显示。
好,继续前面,当从内存缓存获取到的Bitmap为空的情况下
public void displayImage(String uri, ImageAware imageAware, DisplayImageOptions options,
ImageSize targetSize, ImageLoadingListener listener, ImageLoadingProgressListener progressListener) {
…//前两部分
//如果Bitmap为空
} else {
if (options.shouldShowImageOnLoading()) {
imageAware.setImageDrawable(options.getImageOnLoading(configuration.resources));
} else if (options.isResetViewBeforeLoading()) {
imageAware.setImageDrawable(null);
}
ImageLoadingInfo imageLoadingInfo = new ImageLoadingInfo(uri, imageAware, targetSize, memoryCacheKey,
options, listener, progressListener, engine.getLockForUri(uri));
LoadAndDisplayImageTask displayTask = new LoadAndDisplayImageTask(engine, imageLoadingInfo,
defineHandler(options));
if (options.isSyncLoading()) {
displayTask.run();
} else {
engine.submit(displayTask);
}
}
}
如果需要设置显示加载中的图片,则进行设置显示。
ImageLoadingInfo则是一个加载显示图片任务信息的一个类。
之后根据它创建了一个LoadAndDisplayImageTask类,它实现了Runnable。
如果配置了isSyncLoading为true, 直接执行LoadAndDisplayImageTask的run方法,表示同步,默认是false,将LoadAndDisplayImageTask提交给线程池对象
接下来我们就看LoadAndDisplayImageTask的run(), 这个类还是蛮复杂的,我们还是一段一段的分析。
@Override
public void run() {
if (waitIfPaused()) return;
if (delayIfNeed()) return;
…
}
如果waitIfPaused(), delayIfNeed()返回true的话,直接从run()方法中返回了,不执行下面的逻辑, 接下来我们先看看waitIfPaused()
private boolean waitIfPaused() {
AtomicBoolean pause = engine.getPause();
if (pause.get()) {
synchronized (engine.getPauseLock()) {
if (pause.get()) {
L.d(LOG_WAITING_FOR_RESUME, memoryCacheKey);
try {
engine.getPauseLock().wait();
} catch (InterruptedException e) {
L.e(LOG_TASK_INTERRUPTED, memoryCacheKey);
return true;
}
L.d(LOG_RESUME_AFTER_PAUSE, memoryCacheKey);
}
}
}
return isTaskNotActual();
}
这个方法是干嘛用呢,主要是我们在使用ListView,GridView去加载图片的时候,有时候为了滑动更加的流畅,我们会选择手指在滑动或者猛地一滑动的时候不去加载图片,所以才提出了这么一个方法,那么要怎么用呢? 这里用到了PauseOnScrollListener这个类,使用很简单ListView.setOnScrollListener(new PauseOnScrollListener(pauseOnScroll, pauseOnFling )), pauseOnScroll控制我们缓慢滑动ListView,GridView是否停止加载图片,pauseOnFling 控制猛的滑动ListView,GridView是否停止加载图片。
我们可以看下这个PauseOnScrollListener的处理
@Override
public void onScrollStateChanged(AbsListView view, int scrollState) {
switch (scrollState) {
case OnScrollListener.SCROLL_STATE_IDLE:
imageLoader.resume();
break;
case OnScrollListener.SCROLL_STATE_TOUCH_SCROLL:
if (pauseOnScroll) {
imageLoader.pause();
}
break;
case OnScrollListener.SCROLL_STATE_FLING:
if (pauseOnFling) {
imageLoader.pause();
}
break;
}
if (externalListener != null) {
externalListener.onScrollStateChanged(view, scrollState);
}
}
滑动停止的话会调用到imageLoader.pause
public void pause() {
engine.pause();
}
…
void pause() {
paused.set(true);
}
这里的pause是
private final AtomicBoolean paused = new AtomicBoolean(false);
所以调用pause.get则会返回true。
除此之外,这个方法的返回值由isTaskNotActual()决定,我们接着看看isTaskNotActual()的源码
private boolean isTaskNotActual() {
return isViewCollected() || isViewReused();
}
isViewCollected()是判断我们ImageView是否被垃圾回收器回收了,如果回收了,LoadAndDisplayImageTask方法的run()就直接返回了,isViewReused()判断该ImageView是否被重用,被重用run()方法也直接返回,为什么要用isViewReused()方法呢?主要是ListView,GridView我们会复用item对象,假如我们先去加载ListView,GridView第一页的图片的时候,第一页图片还没有全部加载完我们就快速的滚动,isViewReused()方法就会避免这些不可见的item去加载图片,而直接加载当前界面的图片。
回头继续看run方法
@Override
public void run() {
…
ReentrantLock loadFromUriLock = imageLoadingInfo.loadFromUriLock;
L.d(LOG_START_DISPLAY_IMAGE_TASK, memoryCacheKey);
if (loadFromUriLock.isLocked()) {
L.d(LOG_WAITING_FOR_IMAGE_LOADED, memoryCacheKey);
}
loadFromUriLock.lock();
Bitmap bmp;
try {
checkTaskNotActual();
bmp = configuration.memoryCache.get(memoryCacheKey);
if (bmp == null || bmp.isRecycled()) {
bmp = tryLoadBitmap();
if (bmp == null) return; // listener callback already was fired
checkTaskNotActual();
checkTaskInterrupted();
if (options.shouldPreProcess()) {
L.d(LOG_PREPROCESS_IMAGE, memoryCacheKey);
bmp = options.getPreProcessor().process(bmp);
if (bmp == null) {
L.e(ERROR_PRE_PROCESSOR_NULL, memoryCacheKey);
}
}
if (bmp != null && options.isCacheInMemory()) {
L.d(LOG_CACHE_IMAGE_IN_MEMORY, memoryCacheKey);
configuration.memoryCache.put(memoryCacheKey, bmp);
}
} else {
loadedFrom = LoadedFrom.MEMORY_CACHE;
L.d(LOG_GET_IMAGE_FROM_MEMORY_CACHE_AFTER_WAITING, memoryCacheKey);
}
if (bmp != null && options.shouldPostProcess()) {
L.d(LOG_POSTPROCESS_IMAGE, memoryCacheKey);
bmp = options.getPostProcessor().process(bmp);
if (bmp == null) {
L.e(ERROR_POST_PROCESSOR_NULL, memoryCacheKey);
}
}
checkTaskNotActual();
checkTaskInterrupted();
} catch (TaskCancelledException e) {
fireCancelEvent();
return;
} finally {
loadFromUriLock.unlock();
}
DisplayBitmapTask displayBitmapTask = new DisplayBitmapTask(bmp, imageLoadingInfo, engine, loadedFrom);
runTask(displayBitmapTask, syncLoading, handler, engine);
}
第4行代码有一个loadFromUriLock,这个是一个锁,获取锁的方法在ImageLoaderEngine类的getLockForUri()方法中
ReentrantLock getLockForUri(String uri) {
ReentrantLock lock = uriLocks.get(uri);
if (lock == null) {
lock = new ReentrantLock();
uriLocks.put(uri, lock);
}
return lock;
}
从上面可以看出,这个锁对象与图片的url是相互对应的,为什么要这么做?也行你还有点不理解,不知道大家有没有考虑过一个场景,假如在一个ListView中,某个item正在获取图片的过程中,而此时我们将这个item滚出界面之后又将其滚进来,滚进来之后如果没有加锁,该item又会去加载一次图片,假设在很短的时间内滚动很频繁,那么就会出现多次去网络上面请求图片,所以这里根据图片的Url去对应一个ReentrantLock对象,让具有相同Url的请求就会在第10行等待,等到这次图片加载完成之后,ReentrantLock就被释放,刚刚那些相同Url的请求就会继续执行第10行下面的代码。
之后来到第13行,先调用checkTaskNotActual判断当前View是否被GC回收使用,是则抛出异常。
接着15行,它们会先从内存缓存中获取一遍,如果内存缓存中没有在去执行下面的逻辑,所以ReentrantLock的作用就是避免这种情况下重复的去从网络上面请求图片。
17行的方法tryLoadBitmap(),这个方法确实也有点长,我先告诉大家,这里面的逻辑是先从文件缓存中获取有没有Bitmap对象,如果没有在去从网络中获取,然后将bitmap保存在文件系统中,我们还是具体分析下
private Bitmap tryLoadBitmap() throws TaskCancelledException {
Bitmap bitmap = null;
try {
File imageFile = configuration.diskCache.get(uri);
if (imageFile != null && imageFile.exists() && imageFile.length() > 0) {
L.d(LOG_LOAD_IMAGE_FROM_DISK_CACHE, memoryCacheKey);
loadedFrom = LoadedFrom.DISC_CACHE;
checkTaskNotActual();
bitmap = decodeImage(Scheme.FILE.wrap(imageFile.getAbsolutePath()));
}
if (bitmap == null || bitmap.getWidth() <= 0 || bitmap.getHeight() <= 0) {
L.d(LOG_LOAD_IMAGE_FROM_NETWORK, memoryCacheKey);
loadedFrom = LoadedFrom.NETWORK;
String imageUriForDecoding = uri;
if (options.isCacheOnDisk() && tryCacheImageOnDisk()) {
imageFile = configuration.diskCache.get(uri);
if (imageFile != null) {
imageUriForDecoding = Scheme.FILE.wrap(imageFile.getAbsolutePath());
}
}
checkTaskNotActual();
bitmap = decodeImage(imageUriForDecoding);
if (bitmap == null || bitmap.getWidth() <= 0 || bitmap.getHeight() <= 0) {
fireFailEvent(FailType.DECODING_ERROR, null);
}
}
}
…
return bitmap;
}
首先在第4行会去磁盘缓存中去获取图片,如果图片已经保存在磁盘了,则直接获取对应的File路径,调用bitmap = decodeImage(Scheme.FILE.wrap(imageFile.getAbsolutePath()));进行解析。
如果在磁盘中没有的话,则到了12行,开始进行网络下载获取。
在17行会去调用isCacheOnDisk判断是否要保持在磁盘中,如果默认false,如果是则调用tryCacheImageOnDisk来下载图片并且保持在磁盘
private boolean tryCacheImageOnDisk() throws TaskCancelledException {
L.d(LOG_CACHE_IMAGE_ON_DISK, memoryCacheKey);
boolean loaded;
try {
loaded = downloadImage();
…
} …
return loaded;
}
调用了downloadImage进行下载图片
private boolean downloadImage() throws IOException {
InputStream is = getDownloader().getStream(uri, options.getExtraForDownloader());
if (is == null) {
L.e(ERROR_NO_IMAGE_STREAM, memoryCacheKey);
return false;
} else {
try {
return configuration.diskCache.save(uri, is, this);
} finally {
IoUtils.closeSilently(is);
}
}
}
可以看到这里调用了getDownloader().getStream来下载,这里先不扩展,在后面会说到
下载之后则保存在磁盘中。
回来前面
String imageUriForDecoding = uri;
if (options.isCacheOnDisk() && tryCacheImageOnDisk()) {
imageFile = configuration.diskCache.get(uri);
if (imageFile != null) {
imageUriForDecoding = Scheme.FILE.wrap(imageFile.getAbsolutePath());
}
}
checkTaskNotActual();
bitmap = decodeImage(imageUriForDecoding);
这里有个String变量imageUriForDecoding,初始值是uri,如果有设置磁盘缓存的话,则会调用tryCacheImageOnDisk来下载并且保持图片,此时的imageUriForDecoding则是文件File的路径。
如果没有设置磁盘缓存的话,则imageUriForDecoding还是uri。
关键则是在decodeImage,它能根据对应的uri来加载图片。
private Bitmap decodeImage(String imageUri) throws IOException {
ViewScaleType viewScaleType = imageAware.getScaleType();
最后
自我介绍一下,小编13年上海交大毕业,曾经在小公司待过,也去过华为、OPPO等大厂,18年进入阿里一直到现在。
深知大多数初中级Android工程师,想要提升技能,往往是自己摸索成长,自己不成体系的自学效果低效漫长且无助。
因此我收集整理了一份《2024年Android移动开发全套学习资料》,初衷也很简单,就是希望能够帮助到想自学提升又不知道该从何学起的朋友,同时减轻大家的负担。
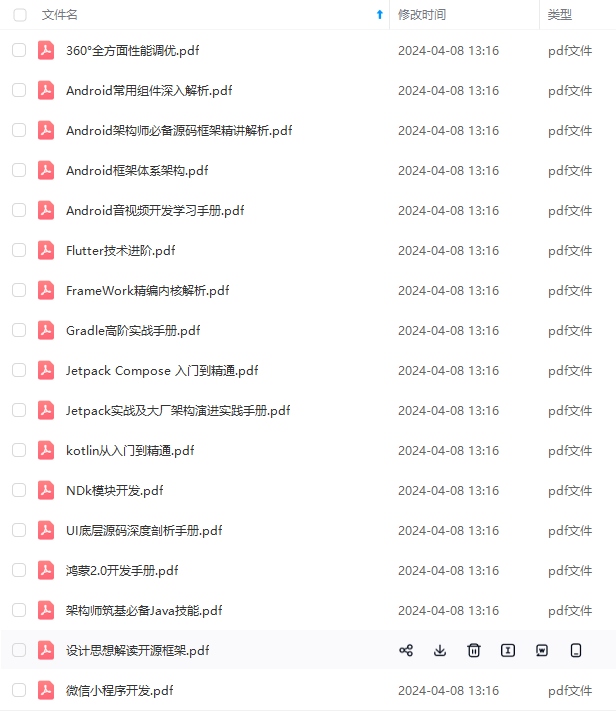
既有适合小白学习的零基础资料,也有适合3年以上经验的小伙伴深入学习提升的进阶课程,基本涵盖了95%以上Android开发知识点!不论你是刚入门Android开发的新手,还是希望在技术上不断提升的资深开发者,这些资料都将为你打开新的学习之门
如果你觉得这些内容对你有帮助,需要这份全套学习资料的朋友可以戳我获取!!
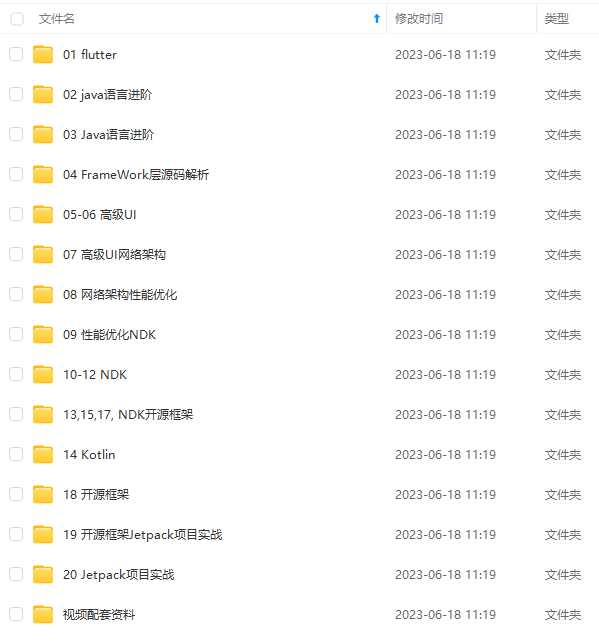
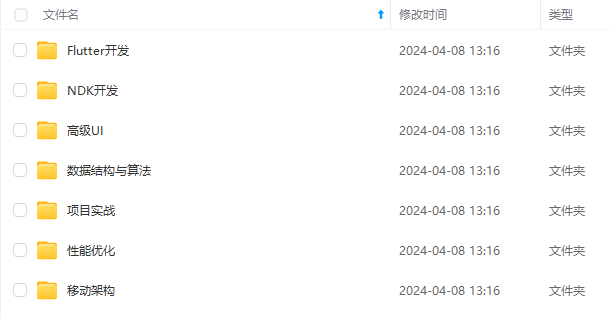
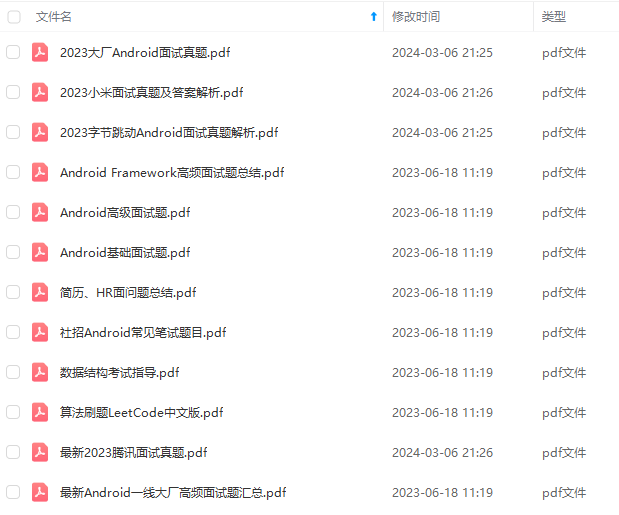
由于文件比较大,这里只是将部分目录截图出来,每个节点里面都包含大厂面经、学习笔记、源码讲义、实战项目、讲解视频,并且会持续更新!
tryCacheImageOnDisk来下载图片并且保持在磁盘
private boolean tryCacheImageOnDisk() throws TaskCancelledException {
L.d(LOG_CACHE_IMAGE_ON_DISK, memoryCacheKey);
boolean loaded;
try {
loaded = downloadImage();
…
} …
return loaded;
}
调用了downloadImage进行下载图片
private boolean downloadImage() throws IOException {
InputStream is = getDownloader().getStream(uri, options.getExtraForDownloader());
if (is == null) {
L.e(ERROR_NO_IMAGE_STREAM, memoryCacheKey);
return false;
} else {
try {
return configuration.diskCache.save(uri, is, this);
} finally {
IoUtils.closeSilently(is);
}
}
}
可以看到这里调用了getDownloader().getStream来下载,这里先不扩展,在后面会说到
下载之后则保存在磁盘中。
回来前面
String imageUriForDecoding = uri;
if (options.isCacheOnDisk() && tryCacheImageOnDisk()) {
imageFile = configuration.diskCache.get(uri);
if (imageFile != null) {
imageUriForDecoding = Scheme.FILE.wrap(imageFile.getAbsolutePath());
}
}
checkTaskNotActual();
bitmap = decodeImage(imageUriForDecoding);
这里有个String变量imageUriForDecoding,初始值是uri,如果有设置磁盘缓存的话,则会调用tryCacheImageOnDisk来下载并且保持图片,此时的imageUriForDecoding则是文件File的路径。
如果没有设置磁盘缓存的话,则imageUriForDecoding还是uri。
关键则是在decodeImage,它能根据对应的uri来加载图片。
private Bitmap decodeImage(String imageUri) throws IOException {
ViewScaleType viewScaleType = imageAware.getScaleType();
最后
自我介绍一下,小编13年上海交大毕业,曾经在小公司待过,也去过华为、OPPO等大厂,18年进入阿里一直到现在。
深知大多数初中级Android工程师,想要提升技能,往往是自己摸索成长,自己不成体系的自学效果低效漫长且无助。
因此我收集整理了一份《2024年Android移动开发全套学习资料》,初衷也很简单,就是希望能够帮助到想自学提升又不知道该从何学起的朋友,同时减轻大家的负担。
[外链图片转存中…(img-kbyROJP8-1715868118393)]
[外链图片转存中…(img-F3nVrWBN-1715868118394)]
[外链图片转存中…(img-wunUQ4fR-1715868118394)]
[外链图片转存中…(img-ak3plfNb-1715868118395)]
既有适合小白学习的零基础资料,也有适合3年以上经验的小伙伴深入学习提升的进阶课程,基本涵盖了95%以上Android开发知识点!不论你是刚入门Android开发的新手,还是希望在技术上不断提升的资深开发者,这些资料都将为你打开新的学习之门
如果你觉得这些内容对你有帮助,需要这份全套学习资料的朋友可以戳我获取!!
由于文件比较大,这里只是将部分目录截图出来,每个节点里面都包含大厂面经、学习笔记、源码讲义、实战项目、讲解视频,并且会持续更新!


 3756
3756


 被折叠的 条评论
为什么被折叠?
被折叠的 条评论
为什么被折叠?
 到【灌水乐园】发言


