


网上学习资料一大堆,但如果学到的知识不成体系,遇到问题时只是浅尝辄止,不再深入研究,那么很难做到真正的技术提升。
一个人可以走的很快,但一群人才能走的更远!不论你是正从事IT行业的老鸟或是对IT行业感兴趣的新人,都欢迎加入我们的的圈子(技术交流、学习资源、职场吐槽、大厂内推、面试辅导),让我们一起学习成长!
g、一般使用auto的场景
(1)stl模板的遍历,以map为例,这里的auto就推导成map<int, string>::iterator类型。
	map<int, string> m;
    for (auto it = m.begin(); it != m.end(); ++it)
    {
        // do something
    }
    return 0;
(2)用于泛型编程
#include <iostream>
#include <string>
using namespace std;

class T1
{
public:
    static int get()
    {
        return 10;
    }
};

class T2
{
public:
    static string get()
    {
        return "hello, world";
    }
};

template <class A>
void func(void)
{
    auto val = A::get();
    cout << "val: " << val << endl;
}

int main()
{
    func<T1>();
    func<T2>();
    return 0;
}
在这个例子中定义了泛型函数 func,在函数中调用了类 A 的静态方法 get () ,这个函数的返回值是不能确定的,如果不使用 auto,就需要再定义一个模板参数,并且在外部调用时手动指定 get 的返回值类型,调用如下,明显要麻烦一些。
#include <iostream>
#include <string>
using namespace std;

class T1
{
public:
    static int get()
    {
        return 0;
    }
};

class T2
{
public:
    static string get()
    {
        return "hello, world";
    }
};

template <class A, typename B>        // 添加了模板参数 B
void func(void)
{
    B val = A::get();
    cout << "val: " << val << endl;
}

int main()
{
    func<T1, int>();                  // 手动指定返回值类型 -> int
    func<T2, string>();               // 手动指定返回值类型 -> string
    return 0;
}
5、decltype
a、decltype 1
int a = 10;
decltype(a) b = 99;                 // b -> int
decltype(a+3.14) c = 52.13;         // c -> double
decltype(a+b\*c) d = 520.1314;       // d -> double
表达式为普通变量或者普通表达式或者类表达式,在这种情况下,使用 decltype 推导出的类型和表达式的类型是一致的。
推导的表达式可简单可复杂,在这一点上 auto 是做不到的,auto 只能推导已初始化的变量类型。
b、decltype 2
class Test{...};
//函数声明
int func\_int();                 // 返回值为 int
int& func\_int\_r();              // 返回值为 int&
int&& func\_int\_rr();            // 返回值为 int&&

const int func\_cint();          // 返回值为 const int
const int& func\_cint\_r();       // 返回值为 const int&
const int&& func\_cint\_rr();     // 返回值为 const int&&

const Test func\_ctest();        // 返回值为 const Test

//decltype类型推导
int n = 100;
decltype(func\_int()) a = 0;
decltype(func\_int\_r()) b = n;
decltype(func\_int\_rr()) c = 0;
decltype(func\_cint())  d = 0;
decltype(func\_cint\_r())  e = n;
decltype(func\_cint\_rr()) f = 0;
decltype(func\_ctest()) g = Test();
//变量 a 被推导为 int 类型
//变量 b 被推导为 int& 类型
//变量 c 被推导为 int&& 类型
//变量 d 被推导为 int 类型
//变量 e 被推导为 const int & 类型
//变量 f 被推导为 const int && 类型
//变量 g 被推导为 const Test 类型
//函数 func\_cint () 返回的是一个纯右值(在表达式执行结束后不再存在的数据,也就是临时性的数据),对于纯右值而言,只有类类型可以携带const、volatile限定符,除此之外需要忽略掉这两个限定符,因此推导出的变量 d 的类型为 int 而不是 const int。
表达式是函数调用,使用 decltype 推导出的类型和函数返回值一致。
c、decltype 3
#include <iostream>
#include <vector>
using namespace std;

class Test
{
public:
    int num;
};

int main() {
    const Test obj;
    //带有括号的表达式
    decltype(obj.num) a = 0;
    decltype((obj.num)) b = a;
    //加法表达式
    int n = 0, m = 0;
    decltype(n + m) c = 0;
    decltype(n = n + m) d = n;
    return 0;
}
//obj.num 为类的成员访问表达式,符合场景 1,因此 a 的类型为 int
//obj.num 带有括号,符合场景 3,因此 b 的类型为 const int&。
//n+m 得到一个右值,符合场景 1,因此 c 的类型为 int
//n=n+m 得到一个左值 n,符合场景 3,因此 d 的类型为 int&
d、应用
#include <list>
using namespace std;

template <class T>
class Container
{
public:
    void func(T& c)
    {
        for (m_it = c.begin(); m_it != c.end(); ++m_it)
        {
            cout << \*m_it << " ";
        }
        cout << endl;
    }
private:
    ??? m_it;  // 这里不能确定迭代器类型
};

int main()
{
    const list<int> lst;
    Container<const list<int>> obj;
    obj.func(lst);
    return 0;
}
迭代器变量共有两种类型只读(T::const_iterator)和读写(T::iterator),有了 decltype 就可以完美的解决这个问题了,当 T 是一个 非 const 容器得到一个 T::iterator,当 T 是一个 const 容器时就会得到一个 T::const_iterator。
#include <list>
#include <iostream>
using namespace std;

template <class T>
class Container
{
public:
    void func(T& c)
    {
        for (m_it = c.begin(); m_it != c.end(); ++m_it)
        {
            cout << \*m_it << " ";
        }
        cout << endl;
    }
private:
    decltype(T().begin()) m_it;  // 这里不能确定迭代器类型
};

int main()
{
    const list<int> lst{ 1,2,3,4,5,6,7,8,9 };
    Container<const list<int>> obj;
    obj.func(lst);
    return 0;
}
decltype(T().begin()) 这种写法在 vs2017/vs2019 下测试可用完美运行。
6、返回值类型后置
#include <iostream>
using namespace std;

template <typename T, typename U>
// 返回类型后置语法
auto add(T t, U u) -> decltype(t+u)
{
    return t + u;
}

int main()
{
    int x = 520;
    double y = 13.14;
    // auto z = add<int, double>(x, y);
    auto z = add(x, y);		// 简化之后的写法
    cout << "z: " << z << endl;
    return 0;
}
得到结论:auto 会追踪 decltype() 推导出的类型
7、final
C++ 中增加了 final 关键字来限制某个类不能被继承,或者某个虚函数不能被重写,和 Jave 的 final 关键字的功能是类似的。如果使用 final 修饰函数,只能修饰虚函数,并且要把final关键字放到类或者函数的后面。
8、override
override 关键字确保在派生类中声明的重写函数与基类的虚函数有相同的签名,同时也明确表明将会重写基类的虚函数,这样就可以保证重写的虚函数的正确性,也提高了代码的可读性,和 final 一样这个关键字要写到方法的后面。
9、模板的右尖括号
在泛型编程中,模板实例化有一个非常繁琐的地方,那就是连续的两个右尖括号(>>)会被编译器解析成右移操作符,而不是模板参数表的结束。我们先来看一段关于容器遍历的代码,在创建的类模板 Base 中提供了遍历容器的操作函数 traversal():
// test.cpp
#include <iostream>
#include <vector>
using namespace std;

template <typename T>
class Base
{
public:
    void traversal(T& t)
    {
        auto it = t.begin();
        for (; it != t.end(); ++it)
        {
            cout << \*it << " ";
        }
        cout << endl;
    }
};


int main()
{
    vector<int> v{ 1,2,3,4,5,6,7,8,9 };
    Base<vector<int>> b;
    b.traversal(v);

    return 0;
}
//如果使用 C++98/03 标准来编译上边的这段代码,就会得到如下的错误提示:
test.cpp:25:20: error: '>>' should be '> >' within a nested template argument list
     Base<vector<int>> b;
10、默认模板参数
#include <iostream>
using namespace std;

template <typename T=int, T t=520>
class Test
{
public:
    void print()
    {
        cout << "current value: " << t << endl;
    }
};

int main()
{
    Test<> t;
    t.print();

    Test<int, 1024> t1;
    t1.print();

    return 0;
}
11、using的使用
// 使用typedef定义函数指针
typedef int(\*func_ptr)(int, double);

// 使用using定义函数指针
using func_ptr1 = int(\*)(int, double);
如果不是特别熟悉函数指针与 typedef,第一眼很难看出 func_ptr 其实是一个别名,其本质是一个函数指针,指向的函数返回类型是 int,函数参数有两个分别是 int,double 类型。
使用 using 定义函数指针别名的写法看起来就非常直观了,把别名的名字强制分离到了左边,而把别名对应的实际类型放在了右边,比较清晰,可读性比较好。
template <typename T>
typedef map<int, T> type;	// error, 语法错误
使用 typename 不支持给模板定义别名,这个简单的需求仅通过 typedef 很难办到,需要添加一个外敷类:
#include <iostream>
#include <functional>
#include <map>
using namespace std;

template <typename T>
// 定义外敷类
struct MyMap
{
    typedef map<int, T> type;
};

int main(void)
{
    MyMap<string>::type m;
    m.insert(make\_pair(1, "luffy"));
    m.insert(make\_pair(2, "ace"));

    MyMap<int>::type m1;
    m1.insert(1, 100);
    m1.insert(2, 200);

    return 0;
}
需求简单但是实现起来并不容易。在 C++11 中,新增了一个特性就是可以通过使用 using 来为一个模板定义别名,
#include <iostream>
#include <functional>
#include <map>
using namespace std;

template <typename T>
using mymap = map<int, T>;

int main(void)
{
    // map的value指定为string类型
    mymap<string> m;
    m.insert(make\_pair(1, "luffy"));
    m.insert(make\_pair(2, "ace"));

    // map的value指定为int类型
    mymap<int> m1;
    m1.insert(1, 100);
    m1.insert(2, 200);

    return 0;
}
通过使用 using 给模板指定别名,就可以基于别名非常方便的给 value 指定相应的类型,这样使编写的程序变得更加灵活,看起来也更加简洁一些。
using 语法和 typedef 一样,并不会创建出新的类型,它们只是给某些类型定义了新的别名。using 相较于 typedef 的优势在于定义函数指针别名时看起来更加直观,并且可以给模板定义别名。
12、委托构造
委托构造函数允许使用同一个类中的一个构造函数调用其它的构造函数,从而简化相关变量的初始化
#include <iostream>
using namespace std;

class Test
{
public:
    Test() {};
    Test(int max)
    {
        this->m_max = max > 0 ? max : 100;
    }

    Test(int max, int min)
    {
        this->m_max = max > 0 ? max : 100;              // 冗余代码
        this->m_min = min > 0 && min < max ? min : 1;
    }

    Test(int max, int min, int mid)
    {
        this->m_max = max > 0 ? max : 100;             // 冗余代码
        this->m_min = min > 0 && min < max ? min : 1;  // 冗余代码
        this->m_middle = mid < max && mid > min ? mid : 50;
    }

    int m_min;
    int m_max;
    int m_middle;
};

int main()
{
    Test t(90, 30, 60);
    cout << "min: " << t.m_min << ", middle: "
         << t.m_middle << ", max: " << t.m_max << endl;
    return 0;
}
这种链式的构造函数调用不能形成一个闭环(死循环),否则会在运行期抛异常。
如果要进行多层构造函数的链式调用,建议将构造函数的调用的写在初始列表中而不是函数体内部,否则编译器会提示形参的重复定义。
在初始化列表中调用了代理构造函数初始化某个类成员变量之后,就不能在初始化列表中再次初始化这个变量了。
13、继承构造函数
继承构造函数的使用方法是这样的:通过使用 using 类名::构造函数名(其实类名和构造函数名是一样的)来声明使用基类的构造函数,这样子类中就可以不定义相同的构造函数了,直接使用基类的构造函数来构造派生类对象。
#include <iostream>
#include <string>
using namespace std;

class Base
{
public:
    Base(int i) :m\_i(i) {}
    Base(int i, double j) :m\_i(i), m\_j(j) {}
    Base(int i, double j, string k) :m\_i(i), m\_j(j), m\_k(k) {}

    int m_i;
    double m_j;
    string m_k;
};

class Child : public Base
{
public:
    using Base::Base;
};

int main()
{
    Child c1(520, 13.14);
    cout << "int: " << c1.m_i << ", double: " << c1.m_j << endl;
    Child c2(520, 13.14, "i love you");
    cout << "int: " << c2.m_i << ", double: "
         << c2.m_j << ", string: " << c2.m_k << endl;
    return 0;
}
如果在子类中隐藏了父类中的同名函数,也可以通过 using 的方式在子类中使用基类中的这些父类函数
#include <iostream>
#include <string>
using namespace std;

class Base
{
public:
    Base(int i) :m\_i(i) {}
    Base(int i, double j) :m\_i(i), m\_j(j) {}
    Base(int i, double j, string k) :m\_i(i), m\_j(j), m\_k(k) {}

    void func(int i)
    {
        cout << "base class: i = " << i << endl;
    }

    void func(int i, string str)
    {
        cout << "base class: i = " << i << ", str = " << str << endl;
    }

    int m_i;
    double m_j;
    string m_k;
};

class Child : public Base
{
public:
    using Base::Base;
    using Base::func;
    void func()
    {
        cout << "child class: i'am luffy!!!" << endl;
    }
};

int main()
{
    Child c(250);
    c.func();
    c.func(19);
    c.func(19, "luffy");
    return 0;
}
输出:
child class: i'am luffy!!!
base class: i = 19
base class: i = 19, str = luffy
子类中的 func() 函数隐藏了基类中的两个 func() 因此默认情况下通过子类对象只能调用无参的 func(),在上面的子类代码中添加了 using Base::func; 之后,就可以通过子类对象直接调用父类中被隐藏的带参 func() 函数了。
14、列表初始化**
a、统一初始化
#include <iostream>
using namespace std;

class Test
{
public:
    Test(int) {}
private:
    Test(const Test &);
};

int main(void)
{
    Test t1(520);
    Test t2 = 520;
    Test t3 = { 520 };
    Test t4{ 520 };
    int a1 = { 1314 };
    int a2{ 1314 };
    int arr1[] = { 1, 2, 3 };
    int arr2[]{ 1, 2, 3 };

	//指针p 指向了一个 new 操作符返回的内存,通过列表初始化将内存数据初始化为了 520
	//变量b 是对匿名对象使用列表初始之后,再进行拷贝初始化。
	//数组array 在堆上动态分配了一块内存,通过列表初始化的方式直接完成了多个元素的初始化。
    int \* p = new int{520};
	double b = double{52.134};
	int \* array = new int[3]{1,2,3};

    return 0;
}
列表初始化还可以直接用在函数返回值上:
#include <iostream>
#include <string>
using namespace std;

class Person
{
public:
    Person(int id, string name)
    {
        cout << "id: " << id << ", name: " << name << endl;
    }
};

Person func()
{
    return { 9527, "华安" };
}

int main(void)
{
    Person p = func();
    return 0;
}
b、聚合体
#include <iostream>
#include <string>
using namespace std;

struct T1
{
    int x;
    int y;
}a = { 123, 321 };

struct T2
{
    int x;
    int y;
    T2(int, int) : x(10), y(20) {}
}b = { 123, 321 };

int main(void)
{
    cout << "a.x: " << a.x << ", a.y: " << a.y << endl;
    cout << "b.x: " << b.x << ", b.y: " << b.y << endl;
    return 0;
}
满足以下条件的类(class、struct、union)可以被看做是一个聚合类型:
(1)无用户自定义的构造函数。
(2)无私有或保护的非静态数据成员。
(3)无基类。
(4)无虚函数。
(5)类中不能有使用 {} 和 = 直接初始化的非静态数据成员(从 c++14 开始就支持了)。
c、非聚合体
#include <iostream>
#include <string>
using namespace std;

struct T1
{
    int x;
    double y;
    // 在构造函数中使用初始化列表初始化类成员
    T1(int a, double b, int c) : x(a), y(b), z(c){}
    virtual void print()
    {
        cout << "x: " << x << ", y: " << y << ", z: " << z << endl;
    }
private:
    int z;
};

int main(void)
{
    T1 t{ 520, 13.14, 1314 };	// ok, 基于构造函数使用初始化列表初始化类成员
    t.print();
    return 0;
}
另外,需要额外注意的是聚合类型的定义并非递归的,也就是说当一个类的非静态成员是非聚合类型时,这个类也可能是聚合类型,比如下面的这个例子:
#include <iostream>
#include <string>
using namespace std;

struct T1
{
    int x;
    double y;
private:
    int z;
};

struct T2
{
    T1 t1;
    long x1;
    double y1;
};

int main(void)
{
    T2 t2{ {}, 520, 13.14 };
    return 0;
}
可以看到,T1 并非一个聚合类型,因为它有一个 Private 的非静态成员。但是尽管 T2 有一个非聚合类型的非静态成员 t1,T2 依然是一个聚合类型,可以直接使用列表初始化的方式进行初始化。
最后强调一下 t2 对象的初始化过程,对于非聚合类型的成员 t1 做初始化的时候,可以直接写一对空的大括号 {},这相当于调用是 T1 的无参构造函数。
对于一个聚合类型,使用列表初始化相当于对其中的每个元素分别赋值,而对于非聚合类型,则需要先自定义一个合适的构造函数,此时使用列表初始化将会调用它对应的构造函数。
15、std::initializer_list
a、作为普通函数参数
#include <iostream>
#include <string>
using namespace std;

void traversal(std::initializer_list<int> a)
{
    for (auto it = a.begin(); it != a.end(); ++it)
    {
        cout << \*it << " ";
    }
    cout << endl;
}

int main(void)
{
    initializer_list<int> list;
    cout << "current list size: " << list.size() << endl;
    traversal(list);

    list = { 1,2,3,4,5,6,7,8,9,0 };
    cout << "current list size: " << list.size() << endl;
    traversal(list);
    cout << endl;

    list = { 1,3,5,7,9 };
    cout << "current list size: " << list.size() << endl;
    traversal(list);
    cout << endl;


    // 直接通过初始化列表传递数据 //

    traversal({ 2, 4, 6, 8, 0 });
    cout << endl;

    traversal({ 11,12,13,14,15,16 });
    cout << endl;


    return 0;
}
std::initializer_list拥有一个无参构造函数,因此,它可以直接定义实例。
此时将得到一个空的std::initializer_list,因为在遍历这种类型的容器的时候得到的是一个只读的迭代器,因此我们不能修改里边的数据,只能通过值覆盖的方式进行容器内部数据的修改。虽然如此,在效率方面也无需担心,std::initializer_list的效率是非常高的,它的内部并不负责保存初始化列表中元素的拷贝,仅仅存储了初始化列表中元素的引用。
b、作为构造函数参数
#include <iostream>
#include <string>
#include <vector>
using namespace std;

class Test
{
public:
    Test(std::initializer_list<string> list)
    {
        for (auto it = list.begin(); it != list.end(); ++it)
        {
            cout << \*it << " ";
            m_names.push\_back(\*it);
        }
        cout << endl;
    }
private:
    vector<string> m_names;
};

int main(void)
{
    Test t({ "jack", "lucy", "tom" });
    Test t1({ "hello", "world", "nihao", "shijie" });
    return 0;
}
16、for循环
#include <iostream>
#include <vector>
using namespace std;

int main(void)
{
    vector<int> t{ 1,2,3,4,5,6 };
    for (auto value : t)
    {
        cout << value << " ";
    }
    cout << endl;

    return 0;
}
上面的例子中,是将容器中遍历的当前元素拷贝到了声明的变量 value 中,因此无法对容器中的元素进行写操作,如果需要在遍历过程中修改元素的值,需要使用引用。
#include <iostream>
#include <vector>
using namespace std;

int main(void)
{
    vector<int> t{ 1,2,3,4,5,6 };
    cout << "遍历修改之前的容器: ";
    for (auto &value : t)
    {
        cout << value++ << " ";
    }
    cout << endl << "遍历修改之后的容器: ";

    for (auto &value : t)
    {
        cout << value << " ";
    }
    cout << endl;

    return 0;
}
对容器的遍历过程中,如果只是读数据,不允许修改元素的值,可以使用 const 定义保存元素数据的变量,在定义的时候建议使用 const auto &,这样相对于 const auto 效率要更高一些。
17、可调用对象
a、分类
在 C++ 中存在 “可调用对象” 这么一个概念。准确来说,可调用对象有如下几种定义:
是一个函数指针
int print(int a, double b)
{
    cout << a << b << endl;
    return 0;
}
// 定义函数指针
int (\*func)(int, double) = &print;
是一个具有operator()成员函数的类对象(仿函数)
#include <iostream>
#include <string>
#include <vector>
using namespace std;

struct Test
{
    // ()操作符重载
    void operator()(string msg)
    {
        cout << "msg: " << msg << endl;
    }
};

int main(void)
{
    Test t;
    t("我是要成为海贼王的男人!!!");	// 仿函数
    return 0;
}
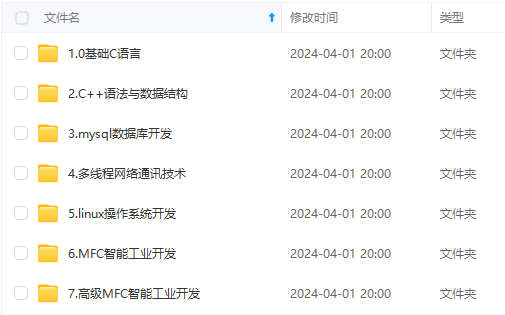
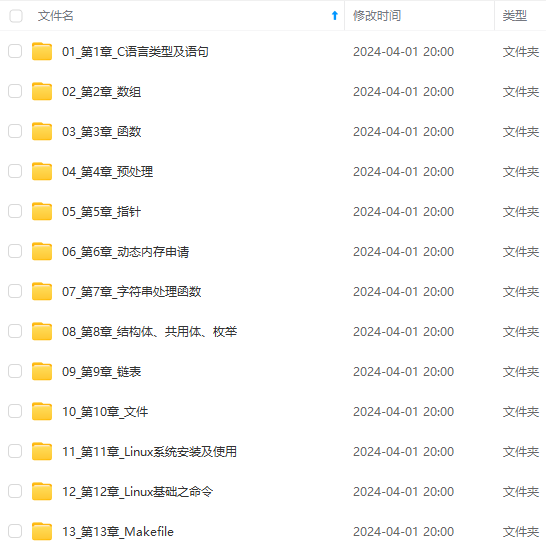
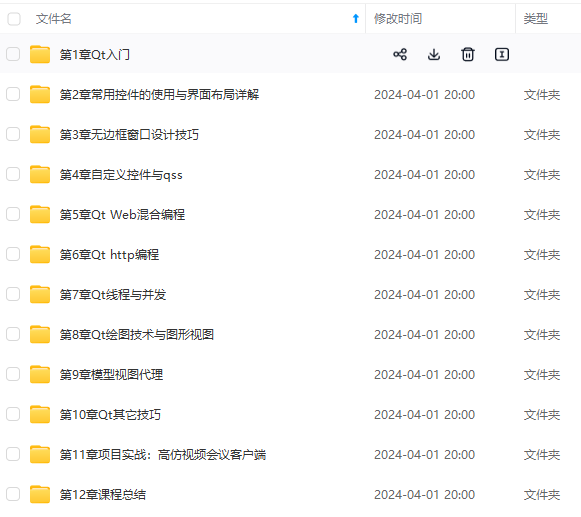
既有适合小白学习的零基础资料,也有适合3年以上经验的小伙伴深入学习提升的进阶课程,涵盖了95%以上C C++开发知识点,真正体系化!
由于文件比较多,这里只是将部分目录截图出来,全套包含大厂面经、学习笔记、源码讲义、实战项目、大纲路线、讲解视频,并且后续会持续更新
" ";
}
cout << endl;
return 0;
}
对容器的遍历过程中,如果只是读数据,不允许修改元素的值,可以使用 const 定义保存元素数据的变量,在定义的时候建议使用 const auto &,这样相对于 const auto 效率要更高一些。


### 17、可调用对象


#### a、分类


在 C++ 中存在 “可调用对象” 这么一个概念。准确来说,可调用对象有如下几种定义:


是一个函数指针
int print(int a, double b)
{
cout << a << b << endl;
return 0;
}
// 定义函数指针
int (*func)(int, double) = &print;
是一个具有operator()成员函数的类对象(仿函数)
#include
#include
#include
using namespace std;
struct Test
{
// ()操作符重载
void operator()(string msg)
{
cout << "msg: " << msg << endl;
}
};
int main(void)
{
Test t;
t(“我是要成为海贼王的男人!!!”); // 仿函数
return 0;
}
[外链图片转存中...(img-i6lUlCn0-1715523051328)]
[外链图片转存中...(img-7jYGQXz6-1715523051329)]

**既有适合小白学习的零基础资料,也有适合3年以上经验的小伙伴深入学习提升的进阶课程,涵盖了95%以上C C++开发知识点,真正体系化!**

**由于文件比较多,这里只是将部分目录截图出来,全套包含大厂面经、学习笔记、源码讲义、实战项目、大纲路线、讲解视频,并且后续会持续更新**

**[如果你需要这些资料,可以戳这里获取](https://bbs.csdn.net/topics/618668825)**


 被折叠的 条评论
为什么被折叠?
被折叠的 条评论
为什么被折叠?
 到【灌水乐园】发言


