


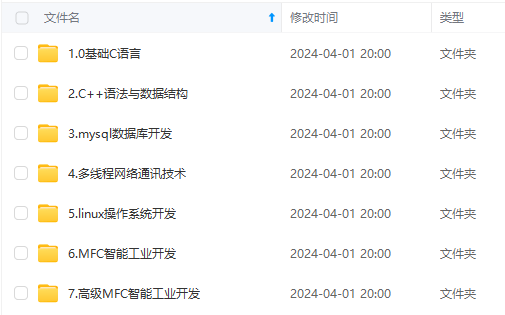
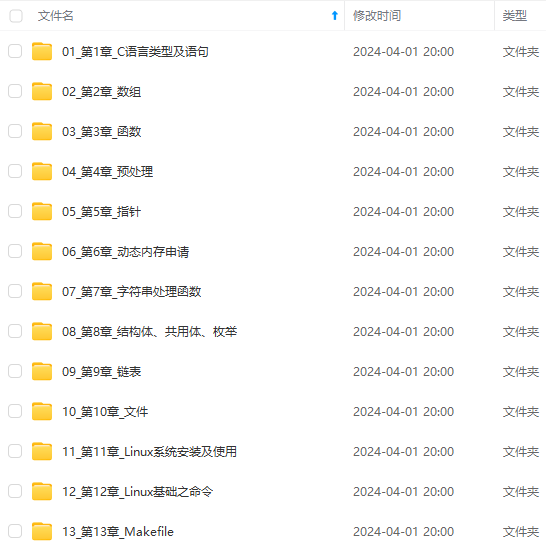
既有适合小白学习的零基础资料,也有适合3年以上经验的小伙伴深入学习提升的进阶课程,涵盖了95%以上C C++开发知识点,真正体系化!
由于文件比较多,这里只是将部分目录截图出来,全套包含大厂面经、学习笔记、源码讲义、实战项目、大纲路线、讲解视频,并且后续会持续更新
#include “stb_image.h”
using namespace std;
void framebuffer_size_callback(GLFWwindow* window, int width, int height);
void mouse_callback(GLFWwindow* window, double xpos, double ypos);
void scroll_callback(GLFWwindow* window, double xoffset, double yoffset);
void processInput(GLFWwindow* window);
const unsigned int SCR_WIDTH = 800;
const unsigned int SCR_HEIGHT = 600;
glm::vec3 cameraPos = glm::vec3(0.0f, 0.0f, 3.0f);
glm::vec3 cameraFront = glm::vec3(0.0f, 0.0f, -1.0f);
glm::vec3 cameraUp = glm::vec3(0.0f, 1.0f, 0.0f);
bool firstMouse = true;//判断是否时第一次鼠标点击,解决第一次闪动很大的问题
float yaw = -90.0f; // 偏航被初始化为-90.0度,因为一个0.0的偏航导致一个方向矢量指向右边,所以我们最初旋转一点到左边。
float pitch = 0.0f;//俯仰角
float lastX = 800.0f / 2.0;//鼠标的xy坐标
float lastY = 600.0 / 2.0;
float fov = 45.0f;
float deltaTime = 0.0f; // 当前帧与上一帧的时间差
float lastFrame = 0.0f; // 上一帧的时间
int main()
{
/1、 初始化opengl窗口***************/
//glfw 初始化和配置
glfwInit();//初始化GLFW
glfwWindowHint(GLFW_CONTEXT_VERSION_MAJOR, 3);//主版本号
glfwWindowHint(GLFW_CONTEXT_VERSION_MINOR, 3);//子版本号
glfwWindowHint(GLFW_OPENGL_PROFILE, GLFW_OPENGL_CORE_PROFILE);//指定哪个配置文件配置上下文:GLFW我们使用的是核心模式
#ifdef APPLE//如果时mac os xp等系统则要进行配置一下才能生效
glfwWindowHint(GLFW_OPENGL_FORWARD_COMPAT, GL_TRUE);
#endif
//glfw创建窗口
GLFWwindow* window = glfwCreateWindow(SCR_WIDTH, SCR_HEIGHT, "LearnOpenGL", NULL, NULL);
if (window == NULL)
{
    std::cout << "Failed to create GLFW window" << std::endl;
    glfwTerminate();
    return -1;
}
glfwMakeContextCurrent(window);//GLFW将我们窗口的上下文设置为当前线程的主上下文
glfwSetFramebufferSizeCallback(window, framebuffer_size_callback);

//设置鼠标移动滚动的回调事件
glfwSetCursorPosCallback(window, mouse_callback);
glfwSetScrollCallback(window, scroll_callback);

//GLAD加载所有的opengl函数指针
if (!gladLoadGLLoader((GLADloadproc)glfwGetProcAddress))
{
    std::cout << "Failed to initialize GLAD" << std::endl;
    return -1;
}

/******************************2、 着色器编译编译链接 *********************************************/
Shader ourShader("shader.vs", "shader.fs");

/******************************3、 顶点属性缓存这些   *********************************************/
float vertices[] = {
//-- 位置 ----       - 纹理坐标 -
-0.5f, -0.5f, -0.5f,  0.0f, 0.0f,
 0.5f, -0.5f, -0.5f, 1.0f, 0.0f,
 0.5f,  0.5f, -0.5f, 1.0f, 1.0f,
 0.5f,  0.5f, -0.5f, 1.0f, 1.0f,
-0.5f,  0.5f, -0.5f, 0.0f, 1.0f,
-0.5f, -0.5f, -0.5f, 0.0f, 0.0f,

-0.5f, -0.5f,  0.5f, 0.0f, 0.0f,
 0.5f, -0.5f,  0.5f, 1.0f, 0.0f,
 0.5f,  0.5f,  0.5f, 1.0f, 1.0f,
 0.5f,  0.5f,  0.5f, 1.0f, 1.0f,
-0.5f,  0.5f,  0.5f, 0.0f, 1.0f,
-0.5f, -0.5f,  0.5f, 0.0f, 0.0f,

-0.5f,  0.5f,  0.5f, 1.0f, 0.0f,
-0.5f,  0.5f, -0.5f, 1.0f, 1.0f,
-0.5f, -0.5f, -0.5f, 0.0f, 1.0f,
-0.5f, -0.5f, -0.5f, 0.0f, 1.0f,
-0.5f, -0.5f,  0.5f, 0.0f, 0.0f,
-0.5f,  0.5f,  0.5f, 1.0f, 0.0f,

 0.5f,  0.5f,  0.5f, 1.0f, 0.0f,
 0.5f,  0.5f, -0.5f, 1.0f, 1.0f,
 0.5f, -0.5f, -0.5f, 0.0f, 1.0f,
 0.5f, -0.5f, -0.5f, 0.0f, 1.0f,
 0.5f, -0.5f,  0.5f, 0.0f, 0.0f,
 0.5f,  0.5f,  0.5f, 1.0f, 0.0f,

-0.5f, -0.5f, -0.5f, 0.0f, 1.0f,
 0.5f, -0.5f, -0.5f, 1.0f, 1.0f,
 0.5f, -0.5f,  0.5f, 1.0f, 0.0f,
 0.5f, -0.5f,  0.5f, 1.0f, 0.0f,
-0.5f, -0.5f,  0.5f, 0.0f, 0.0f,
-0.5f, -0.5f, -0.5f, 0.0f, 1.0f,

-0.5f,  0.5f, -0.5f, 0.0f, 1.0f,
 0.5f,  0.5f, -0.5f, 1.0f, 1.0f,
 0.5f,  0.5f,  0.5f, 1.0f, 0.0f,
 0.5f,  0.5f,  0.5f, 1.0f, 0.0f,
-0.5f,  0.5f,  0.5f, 0.0f, 0.0f,
-0.5f,  0.5f, -0.5f, 0.0f, 1.0f
};
//索引数组
unsigned int indices[] = {
    0, 1, 3, // first triangle
    1, 2, 3  // second triangle
};
unsigned int VBO, VAO, EBO;
glGenVertexArrays(1, &VAO);//创建一个顶点数组 与顶点属性相绑定
glGenBuffers(1, &VBO);//创建顶点缓冲对象
glGenBuffers(1, &EBO);

glBindVertexArray(VAO);//绑定顶点数组 配置顶点属性

glBindBuffer(GL_ARRAY_BUFFER, VBO);//将GL_ARRAY_BUFFER类型的缓存与VBO绑定
glBufferData(GL_ARRAY_BUFFER, sizeof(vertices), vertices, GL_STATIC_DRAW);//之前定义的顶点数据复制到缓冲的内存
glBindBuffer(GL_ELEMENT_ARRAY_BUFFER, EBO);//将GL_ELEMENT_ARRAY_BUFFER类型的缓冲与EBO绑定
glBufferData(GL_ELEMENT_ARRAY_BUFFER, sizeof(indices), indices, GL_STATIC_DRAW);//把索引复制到缓冲里

/*
    0;指定我们要配置的顶点位置属性 就是顶点着色器里面location那个
*/
glVertexAttribPointer(0, 3, GL_FLOAT, GL_FALSE, 5 *sizeof(float), (void *)0);//步长为8了
glEnableVertexAttribArray(0);//以顶点属性位置值0作为参数,启用顶点属性

/*
    2;指定我们要配置的顶点纹理属性 就是顶点着色器里面location那个  glVertexAttribPointer函数更新顶点格式
*/
glVertexAttribPointer(1, 2, GL_FLOAT, GL_FALSE, 5 * sizeof(float), (void*)(3 * sizeof(float)));
glEnableVertexAttribArray(1);
glBindBuffer(GL_ARRAY_BUFFER, 0);//VBO 已经与顶点属性数组VAO进行绑定了 那么GL_ARRAY_BUFFER就可以解除绑定
//glBindBuffer(GL_ELEMENT_ARRAY_BUFFER, 0); //记住:不要在VAO激活时解除绑定EBO,因为绑定的元素缓冲区对象存储在VAO中;保持EBO绑定。
glBindVertexArray(0);//您可以在之后解除绑定VAO,这样其他VAO调用就不会意外地修改这个VAO

// 加载创建纹理
unsigned int texture, texture2;
glGenTextures(1, &texture);//生成纹理对象,同样也可以创建一个数组的纹理
glBindTexture(GL_TEXTURE_2D, texture); //绑定它,让之后任何的纹理指令都可以配置当前绑定的纹理:
//为当前绑定的纹理对象设置环绕、过滤方式
glTexParameteri(GL_TEXTURE_2D, GL_TEXTURE_WRAP_S, GL_REPEAT);	//重复纹理的填充方式
glTexParameteri(GL_TEXTURE_2D, GL_TEXTURE_WRAP_T, GL_REPEAT);
// 多级渐远纹理的设置
glTexParameteri(GL_TEXTURE_2D, GL_TEXTURE_MIN_FILTER, GL_LINEAR_MIPMAP_LINEAR);//缩小时采用在两个邻近的多级渐远纹理之间使用线性插值,并使用线性插值进行采样
glTexParameteri(GL_TEXTURE_2D, GL_TEXTURE_MAG_FILTER, GL_LINEAR);//线性
// 加载图像
int width, height, nrChannels;
unsigned char* data = stbi_load("container.jpg", &width, &height, &nrChannels, 0);
if (data)
{
    glTexImage2D(GL_TEXTURE_2D, 0, GL_RGB, width, height, 0, GL_RGB, GL_UNSIGNED_BYTE, data);
    glGenerateMipmap(GL_TEXTURE_2D);//为当前绑定的纹理自动生成所有需要的多级渐远纹理
}
else
{
    std::cout << "Failed to load texture" << std::endl;
}
stbi_image_free(data);//释放图像的内存

//纹理2
glGenTextures(1, &texture2);
glBindTexture(GL_TEXTURE_2D, texture2);
glTexParameteri(GL_TEXTURE_2D, GL_TEXTURE_WRAP_S, GL_REPEAT);
glTexParameteri(GL_TEXTURE_2D, GL_TEXTURE_WRAP_T, GL_REPEAT);
glTexParameteri(GL_TEXTURE_2D, GL_TEXTURE_MIN_FILTER, GL_LINEAR);
glTexParameteri(GL_TEXTURE_2D, GL_TEXTURE_MAG_FILTER, GL_LINEAR);
stbi_set_flip_vertically_on_load(true);
data = stbi_load("awesomeface.png", &width, &height, &nrChannels, 0);
if (data)
{
    glTexImage2D(GL_TEXTURE_2D, 0, GL_RGBA, width, height, 0, GL_RGBA, GL_UNSIGNED_BYTE, data);
    glGenerateMipmap(GL_TEXTURE_2D);
}
else
{
    std::cout << "Failed to load texture" << std::endl;
}
stbi_image_free(data);

ourShader.use();
glUniform1i(glGetUniformLocation(ourShader.ID, "texture1"), 0);//绑定这个着色器的第0个纹理
ourShader.setInt("texture2", 1);//绑定这个着色器的第0个纹理


//启动Z缓冲
glEnable(GL_DEPTH_TEST);
//渲染循环
//程序在我们主动关闭它之前不断绘制图像并能够接受用户输入 GLFW退出前一直保持运行
glm::vec3 cubePositions[] = {
      glm::vec3(0.0f,  0.0f,  0.0f),
      glm::vec3(2.0f,  5.0f, -15.0f),
      glm::vec3(-1.5f, -2.2f, -2.5f),
      glm::vec3(-3.8f, -2.0f, -12.3f),
      glm::vec3(2.4f, -0.4f, -3.5f),
      glm::vec3(-1.7f,  3.0f, -7.5f),
      glm::vec3(1.3f, -2.0f, -2.5f),
      glm::vec3(1.5f,  2.0f, -2.5f),
      glm::vec3(1.5f,  0.2f, -1.5f),
      glm::vec3(-1.3f,  1.0f, -1.5f)
};

while (!glfwWindowShouldClose(window))//检查一次GLFW是否被要求退出
{

    float currentFrame = glfwGetTime();
    deltaTime = currentFrame - lastFrame;
    lastFrame = currentFrame;

    //可接收键盘输入esc从而退出
    processInput(window);
    glClearColor(0.2f, 0.3f, 0.3f, 1.0f); //设置状态函数
    //glClear(GL_COLOR_BUFFER_BIT);//使用状态函数
    glClear(GL_COLOR_BUFFER_BIT | GL_DEPTH_BUFFER_BIT);//要在每次渲染迭代之前清除深度缓冲(否则前一帧的深度信息仍然保存在缓冲中
    //定义变化矩阵
    //z轴负方向3个单位
    glm::mat4 view;
    view = glm::lookAt(cameraPos, cameraPos + cameraFront, cameraUp);

    //透视投影
    glm::mat4 projection = glm::perspective(glm::radians(fov), (float)SCR_WIDTH / (float)SCR_HEIGHT, 0.1f, 100.0f);
    ourShader.setMat4("projection", projection);

    //传到顶点着色器进行设置
    //unsigned int modelLoc = glGetUniformLocation(ourShader.ID, "model");
    unsigned int viewLoc = glGetUniformLocation(ourShader.ID, "view");
    //glUniformMatrix4fv(modelLoc, 1, GL_FALSE, glm::value_ptr(model));
    glUniformMatrix4fv(viewLoc, 1, GL_FALSE, &view[0][0]);
    //激活纹理进行绑定
    glActiveTexture(GL_TEXTURE0);
    glBindTexture(GL_TEXTURE_2D, texture);
    glActiveTexture(GL_TEXTURE1);
    glBindTexture(GL_TEXTURE_2D, texture2);
    //着色器使用
    ourShader.use();
    //绑定顶点数组  就是使用顶点属性
    glBindVertexArray(VAO);
    //进行绘制
    for (unsigned int i = 0; i < 10; i++)
    {
        glm::mat4 model = glm::mat4(1.0f);
        model = glm::translate(model, cubePositions[i]);
        float angle = 20.0f;
        model = glm::rotate(model, (float)glfwGetTime() * glm::radians(angle), glm::vec3(1.0f, 0.3f, 0.5f));
        ourShader.setMat4("model", model);

        glDrawArrays(GL_TRIANGLES, 0, 36);
    }
   // glDrawElements(GL_TRIANGLES, 6, GL_UNSIGNED_INT, 0);//使用当前绑定的索引缓冲对象中的索引进行绘制:
    //glDrawArrays(GL_TRIANGLES, 0, 36);//绘制36个顶点

    glfwSwapBuffers(window);//交换颜色缓冲(它是一个储存着GLFW窗口每一个像素颜色值的大缓冲),它在这一迭代中被用来绘制,并且将会作为输出显示在屏幕上。
    glfwPollEvents();//检查有没有触发什么事件(比如键盘输入、鼠标移动等)、更新窗口状态,并调用对应的回调函数
}

glDeleteVertexArrays(1, &VAO);
glDeleteBuffers(1, &VBO);
ourShader.dele();

//释放/删除之前的分配的所有资源
glfwTerminate();

return 0;
}
void processInput(GLFWwindow* window)
{
if (glfwGetKey(window, GLFW_KEY_ESCAPE) == GLFW_PRESS)//会返回这个按键是否正在被按下
glfwSetWindowShouldClose(window, true);//把WindowShouldClose属性设置为 true的方法关闭GLFW
/*
向前或向后移动,我们就把位置向量加上或减去方向向量
向左右移动,我们使用叉乘来创建一个右向量(Right Vector),并沿着它相应移动就可以了
*/
float cameraSpeed = 2.5f * deltaTime; // adjust accordingly
if (glfwGetKey(window, GLFW_KEY_W) == GLFW_PRESS)
    cameraPos += cameraSpeed * cameraFront;
if (glfwGetKey(window, GLFW_KEY_S) == GLFW_PRESS)
    cameraPos -= cameraSpeed * cameraFront;
if (glfwGetKey(window, GLFW_KEY_A) == GLFW_PRESS)
    cameraPos -= glm::normalize(glm::cross(cameraFront, cameraUp)) * cameraSpeed;
if (glfwGetKey(window, GLFW_KEY_D) == GLFW_PRESS)
    cameraPos += glm::normalize(glm::cross(cameraFront, cameraUp)) * cameraSpeed;
}
void framebuffer_size_callback(GLFWwindow* window, int width, int height)
{
//左上角坐标xy和宽高
glViewport(0, 0, width, height);//OpenGL的显示试图
}
void mouse_callback(GLFWwindow* window, double xpos, double ypos)
{
if (firstMouse)
{
lastX = xpos;
lastY = ypos;
firstMouse = false;
}
float xoffset = xpos - lastX;
float yoffset = lastY - ypos; // 注意这里是相反的,因为y坐标是从底部往顶部依次增大的
lastX = xpos;
lastY = ypos;

float sensitivity = 0.1f; //设置灵敏度
xoffset *= sensitivity;
yoffset *= sensitivity;

yaw += xoffset;
pitch += yoffset;

// 做限制 确保当投出界外时,屏幕不会翻转
if (pitch > 89.0f)
    pitch = 89.0f;
if (pitch < -89.0f)
    pitch = -89.0f;

//计算得到cameraFront摄像机方向向量
glm::vec3 front;
front.x = cos(glm::radians(yaw)) * cos(glm::radians(pitch));
front.y = sin(glm::radians(pitch));
front.z = sin(glm::radians(yaw)) * cos(glm::radians(pitch));
cameraFront = glm::normalize(front);
}
void scroll_callback(GLFWwindow* window, double xoffset, double yoffset)
{
fov -= (float)yoffset;
if (fov < 1.0f)
fov = 1.0f;
if (fov > 45.0f)
fov = 45.0f;
}
### 3、摄像头封装成类
#ifndef CAMERA_H
#define CAMERA_H
#include <glad/glad.h>
#include <glm/glm/glm.hpp>
#include <glm/glm/gtc/matrix_transform.hpp>
#include
// Defines several possible options for camera movement. Used as abstraction to stay away from window-system specific input methods
enum Camera_Movement {
FORWARD,
BACKWARD,
LEFT,
RIGHT
};
// Default camera values
const float YAW = -90.0f;
const float PITCH = 0.0f;
const float SPEED = 2.5f;
const float SENSITIVITY = 0.1f;
const float ZOOM = 45.0f;
// An abstract camera class that processes input and calculates the corresponding Euler Angles, Vectors and Matrices for use in OpenGL
class Camera
{
public:
// camera Attributes
glm::vec3 Position;
glm::vec3 Front;
glm::vec3 Up;
glm::vec3 Right;
glm::vec3 WorldUp;
// euler Angles
float Yaw;
float Pitch;
// camera options
float MovementSpeed;
float MouseSensitivity;
float Zoom;
// constructor with vectors
Camera(glm::vec3 position = glm::vec3(0.0f, 0.0f, 0.0f), glm::vec3 up = glm::vec3(0.0f, 1.0f, 0.0f), float yaw = YAW, float pitch = PITCH) : Front(glm::vec3(0.0f, 0.0f, -1.0f)), MovementSpeed(SPEED), MouseSensitivity(SENSITIVITY), Zoom(ZOOM)
{
    Position = position;
    WorldUp = up;
    Yaw = yaw;
    Pitch = pitch;
    updateCameraVectors();
}
// constructor with scalar values
Camera(float posX, float posY, float posZ, float upX, float upY, float upZ, float yaw, float pitch) : Front(glm::vec3(0.0f, 0.0f, -1.0f)), MovementSpeed(SPEED), MouseSensitivity(SENSITIVITY), Zoom(ZOOM)
{
    Position = glm::vec3(posX, posY, posZ);
    WorldUp = glm::vec3(upX, upY, upZ);
    Yaw = yaw;
    Pitch = pitch;
    updateCameraVectors();
}

// returns the view matrix calculated using Euler Angles and the LookAt Matrix
glm::mat4 GetViewMatrix()
{
    return glm::lookAt(Position, Position + Front, Up);
}

// processes input received from any keyboard-like input system. Accepts input parameter in the form of camera defined ENUM (to abstract it from windowing systems)
void ProcessKeyboard(Camera_Movement direction, float deltaTime)
{
    float velocity = MovementSpeed * deltaTime;
    if (direction == FORWARD)
        Position += Front * velocity;
    if (direction == BACKWARD)
        Position -= Front * velocity;
    if (direction == LEFT)
        Position -= Right * velocity;
    if (direction == RIGHT)
        Position += Right * velocity;
}

// processes input received from a mouse input system. Expects the offset value in both the x and y direction.
void ProcessMouseMovement(float xoffset, float yoffset, GLboolean constrainPitch = true)
{
    xoffset *= MouseSensitivity;
    yoffset *= MouseSensitivity;

    Yaw += xoffset;
    Pitch += yoffset;

    // make sure that when pitch is out of bounds, screen doesn't get flipped
    if (constrainPitch)
    {
        if (Pitch > 89.0f)
            Pitch = 89.0f;
        if (Pitch < -89.0f)
            Pitch = -89.0f;
    }

    // update Front, Right and Up Vectors using the updated Euler angles
    updateCameraVectors();
}

// processes input received from a mouse scroll-wheel event. Only requires input on the vertical wheel-axis
void ProcessMouseScroll(float yoffset)
{
    Zoom -= (float)yoffset;
    if (Zoom < 1.0f)
        Zoom = 1.0f;
    if (Zoom > 45.0f)
        Zoom = 45.0f;
}
private:
// calculates the front vector from the Camera’s (updated) Euler Angles
void updateCameraVectors()
{
// calculate the new Front vector
glm::vec3 front;
front.x = cos(glm::radians(Yaw)) * cos(glm::radians(Pitch));
front.y = sin(glm::radians(Pitch));
front.z = sin(glm::radians(Yaw)) * cos(glm::radians(Pitch));
Front = glm::normalize(front);
// also re-calculate the Right and Up vector
Right = glm::normalize(glm::cross(Front, WorldUp)); // normalize the vectors, because their length gets closer to 0 the more you look up or down which results in slower movement.
Up = glm::normalize(glm::cross(Right, Front));
}
};
#endif
应用
#include
#include <glad/glad.h>
#include <GLFW/glfw3.h>
#include “glm/glm/glm.hpp”
#include “glm/glm/gtc/matrix_transform.hpp”
#include “glm/glm/gtc/type_ptr.hpp”
#include “ShaderClass.h”
#include “stb_image.h”
#include “Camera.h”
using namespace std;
void framebuffer_size_callback(GLFWwindow* window, int width, int height);
void mouse_callback(GLFWwindow* window, double xpos, double ypos);
void scroll_callback(GLFWwindow* window, double xoffset, double yoffset);
void processInput(GLFWwindow* window);
const unsigned int SCR_WIDTH = 800;
const unsigned int SCR_HEIGHT = 600;
glm::vec3 cameraPos = glm::vec3(0.0f, 0.0f, 3.0f);
glm::vec3 cameraFront = glm::vec3(0.0f, 0.0f, -1.0f);
glm::vec3 cameraUp = glm::vec3(0.0f, 1.0f, 0.0f);
// camera
Camera camera(glm::vec3(0.0f, 0.0f, 3.0f));
float lastX = SCR_WIDTH / 2.0f;
float lastY = SCR_HEIGHT / 2.0f;
bool firstMouse = true;
float deltaTime = 0.0f; // 当前帧与上一帧的时间差
float lastFrame = 0.0f; // 上一帧的时间
int main()
{
/1、 初始化opengl窗口***************/
//glfw 初始化和配置
glfwInit();//初始化GLFW
glfwWindowHint(GLFW_CONTEXT_VERSION_MAJOR, 3);//主版本号
glfwWindowHint(GLFW_CONTEXT_VERSION_MINOR, 3);//子版本号
glfwWindowHint(GLFW_OPENGL_PROFILE, GLFW_OPENGL_CORE_PROFILE);//指定哪个配置文件配置上下文:GLFW我们使用的是核心模式
#ifdef APPLE//如果时mac os xp等系统则要进行配置一下才能生效
glfwWindowHint(GLFW_OPENGL_FORWARD_COMPAT, GL_TRUE);
#endif
//glfw创建窗口
GLFWwindow* window = glfwCreateWindow(SCR_WIDTH, SCR_HEIGHT, "LearnOpenGL", NULL, NULL);
if (window == NULL)
{
    std::cout << "Failed to create GLFW window" << std::endl;
    glfwTerminate();
    return -1;
}
glfwMakeContextCurrent(window);//GLFW将我们窗口的上下文设置为当前线程的主上下文
glfwSetFramebufferSizeCallback(window, framebuffer_size_callback);

//设置鼠标移动滚动的回调事件
glfwSetCursorPosCallback(window, mouse_callback);
glfwSetScrollCallback(window, scroll_callback);

//GLAD加载所有的opengl函数指针
if (!gladLoadGLLoader((GLADloadproc)glfwGetProcAddress))
{
    std::cout << "Failed to initialize GLAD" << std::endl;
    return -1;
}

/******************************2、 着色器编译编译链接 *********************************************/
Shader ourShader("shader.vs", "shader.fs");

/******************************3、 顶点属性缓存这些   *********************************************/
float vertices[] = {
//-- 位置 ----       - 纹理坐标 -
-0.5f, -0.5f, -0.5f,  0.0f, 0.0f,
 0.5f, -0.5f, -0.5f, 1.0f, 0.0f,
 0.5f,  0.5f, -0.5f, 1.0f, 1.0f,
 0.5f,  0.5f, -0.5f, 1.0f, 1.0f,
-0.5f,  0.5f, -0.5f, 0.0f, 1.0f,
-0.5f, -0.5f, -0.5f, 0.0f, 0.0f,

-0.5f, -0.5f,  0.5f, 0.0f, 0.0f,
 0.5f, -0.5f,  0.5f, 1.0f, 0.0f,
 0.5f,  0.5f,  0.5f, 1.0f, 1.0f,
 0.5f,  0.5f,  0.5f, 1.0f, 1.0f,
-0.5f,  0.5f,  0.5f, 0.0f, 1.0f,
-0.5f, -0.5f,  0.5f, 0.0f, 0.0f,

-0.5f,  0.5f,  0.5f, 1.0f, 0.0f,
-0.5f,  0.5f, -0.5f, 1.0f, 1.0f,
既有适合小白学习的零基础资料,也有适合3年以上经验的小伙伴深入学习提升的进阶课程,涵盖了95%以上C C++开发知识点,真正体系化!
由于文件比较多,这里只是将部分目录截图出来,全套包含大厂面经、学习笔记、源码讲义、实战项目、大纲路线、讲解视频,并且后续会持续更新
0.0f, 0.0f,
0.5f, -0.5f, 0.5f, 1.0f, 0.0f,
0.5f, 0.5f, 0.5f, 1.0f, 1.0f,
0.5f, 0.5f, 0.5f, 1.0f, 1.0f,
-0.5f, 0.5f, 0.5f, 0.0f, 1.0f,
-0.5f, -0.5f, 0.5f, 0.0f, 0.0f,
-0.5f,  0.5f,  0.5f, 1.0f, 0.0f,
-0.5f,  0.5f, -0.5f, 1.0f, 1.0f,
[外链图片转存中…(img-jVeYFDuq-1715817759749)]
[外链图片转存中…(img-kAWlUWRy-1715817759749)]
既有适合小白学习的零基础资料,也有适合3年以上经验的小伙伴深入学习提升的进阶课程,涵盖了95%以上C C++开发知识点,真正体系化!
由于文件比较多,这里只是将部分目录截图出来,全套包含大厂面经、学习笔记、源码讲义、实战项目、大纲路线、讲解视频,并且后续会持续更新


 2573
2573


 被折叠的 条评论
为什么被折叠?
被折叠的 条评论
为什么被折叠?
 到【灌水乐园】发言


