


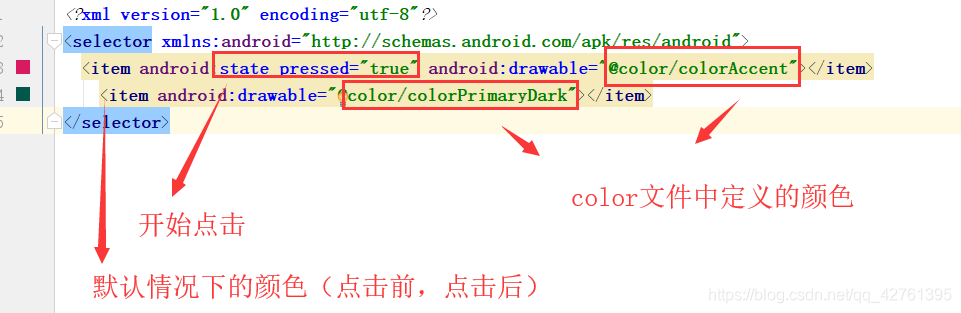
其中demo_style如下:一般都是放的.9图片,为了方便就放个颜色了
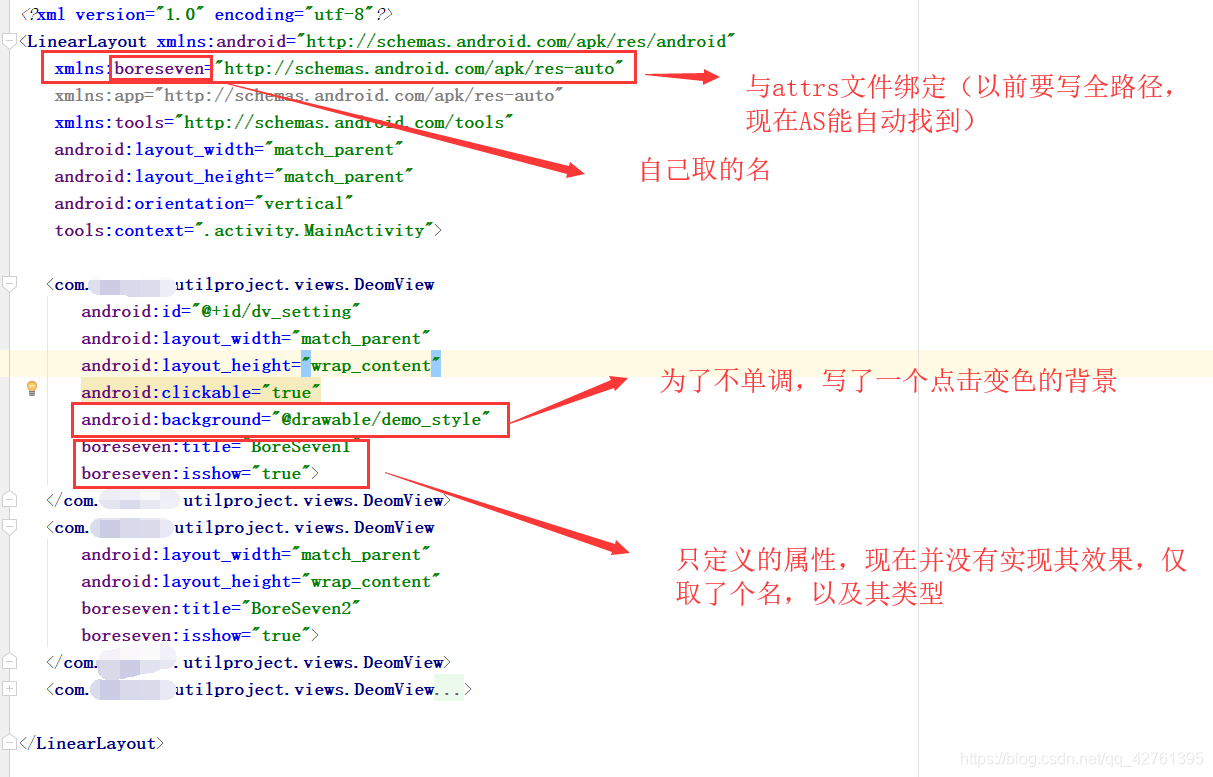
最后当然是要将自定义的属性实现其功能了(回到第一步中)
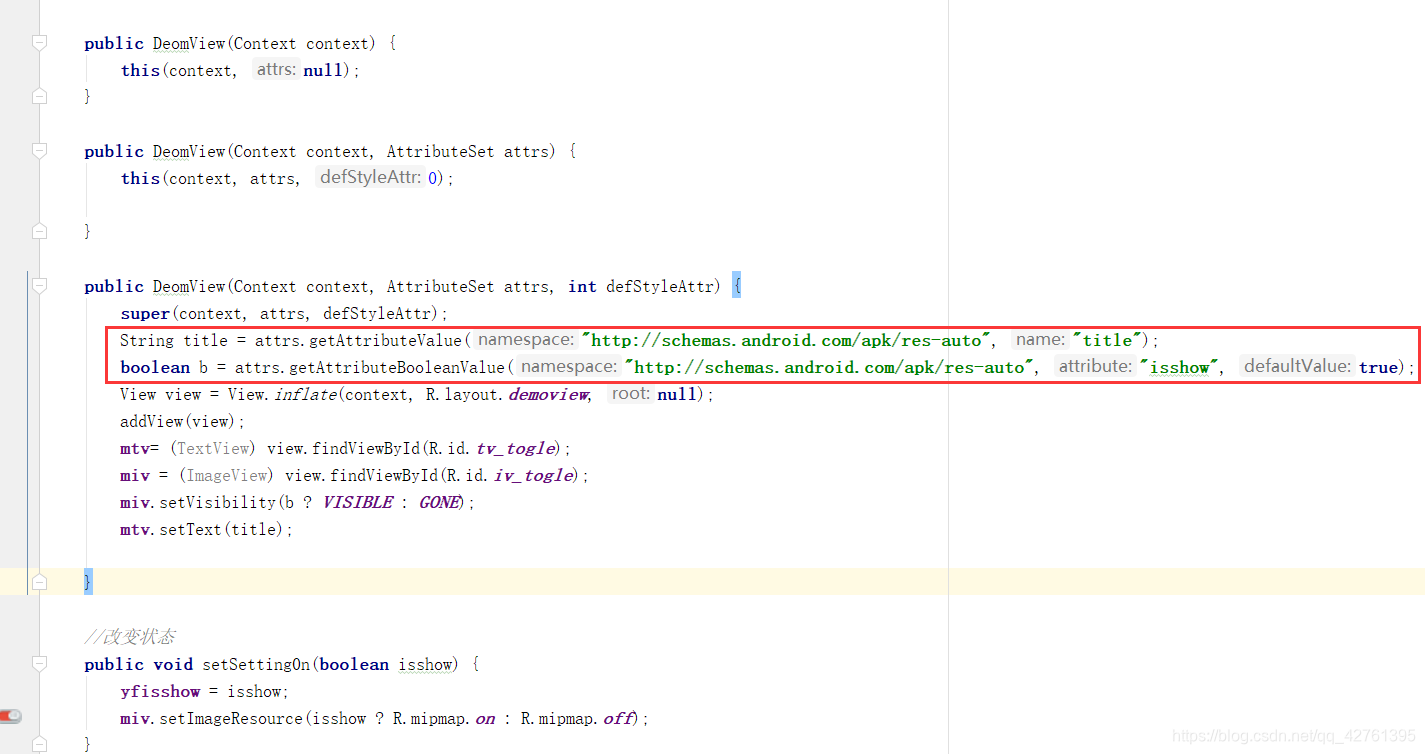
这两句就是取得你在运用中输入的东西了
其中:为了使title相当于TextView中的text:mtv.setText(),将获取的值放入就行了。
那么,那个boolean的值是用来干嘛的呢:控制图片是否显示–> miv.setVisibility(b ? VISIBLE : GONE);如果b为true则显示,为false则不显示。(拓展:了解一下VISIBLE :,GONE,INVISIBLE);
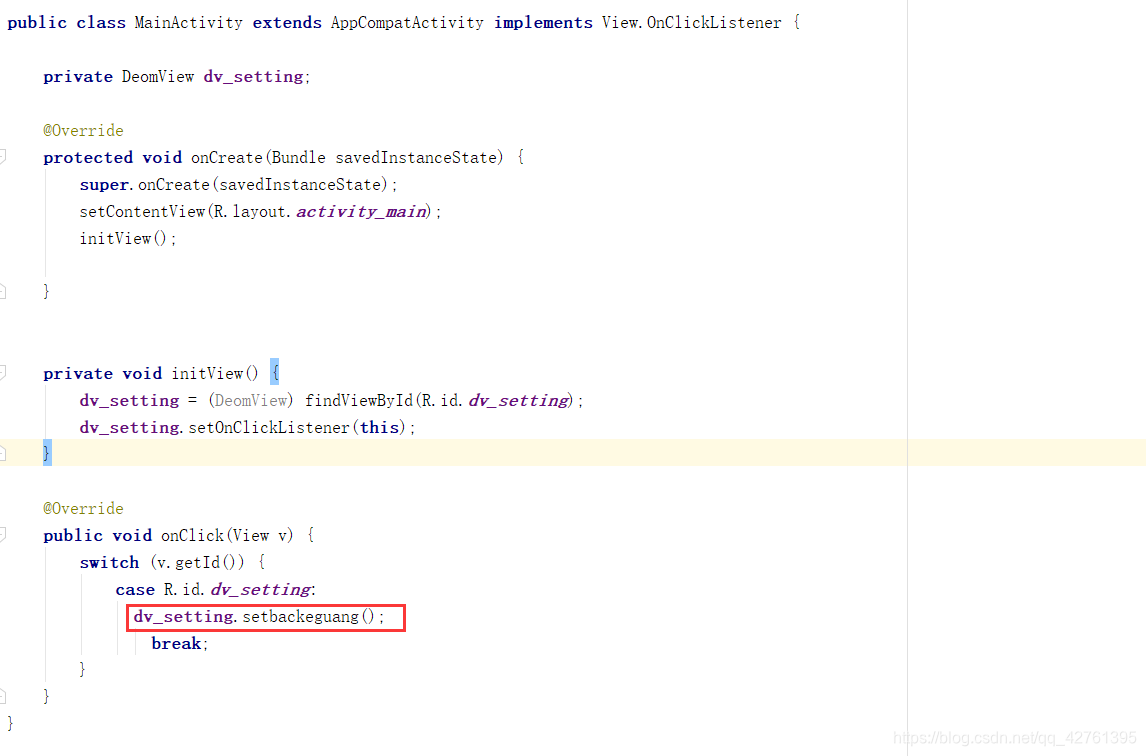
好了现在已经完成了这两个功能了,现在来提一下,点击更换图片
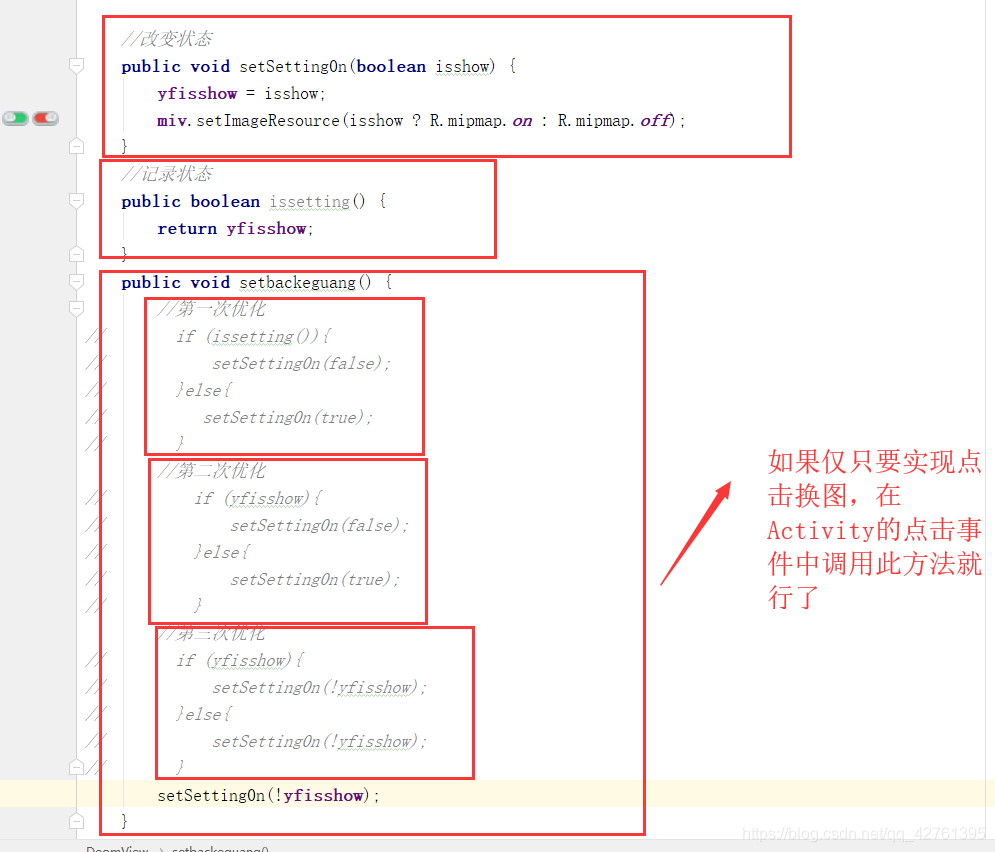
最后在Activity中调用:
DemoView.java代码如下:
public class DeomView extends RelativeLayout {
private ImageView miv;
private TextView mtv;
private boolean yfisshow;
public DeomView(Context context) {
this(context, null);
}
public DeomView(Context context, AttributeSet attrs) {
this(context, attrs, 0);
}
public DeomView(Context context, AttributeSet attrs, int defStyleAttr) {
super(context, attrs, defStyleAttr);
String title = attrs.getAttributeValue(“http://schemas.android.com/apk/res-auto”, “title”);
boolean b = attrs.getAttributeBooleanValue(“http://schemas.android.com/apk/res-auto”, “isshow”, true);
View view = View.inflate(context, R.layout.demoview, null);
addView(view);
mtv= (TextView) view.findViewById(R.id.tv_togle);
miv = (ImageView) view.findViewById(R.id.iv_togle);
miv.setVisibility(b ? VISIBLE : GONE);
mtv.setText(title);
}
//改变状态
public void setSetting0n(boolean isshow) {
yfisshow = isshow;
miv.setImageResource(isshow ? R.mipmap.on : R.mipmap.off);
}
//记录状态
public boolean issetting() {
return yfisshow;
}
public void setbackeguang() {
//第一次优化
// if (issetting()){
// setSetting0n(false);
// }else{
// setSetting0n(true);
// }
//第二次优化
// if (yfisshow){
// setSetting0n(false);
// }else{
// setSetting0n(true);
// }
//第三次优化
// if (yfisshow){
// setSetting0n(!yfisshow);
// }else{
// setSetting0n(!yfisshow);


 925
925

 被折叠的 条评论
为什么被折叠?
被折叠的 条评论
为什么被折叠?
 到【灌水乐园】发言


