


找到【app-res-layout-activity.xml】双击打开
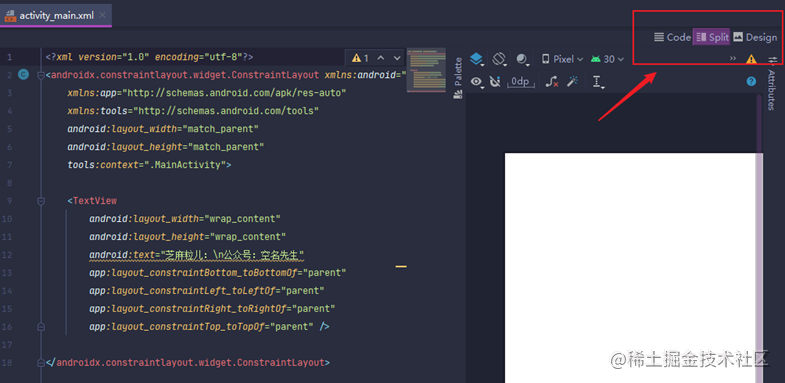
编辑布局有三种模式:
【Code】:只展示代码
【Split】:代码和可视化编辑一边一半
【Design】:可视化编辑形式
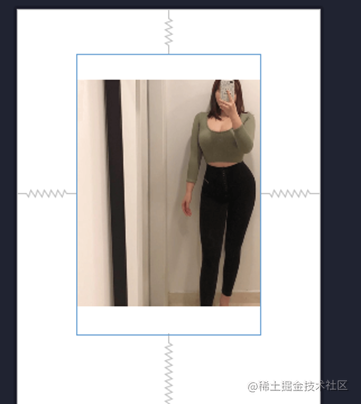
我们先用【Split】来搞一波,开始之前我们现将上面的ConstraintLayout改为Relativelayout(小空先用好理解的布局来做教学,ConstraintLayout是Android官方推出的新的布局方式,很棒的方案,我们会专门讲解),实现创建一个图片,并且让他水平居中,然后距离顶部60dp
<?xml version="1.0" encoding="utf-8"?><RelativeLayout xmlns:android=“http://schemas.android.com/apk/res/android”
xmlns:app=“http://schemas.android.com/apk/res-auto”
xmlns:tools=“http://schemas.android.com/tools”
android:layout_width=“match_parent”
android:layout_height=“match_parent”
tools:context=“.MainActivity”>
<ImageView
android:layout_width=“250dp”
android:layout_height=“380dp”
android:layout_centerHorizontal=“true”
android:layout_marginTop=“60dp”
android:src=“@mipmap/study_one” />
接着让图片更加的性感一些, 增加些角度
<?xml version="1.0" encoding="utf-8"?><RelativeLayout xmlns:android=“http://schemas.android.com/apk/res/android”
xmlns:app=“http://schemas.android.com/apk/res-auto”
xmlns:tools=“http://schemas.android.com/tools”
android:layout_width=“match_parent”
android:layout_height=“match_parent”
tools:context=
“.MainActivity”>
<ImageView
android:layout_width=“250dp”
android:layout_height=“380dp”
android:layout_centerHorizontal=“true”
android:layout_marginTop=“60dp”
android:rotationX=“10”
android:rotationY=“-10”
android:src=“@mipmap/study_one” />
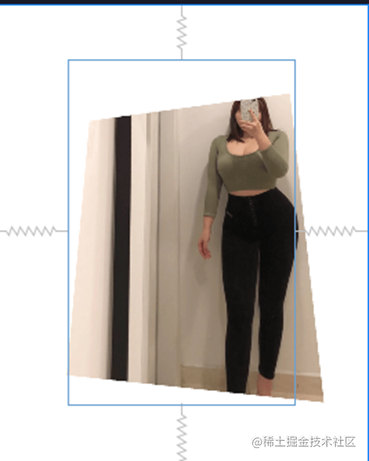
是不是感觉更立体了?这感觉超棒的。
接着我们再创建一个输入框,还有一个按钮
<?xml version="1.0" encoding="utf-8"?><RelativeLayout xmlns:android=“http://schemas.android.com/apk/res/android”
xmlns:app=“http://schemas.android.com/apk/res-auto”
xmlns:tools=“http://schemas.android.com/tools”
android:layout_width=“match_parent”
android:layout_height=“match_parent”
tools:context=“.MainActivity”>
<ImageView
android:id=“@+id/myImg”
android:layout_width=“250dp”
android:layout_height=“380dp”
android:layout_centerHorizontal=“true”
android:layout_marginTop=“60dp”
android:rotationX=“10”
android:rotationY=“-10”
android:src=“@mipmap/study_one” />
<EditText
android:layout_width=“300dp”
android:layout_height=“40dp”
android:hint=“请输入你想输入的内容” />
<TextView
android:layout_width=“wrap_content”
android:layout_height=“wrap_content”
android:layout_below=“@id/myImg”
android:background=“#00ff00”
android:text=“芝麻粒儿:\n公众号:空名先生”
android:textSize=“20sp” />
<Button
android:layout_width=“wrap_content”
android:layout_height=“wrap_content”
android:text=“这是个按钮” />
然后回到我们的【MainActivity】
public class MainActivity extends AppCompatActivity {
private Button myBtn;
@Override
protected void onCreate(Bundle savedInstanceState) {
super.onCreate(savedInstanceState);
setContentView(R.layout.activity_main);
myBtn = findViewById(R.id.myBtn);
myBtn.setOnClickListener(new View.OnClickListener() {
@Override
public void onClick(View view) {
Toast.makeText(MainActivity.this, “触发了按钮点击事件”, Toast.LENGTH_SHORT).show();
}
});
}
}
最后
小编这些年深知大多数初中级Android工程师,想要提升自己,往往是自己摸索成长,自己不成体系的自学效果低效漫长且无助。
因此我收集整理了一份《2024年Android移动开发全套学习资料》,初衷也很简单,就是希望能够帮助到想自学提升又不知道该从何学起的朋友。
 一个人可以走的很快,但一群人才能走的更远!不论你是正从事IT行业的老鸟或是对IT行业感兴趣的新人
都欢迎加入我们的的圈子(技术交流、学习资源、职场吐槽、大厂内推、面试辅导),让我们一起学习成长!
资料⬅专栏获取
,往往是自己摸索成长,自己不成体系的自学效果低效漫长且无助**。
因此我收集整理了一份《2024年Android移动开发全套学习资料》,初衷也很简单,就是希望能够帮助到想自学提升又不知道该从何学起的朋友。
[外链图片转存中…(img-m4fwezwf-1719082471539)]一个人可以走的很快,但一群人才能走的更远!不论你是正从事IT行业的老鸟或是对IT行业感兴趣的新人
都欢迎加入我们的的圈子(技术交流、学习资源、职场吐槽、大厂内推、面试辅导),让我们一起学习成长!
资料⬅专栏获取


 314
314

 被折叠的 条评论
为什么被折叠?
被折叠的 条评论
为什么被折叠?
 到【灌水乐园】发言


