-
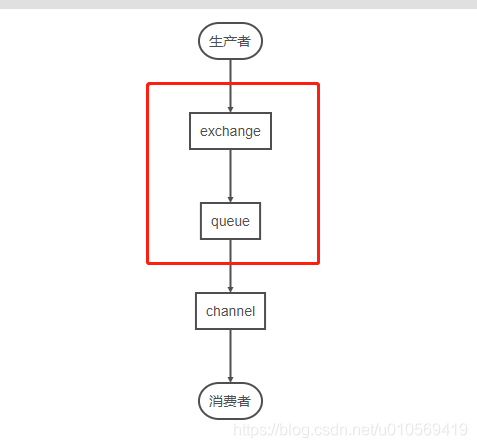
由生产者创建消息后,放置在(交换机)exchange中
-
RabbitMQ通过相关配置绑定exchange和queue(队列)
-
消费者通过channel(管道)获取channel中的消息

实验环境:
- rabbitmq 3.7.14(使用rpm安装)
主要步骤为:
-
创建一个Springboot项目,小白请自行百度
-
通过maven的pom文件引入相关依赖jar包
-
编写生产端、消费端代码
- pom.xml文件
<project xmlns=“http://maven.apache.org/POM/4.0.0” xmlns:xsi=“http://www.w3.org/2001/XMLSchema-instance”
xsi:schemaLocation=“http://maven.apache.org/POM/4.0.0 https://maven.apache.org/xsd/maven-4.0.0.xsd”>
4.0.0
org.springframework.boot
spring-boot-starter-parent
2.1.7.RELEASE
com.rabbitMQ
mq_demo
0.0.1-SNAPSHOT
mq_demo
Demo project for Spring Boot
<java.version>1.8</java.version>
org.springframework.boot
spring-boot-starter-web
org.springframework.boot
spring-boot-starter-test
test
com.rabbitmq
amqp-client
5.6.0
org.springframework.boot
spring-boot-maven-plugin
生产者代码
package com.new_rabbitmq;
import com.rabbitmq.client.Channel;
import com.rabbitmq.client.Connection;
import com.rabbitmq.client.ConnectionFactory;
public class Produce {
public static void main(String[] args) throws Exception{
ConnectionFactory connectionFactory= new ConnectionFactory();
connectionFactory.setHost(“你的主机IP”);
connectionFactory.setPort(5672);
connectionFactory.setVirtualHost(“/”);
Connection connection=connectionFactory.newConnection();
Channel channel=connection.createChannel();
String msg=“This is a message2!”;
//这里的test01为队列名称
channel.basicPublish(“”,“test01”,null,msg.getBytes());
channel.close();
connection.close();
}
}
消费者代码
package com.new_rabbitmq;
import com.rabbitmq.client.*;
import com.rabbitmq.client.impl.AMQImpl;
import java.io.IOException;
public class Consumer {
public static void main(String[] args) throws Exception{


 1614
1614


 被折叠的 条评论
为什么被折叠?


