


        android:src="@drawable/ic_launcher"/>

</item>


<item android:left="70dp"

      android:top="70dp">

    <bitmap

        android:src="@drawable/ic_launcher"/>

</item>
或者也可以使用如下代码,实现缩放的叠加图:
<!--这种方式拿到的是带有缩放的效果,即便给item 设置了gravity 并且从模拟器上看到的效果是不缩放的,但是真机上依旧是缩放的效果-->

<item android:drawable="@drawable/ic_launcher">

</item>

<item android:drawable="@drawable/ic_launcher"

      android:left="45dp"

      android:top="45dp">

</item>

<item android:drawable="@drawable/ic_launcher"

      android:left="90dp"

      android:top="90dp">

</item>
* 使用 layer-list 图
<ImageView
    android:layout_width="wrap_content"

    android:layout_height="wrap_content"

    android:background="@drawable/overlay"

/>
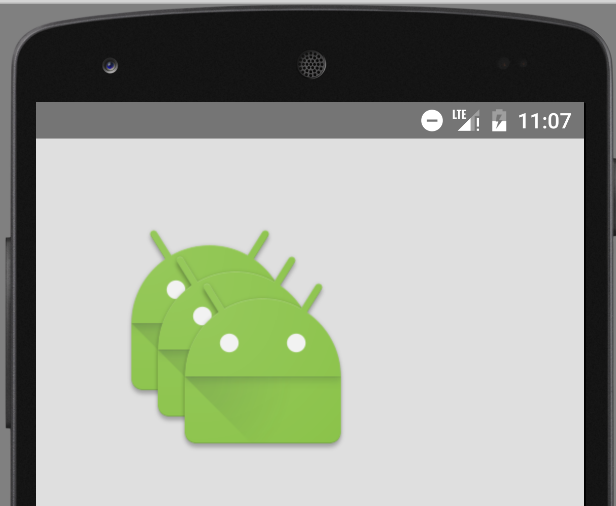
**效果图 2):不带缩放效果的**
注意:
A. 不缩放的时候,必须在 item 节点中使用 bitmap 节点,并给 bitmap 设置 gravity=center ;
B. 虽然在实现缩放效果的时候,可以直接使用 item 中的 drawable属性,但实现不缩放的效果时,如果还用drawable 属性,即便给item 设置了gravity =center ,在真机上的效果依旧是缩放的。(但模拟器是不缩放的)
**具体代码 2):**
* 创建 layer-list
<!--不缩放-->

<item>

    <bitmap

        android:gravity="center"

        android:src="@drawable/ic_launcher"/>

</item>


<item android:left="35dp"

      android:top="35dp">

    <bitmap android:gravity="center"

            android:src="@drawable/ic_launcher"/>

</item>


<item android:left="70dp"

      android:top="70dp">

    <bitmap android:gravity="center"

            android:src="@drawable/ic_launcher"/>

</item>
* 使用 layer-list 图
<ImageView
    android:layout_width="wrap_content"

    android:layout_height="wrap_content"

    android:background="@drawable/overlay"

/>
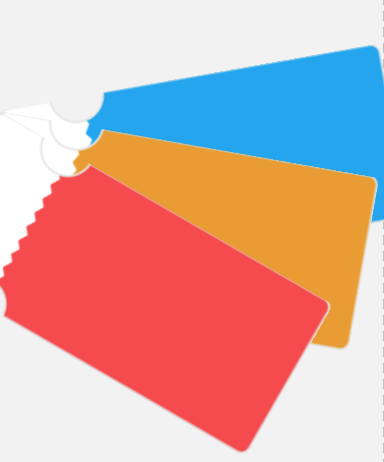
#### **3.5 效果5 :叠加旋转**
**效果图:**
**具体代码:**
* 创建 layer-list
<item>

    <rotate android:fromDegrees="-10" android:pivotX="0"

            android:pivotY="0">

        <bitmap android:src="@drawable/decibel_blue_background"/>

    </rotate>

</item>

<item>

    <rotate android:fromDegrees="10" android:pivotX="0"

            android:pivotY="0">

        <bitmap android:src="@drawable/decibel_orange_background"/>

    </rotate>

</item>

<item>

    <rotate android:fromDegrees="30" android:pivotX="0"

            android:pivotY="0">

        <bitmap android:src="@drawable/decibel_red_background"/>

    </rotate>

</item>
旋转的时候,只需要给出 起始的角度( fromdegress )即可。


*   使用 layer-list 图
<!--图片叠加并带旋转效果-->

<ImageView

    android:layout_width="wrap_content"

    android:layout_height="wrap_content"

    android:background="@drawable/rotate"/>
### **4\. layer-list 的扩展使用**
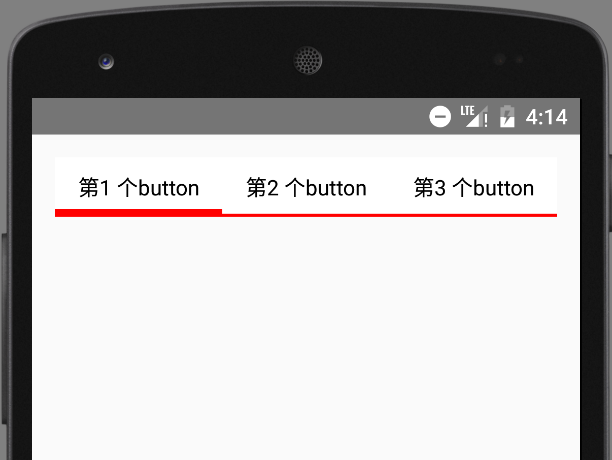
#### **4.1.实现选择器的效果**
主要使用组件:RadioGroup Selector layer-list
**1). 效果图:**
**2). 具体代码**
定义 selector 选择器
selector 的 item 节点中,直接嵌套 layer-list
当然也可以先写好layer-list ,然后再去引用
<!--被选中时是4dp的底部边线-->

<item android:state_checked="true">

    <layer-list>

        <item>

            <shape>

                <solid android:color="#f00"/>

            </shape>

        </item>

        <item android:bottom="4dp">

            <shape>

                <solid android:color="#fff"/>

            </shape>

        </item>

    </layer-list>

</item>


<!--未被选中的是2dp的底部边线-->

<item>

    <layer-list>

        <item>

            <shape>

                <solid android:color="#f00"/>

            </shape>

        </item>

        <item android:bottom="2dp">

            <shape>

                <solid android:color="#fff"/>

            </shape>

        </item>

    </layer-list>

</item>
注意:

在上面的代码中,由于并没有具体的shape ,所以可以省略shape , 直接用 color , 简化后的代码如下:
<!--被选中时是4dp的底部边线-->

<item android:state_checked="true">

    <layer-list>

        <item>

            <color android:color="#f00"/>

        </item>

        <item android:bottom="5dp">

            <color android:color="#fff"/>

        </item>

    </layer-list>

</item>


<!--未被选中的是2dp的底部边线-->

<item>

    <layer-list>

        <item>

            <color android:color="#f00"/>

        </item>

        <item android:bottom="2dp">

            <color android:color="#fff"/>

        </item>

    </layer-list>

</item>
* 使用selector
<LinearLayout xmlns:android=“http://schemas.android.com/apk/res/android”
          android:layout_width="match_parent"

          android:layout_height="match_parent"

          android:orientation="vertical"

          android:padding="15dp">

<RadioGroup

    android:id="@+id/rg"

    android:layout_width="match_parent"

    android:layout_height="wrap_content"

    android:orientation="horizontal">

    <RadioButton

        android:id="@+id/rb1"

        android:layout_width="0dp"

        android:layout_height="wrap_content"

        android:layout_weight="1"

        android:background="@drawable/selector_bk_rb"

        android:button="@null"

        android:checked="true"

        android:gravity="center"

        android:padding="10dp"

        android:text="第1 个button"/>

    <RadioButton

        android:layout_width="0dp"

        android:layout_height="wrap_content"

        android:layout_weight="1"

        android:background="@drawable/selector_bk_rb"

        android:button="@null"

        android:gravity="center"

        android:padding="10dp"

        android:text="第2 个button"/>

    <RadioButton

        android:layout_width="0dp"

        android:layout_height="wrap_content"

        android:layout_weight="1"

        android:background="@drawable/selector_bk_rb"

        android:button="@null"

        android:gravity="center"

        android:padding="10dp"

        android:text="第3 个button"/>


</RadioGroup>
**注意:**
在 RadioGroup 中,是通过 RadioButton 的 id 来控制是否选中。
所以,如果需要设置某一个 RadioButton 为默认选中,就必须给该 RadioButton 设置 id ;
如果不设置 id ,导致的结果就是该 RadioButton 会一直处于选中状态!!!
[

创作打卡挑战赛 
# 文末
很多人在刚接触这个行业的时候或者是在遇到瓶颈期的时候,总会遇到一些问题,比如学了一段时间感觉没有方向感,不知道该从那里入手去学习,对此我整理了一些资料,需要的可以免费分享给大家
这里笔者分享一份自己收录整理上述技术体系图相关的几十套腾讯、头条、阿里、美团等公司2021年的面试题,把技术点整理成了视频和PDF(实际上比预期多花了不少精力),包含知识脉络 + 诸多细节,由于篇幅有限,这里以图片的形式给大家展示一部分。


【视频教程】
天道酬勤,只要你想,大厂offer并不是遥不可及!希望本篇文章能为你带来帮助,如果有问题,请在评论区留言。
加入社区》https://bbs.csdn.net/forums/4304bb5a486d4c3ab8389e65ecb71ac0
057060c9c93.png)
创作打卡挑战赛 [外链图片转存中...(img-EhWUERTV-1725693778743)]
# 文末
很多人在刚接触这个行业的时候或者是在遇到瓶颈期的时候,总会遇到一些问题,比如学了一段时间感觉没有方向感,不知道该从那里入手去学习,对此我整理了一些资料,需要的可以免费分享给大家
这里笔者分享一份自己收录整理上述技术体系图相关的几十套腾讯、头条、阿里、美团等公司2021年的面试题,把技术点整理成了视频和PDF(实际上比预期多花了不少精力),包含知识脉络 + 诸多细节,由于篇幅有限,这里以图片的形式给大家展示一部分。
[外链图片转存中...(img-9zhUFgyJ-1725693778744)]
[外链图片转存中...(img-OhGmsh97-1725693778744)]
【视频教程】
[外链图片转存中...(img-I6jIfJuE-1725693778745)]
天道酬勤,只要你想,大厂offer并不是遥不可及!希望本篇文章能为你带来帮助,如果有问题,请在评论区留言。
加入社区》https://bbs.csdn.net/forums/4304bb5a486d4c3ab8389e65ecb71ac0


 1360
1360

 被折叠的 条评论
为什么被折叠?
被折叠的 条评论
为什么被折叠?
 到【灌水乐园】发言


