


python 基于深度学习的行人车辆多目标实时检测与跟踪系统 ui
行人车辆多目标实时检测与跟踪系统
(UI界面,Python代码)
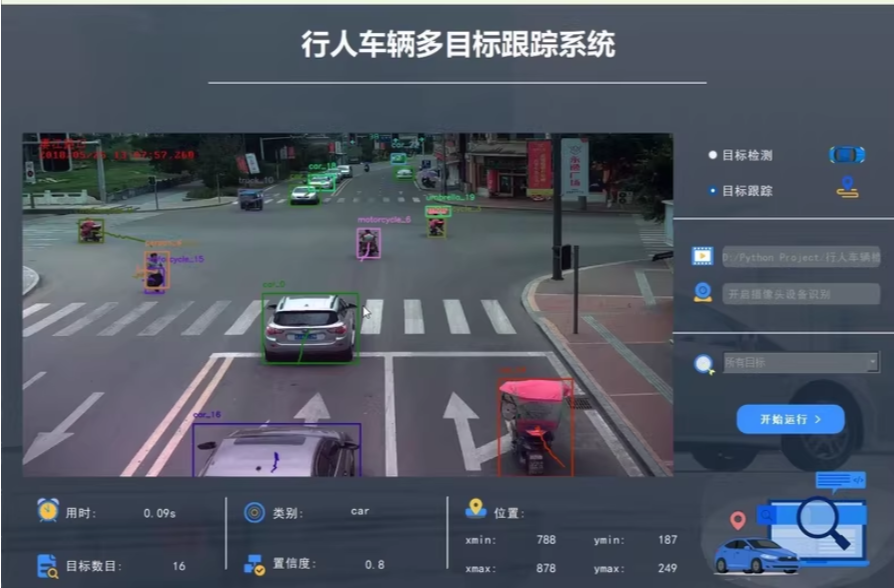
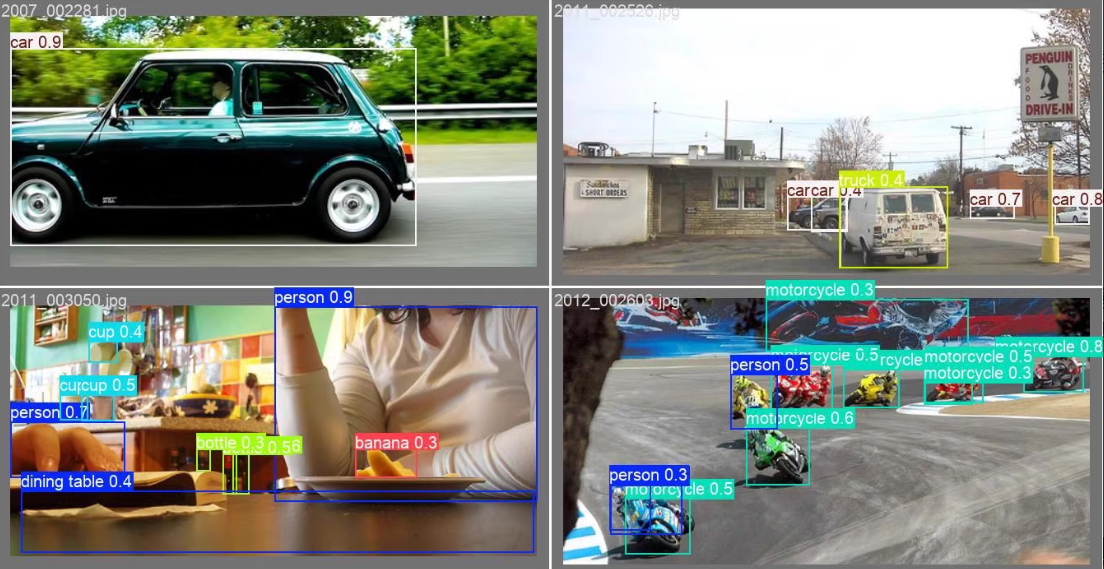
使用深度学习中的YOLOv5和OCTrack算法实现车辆、行人等多目标的实时检测和跟踪,并利用PyQt5设计了简约的系统UI界面。选择自己的视频文件进行检测和跟踪,可通过电脑自带的摄像头进行实时处理。
行人车辆多目标实时检测与跟踪系统
涉及多个步骤:模型训练、推理代码、目标跟踪算法以及UI设计
关键代码示例:
1. 环境搭建
确保你的开发环境已经安装了必要的库和工具。
安装依赖
# 创建并激活虚拟环境
conda create -n multi_target_tracking python=3.8
conda activate multi_target_tracking

# 安装YOLOv5和相关库
pip install torch torchvision torchaudio --extra-index-url https://download.pytorch.org/whl/cu113
pip install opencv-python PyQt5 numpy scipy filterpy
git clone https://github.com/ultralytics/yolov5.git
cd yolov5
pip install -r requirements.txt

# 安装OCTrack
git clone https://github.com/your-octrack-repo.git
cd octrack
pip install -r requirements.txt
2. 数据准备
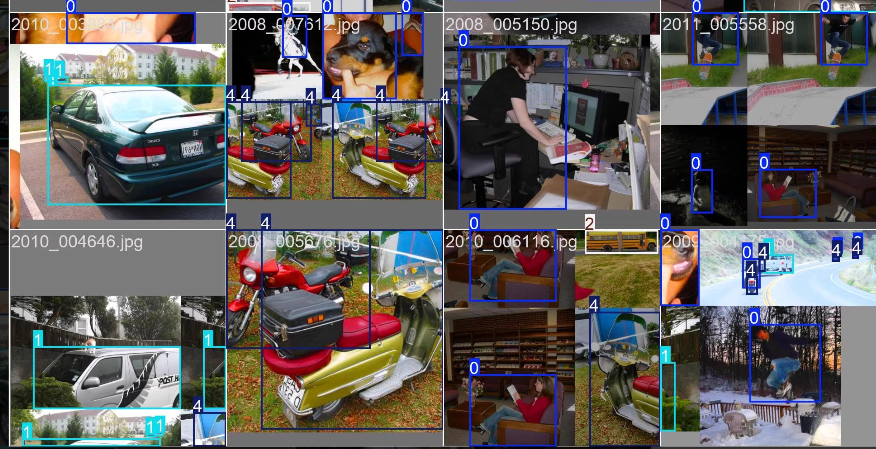
收集和标注包含行人和车辆的数据集。使用Labelimg进行标注,并将标注文件保存为YOLO格式。
数据集结构
dataset/
├── images/
│   ├── train/
│   ├── val/
│   └── test/
└── labels/
    ├── train/
    ├── val/
    └── test/
3. 模型训练
使用YOLOv5进行模型训练。
训练配置文件
创建一个data.yaml文件,定义数据集和类别信息。
train: dataset/images/train
val: dataset/images/val
test: dataset/images/test

nc: 2
names: ['person', 'car']
训练模型
使用以下命令进行模型训练。
python train.py --img 640 --batch 16 --epochs 100 --data data.yaml --weights yolov5s.pt
4. 目标跟踪
使用OCTrack进行目标跟踪。
OCTrack配置
根据需要调整OCTrack的参数和配置。
from octrack import OCTrack

def init_tracker():
    return OCTrack()

def update_tracker(tracker, detections):
    tracker.update(detections)
    return tracker.get_tracks()
5. UI设计与结果展示
使用PyQt5设计用户界面,并展示检测和跟踪结果。
设计界面
使用Qt Designer设计界面,并导出为.ui文件,然后使用pyuic5转换为Python代码。
pyuic5 -x your_design.ui -o ui_design.py
主程序代码
import sys
from PyQt5.QtWidgets import QApplication, QMainWindow, QFileDialog
from PyQt5.QtGui import QImage, QPixmap
from PyQt5.QtCore import QTimer
import cv2
from yolov5.models.experimental import attempt_load
from yolov5.utils.datasets import LoadStreams, LoadImages
from yolov5.utils.general import non_max_suppression, scale_coords
from yolov5.utils.torch_utils import select_device
from octrack import OCTrack

from ui_design import Ui_MainWindow

class MultiTargetTrackingApp(QMainWindow, Ui_MainWindow):
    def __init__(self):
        super().__init__()
        self.setupUi(self)
        self.device = select_device('0')
        self.model = attempt_load('best.pt', map_location=self.device)
        self.tracker = init_tracker()

        self.loadImageButton.clicked.connect(self.load_image)
        self.loadVideoButton.clicked.connect(self.load_video)
        self.startCameraButton.clicked.connect(self.start_camera)

        self.saveButton.clicked.connect(self.save_results)
        self.exitButton.clicked.connect(self.close)

        self.timer = QTimer()
        self.timer.timeout.connect(self.update_frame)
        self.cap = None

    def load_image(self):
        file_name, _ = QFileDialog.getOpenFileName(self, "选择图片文件", "", "Images (*.png *.xpm *.jpg)")
        if file_name:
            self.detect_and_track(file_name)

    def load_video(self):
        file_name, _ = QFileDialog.getOpenFileName(self, "选择视频文件", "", "Videos (*.mp4 *.avi)")
        if file_name:
            self.cap = cv2.VideoCapture(file_name)
            self.timer.start(30)

    def start_camera(self):
        self.cap = cv2.VideoCapture(0)
        self.timer.start(30)

    def update_frame(self):
        ret, frame = self.cap.read()
        if ret:
            results = self.detect_and_track(frame)
            annotated_frame = self.plot_results(results, frame)
            height, width, channel = annotated_frame.shape
            bytes_per_line = 3 * width
            q_img = QImage(annotated_frame.data, width, height, bytes_per_line, QImage.Format_RGB888)
            self.imageLabel.setPixmap(QPixmap.fromImage(q_img))

    def detect_and_track(self, image):
        img = cv2.resize(image, (640, 640))
        img = img[:, :, ::-1].transpose(2, 0, 1)  # BGR to RGB, to 3x416x416
        img = np.ascontiguousarray(img)
        img = torch.from_numpy(img).to(self.device)
        img = img.float() / 255.0  # 0 - 255 to 0.0 - 1.0
        if img.ndimension() == 3:
            img = img.unsqueeze(0)

        pred = self.model(img, augment=False)[0]
        pred = non_max_suppression(pred, conf_thres=0.25, iou_thres=0.45, classes=None, agnostic=False)

        detections = []
        for det in pred:
            if len(det):
                det[:, :4] = scale_coords(img.shape[2:], det[:, :4], image.shape).round()
                for *xyxy, conf, cls in reversed(det):
                    x1, y1, x2, y2 = map(int, xyxy)
                    detections.append([x1, y1, x2, y2, float(conf), int(cls)])

        tracks = update_tracker(self.tracker, detections)
        return tracks

    def plot_results(self, tracks, image):
        for track in tracks:
            x1, y1, x2, y2, id = map(int, track[:5])
            cv2.rectangle(image, (x1, y1), (x2, y2), (0, 255, 0), 2)
            cv2.putText(image, f'ID: {id}', (x1, y1 - 10), cv2.FONT_HERSHEY_SIMPLEX, 0.9, (0, 255, 0), 2)
        return image

    def save_results(self):
        file_name, _ = QFileDialog.getSaveFileName(self, "保存结果", "", "Text Files (*.txt)")
        if file_name:
            with open(file_name, 'w') as f:
                for track in self.tracks:
                    f.write(f'{track}\n')

if __name__ == '__main__':
    app = QApplication(sys.argv)
    window = MultiTargetTrackingApp()
    window.show()
    sys.exit(app.exec_())
6. 运行与测试
运行主程序,加载图片、视频或启动摄像头进行检测和跟踪,并展示检测和跟踪结果及可视化。
关键代码示例,仅供参考。


 被折叠的 条评论
为什么被折叠?
被折叠的 条评论
为什么被折叠?
 到【灌水乐园】发言


