


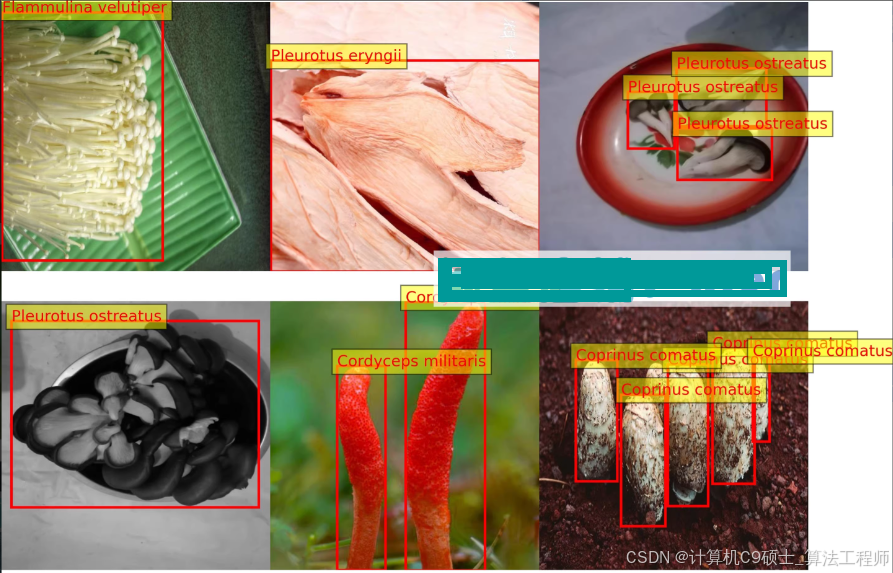
蘑菇检测数据集,8857张 yolo和voc两种标注方式
21类,标注数量: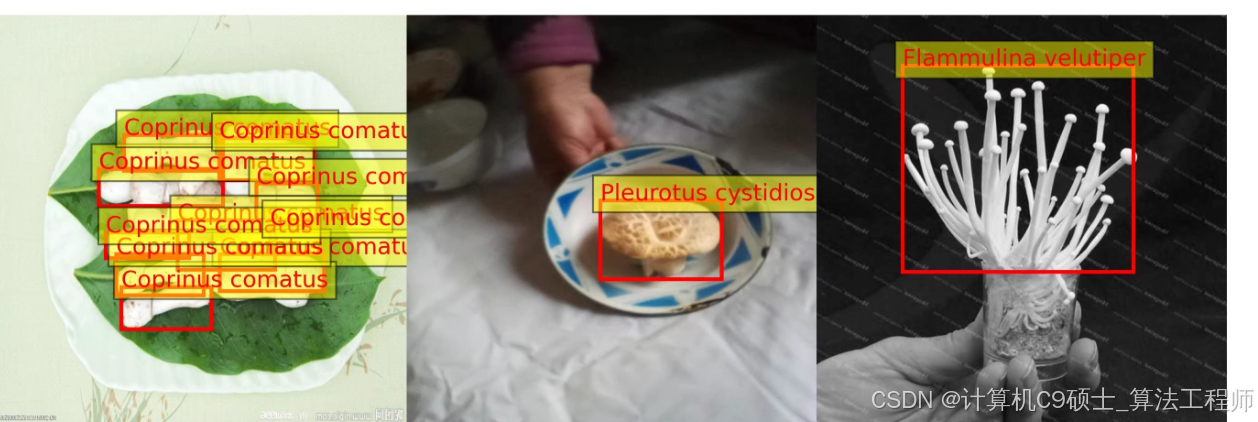
Lentinus edodes: 香菇 - 2690
Flammulina velutiper: 金针菇 - 550
Pleurotus eryngii: 杏鲍菇 - 704
Hypsizygus marmoreus: 花菇 - 583
Morchella esculenta: 脆皮羊肚菌 - 1107
Pleurotus citrinopileatus: 黄丽菇 - 531
Pleurotus cystidiosus: 棒棒菇 - 711
Dictyophora indusiate: 竹荪 - 1275
Hericium erinaceus: 猴头菇 - 1299
Cordyceps militaris: 冬虫夏草 - 1137
Pleurotus ostreatus: 平菇 - 549
Coprinus comatus: 剑状小伞菌 - 1599
Cantharellus cibarius: 金针菇 - 1317
Boletus: 牛肝菌 - 1353
Clitocybe maxima: 大伞菌 - 1046
Collybia albuminosa: 白色苔藓菇 - 2072
Auricularia auricula: 木耳 - 408
Agaricus blazei Murill: 巴西蘑菇 - 307
Agaricus bisporus: 白蘑菇 - 521
Agrocybe aegerita: 黑木耳 - 197
Armillaria mellea: 蜂窝菌 - 290
image num: 图像数量 - 8857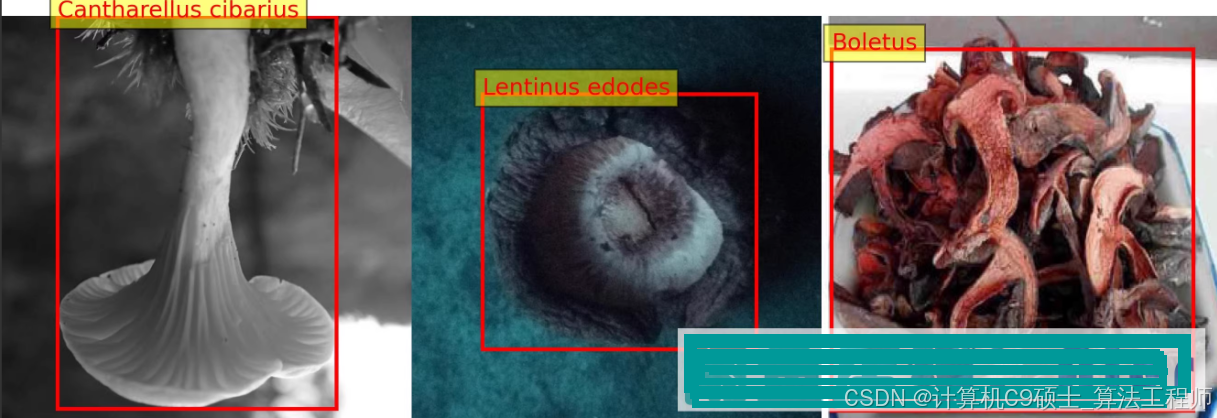
好的,我们将使用YOLO和VOC两种标注方式来处理蘑菇检测数据集。我们将构建一个YOLO模型来进行目标检测,并提供代码示例来加载和处理这些数据。
环境配置
首先,确保你的 Python 环境已经安装了必要的库。你可以使用以下命令来安装所需的库:
pip install tensorflow numpy pandas opencv-python matplotlib scikit-learn albumentations
此外,你需要安装 YOLOv5 或其他版本的 YOLO 模型。以下是安装 YOLOv5 的步骤:
git clone https://github.com/ultralytics/yolov5.git
cd yolov5
pip install -r requirements.txt
数据准备
我们需要将数据转换为 YOLO 和 VOC 格式。假设你已经有了标注文件,并且它们是以某种格式提供的(例如 CSV 文件或 XML 文件)。我们将编写一些函数来处理这些标注文件并将其转换为 YOLO 和 VOC 格式。
1. 加载和预处理数据
我们将编写一个函数来加载和预处理数据,并将其转换为 YOLO 和 VOC 格式。
import os
import cv2
import xml.etree.ElementTree as ET
import pandas as pd
from sklearn.model_selection import train_test_split
import shutil

# Define paths
data_path = 'path_to_your_dataset'
images_path = os.path.join(data_path, 'images')
annotations_path = os.path.join(data_path, 'annotations')
train_images_path = os.path.join(data_path, 'train', 'images')
train_annotations_path = os.path.join(data_path, 'train', 'annotations')
val_images_path = os.path.join(data_path, 'val', 'images')
val_annotations_path = os.path.join(data_path, 'val', 'annotations')

# Create directories if they don't exist
os.makedirs(train_images_path, exist_ok=True)
os.makedirs(train_annotations_path, exist_ok=True)
os.makedirs(val_images_path, exist_ok=True)
os.makedirs(val_annotations_path, exist_ok=True)

# Load annotations and split into train and validation sets
def load_annotations(annotations_path):
    annotations = []
    for filename in os.listdir(annotations_path):
        if filename.endswith('.xml'):
            tree = ET.parse(os.path.join(annotations_path, filename))
            root = tree.getroot()
            image_filename = root.find('filename').text
            size = root.find('size')
            width = int(size.find('width').text)
            height = int(size.find('height').text)
            objects = root.findall('object')
            bboxes = []
            labels = []
            for obj in objects:
                name = obj.find('name').text
                bbox = obj.find('bndbox')
                xmin = int(bbox.find('xmin').text)
                ymin = int(bbox.find('ymin').text)
                xmax = int(bbox.find('xmax').text)
                ymax = int(bbox.find('ymax').text)
                bboxes.append([xmin, ymin, xmax, ymax])
                labels.append(name)
            annotations.append({'image': image_filename, 'width': width, 'height': height, 'bboxes': bboxes, 'labels': labels})
    return annotations

annotations = load_annotations(annotations_path)

# Split data into train and validation sets
train_annots, val_annots = train_test_split(annotations, test_size=0.2, random_state=42)

# Save images and annotations to respective folders
def save_data(annots, images_save_path, annots_save_path):
    for annot in annots:
        image_filename = annot['image']
        image_path = os.path.join(images_path, image_filename)
        shutil.copy(image_path, images_save_path)

        with open(os.path.join(annots_save_path, os.path.splitext(image_filename)[0] + '.txt'), 'w') as f:
            for bbox, label in zip(annot['bboxes'], annot['labels']):
                x_center = (bbox[0] + bbox[2]) / 2.0 / annot['width']
                y_center = (bbox[1] + bbox[3]) / 2.0 / annot['height']
                width = (bbox[2] - bbox[0]) / annot['width']
                height = (bbox[3] - bbox[1]) / annot['height']
                class_id = class_names.index(label)
                f.write(f"{class_id} {x_center} {y_center} {width} {height}\n")

class_names = [
    "Lentinus edodes", "Flammulina velutiper", "Pleurotus eryngii", "Hypsizygus marmoreus",
    "Morchella esculenta", "Pleurotus citrinopileatus", "Pleurotus cystidiosus", "Dictyophora indusiate",
    "Hericium erinaceus", "Cordyceps militaris", "Pleurotus ostreatus", "Coprinus comatus",
    "Cantharellus cibarius", "Boletus", "Clitocybe maxima", "Collybia albuminosa", "Auricularia auricula",
    "Agaricus blazei Murill", "Agaricus bisporus", "Agrocybe aegerita", "Armillaria mellea"
]

save_data(train_annots, train_images_path, train_annotations_path)
save_data(val_annots, val_images_path, val_annotations_path)

# Create dataset.yaml file for YOLOv5
dataset_yaml_content = f"""
train: {train_images_path}
val: {val_images_path}

nc: {len(class_names)}
names: {class_names}
"""

with open(os.path.join(data_path, 'dataset.yaml'), 'w') as f:
    f.write(dataset_yaml_content)
2. 构建和训练 YOLO 模型
我们将使用 YOLOv5 来进行目标检测。以下是完整的代码示例,包括数据准备、模型训练和生成预测结果。
运行脚本
在终端中运行以下命令来执行整个流程:
python main.py
总结
以上文档包含了从数据加载、预处理、模型构建到训练的所有步骤。希望这些详细的信息和代码能够帮助你顺利实施和优化你的蘑菇检测系统。
自定义说明
- 数据文件路径: 修改
data_path变量以指向你的数据文件。 - 类名列表: 确保
class_names列表中的类别名称与你的标注文件中的类别名称一致。 - 超参数调整: 根据需要调整训练参数,如
--img,--batch,--epochs等。 - 模型选择: 你可以选择不同的 YOLOv5 模型大小(
yolov5s,yolov5m,yolov5l,yolov5x)以适应你的需求。
使用 YOLOv5 进行蘑菇检测任务。


 被折叠的 条评论
为什么被折叠?
被折叠的 条评论
为什么被折叠?
 到【灌水乐园】发言


