


使用YOLOv5进行训练建筑物损伤分割与检测数据集 完成建筑物损伤分割与检测任务 建立基于深度学习卷积神经网络的建筑物损害分割与检测
文章目录
以下文字及代码仅供参考。
建筑物损伤分割与检测数据集,5925张,voc,yolo格式分割与检测标注
4类,标注数量:
钢筋外露 Rebar-Exposure 1281
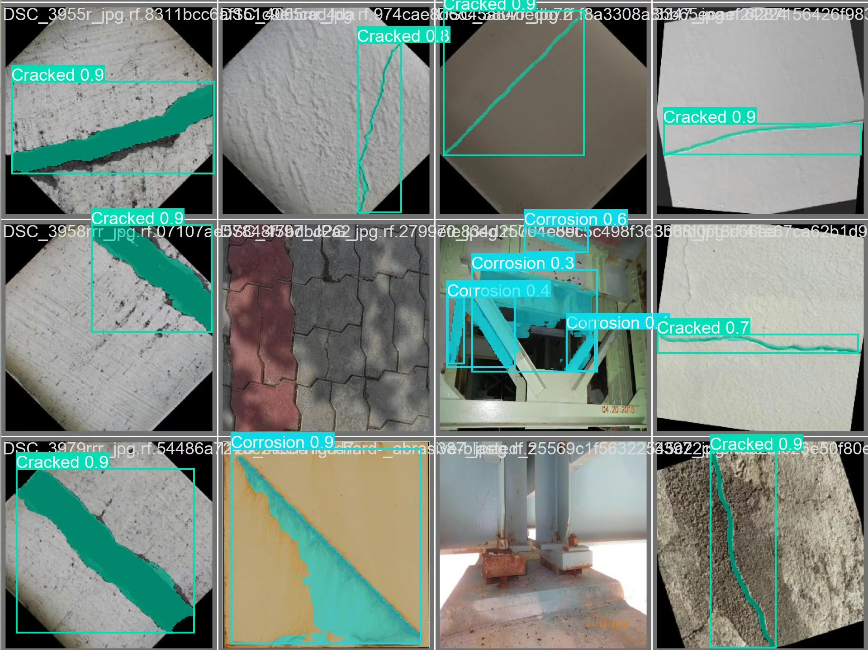
腐蚀 Corrosion 6843
泛碱 Efflorescence 2297
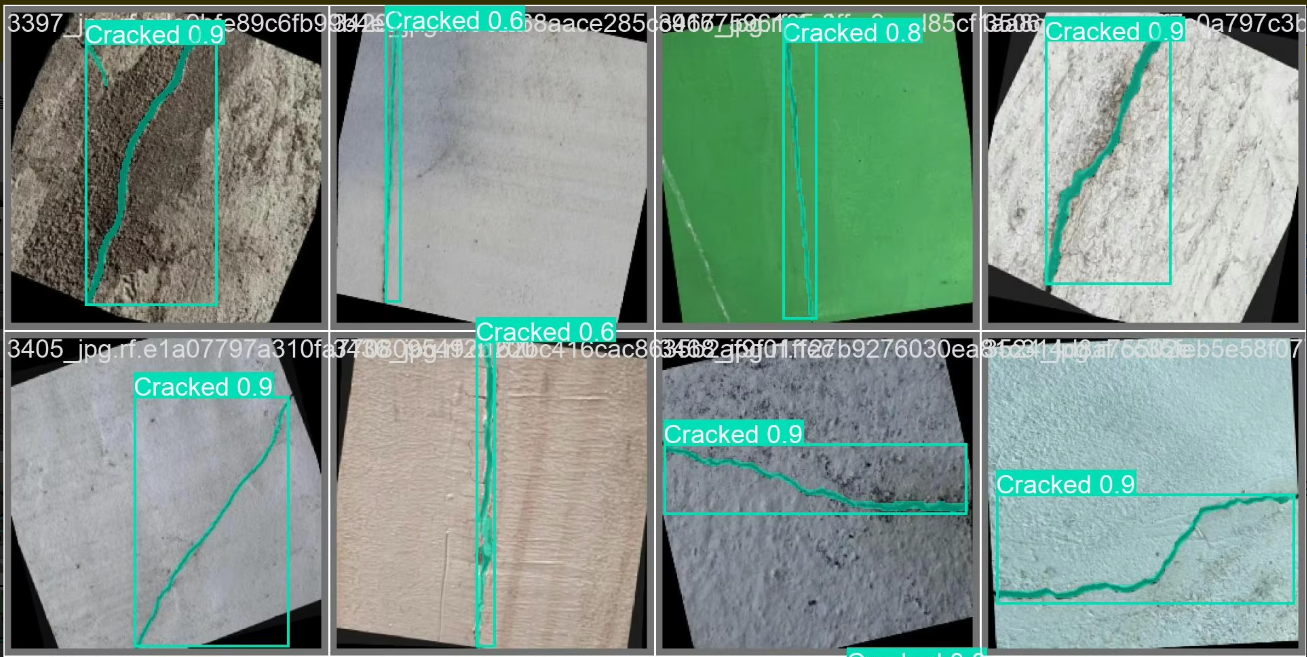
开裂 Cracked 3471
图像数量 image num 5925
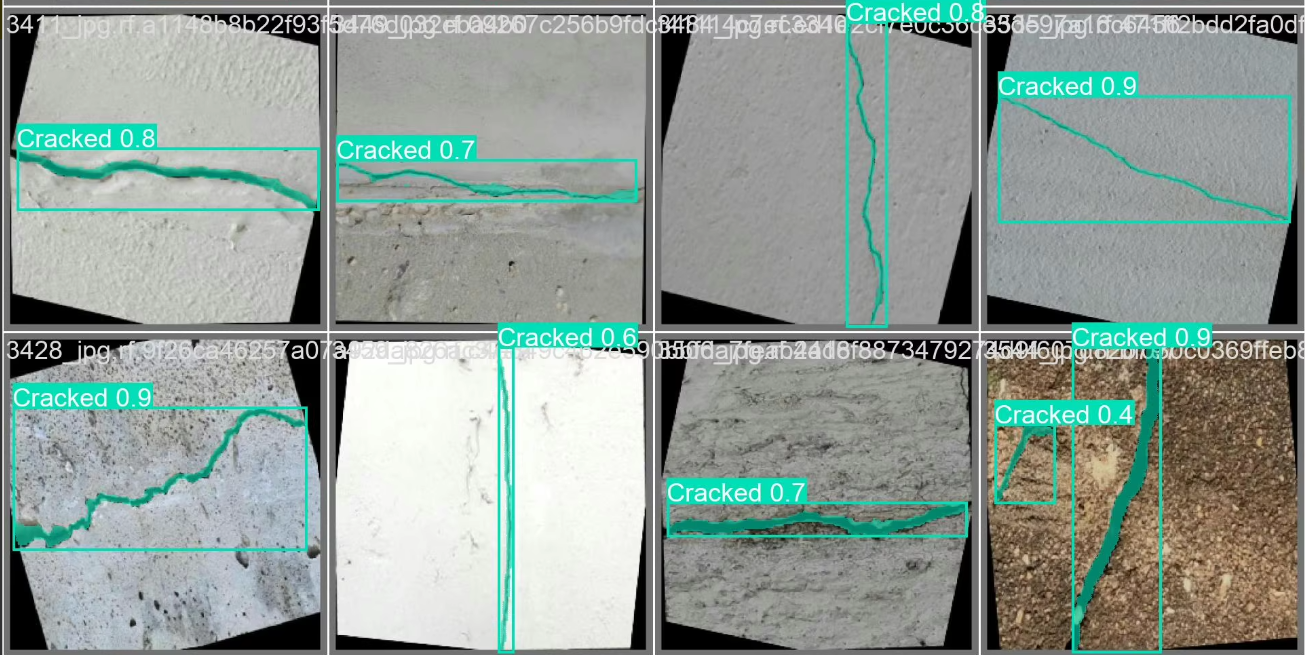
完成建筑物损伤分割与检测任务,从数据准备、格式转换、数据划分、环境搭建、数据配置、模型训练、超参数配置、模型推理、批量推理和性能评估等方面详细说明。
以下是一个完整的流程,附有代码示例。
仅供参考。同学
—
1. 数据准备
数据集结构
假设数据集目录结构如下:
dataset/
├── images/
│   ├── img1.jpg
│   ├── img2.jpg
│   └── ...
├── labels_voc/
│   ├── img1.xml
│   ├── img2.xml
│   └── ...
├── labels_yolo/
│   ├── img1.txt
│   ├── img2.txt
│   └── ...
标注信息
- VOC格式:
xml文件,包含目标框坐标和类别。 - YOLO格式:
txt文件,每行一个目标,格式为class x_center y_center width height(归一化)。
2. 格式转换
将VOC格式转换为YOLO格式:
import os
import xml.etree.ElementTree as ET

def convert_voc_to_yolo(voc_dir, yolo_dir, classes):
    if not os.path.exists(yolo_dir):
        os.makedirs(yolo_dir)

    for xml_file in os.listdir(voc_dir):
        tree = ET.parse(os.path.join(voc_dir, xml_file))
        root = tree.getroot()

        size = root.find('size')
        w = int(size.find('width').text)
        h = int(size.find('height').text)

        with open(os.path.join(yolo_dir, os.path.splitext(xml_file)[0] + '.txt'), 'w') as f:
            for obj in root.findall('object'):
                cls = obj.find('name').text
                if cls not in classes:
                    continue
                cls_id = classes.index(cls)
                bbox = obj.find('bndbox')
                xmin = int(bbox.find('xmin').text)
                ymin = int(bbox.find('ymin').text)
                xmax = int(bbox.find('xmax').text)
                ymax = int(bbox.find('ymax').text)

                x_center = (xmin + xmax) / 2.0 / w
                y_center = (ymin + ymax) / 2.0 / h
                width = (xmax - xmin) / w
                height = (ymax - ymin) / h

                f.write(f"{cls_id} {x_center:.6f} {y_center:.6f} {width:.6f} {height:.6f}\n")

# 类别列表
classes = ['Rebar-Exposure', 'Corrosion', 'Efflorescence', 'Cracked']
convert_voc_to_yolo('dataset/labels_voc', 'dataset/labels_yolo', classes)
3. 数据划分
将数据集划分为训练集、验证集和测试集(如8:1:1):
import os
import random

def split_dataset(image_dir, train_ratio=0.8, val_ratio=0.1):
    images = [f for f in os.listdir(image_dir) if f.endswith('.jpg')]
    random.shuffle(images)

    train_num = int(len(images) * train_ratio)
    val_num = int(len(images) * val_ratio)

    train_images = images[:train_num]
    val_images = images[train_num:train_num + val_num]
    test_images = images[train_num + val_num:]

    return train_images, val_images, test_images

image_dir = 'dataset/images'
train_images, val_images, test_images = split_dataset(image_dir)

# 保存划分结果
with open('dataset/train.txt', 'w') as f:
    f.writelines([os.path.join(image_dir, img) + '\n' for img in train_images])

with open('dataset/val.txt', 'w') as f:
    f.writelines([os.path.join(image_dir, img) + '\n' for img in val_images])

with open('dataset/test.txt', 'w') as f:
    f.writelines([os.path.join(image_dir, img) + '\n' for img in test_images])
4. 环境搭建
安装依赖库:
pip install torch torchvision opencv-python matplotlib tqdm
5. 数据配置
创建YOLO的数据配置文件 data.yaml:
train: dataset/train.txt
val: dataset/val.txt
test: dataset/test.txt

nc: 4  # 类别数量
names: ['Rebar-Exposure', 'Corrosion', 'Efflorescence', 'Cracked']
6. 模型训练
使用YOLOv5进行训练:
git clone https://github.com/ultralytics/yolov5
cd yolov5
pip install -r requirements.txt

# 开始训练
python train.py --img 640 --batch 16 --epochs 50 --data ../data.yaml --cfg models/yolov5s.yaml --weights yolov5s.pt --name building_damage
7. 配置超参数
在 train.py 中调整以下参数:
--img: 输入图像尺寸。--batch: 批次大小。--epochs: 训练轮数。--cfg: 模型配置文件。--weights: 预训练权重。
8. 模型推理
加载训练好的模型进行推理:
from PIL import Image
import torch
from yolov5.models.experimental import attempt_load
from yolov5.utils.general import non_max_suppression, scale_coords
from yolov5.utils.datasets import letterbox
from yolov5.utils.plots import plot_one_box

# 加载模型
model = attempt_load('runs/train/building_damage/weights/best.pt', map_location='cpu')

# 推理函数
def detect(image_path):
    img_size = 640
    conf_thres = 0.25
    iou_thres = 0.45

    img0 = Image.open(image_path)
    img = letterbox(img0, new_shape=img_size)[0]
    img = img[:, :, ::-1].transpose(2, 0, 1)  # BGR to RGB
    img = torch.from_numpy(img).unsqueeze(0).float() / 255.0

    # 推理
    pred = model(img)[0]
    pred = non_max_suppression(pred, conf_thres, iou_thres)

    # 绘制结果
    for det in pred:
        if len(det):
            det[:, :4] = scale_coords(img.shape[2:], det[:, :4], img0.size).round()
            for *xyxy, conf, cls in reversed(det):
                label = f'{classes[int(cls)]} {conf:.2f}'
                plot_one_box(xyxy, img0, label=label, color=(0, 255, 0), line_thickness=3)

    img0.show()

detect('dataset/images/img1.jpg')
9. 批量推理
对测试集进行批量推理:
import glob

test_images = glob.glob('dataset/images/*.jpg')
for img_path in test_images:
    detect(img_path)
10. 性能评估
使用mAP评估模型性能:
python val.py --data ../data.yaml --weights runs/train/building_damage/weights/best.pt --img 640


 被折叠的 条评论
为什么被折叠?
被折叠的 条评论
为什么被折叠?
 到【灌水乐园】发言


