


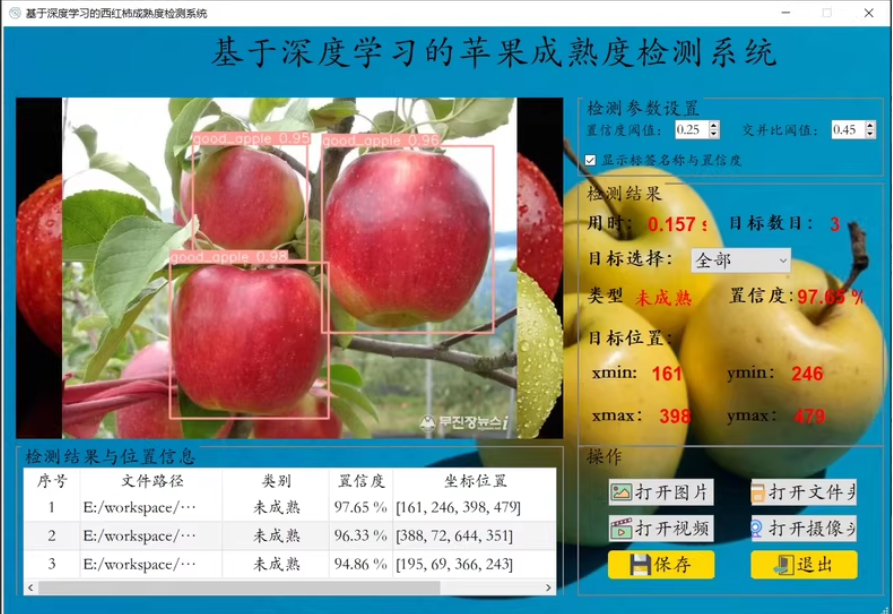
如何使用深度学习框架Yolov8 苹果成熟度检测数据集 4类 建立基于深度学习的苹果成熟度检测系统 识别成熟 未成熟苹果
以下文字及代码仅供参考,
文章目录
苹果成熟度检测数据集 2039张 4类 yolo/voc
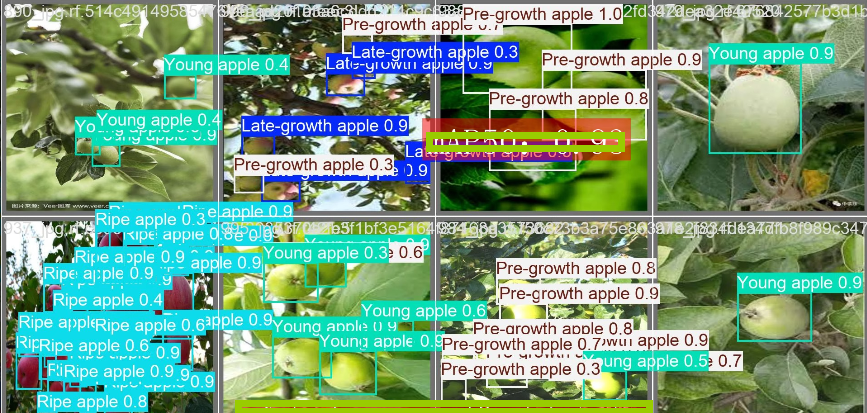
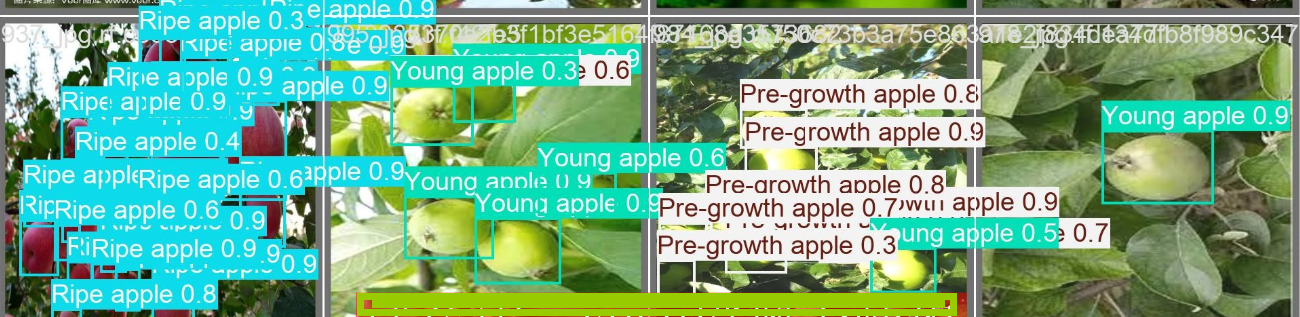
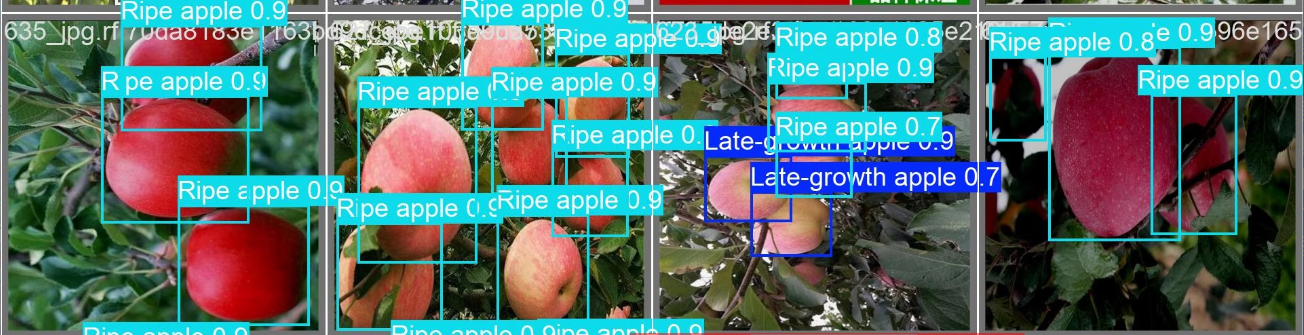
苹果成熟度检测数据集共2039张4类,分类为:‘Late-growth apple’, ‘Ripe apple’, ‘Pre-growth apple’, ‘Young apple’
每个类别的图片数量和标注框数量如下:
| 类别 | 图片数量 | 标注框数量 |
|---|---|---|
| Late-growth apple | 273 | 1030 |
| Ripe apple | 1333 | 11640 |
| Pre-growth apple | 305 | 1434 |
| Young apple | 369 | 903 |
- 训练集:1631张图片
- 验证集:408张图片
- 总数据集:2039张图片
基于YOLO的苹果成熟度检测系统,、
我们需要按照以下步骤进行:数据准备、环境搭建、模型配置和训练、推理和性能评估。代码示例。仅供参考。
1. 数据准备
文件结构
确保你的数据集文件结构如下:
apple_maturity_dataset/
├── images/
│   ├── train/
│   │   ├── image1.jpg
│   │   ├── image2.jpg
│   │   └── ...
│   └── val/
│       ├── image1.jpg
│       ├── image2.jpg
│       └── ...
└── labels/
    ├── train/
    │   ├── image1.txt
    │   ├── image2.txt
    │   └── ...
    └── val/
        ├── image1.txt
        ├── image2.txt
        └── ...
类别映射文件(classes.txt)
创建一个 classes.txt 文件,列出所有4个类别:
Late-growth apple
Ripe apple
Pre-growth apple
Young apple
2. 环境搭建
安装必要的依赖包:
pip install torch torchvision torchaudio
git clone https://github.com/ultralytics/yolov5
cd yolov5
pip install -r requirements.txt
3. 数据配置
创建一个 data.yaml 文件来定义数据集路径和类别信息:
train: ../apple_maturity_dataset/images/train
val: ../apple_maturity_dataset/images/val

nc: 4
names: ['Late-growth apple', 'Ripe apple', 'Pre-growth apple', 'Young apple']
4. 模型训练
使用YOLOv5的训练脚本来训练模型:
from yolov5.train import run

# 配置超参数
hyp = 'data/hyp.scratch-low.yaml'  # 超参数文件路径
cfg = 'models/yolov5s.yaml'  # 模型配置文件路径
weights = 'yolov5s.pt'  # 预训练权重路径
imgsz = 640  # 输入图像尺寸
batch_size = 16  # 批次大小
epochs = 100  # 训练周期数
data = 'data.yaml'  # 数据配置文件路径

# 开始训练
run(data=data, cfg=cfg, weights=weights, hyp=hyp, imgsz=imgsz, batch=batch_size, epochs=epochs)
5. 模型推理
单张图片推理
from yolov5.detect import run as detect_run

# 推理配置
source = 'path/to/image.jpg'  # 图像路径
weights = 'runs/train/exp/weights/best.pt'  # 训练好的模型权重路径
imgsz = 640  # 输入图像尺寸
conf_thres = 0.25  # 置信度阈值
iou_thres = 0.45  # IOU阈值

# 进行推理
detect_run(source=source, weights=weights, imgsz=imgsz, conf_thres=conf_thres, iou_thres=iou_thres)

批量图片推理
import os
from yolov5.detect import run as detect_run

# 批量推理配置
source_dir = 'path/to/images'  # 图像文件夹路径
weights = 'runs/train/exp/weights/best.pt'  # 训练好的模型权重路径
imgsz = 640  # 输入图像尺寸
conf_thres = 0.25  # 置信度阈值
iou_thres = 0.45  # IOU阈值

# 获取文件夹中所有图像文件
image_files = [os.path.join(source_dir, f) for f in os.listdir(source_dir) if f.endswith('.jpg')]

# 对每张图像进行推理
for image_file in image_files:
    detect_run(source=image_file, weights=weights, imgsz=imgsz, conf_thres=conf_thres, iou_thres=iou_thres)
6. 性能评估
在验证集上评估模型性能:
from yolov5.val import run as val_run

# 验证配置
data = 'data.yaml'  # 数据配置文件路径
weights = 'runs/train/exp/weights/best.pt'  # 训练好的模型权重路径
imgsz = 640  # 输入图像尺寸
conf_thres = 0.25  # 置信度阈值
iou_thres = 0.45  # IOU阈值

# 进行验证
val_run(data=data, weights=weights, imgsz=imgsz, conf_thres=conf_thres, iou_thres=iou_thres)
7. 构建深度学习苹果成熟度检测系统
你可以使用 Flask 构建一个简单的 Web 应用,接收上传的图片并返回检测结果。以下是简化版本:
from flask import Flask, request, jsonify
from PIL import Image
import io
from yolov5.detect import run as detect_run

app = Flask(__name__)

@app.route('/detect', methods=['POST'])
def detect():
    file = request.files['image']
    img = Image.open(io.BytesIO(file.read()))
    img.save('temp.jpg')

    results = detect_run(source='temp.jpg', weights='runs/train/exp/weights/best.pt', imgsz=640, conf_thres=0.25, iou_thres=0.45)

    return jsonify({"result": results})

if __name__ == '__main__':
    app.run(debug=True)
启动服务:
flask run

发送 POST 请求即可获取检测结果。
通过以上步骤tx同学你可以构建一个基于深度学习的苹果成熟度检测系统,
以上文字及代码仅供参考。


 被折叠的 条评论
为什么被折叠?
被折叠的 条评论
为什么被折叠?
 到【灌水乐园】发言


