


打卡页
打卡页应该分为两种状态,未登录状态和登录状态,未登录状态提醒用户登录,登录状态则可以查询打卡圈(即自己和别人的打卡情况)
这个页面主要分为“英语打卡圈”标题和下半部分,所以上面是相同的,下面为封装的自定义组件。
未登录状态:
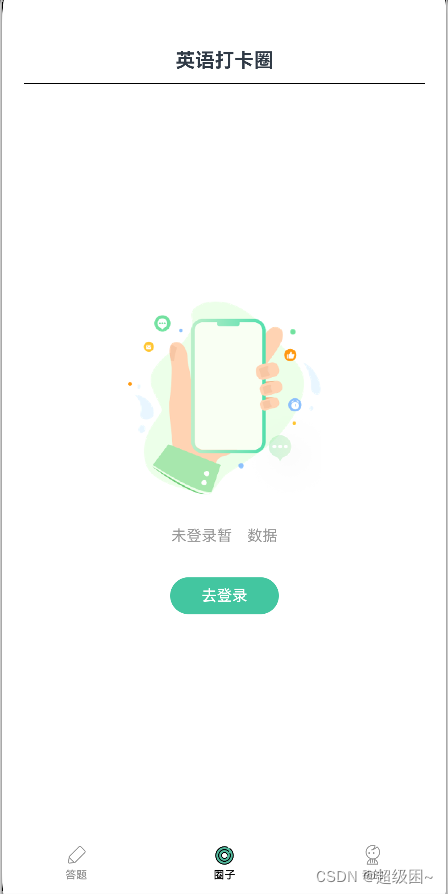
未登录状态部分很简单,主要就是提醒用户前往登录,因此点击“去登录”后要进行跳转,跳转到登录页。代码如下:
unLoginBuilder() {
    Column({ space: 30 }) {
      Image($r("app.media.ic_unLogin_bg"))
        .width(177)
        .height(177)
      Text('未登录暂⽆数据')
        .fontSize(14)
        .fontColor('#999999')
      Button('去登录')
        .fontColor(Color.White)
        .fontSize(14)
        .width(100)
        .height(34)
        .backgroundColor('#43C6A0')
        .onClick(() => router.pushUrl({ url: 'pages/LoginPage' }))
    }
登录状态
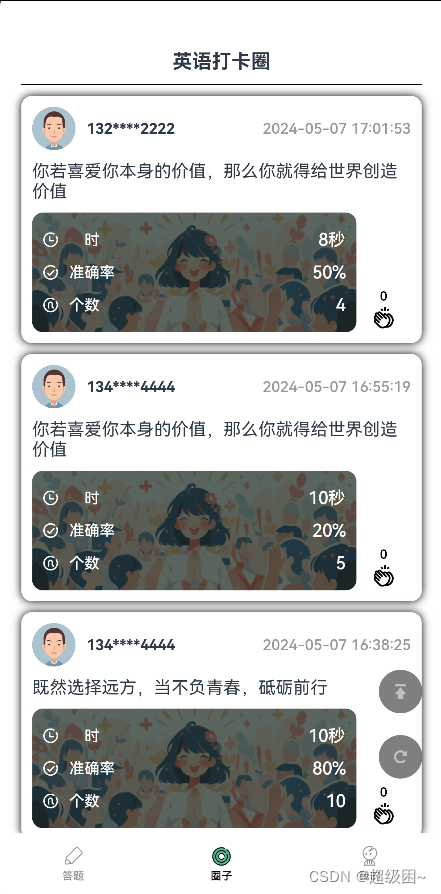
登录后的页面,很明显是一个list列表,每个打卡信息用卡片的形式展现,因此我们要封装一个卡片组件,除此之外,我们可以看到右侧有两个按钮,一个回到顶部和一个刷新按钮。
我们要怎么获取这些信息呢,这就需要用到接口了,通过接口从后端调取数据然后来进行渲染。封装的函数如下:
 async getPostInfoPage(){
    let response = await getAllPost(this.page,10)
    response.data.data.records.forEach(post=>this.postInfoList.push(new PostInfo(post)))
    this.total=response.data.data.total
    this.page++
  }
调用getAllPost接口, 传入的page是页数,10是每页包含多少条打卡信息。获取之后通过foreach转换为PostInfo格式,PostInfo是封装好的,专门用来存储打卡卡片信息的一个数据格式。然后存在postInfoList列表中,用于后续的渲染。
export class PostInfo {
  id: number;
  postText: string;
  rightCount: number;
  answeredCount: number;
  timeUsed: number;
  createTime: string;
  likeCount: number;
  nickname: string;
  avatarUrl: string
  isLike: boolean;
  constructor(post:{id: number, postText: string, rightCount: number, answeredCount: number, timeUsed: number, createTime: string, likeCount: number, nickname: string, avatarUrl: string, isLike: boolean}) {
    this.id = post.id;
    this.postText = post.postText;
    this.rightCount = post.rightCount;
    this.answeredCount = post.answeredCount;
    this.timeUsed = post.timeUsed;
    this.createTime = post.createTime;
    this.likeCount = post.likeCount;
    this.nickname = post.nickname;
    this.avatarUrl = post.avatarUrl;
    this.isLike = post.isLike;
  }
}
卡片组件
通过前面那么多次的讲述,相信大家可以很快看出来这个卡片的结构,分为三部分,上面为Image +text +blank +text,中间就是一个text,下面则是和前面统计页面相同的卡片页面,可以复用我们前面封装的组件信息。值得注意的是在卡片右边还有一个小小的点赞按钮。
点赞
点赞的UI是不难,需要注意的是他的逻辑,第一、一个人只能点赞一次,再点一次会取消点赞,因此我们需要一个boolean变量来记录。第二、多个不同用户点赞的话,他的点赞数应该是累加的,需要我们上传到数据库,要不我们永远只能看到0和1.(代码中的cancelLike和Like就是两个接口,用于记录此用户是否点赞过这个卡片)
Column({ space: 10 }) {
      Row({ space: 10 }) {
        Image(this.post.avatarUrl)
          .height(40)
          .width(40)
          .borderRadius(20)
        Text(this.post.nickname)
          .height(40)
          .fontSize(14)
          .fontWeight(FontWeight.Bold)
        Blank()
        Text(this.post.createTime)
          .height(40)
          .fontSize(14)
          .fontColor('#999999')
          .fontWeight(FontWeight.Medium)
      }.width('100%')

      Text(this.post.postText)
        .width('100%')
      Row() {
        Column() {
          StatItem({
            icon: $r('app.media.ic_timer_white'),
            name: '⽤时',
            fontColor: Color.White
          }) {
            Text(convertMillisecondsToTime(this.post.timeUsed))
              .statTextStyle()
          }

          StatItem({
            icon: $r('app.media.ic_accuracy_white'),
            name: '准确率',
            fontColor: Color.White
          }) {
            Text((this.post.answeredCount === 0 ? 0 : this.post.rightCount / this.post.answeredCount * 100).toFixed(0) + '%')
              .statTextStyle()
          }

          StatItem({
            icon: $r('app.media.ic_count_white'),
            name: '个数',
            fontColor: Color.White
          }) {
            Text(this.post.answeredCount.toString())
              .statTextStyle()
          }
        }
        .padding(10)
        .borderRadius(10)
        .layoutWeight(1)
        .backgroundImage($r('app.media.img_post_bg'))
        .backgroundImageSize(ImageSize.Cover)

        Column() {
          Text(this.post.likeCount.toString())
            .fontSize(12)
            .fontWeight(FontWeight.Medium)
            .fontColor(this.post.isLike ? '#3ECBA1' : '#000000')
          Image(this.post.isLike ? $r('app.media.ic_post_like_selected') : $r('app.media.ic_post_like'))
            .width(26)
            .height(26)
            .onClick(() => {
              //todo:点赞/取消点赞
              if(this.post.isLike){
                this.post.isLike=false
                this.post.likeCount--
                cancelLike(this.post.id)
              }else{
                this.post.isLike=true
                this.post.likeCount++
                like(this.post.id)
              }
            })
        }.width(50)
      }.width('100%')
      .alignItems(VerticalAlign.Bottom)
    }
回到顶部
Column({ space: 20 }) {
        Button({ type: ButtonType.Circle }) {
          Image($r('app.media.ic_top'))
            .height(14)
            .width(14)
        }
        .height(40)
        .width(40)
        .backgroundColor(Color.Black)
        .opacity(0.5)
        .onClick(() => {
          //返回顶部
          this.scroller.scrollToIndex(0)
        })
UI不必多说,就是一个按钮组件中放置了一个Image,主要是回到顶部的逻辑是怎么样的呢。这里我们需要用的一个新的api:scroll可滚动的容器组件,当子组件的布局尺寸超过父组件的尺寸时,内容可以滚动。其中有个scrollToIndex属性,作用是滑动到指定Index,仅适用与grid和list布局,正好我们就是list布局,因此只要我们填入0,他就可以滑动到索引为0的地方,也就是列表的最上方,这样就实现了回到顶部的功能。
刷新
这个逻辑比较简单,将所有信息重置为初始状态,然后重新获取一次列表,就实现了刷新功能。
 async refresh(){
    this.isLoading=true
    this.postInfoList=[]
    this.page=1
    this.total=0
    await this.getPostInfoPage()
    this.isLoading=false
  }
登录页

这个页面中有一个很明显和其他页面不同的地方是,他的左上角有一个返回按钮,因为登录页面一般不是一个长期使用的页面,一般我们最开始使用登录一次,后续就可以使用了。因而只是一个临时界面,一般由打卡圈界面、个人界面或者打卡弹窗跳转而来,所以返回按钮使用到了router路由中的back函数,这样就可以跳转回刚才的界面。
Image($r('app.media.ic_back'))
        .backStyle()
        .alignSelf(ItemAlign.Start)
        .onClick(() => {
          //返回上⼀⻚⾯
          router.back()
        })
输入手机号码和验证码是用到两个TextInput组件,这也是很常用的组件,不过多赘述。这个获取验证码按钮是采用调取后端接口,直接返回一个验证码并显示在TextInput中,登录也是采用了调用后端接口的方式,将手机号和验证码发给后端进行登录。
 Button('获取验证码')
            .buttonStyle(Color.White, Color.Black)
            .onClick(async () => {
              //获取验证码
             let response = await sendCode(this.phone)
              this.code = response.data.data
            })
Button('⽴即登录')
.buttonStyle(Color.Black, Color.White)
.width('100%')
.margin({ top: 50 })
.onClick(async () => {
//登录
let response = await login(this.phone,this.code)
this.token = response.data.data
}
个人页
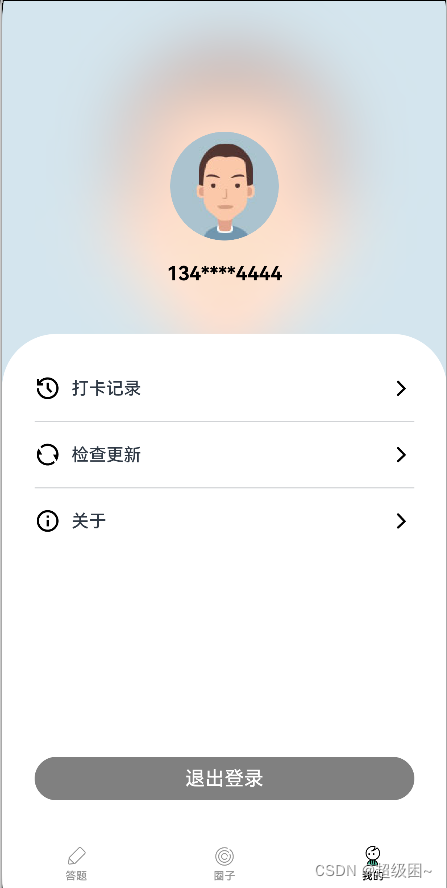
个人页比较简单,退出登录则将信息重置,未登录则点击跳转到登录页面,在这就不讲啦。
调用接口
这个项目中前后端交互的方式是大部分学前端同学比较熟悉的axios,首先你要先下载第三方库axios。Axios 是一个基于 Promise 的 HTTP 客户端,它可以让你更方便地进行 HTTP 请求和处理响应,支持异步操作,并提供了简洁的 API 接口。
首先,我们先创建一个axios实例
export const instance = axios.create({
  baseURL: 'http://192.168.0.103:3000',
  timeout: 2000
})
baseUrl的作用是用变量名代替后面长串的url,因为每个api都是拼接在baseurl之后的,前半部分都是相同的。timeout是超时时长,超过这个时间则视为请求超时,需要检查网络或者url是否正确等。
请求拦截器
// 添加请求拦截器
instance.interceptors.request.use((config: InternalAxiosRequestConfig) => {
  // 通过AppStorage获取token
  const token = AppStorage.Get('token')
  if (token) {
    // 若token存在,则将其添加到请求头
    config.headers['token'] = token
  }
  return config;
}, (error: AxiosError) => {
  //若出现异常,则提示异常信息
  promptAction.showToast({ message: error.message })
  return Promise.reject(error);
});
每个代码块的作用已用注释卸载了代码块之前,这里介绍一下token,我对token的认知是:token是一个用于标识用户身份的代码串。当一个用户注册后,后端就会给其赋予一个token,每次用户请求操作时,就会在请求头中带上token,后端接收后通过解析token,就可以知道是哪个用户进行了操作。
响应拦截器
// 添加响应拦截器
instance.interceptors.response.use((response: AxiosResponse) => {
  // 若服务器返回的是正常数据,不做任何处理
  if (response.data.code === 200) {
    return response
  } else {
    //若服务器返回的是异常数据,则提示异常信息
    promptAction.showToast({ message: response.data.message })
    return Promise.reject(response.data.message)
  }
}, (error: AxiosError) => {
  //若出现异常,则提示异常信息
  promptAction.showToast({ message: error.message })
  return Promise.reject(error);
});
API
下面展示一个get请求和一个post请求
Get
get请求一般用于请求数据
//获取验证码
export function sendCode(phone: string) {
  return instance.get('/word/user/code', { params: { phone: phone } });
}
比如这个获取验证码的请求,我们传递手机号给后端,后端return给我们一个验证码。instance是刚刚我们创建的axios实例。
Post
post请求一般用于发送数据
//登录
export function login(phone: string, code: string) {
  return instance.post('/word/user/login', { phone: phone, code: code });
}
比如这个登录请求,我们需要传递手机号和验证码给后端,后端进行验证,成功则登录,失败则返回错误信息。
不管是post还是get或者其他请求,我们都可以看到一个形如“/word/user/login”的字符串,这个就是拼接到前面实例中的baseUrl之后形成完整的url,使得请求得以成功发送。


 895
895

 被折叠的 条评论
为什么被折叠?
被折叠的 条评论
为什么被折叠?
 到【灌水乐园】发言


