


参考手册
https://dev.mysql.com/doc/refman/8.0/en/verifying-package-integrity.html
安装包下载方式:
官网下载地址:https://dev.mysql.com/downloads/mysql/5.7.html#downloads

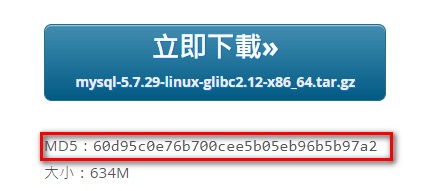
MD5 数值用来检验包的完整性 记得留意 登陆oracle账号 下载 才能看到
用xftp上传到linux
检验包的完整性
]# md5sum mysql-5.7.29-linux-glibc2.12-x86_64.tar.gz
MD5 值与下载页面MD5 一致则包完整
wget 下载方式:
wget https://cdn.mysql.com//Downloads/MySQL-5.7/mysql-5.7.29-linux-glibc2.12-i686.tar.gz
解压:
tar -xvf mysql-5.7.29-linux-glibc2.12-x86_64.tar.gz -C /usr/local
不要安装到其它目录,否则数据库初始化的时候会报cannot change dir的错,不好处理
修改 mysql包名称:
ln -s /usr/local/mysql-5.7.29-linux-glibc2.12-x86_64 /usr/local/mysql
卸载系统自带mysql
[root@hdp265dnsnfs ~]# rpm -qa|grep mariadb
mariadb-libs-5.5.56-2.el7.x86_64
[root@hdp265dnsnfs ~]# rpm -e --nodeps mariadb-libs-5.5.44-2.el7.centos.x86_64 //删除mariadb-libs-5.5.56-2.el7.x86_64查到的
删除etc目录下的my.cnf文件,如果有的话
~]# rm -f /etc/my.cnf
#检查mysql是否存在
查 : rpm -qa | grep mysql
卸载:rpm -e --nodeps     查到的
创建用户组和用户
#检查mysql组和用户是否存在,如无创建
[root@hdp265dnsnfs ~]# cat /etc/group | grep mysql
[root@hdp265dnsnfs ~]# cat /etc/passwd | grep mysql

#创建mysql用户组
[root@hdp265dnsnfs ~]# groupadd mysql
#创建一个用户名为mysql的用户并加入mysql用户组
[root@hdp265dnsnfs ~]# useradd -g mysql mysql
#制定password 为mysql
[root@hdp265dnsnfs ~]# passwd mysql

不建议直接用root初始化mysql,否则连接mysql时会报错:[ERROR] Fatal error: Please read "Security" section of the manual to find out how to run mysqld as root!
为了安全性,给mysql数据库创建专有用户,该用户只能访问mysql目录,不能访问系统其它目录
更改所属的组和用户
[root@hdp265dnsnfs var]# cd /usr/local
[root@hdp265dnsnfs var]# chown -R mysql:mysql mysql/
[root@hdp265dnsnfs var]# chown -R mysql:mysql mysql
[root@hdp265dnsnfs var]# cd mysql/
[root@hdp265dnsnfs mysql]# mkdir  data
[root@hdp265dnsnfs mysql]# chown -R mysql:mysql data
初始化mysql
/usr/local/mysql/bin/mysqld --initialize --user=mysql --basedir=/usr/local/mysql/ --datadir=/usr/local/mysql/data/
若初始化 没异常 最后一行:后为密码 请记住

若报异常:
报错:bin/mysqld: error while loading shared libraries: libaio.so.1: cannot open shared object file: No such file or directory
解决:yum install -y libaio
其余异常 建议之间删除 data 目录下 内容 重新初始化
开启SSL
/usr/local/mysql/bin/mysql_ssl_rsa_setup --datadir=/usr/local/mysql/data/
授权
chown -R mysql:mysql /usr/local/mysql/data/
配置my.cnf
[mysql]
# 设置mysql客户端默认字符集
default-character-set=utf8
[mysqld]
skip-name-resolve
#设置3306端口
port = 3306
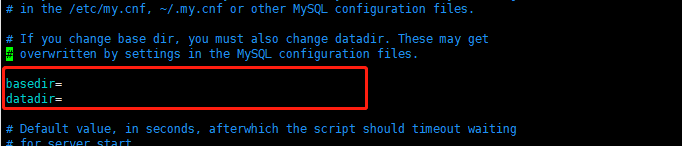
# 设置mysql的安装目录
basedir=/usr/local/mysql
# 设置mysql数据库的数据的存放目录
datadir=/usr/local/mysql/data
# 允许最大连接数
max_connections=200
# 服务端使用的字符集默认为8比特编码的latin1字符集
character-set-server=utf8
# 创建新表时将使用的默认存储引擎
default-storage-engine=INNODB
lower_case_table_names=1
max_allowed_packet=16M
[mysqld_safe]
socket=/tmp/mysql.sock
#是否区分大小写:0-区分大小写,1-不区分大小写
lower_case_table_names = 1
#不开启sql严格模式
sql_mode="STRICT_TRANS_TABLES,NO_ZERO_IN_DATE,NO_ZERO_DATE,ERROR_FOR_DIVISION_BY_ZERO,NO_AUTO_CREATE_USER,NO_ENGINE_SUBSTITUTION"
log-error=/var/log/mysqld.log
pid-file=/usr/local/mysql/data/mysqld.pid
也可以选择简化配置my.cnf(启动报错与配置文件有关系时 就选择简化版):
[mysqld]
character_set_server=utf8
init_connect='SET NAMES utf8'
basedir=/usr/local/mysql
datadir=/usr/local/mysql/data

[mysqld_safe]
socket=/tmp/mysql.sock
#是否区分大小写:0-区分大小写,1-不区分大小写
lower_case_table_names = 1
#不开启sql严格模式
sql_mode="STRICT_TRANS_TABLES,NO_ZERO_IN_DATE,NO_ZERO_DATE,ERROR_FOR_DIVISION_BY_ZERO,NO_AUTO_CREATE_USER,NO_ENGINE_SUBSTITUTION"
log-error=/var/log/mysqld.log
pid-file=/usr/local/mysql/data/iZbp1ifbb3u2rxy6jb7upyZ
启动MySQL
[root@hdp265dnsnfs mysql]# cp ./support-files/mysql.server /etc/init.d/mysqld
修改mysqld

[root@hdp265dnsnfs mysql]# chmod +x /etc/init.d/mysqld
[root@hdp265dnsnfs mysql]# service mysqld start
启动失败:
 mysql]# service mysql restart
MySQL server PID file could not be found![失败]
Starting MySQL...The server quit without updating PID file (/usr/local/mysql/data/rekfan.pid).[失败]
失败原因排查
1.可能是/usr/local/mysql/data/rekfan.pid文件没有写的权限解决方法 :给予权限,
执行 “chmod -R 755 /usr/local/mysql/data”  然后重新启动mysqld!

2.可能进程里已经存在mysql进程解决方法:用命令“ps -ef|grep mysqld”查看是否有mysqld进程,如果有使用“kill -9  进程号”杀死,然后重新启动mysqld!

3.可能是第二次在机器上安装mysql,有残余数据影响了服务的启动。解决方法:去mysql的数据目录/data看看,如果存在mysql-bin.index,就赶快把它删除掉吧,它就是罪魁祸首了。本人就是使用第三条方法解决的 !http://blog.rekfan.com/?p=186

4.mysql在启动时没有指定配置文件时会使用/etc/my.cnf配置文件,请打开这个文件查看在[mysqld]节下有没有指定数据目录(datadir)。解决方法:请在[mysqld]下设置这一行:datadir = /usr/local/mysql/data

5.skip-federated字段问题解决方法:检查一下/etc/my.cnf文件中有没有没被注释掉的skip-federated字段,如果有就立即注释掉吧。

6.错误日志目录不存在解决方法:使用“chown” “chmod”命令赋予mysql所有者及权限

7.selinux惹的祸,如果是centos系统,默认会开启selinux解决方法:关闭它,打开/etc/selinux/config,把SELINUX=enforcing改为SELINUX=disabled后存盘退出重启机器试试。
最后不行 请将data 目录内容全部删除 重新格式化
设置开机启动
[root@hdp265dnsnfs mysql]# chkconfig --level 35 mysqld on
[root@hdp265dnsnfs mysql]# chkconfig --list mysqld

[root@hdp265dnsnfs mysql]# chmod +x /etc/rc.d/init.d/mysqld
[root@hdp265dnsnfs mysql]# chkconfig --add mysqld
[root@hdp265dnsnfs mysql]# chkconfig --list mysqld
[root@hdp265dnsnfs mysql]# systemctl status mysqld
[root@hdp265dnsnfs mysql]# systemctl start mysqld
systemctl status mysqld 查看状态 正常则进行下一步操作

配置全局环境
vim/etc/profile/

export PATH=$PATH:/usr/local/mysql/bin

[root@hdp265dnsnfs mysql]# source /etc/profile
修改密码设置远程登陆
[root@hdp265dnsnfs bin]# mysql -uroot -p
Enter password: 此处需要输入初始密码 建议复制黏贴回车即可
Welcome to the MySQL monitor. Commands end with ; or \g.
Your MySQL connection id is 5
Server version: 5.7.26

Copyright © 2000, 2017, Oracle and/or its affiliates. All rights reserved.

Oracle is a registered trademark of Oracle Corporation and/or its
affiliates. Other names may be trademarks of their respective
owners.

Type ‘help;’ or ‘\h’ for help. Type ‘\c’ to clear the current input statement.

mysql> set PASSWORD = PASSWORD(‘root’); //初始化密码改为root
Query OK, 0 rows affected, 1 warning (0.07 sec)
或者使用下面这种方式修改密码 newpassword(自定义密码)
mysql> alter user 'root'@'localhost' identified by 'newpassword';

mysql> flush privileges;
Query OK, 0 rows affected (0.01 sec)

添加远程访问权限
mysql> use mysql;
mysql> select user,host from user;
mysql> create user 'admin'@'%' identified by 'admin'; //这个设置就是远程登陆mysql的账号与密码
mysql> grant all on *.* to 'admin'@'%' identified by 'admin';
# 8.0.x 版本
mysql> grant all  privileges on *.* to 'admin'@'%';
//这个设置就是远程登陆给这个账号授权
mysql> flush privileges;
mysql> quit;

重启生效

[root@hdp265dnsnfs bin]# systemctl restart mysqld

[root@hdp265dnsnfs bin]# /etc/init.d/mysqld restart
启动命令:
service mysqld start
或
/etc/init.d/mysqld start


 3183
3183


 被折叠的 条评论
为什么被折叠?
被折叠的 条评论
为什么被折叠?
 到【灌水乐园】发言


