


命令模式组合拦截器模式
本文为研究Activiti6源码总结文章。
注:
1、所有类名都加了前缀X,为了方便区别,不和其他类混淆。
2、引入lombok 简化代码。
1、要干什么
情形:有很多具体的命令,比如命令A,命令B,一般的做法是直接调用命令A类的执行方法就好了,得到结果。
但是命令的定义,与执行就耦合了。
现在要做的就是结构,定义的就定义,让专门的类去执行,叫执行者。
2、为什么要组合拦截器
很简单,为了功能拓展。执行者在执行方法时,通过拦截器,可以拓展功能。
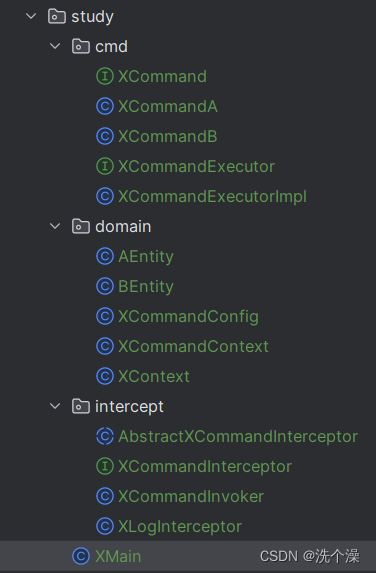
3、代码结构
3.1 命令接口 XCommand
import com.xgzit.workflow.study.domain.XCommandContext;
/**
* 命令接口
* @author xgz
*/
public interface XCommand<T> {
/**
* 命令只有一个方法 执行
* 接收一个参数,命令上下文XCommandContext context,这个参数也是为了拓展功能。不需要可以去除!
* @param context 命令上下文
* **/
T execute(XCommandContext context);
}3.2 命令实现类
XCommandA 类
这个类的目的是 得到 AEntity 对象。
先准备AEntity对象。
import lombok.Data;
import lombok.ToString;
/**
* @author xgz
*/
@Data
@ToString
public class AEntity {
private String name;
}XCommandA 代码:
import com.xgzit.workflow.study.domain.AEntity;
import com.xgzit.workflow.study.domain.XCommandContext;
import lombok.extern.slf4j.Slf4j;
/**
* 具体的命令A
* @author xgz
*/
@Slf4j
public class XCommandA implements XCommand<AEntity> {
public XCommandA(){
System.out.println("创建一条命令A");
// 可以在有参构造函数传入其他的属性进行拓展 用属性接收,然后在 execute 方法使用。
}
/**
* 实现命令接口
* 这个命令就是为了 得到一个AEntity对象。
* 实际业务可以自己定义执行逻辑。
* 接收一个参数,命令上下文XCommandContext context,这个参数也是为了拓展功能。不需要可以去除!
* @param context 命令上下文
**/
@Override
public AEntity execute(XCommandContext context) {
// 执行逻辑
log.info("XCommandA#execute方法 执行... 得到AEntity,设置name为 Aaaaaaaa");
AEntity aEntity = new AEntity();
aEntity.setName("Aaaaaaaa");
return aEntity;
}
}实际上,有这个类就够了,如果不用设计模式。直接new 这个类,调用 execute方法,照样得到 AEntity对象。
但是调用者就是 我们自己new 的 XCommandA
   public static void main(String[] args) {
       // 直接new XCommandA()
     XCommandA commandA = new XCommandA();
       // 直接用对象点的方式调用 照样得到结构
       // 调用对象就是 自己new的对象commandA
     AEntity result = commandA.execute(new XCommandContext());
     System.out.println(result);
   }
同理,我们可以写很多很多命令。比如 XCommandB 命令,为了得到 BEntity
@Data
@ToString
public class BEntity {
private int age;
}XCommandB 类
代码:
import com.xgzit.workflow.study.domain.BEntity;
import com.xgzit.workflow.study.domain.XCommandContext;
import lombok.extern.slf4j.Slf4j;
/**
* @author xgz
*/
@Slf4j
public class XCommandB implements XCommand<BEntity> {
public XCommandB(){
// 传入其他的属性进行拓展
}
/**
* 命令只有一个方法 执行
*
* @param
**/
@Override
public BEntity execute(XCommandContext context) {
// 执行逻辑 得到一个BEntity 设置age属性为 18
BEntity bEntity = new BEntity();
bEntity.setAge(18);
log.info("执行逻辑 得到一个BEntity 设置age属性为 18");
return bEntity;
}
}3.3 命令执行者
为了解耦合,不再直接new 对象去调用了,而是用命令执行者去调用命令
3.1 执行者接口
XCommandExecutor
代码:
XCommandConfig 是命令配置,也是拓展项。这里没有用到。写在这里方便为了提示可以这样拓展。
import com.xgzit.workflow.study.domain.XCommandConfig;
/**
* 命令执行者接口
*
* 接收一个命令,也可接收带参数的命令,并执行命令
* @author xgz
*/
public interface XCommandExecutor {
/**
* @return 返回默认配置
*/
XCommandConfig getDefaultConfig();
/**
* 执行自定义配置的命令
*/
<T> T execute(XCommandConfig config, XCommand<T> command);
/**
* 执行默认配置的命令
*/
<T> T execute(XCommand<T> command);
}3.2 执行者实现类
先看代码:
import com.xgzit.workflow.study.domain.XCommandConfig;
import com.xgzit.workflow.study.intercept.XCommandInterceptor;
/**
* 命令执行者 实现类
* 组合了 默认配置、拦截器(第一个)
*
* 作用是执行 命令的 execute 方法,但是结合了拦截器,就调用拦截器的 execute 方法
* @author xgz
*/
public class XCommandExecutorImpl implements XCommandExecutor{
protected XCommandConfig defaultConfig;
protected XCommandInterceptor first;
public XCommandExecutorImpl(XCommandConfig defaultConfig, XCommandInterceptor first) {
this.defaultConfig = defaultConfig;
this.first = first;
}
/**
*
*/
@Override
public XCommandConfig getDefaultConfig() {
return defaultConfig;
}
/**
* 执行默认配置的命令
*
* @param command
*/
@Override
public <T> T execute(XCommand<T> command) {
return execute(defaultConfig, command);
}
/**
* 执行自定义配置的命令
*
* @param config
* @param command
*/
@Override
public <T> T execute(XCommandConfig config, XCommand<T> command) {
// 执行者 应该执行收到的命令。这里交给命令拦截器去执行
return first.execute(config, command);
}
}组合 拦截器模式的关键就是 命令执行者的实现。
在实现 execute 方法时,不是调用 接收的 command的execute方法,而是调用 拦截器的 execute 方法
即:
 /**
    * 执行自定义配置的命令
    *
    * @param config 配置
    * @param command 接收的 command
    */
   @Override
   public <T> T execute(XCommandConfig config, XCommand<T> command) {
     // 执行者 应该执行收到的命令。这里交给命令拦截器去执行
     return first.execute(config, command);
   }
拦截器从哪里来的?
通过组合,执行者实现类构造函数设置进来的。
protected XCommandConfig defaultConfig;
protected XCommandInterceptor first;
public XCommandExecutorImpl(XCommandConfig defaultConfig, XCommandInterceptor first) {
this.defaultConfig = defaultConfig;
this.first = first;
}3.4 拦截器
XCommandInterceptor 接口
代码:
import com.xgzit.workflow.study.cmd.XCommand;
import com.xgzit.workflow.study.domain.XCommandConfig;
/**
* 命令拦截器
*
* @author xgz
*/
public interface XCommandInterceptor {
<T> T execute(XCommandConfig config, XCommand<T> command);
XCommandInterceptor getNext();
void setNext(XCommandInterceptor next);
}拦截器有3个方法,setNext和getNext是为了形成拦截器链,而execute方法是用来执行 command的
抽象的拦截器实现类
拦截器有3个方法,如果不使用抽象类,那么每个实现类都需要实现这3个方法。如果利用一个抽象类,先实现几个方法。其他的实现类再继承这个抽象类,就只需要实现还没有实现的方法。
这一点很多框架都用。都是 接口-抽象实现类-具体实现类 这样3层模式。
/**
* 抽象的命令拦截器
*
* @author xgz
*/
public abstract class AbstractXCommandInterceptor implements XCommandInterceptor{
/**
*
*/
protected XCommandInterceptor next;
@Override
public XCommandInterceptor getNext() {
return next;
}
@Override
public void setNext(XCommandInterceptor next) {
this.next = next;
}
}具体实现类1
XLogInterceptor
这个实现类没有执行 command方法,但是拓展了 日志记录
import com.xgzit.workflow.study.cmd.XCommand;
import com.xgzit.workflow.study.domain.XCommandConfig;
import lombok.extern.slf4j.Slf4j;
@Slf4j
public class XLogInterceptor extends AbstractXCommandInterceptor{
public <T> T execute(XCommandConfig config, XCommand<T> command) {
log.debug("\n");
log.debug("--- starting {} --------------------------------------------------------", command.getClass().getSimpleName());
try {
return next.execute(config, command);
} finally {
log.debug("--- {} finished --------------------------------------------------------", command.getClass().getSimpleName());
log.debug("\n");
}
}
}具体实现类2
XCommandInvoker
这个实现类就会执行 command 的 execute 方法!
import com.xgzit.workflow.study.cmd.XCommand;
import com.xgzit.workflow.study.domain.XCommandConfig;
import com.xgzit.workflow.study.domain.XCommandContext;
import com.xgzit.workflow.study.domain.XContext;
/**
* 命令执行 拦截器
* @author xgz
*/
public class XCommandInvoker extends AbstractXCommandInterceptor{
@Override
@SuppressWarnings("unchecked")
public <T> T execute(final XCommandConfig config, final XCommand<T> command) {
// 调用工具类 获取 命令上下文
final XCommandContext commandContext = XContext.getCommandContext();
return command.execute(commandContext);
}
@Override
public XCommandInterceptor getNext() {
return null;
}
@Override
public void setNext(XCommandInterceptor next) {
throw new UnsupportedOperationException("CommandInvoker must be the last interceptor in the chain");
}
}还可以自己实现更多的拦截器接口。组装成拦截器链。
3.5 测试
import com.xgzit.workflow.study.cmd.XCommandA;
import com.xgzit.workflow.study.cmd.XCommandB;
import com.xgzit.workflow.study.cmd.XCommandExecutorImpl;
import com.xgzit.workflow.study.domain.AEntity;
import com.xgzit.workflow.study.domain.BEntity;
import com.xgzit.workflow.study.domain.XCommandConfig;
import com.xgzit.workflow.study.intercept.XCommandInvoker;
import com.xgzit.workflow.study.intercept.XLogInterceptor;
public class XMain {
public static void main(String[] args) {
// 命令
XCommandA commandA = new XCommandA();
XCommandB commandB = new XCommandB();
// 命令配置
XCommandConfig defaultConfig = new XCommandConfig();
// 命令拦截器 组装拦截器链
XLogInterceptor first = new XLogInterceptor();
first.setNext(new XCommandInvoker());
// 命令执行者
XCommandExecutor commandExecutor = new XCommandExecutorImpl(defaultConfig, first);
// 执行者执行命令
AEntity aEntity = commandExecutor.execute(commandA);
BEntity bEntity = commandExecutor.execute(commandB);
System.out.println(aEntity);
System.out.println(bEntity);
}
}可以看到,执行命令的对象变成 commandExecutor 了,并且实际调用执行命令接口XCommand的execute方法 是 拦截器 的 execute 方法。
总结一下执行 XCommandA 的过程:
 1、构建命令 XCommandA commandA
 2、传递给命令执行器 XCommandExecutor commandExecutor
 3、命令执行器对象 commandExecutor 执行自己的  execute 方法
 4、commandExecutor#execute 方法内部调用 拦截器的 execute 方法
 5、第一个拦截器的execute方法 return next.execute(config, command);
 6、继续执行下一个拦截器。
 7、最后一个拦截器直接返回结构,而不是返回 next.execute(config, command); 则调用结束。
4、代码结构
拷贝代码时,注意修改import的路径即可。


 929
929


 被折叠的 条评论
为什么被折叠?
被折叠的 条评论
为什么被折叠?
 到【灌水乐园】发言


