沧海图片处理软件介绍:
-
分割功能优化描述:
通过简单的操作,您可以轻松实现图片的分割。首先,点击“添加图片”按钮,随后设置您希望的分割行数和列数。接着,点击“开始处理”,软件便会在您的桌面上自动创建一个名为“分割后的图片”的文件夹,并将分割完成的图片保存在其中。值得一提的是,这一过程中,图片的像素质量得以完整保留,确保您获得与原图一致的清晰度。
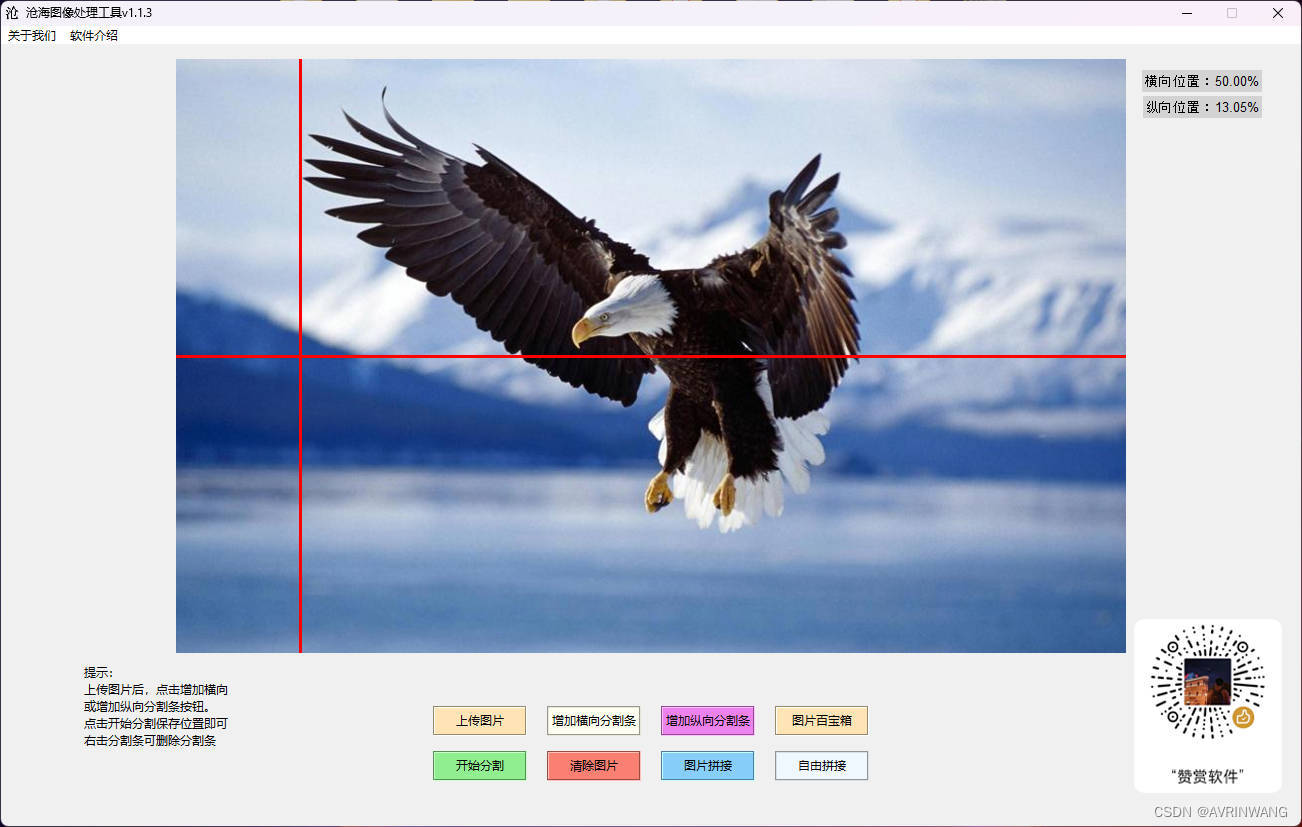
![](https://img-blog.csdnimg.cn/direct/4aed721b2487487f9f0e3af487459347.jpeg)
-
拼图功能优化描述:
使用拼图功能,您可以轻松创建个性化的图片组合。点击“图片拼接”按钮后,将弹出一个窗口供您选择多个图片文件。无论横向还是纵向,我们都支持无限制的文件添加(但请注意,对于特定的布局,如6宫格和9宫格,分别有6张和9张的图片上限)。在选择好拼接方向后,软件默认设置图片间隔为10像素。若您希望实现类似朋友九宫格的效果,建议将间隔调整为5像素左右。当然,其他参数均可根据您的个人需求自由调整。
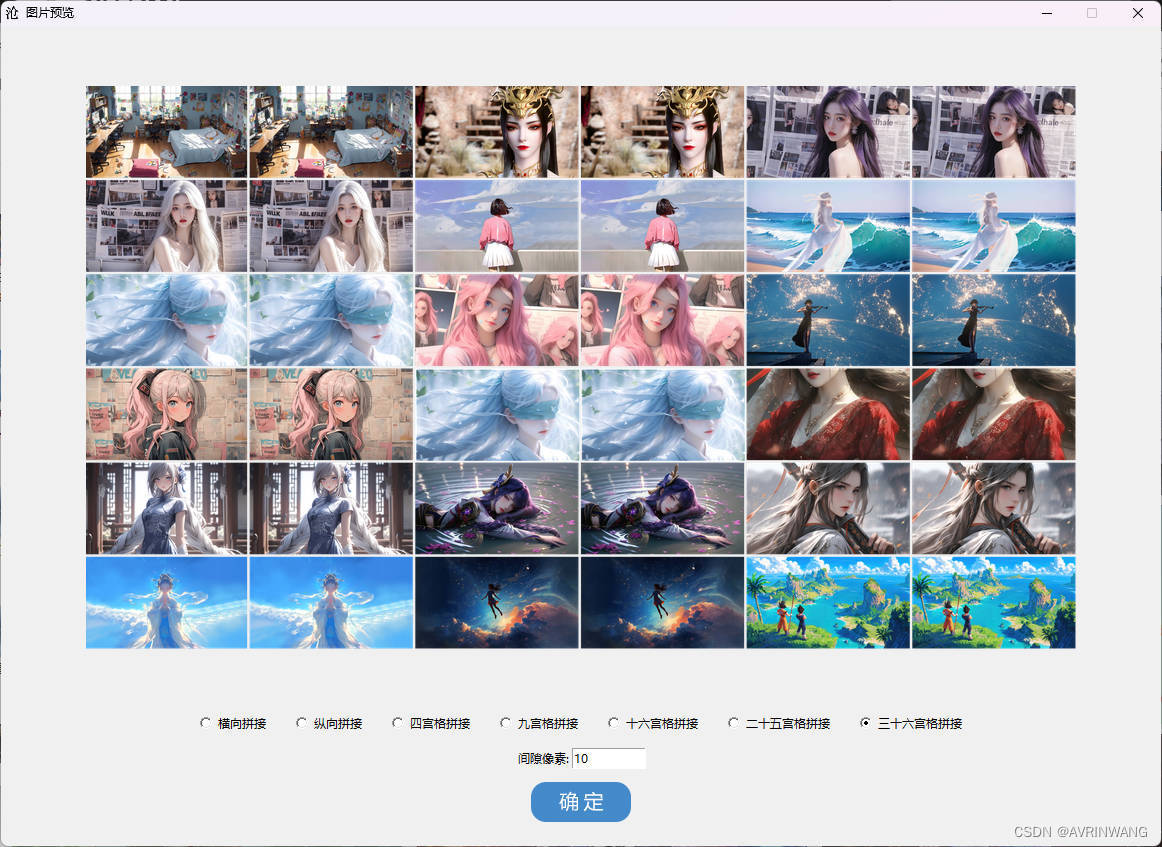
![](https://img-blog.csdnimg.cn/direct/4ceb3d1d0fef4ee496346849f43feee4.jpeg)
-
自由拼接功能介绍
能尽享更为自由灵活的图片编辑之旅。不仅能自定义背景,上传个性化图片或选择多彩画布颜色,还能根据需求调整画布尺寸,系统会智能匹配以保持画面和谐。尽管系统支持超高像素(超过9999像素),但为了提升编辑流畅度和性能,建议用户适度控制。此外,无限制的图片拼接功能更是激发创意的无限可能。无论您是专业设计师还是业余爱好者,这一强大的图片编辑平台都能满足您的各种需求。如遇技术难题,随时联系我们的技术支持。![](https://img-blog.csdnimg.cn/direct/9ef7f0c70e3c469496a68135b2e76357.png)
创作初衷:
在日常工作中,我们经常需要处理图片以适应各种展示需求。最近,我的同事在准备PPT时,需要将一张图片分割成6宫格效果,并且要求中间有一定的间隔。然而,在寻找合适的工具时,我们发现许多现有的软件或在线服务要么收费昂贵,要么功能受限,无法完全满足我们的需求。
因此,为了解决这一实际问题,我决定自主开发一款简单易用的图片分割软件。经过一段时间的努力,这款软件已经能够完美地实现6、9宫格图片分割,并允许用户自定义间隔大小。现在,我已经将这款软件分享出来,希望能够帮助到更多有类似需求的用户。
软件部分代码:
def save_joined_image(self, image_paths, direction, gap):
images = [Image.open(path) for path in image_paths]
if not images:
return
def create_grid_image(grid_cols, grid_rows, max_images):
if len(images) > max_images:
messagebox.showerror("错误", f"{max_images}宫格模式最多只能拼接{max_images}张图片")
return None
max_width = max(image.width for image in images)
max_height = max(image.height for image in images)
new_image = Image.new("RGB", ((max_width + gap) * grid_cols + gap, (max_height + gap) * grid_rows + gap), color="white")
for i, image in enumerate(images):
row, col = divmod(i, grid_cols)
x_offset = col * (max_width + gap) + gap
y_offset = row * (max_height + gap) + gap
new_image.paste(image, (x_offset, y_offset))
return new_image
if direction == "horizontal":
total_width = sum(image.width for image in images) + (len(images) + 1) * gap
max_height = max(image.height for image in images) + 2 * gap
new_image = Image.new("RGB", (total_width, max_height), color="white")
x_offset = gap
for image in images:
new_image.paste(image, (x_offset, gap))
x_offset += image.width + gap
elif direction == "vertical":
max_width = max(image.width for image in images) + 2 * gap
total_height = sum(image.height for image in images) + (len(images) + 1) * gap
new_image = Image.new("RGB", (max_width, total_height), color="white")
y_offset = gap
for image in images:
new_image.paste(image, (gap, y_offset))
y_offset += image.height + gap
else:
grid_sizes = {
"grid_2x2": (2, 2, 4),
"grid_3x3": (3, 3, 9),
"grid_4x4": (4, 4, 16),
"grid_5x5": (5, 5, 25),
"grid_6x6": (6, 6, 36)
}
grid_cols, grid_rows, max_images = grid_sizes[direction]
new_image = create_grid_image(grid_cols, grid_rows, max_images)
百度盘:
链接:https://pan.baidu.com/s/1CVcAIvbHpbLxztXWGVndfw?pwd=fgay
提取码:fgay
https://wwd.lanzouq.com/b0ny7us2f
密码:7y77