


目录
1 WSL2安装CentOS7
Windows11官方WSL2已经支持Ubuntu、Open SUSE、Debian。但是没有centos,所以centos的安装方式略有不同。
1.1 下载安装包
下载安装包:https://github.com/mishamosher/CentOS-WSL?tab=readme-ov-file
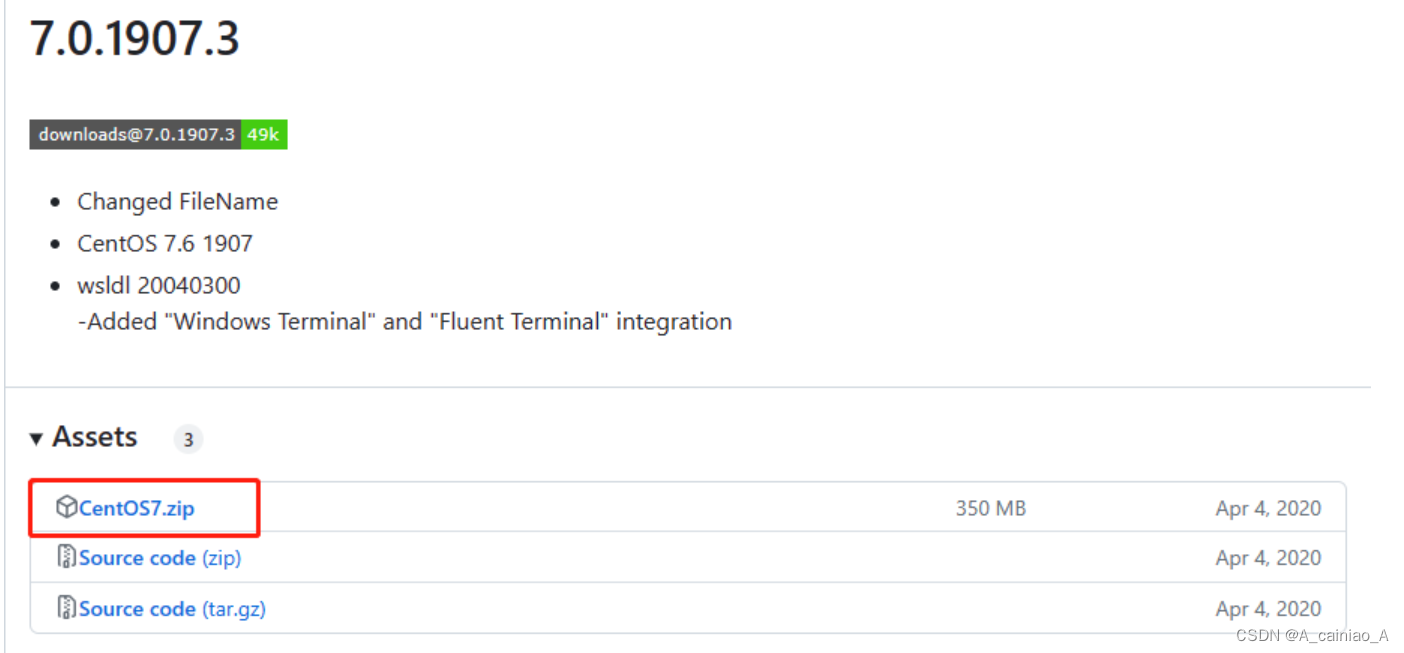
1.2 安装
找到一个空间大点的盘,解压这个zip,然后双击CentOS7.exe

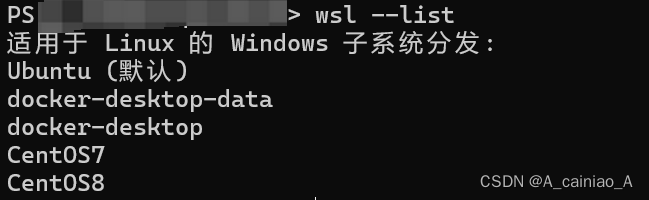
等待一会就安装好了,在powershell中执行
wsl --list
就可以看到安装好的子系统了,我自己装了好几个。
关于wsl的操作可以执行
wsl --help
查看更多参数
1.3 启动CentOS7
在powershell中执行
wsl -d CentOS7
即可启动CentOS7。
2 CentOS7更换国内源
比较常用的有阿里源,清华源等,这是阿里源的地址,其中有更换源的教程。
3 gcc安装,有两种方式
一种使用使用yum,一种是从源码。推荐使用yum,安装速度快。关于yum的介绍
3.1 使用yum安装gcc 9
执行如下命令
yum update -y
yum install -y centos-release-scl centos-release-scl-rh
先不着急安装gcc,因为访问不到mirrorlist.centos.org,会报如下错误。所以先换成国内的地址
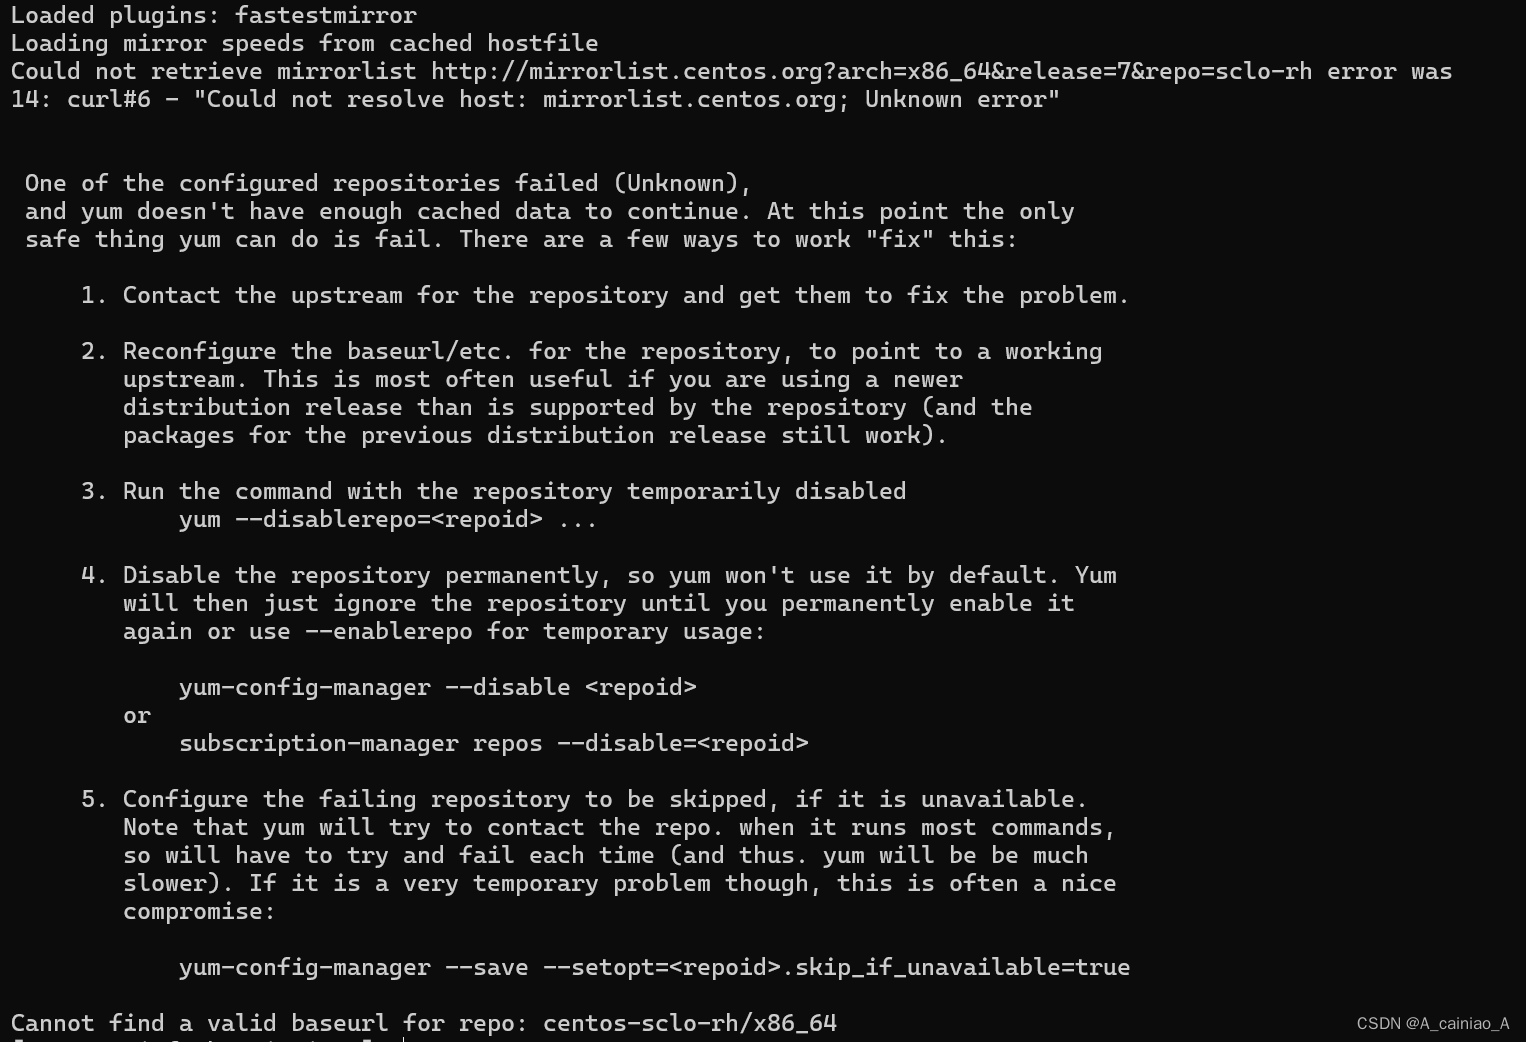
vi /etc/yum.repos.d/CentOS-SCLo-scl.repo
# 用下面地址替换原来的
[centos-sclo-sclo]
name=CentOS-7 - SCLo sclo
baseurl=https://mirrors.aliyun.com/centos/7/sclo/x86_64/sclo/
gpgcheck=0
enabled=1
gpgkey=file:///etc/pki/rpm-gpg/RPM-GPG-KEY-CentOS-SIG-SCLo
替换之后是这样的:
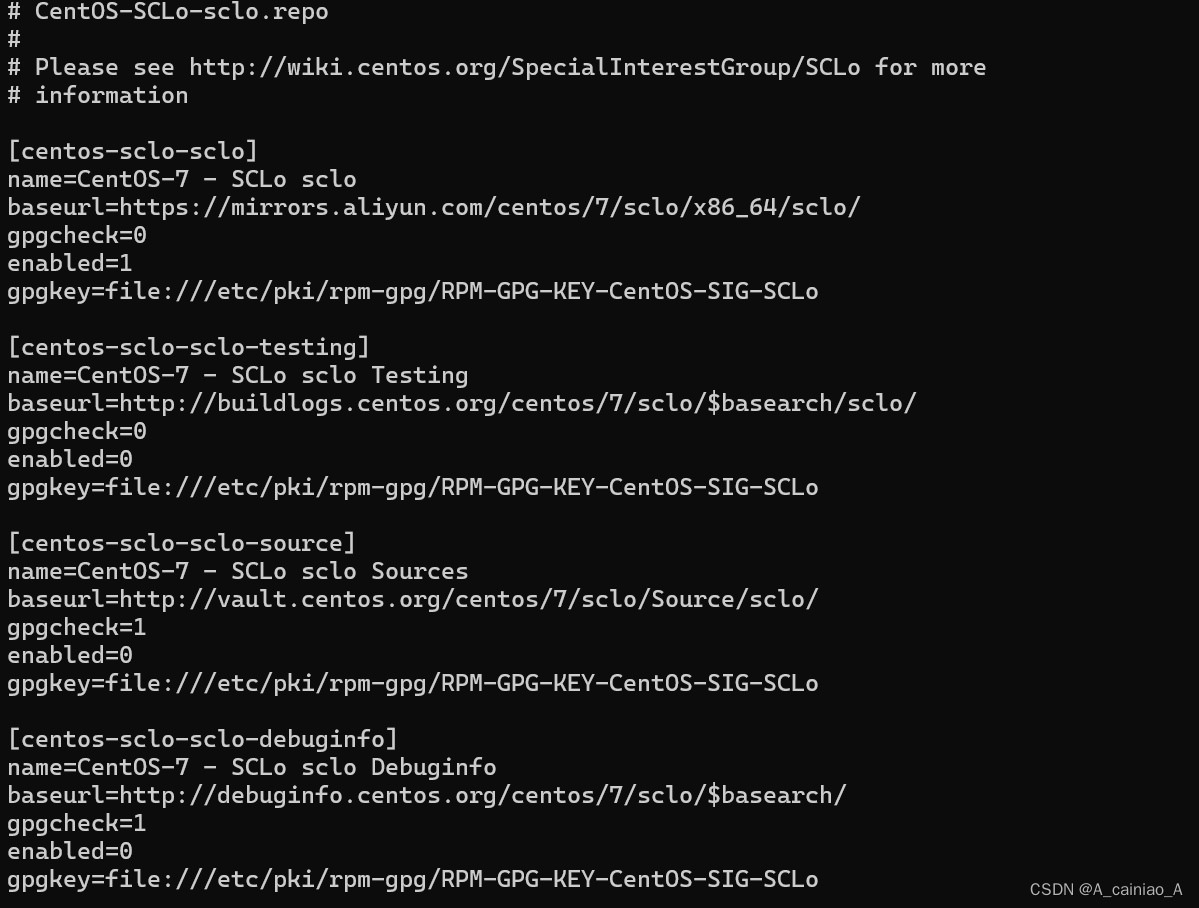
vi /etc/yum.repos.d/CentOS-SCLo-scl-rh.repo
# 和/etc/yum.repos.d/CentOS-SCLo-scl.repo一样的操作
[centos-sclo-rh]
name=CentOS-7 - SCLo rh
baseurl=https://mirrors.aliyun.com/centos/7/sclo/x86_64/rh/
gpgcheck=0
enabled=1
gpgkey=file:///etc/pki/rpm-gpg/RPM-GPG-KEY-CentOS-SIG-SCLo
之后,刷新缓存,安装gcc
yum repolist && yum clean all && yum makecache
yum install -y devtoolset-9
echo "source /opt/rh/devtoolset-9/enable" >> /etc/bashrc
source /etc/bashrc
gcc --version

3.2 从源码安装gcc
进到centos里之后,首先从这里这里你需要的gcc版本,然后解压。类似:
wget https://ftp.gnu.org/gnu/gcc/gcc-9.2.0/gcc-9.2.0.tar.gz
tar xf gcc-9.2.0.tar.gz
如果找不到wget就用yum安装
yum install wget
在下载的同时可以装一下开发工具
yum groupinstall "Development tools" -y
编译安装gcc
cd gcc-9.2.0
# Configure the build, --disable-multilib支持64位,--enable-languages=c,c++仅编译C和C++编译器
./configure --disable-multilib --enable-languages=c,c++

# Build and install
make -j8
sudo make install
3.2.1 卸载源码安装的gcc
gcc没有类似make uninstall的命令,只能手动删除。但是文件比较多,可是使用脚本删除。但是我们不知道要删除哪些文件,可以重新将gcc安装到一个指定临时的路径,之后根据临时路径中的文件,删除默认安装路径(/usr/local/)的文件
rm -rf gcc-9.2.0  # 直接重新configure有些路径还是默认的,所以直接删了,重新解压
tar xf gcc-9.2.0.tar.gz
cd gcc-9.2.0
./configure --disable-multilib --enable-languages=c,c++ --prefix=/home/work/gcc-deps/gcc-9.2.0_install
make -j8
sudo make install
cd /home/work/gcc-deps/gcc-9.2.0_install

# [注意]防止误操作,你可以先执行echo,确认没有问题,再执行rm
find . -type f -print0 | while IFS= read -r -d '' file; do basename="$(basename -- "$file")"; find /usr/local/ -type f -name "$basename" -exec echo {} +; done

find . -type f -print0 | while IFS= read -r -d '' file; do basename="$(basename -- "$file")"; find /usr/local/ -type f -name "$basename" -exec rm {} +; done
4 CMake中使用gcc
安装了gcc 9.2.0,但是cmake中找到的还是gcc 4.8.0,有两种方式设置gcc
- 命令行参数
cmake -D CMAKE_C_COMPILER=/path/to/gcc/bin/gcc -D CMAKE_CXX_COMPILER=/path/to/gcc/bin/g++
- 修改CMakeLists.txt
SET(CMAKE_C_COMPILER "/home/hhb/gcc-9.2.0/bin/gcc")
SET(CMAKE_CXX_COMPILER "/home/hhb/gcc-9.2.0/bin/g++")
project(PROJECT_NAME)  # 注意需要project之前
5 关于linux配置文件
linux下主要有四个配置文件:/etc/profile 、/etc/bashrc 、/root/.bashrc 、/root/.bash_profile。
- /etc/profile 设置的是系统全局环境和登录系统的一些配置,该配置对所有用户生效;
- /etc/bashrc 是shell全局自定义配置文件,主要用于自定义 shell,该配置对所有用户的shell都生效;
- /root/.bashrc 用于单独自定义root用户的 bash,只对root用户的bash生效,如果要使elk用户生效,则需要配置/home/elk/.bashrc文件
- /root/.bash_profile 用于单独自定义root用户的系统环境,只对root用户生效,如果要使elk用户生效,则需要配置/home/elk/.bash_profile。
这四个配置文件的加载顺序如下:
/etc/profile -> /etc/bashrc -> /root/.bashrc -> /root/.bash_profile
6 参考
- https://blog.csdn.net/jiexijihe945/article/details/132067793
- https://www.cnblogs.com/renshengdezheli/p/14131943.html
- https://ioflood.com/blog/install-gcc-command-linux/#:~:text=In%20most%20Linux%20distributions%2C%20the,command%20sudo%20yum%20install%20gcc%20.
- https://stackoverflow.com/questions/19816275/no-acceptable-c-compiler-found-in-path-when-installing-python
- https://wangchujiang.com/linux-command/c/yum.html#:~:text=yum%E5%91%BD%E4%BB%A4%E6%98%AF%E5%9C%A8Fedora,%E5%9C%B0%E4%B8%80%E6%AC%A1%E6%AC%A1%E4%B8%8B%E8%BD%BD%E3%80%81%E5%AE%89%E8%A3%85%E3%80%82
- https://stackoverflow.com/questions/17275348/how-to-specify-new-gcc-path-for-cmake
- https://stackoverflow.com/questions/67090507/how-to-install-gcc-g-9-on-centos-7-docker-centos7
- https://blog.csdn.net/omaidb/article/details/126462159
- https://www.codecomeon.com/posts/245/


 3320
3320

 被折叠的 条评论
为什么被折叠?
被折叠的 条评论
为什么被折叠?
 到【灌水乐园】发言


