


废话不多说,先上一些资料
这里,我的Spring MVC 版本是4.2.RELEASE
swagger maven依赖
<dependency>
			<groupId>com.mangofactory</groupId>
			<artifactId>swagger-springmvc</artifactId>
			<version>1.0.2</version>
		</dependency>
		<dependency>
			<groupId>com.fasterxml.jackson.core</groupId>
			<artifactId>jackson-databind</artifactId>
			<version>2.4.2</version>
		</dependency>
新建一个文件,用做扩展的Swagger配置
import org.springframework.beans.factory.annotation.Autowired;
import org.springframework.context.annotation.Bean;
import org.springframework.context.annotation.ComponentScan;
import org.springframework.context.annotation.Configuration;


import com.mangofactory.swagger.configuration.SpringSwaggerConfig;
import com.mangofactory.swagger.models.dto.ApiInfo;
import com.mangofactory.swagger.plugin.EnableSwagger;
import com.mangofactory.swagger.plugin.SwaggerSpringMvcPlugin;

@Configuration
@EnableSwagger
@ComponentScan(value = { "hy.cmcc.oa.api.controller", "hy.cmcc.oa.web.controller" })   //这个不加,貌似也没关系
public class SwaggerConfig {
    private SpringSwaggerConfig springSwaggerConfig;

    @Autowired
    public void setSpringSwaggerConfig(SpringSwaggerConfig springSwaggerConfig) {
        this.springSwaggerConfig = springSwaggerConfig;
    }

    @Bean
    public SwaggerSpringMvcPlugin customImplementation() {
        return new SwaggerSpringMvcPlugin(this.springSwaggerConfig).apiInfo(apiInfo())
                .includePatterns(".*").apiVersion("0.0.1");
        //.swaggerGroup(PROJECT_NAME);
    }

    private ApiInfo apiInfo() {
        ApiInfo apiInfo = new ApiInfo("开发文档", "API文档", "BaseURL des",
                "contact email", "Project License", "Project API License URL");
        return apiInfo;
    }
}
Spring-mvc.xml 配置扫描上面新建的新建文件路径
<context:component-scan base-package="hy.cmcc.oa.web.base.swagger" />
<mvc:default-servlet-handler />或者<mvc:resources mapping="*.html" location="/" />
接下来就是通过swagger的ui组件对API接口可视化展示,网上的很多教程都是在 GitHub上下载dist文件夹下的资源,但是我发现集成起来没有效果,于是通过了另一种办法,下载 Spring-swagger-ui-2.4.0.jar,解压开
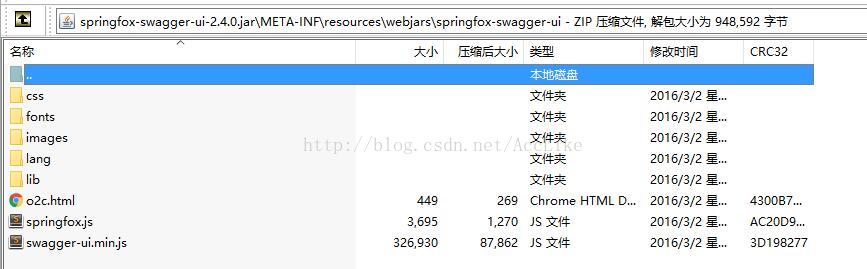
获取这个jar里面的资源文件,在webapp下新建一个swagger文件夹,把这些资源文件丢进去
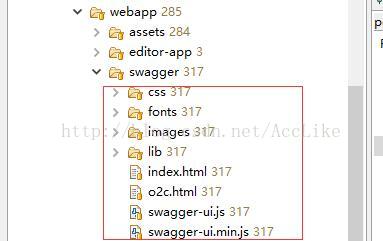
然后编辑index.html
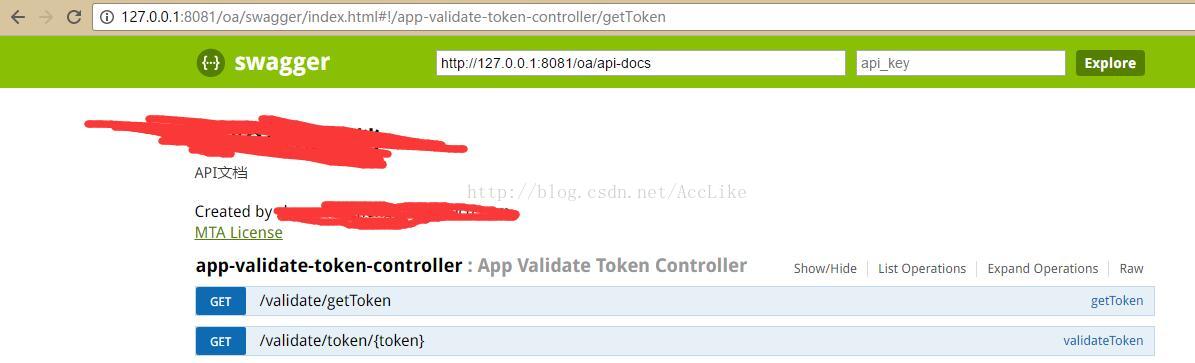
将url替换为自己的api路径
http://ip:port/projectName/api-docs
启动tomcat,访问 http://127.0.0.1:8081/oa/swagger/index.html 即可,注意url的ip要和浏览器的访问ip保持一致,否则Ajax会存在跨域而无法访问的问题,效果如下
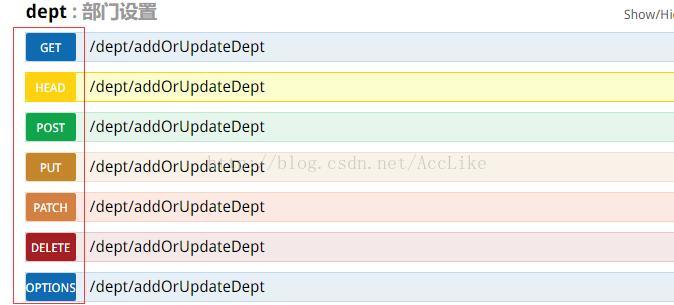
不然可能会出现这种情况
其他的注解使用情况可以参考
Controller注解
@Api(description = "功能模块设置", value = "/moulde", produces = MediaType.APPLICATION_JSON_UTF8_VALUE)Method注解
@ApiOperation(value = "list", notes = "获取结构树数据", httpMethod = "GET", response = JsonResult.class, position = 1)@ApiIgnore声明该Controller或者Method被Swagger忽略
更多的注解使用可以参考官方API


 777
777

 被折叠的 条评论
为什么被折叠?
被折叠的 条评论
为什么被折叠?
 到【灌水乐园】发言


