


Linux安装Nginx步骤
1、官网介绍
http://nginx.org/en/download.html

2、上传安装包
上传到指定目录中 /usr/local/src

3、解压Nginx 压缩文件
[root@localhost src]# tar -xvf nginx-1.19.4.tar.gz

移动安装目录到指定文件
[root@localhost src]# mv nginx-1.19.4.tar.gz software/
4 、关于nginx 目录说明

改完名称之后的结果:

5、安装nginx服务器
说明:在nginx-source的根目录中执行如下命令
需要提前安装nginx的依赖项
[root@localhost src]# yum -y install gcc pcre-devel zlib-devel openssl openssl-devel
5.1)./configure

直接结果:

5.2)在nginx-source的根目录中 执行 make

5.2)在nginx-source的根目录中 执行 make install

6、Nginx工作目录说明
说明:查找工作目录
路径:whereis nginx

7、跳转到Nginx工作目录

7.1)nginx命令,进入nginx/sbin目录中执行
启动命令: ./nginx
重启命令: ./nginx -s reload
关闭命令: ./nginx -s stop

7.2)修改nginx配置文件

需求说明:
1.实现图片反向代理
2.实现tomcat负载均衡实现
具体实现:
修改完成之后,重启nginx服务器。
#配置图片代理服务器  http://image.jt.com:80
	server {
		listen 80;
		server_name image.jt.com;

		location / {
			#root  D:/JT-SOFT/images;
			root  /usr/local/src/images;
		}
	}

	#配置商品后台服务器
	server{
		listen  80;
		server_name manage.jt.com;

		location / {
			#代理真实服务器地址
			#proxy_pass http://localhost:8091;
			#映射到集群
			#proxy_pass  http://jtWindows;
			proxy_pass  http://jtLinux;
		}
	}

	#配置tomcat服务器集群  1.默认 轮询策略  2.权重策略  3.ip_hash策略
	upstream jtWindows {
		#ip_hash;     down 标识宕机     backup 备用机
		#max_fails=1  		表示最大的失败次数
		#fail_timeout=60s	如果访问不通,则在60秒内,不会再次访问故障机
		server 127.0.0.1:8081 max_fails=1 fail_timeout=60s;
		server 127.0.0.1:8082 max_fails=1 fail_timeout=60s;
		server 127.0.0.1:8083 max_fails=1 fail_timeout=60s;
	}

	upstream jtLinux {
		server 192.168.126.129:8081;
		server 192.168.126.129:8082;
		server 192.168.126.129:8083;
	}
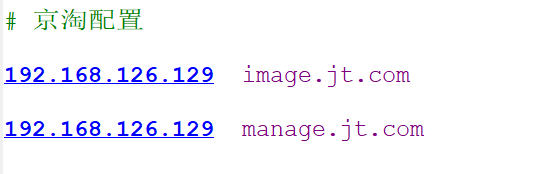
8、修改hosts文件
说明:由于没有购买image/manage.jt.com的域名,所以需要通过hosts文件修改转向。
修改windows中的hosts文件:C:\Windows\System32\drivers\etc\host


 3563
3563


 被折叠的 条评论
为什么被折叠?
被折叠的 条评论
为什么被折叠?
 到【灌水乐园】发言


