


jenkins
下载插件

等所有插件加载完毕之后,进入jenkins_home文件夹,updates目录中,有个default.json文件
将相关的下载仓库改成清华仓库,搜索引擎改成百度。
sed -i 's/http:\/\/updates.jenkins-ci.org\/download/https:\/\/mirrors.tuna.tsinghua.edu.cn\/jenkins/g' /var/lib/jenkins/updates/default.json && sed -i 's/http:\/\/www.google.com/https:\/\/www.baidu.com/g' /var/lib/jenkins/updates/default.json
修改Advanced选项页的Update Site文件为清华的json文件
https://mirrors.tuna.tsinghua.edu.cn/jenkins/updates/update-center.json

重启jenkins
在地址栏端口后边加上 /restart就可以重启
凭证管理(Credentials Binding插件)
下载Credentials Binding插件


例如Username with password凭证,
可以添加gitlab账号,在拉去git代码时,可以从凭证中读取账号密码。
安装Maven
在宿主机上安装jdk,和maven
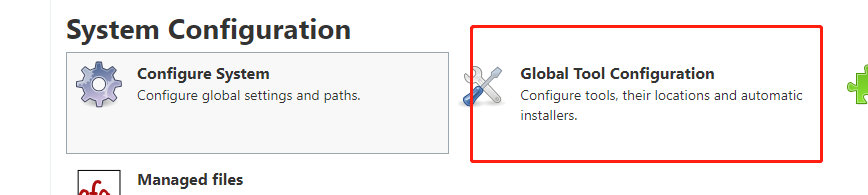
配置全局工具

maven和jdk都填写宿主机上的路径
添加jenkins全局配置Configure System

添加三个jenkins全局环境变量
JAVA_HOME、M2_HOME、PATH+EXTRA
值分别填jdk路径、maven路径、$M2_HOME/bin
之后Jenkins就可以使用maven命令
节点

安装SSH Build Agents插件

使用 Launch agents via SSH 连接服务器
并配置jdk路径

Pipeline
创建Pipeline风格的job

General
写一些基本信息,
主要使用:This project is parameterized(传入参数构建)
例如:Choice Parameter

构建时,Choices里的每一行内容就是一个选项,可以通过Name获得。


Build Triggers(构建触发器)
Build after other projects are built: 其他项目触发构建,填入前置job名称,前置job构建后,当前项目进行构建
Build when a change is pushed to GitLab: gitlab hook触发构建

按需勾选,一般默认就可以。记住这个地址,一会要在gitlab上配置
更改配置

取消身份验证

用管理员账号登录gitlab


填入jenkins上的地址,保存后在下面的Project Hooks可以测试。
Pipeline
Pipeline脚本有两种:声明式和脚本式
脚本式语法结构
node {
    def mvnHome
    stage('Preparation') { // for display purposes
        // Get some code from a GitHub repository
        git 'https://github.com/jglick/simple-maven-project-with-tests.git'
        // Get the Maven tool.
        // ** NOTE: This 'M3' Maven tool must be configured
        // **       in the global configuration.
        mvnHome = tool 'M3'
    }
    stage('Build') {
        // Run the maven build
        withEnv(["MVN_HOME=$mvnHome"]) {
            if (isUnix()) {
                sh '"$MVN_HOME/bin/mvn" -Dmaven.test.failure.ignore clean package'
            } else {
                bat(/"%MVN_HOME%\bin\mvn" -Dmaven.test.failure.ignore clean package/)
            }
        }
    }
    stage('Results') {
        junit '**/target/surefire-reports/TEST-*.xml'
        archiveArtifacts 'target/*.jar'
    }
}
声明式语法
pipeline {
    agent any

    stages {
        stage('Hello') {
            steps {
                echo 'Hello World'
            }
        }
    }
}
声明式没有判断,没有循环。如果需要判断或者循环就要用script{}
声明式语法用pipeline包围,里面包含多个指令或者说明:
-
agent:指明流水线在哪个节点上运行 ,每个stage里可以指定不同的agent
- any: 在任何可用的agent 上执行Pipeline或stage。例如:agent any
- none: 当在pipeline块的顶层使用none时,将不会为整个Pipeline运行分配全局agent ,每个stage部分将需要包含其自己的agent部分。例如:agent none
- label: 使用有label标签的agent,例如:agent { label ‘my-defined-label’ }
- node: agent { node { label ‘labelName’ } },等同于 agent { label ‘labelName’ },但node允许其他选项(如customWorkspace)。
- docker: 动态供应一个docker节点去执行pipeline或stage,docker还可以接受一个args,直接传递给docker run调用。
-
post:脚本执行完成后执行
- always: 运行,无论Pipeline运行的完成状态如何。
- changed: 只有当前Pipeline运行的状态与先前完成的Pipeline的状态不同时,才能运行。
- failure: 仅当当前Pipeline处于“失败”状态时才运行,通常在Web UI中用红色指示表示。
- success: 仅当当前Pipeline具有“成功”状态时才运行,通常在具有蓝色或绿色指示的Web UI中表示。
- unstable: 只有当前Pipeline具有“不稳定”状态,通常由测试失败,代码违例等引起,才能运行。通常在具有黄色指示的Web UI中表示。
- aborted: 只有当前Pipeline处于“中止”状态时,才会运行,通常是由于Pipeline被手动中止。通常在具有灰色指示的Web UI中表示。
-
stages:执行的阶段
-
steps:执行的每个步骤
-
environment:指定一系列键值对,这些键值对将被定义为所有step或stage-specific step的环境变量,具体取决于environment指令在Pipeline中的位置。
-
options:允许在Pipeline本身内配置Pipeline专用选项。
- buildDiscarder: pipeline保持构建的最大个数。例如:options { buildDiscarder(logRotator(numToKeepStr: ‘1’)) }
- disableConcurrentBuilds: 不允许并行执行Pipeline,可用于防止同时访问共享资源等。例如:options { disableConcurrentBuilds() }
- skipDefaultCheckout: 默认跳过来自源代码控制的代码。例如:options { skipDefaultCheckout() }
- skipStagesAfterUnstable: 一旦构建状态进入了“Unstable”状态,就跳过此stage。例如:options { skipStagesAfterUnstable() }
- timeout: 设置Pipeline运行的超时时间。例如:options { timeout(time: 1, unit: ‘HOURS’) }
retry: 失败后,重试整个Pipeline的次数。例如:options { retry(3) } - timestamps: 预定义由Pipeline生成的所有控制台输出时间。例如:options { timestamps() }
-
parameters:参数列表
-
triggers:指令定义了Pipeline自动化触发的方式
- cron: 接受一个cron风格的字符串来定义Pipeline触发的常规间隔,例如: triggers { cron(‘H 4/* 0 0 1-5’) }
- pollSCM: 接受一个cron风格的字符串来定义Jenkins检查SCM源更改的常规间隔。如果存在新的更改,则Pipeline将被重新触发。例如:triggers { pollSCM(‘H 4/* 0 0 1-5’) }
-
tools:通过tools可自动安装工具,并放置环境变量到PATH
-
when:允许Pipeline根据给定的条件确定是否执行该阶段
- branch: 当正在构建的分支与给出的分支模式匹配时执行,例如:when { branch ‘master’ }。请注意,这仅适用于多分支Pipeline。
- environment: 当指定的环境变量设置为给定值时执行,例如: when { environment name: ‘DEPLOY_TO’, value: ‘production’ }
- expression: 当指定的Groovy表达式求值为true时执行,例如: when { expression { return params.DEBUG_BUILD } }
- not: 当嵌套条件为false时执行。必须包含一个条件。例如:when { not { branch ‘master’ } }
- allOf: 当所有嵌套条件都为真时执行。必须至少包含一个条件。例如:when { allOf { branch ‘master’; environment name: ‘DEPLOY_TO’, value: ‘production’ } }
- anyOf: 当至少一个嵌套条件为真时执行。必须至少包含一个条件。例如:when { anyOf { branch ‘master’; branch ‘staging’ } }
-
Parallel:对耗时长,相互不存在依赖的stage可以使用此方式提升运行效率
pipeline {
	//使用多个代理,pipeline顶层agent none,每个stage有各自的agent代理
    agent none
    environment {
        CRDE_EAMIL='xxx@email.com'
    }
    options {
        timeout(time: 1, unit: 'HOURS')
    }
    parameters {
        string(name: 'PERSON', defaultValue: 'Mr Jenkins', description: 'Who should I say hello to?')
		choice(name: 'server', choices: '192.168.1.1,22,vito,vito111', description: '测试服务器列表选择(IP,SshPort,Name,Passwd)')
		booleanParam(name: 'isCommit', description: '是否邮件通知部署人员', defaultValue: false)
    }
   triggers {
        cron('H 4/* 0 0 1-5')
    }
    tools {
        //工具名称必须在Jenkins 管理Jenkins → 全局工具配置中预配置。
        maven 'apache-maven-3.0.1'
    }
    stages {
        stage('Example Build') {
            agent { docker 'maven:3-alpine' }
            steps {
                echo 'Hello, Maven'
                sh 'mvn --version'
            }
        }

        stage('Example') {
            steps {
                echo "Hello ${params.PERSON}"
				script {
					def split = ${params.server.split(",")}
					serverIP = split[0]
					sshport = split[1]
					username = split[2]
					password = split[3]
					echo "serverIP:${serverIP},sshport:${sshport},username:${username},password:${password}"
				}
            }
        }

        stage('Example Deploy') {
            when {
                allOf {
                    branch 'production'
                    environment name: 'DEPLOY_TO', value: 'production'
                }
            }
            steps {
                echo 'Deploying'
                //可以将ls命令得到的多行内容转为数组
                def temport=sh(returnStdout: true, script: 'ls').split("\n").toList()
            }
        }

        stage('Parallel Stage') {
            when {
                branch 'master'
            }
            parallel {
                stage('Branch A') {
                    agent {
                        label "for-branch-a"
                    }
                    steps {
                        echo "On Branch A"
                    }
                }
                stage('Branch B') {
                    agent {
                        label "for-branch-b"
                    }
                    steps {
                        echo "On Branch B"
                    }
                }
            }
        }

    }

    post {
        success {
            script {
                //使用wrap([$class: 'BuildUser'])需要安装user build vars plugin插件
		// JOB_NAME,BUILD_NUMBER,BUILD_USER,env.BUILD_URL是jenkins pipeline内部变量
                wrap([$class: 'BuildUser']) {
                    mail to: "${CRDE_EAMIL}",
                            subject: "pipeline '${JOB_NAME}' (${BUILD_NUMBER}) result",
                            body: "${BUILD_USER}'s pipeline '${JOB_NAME}' (${BUILD_NUMBER}) run success\n请及时前往${env.BUILD_URL}进行查看."
                }
            }
        }
        failure {
            script {
                wrap([$class: 'BuildUser']) {
                    mail to: "${CRDE_EAMIL}",
                            subject: "pipeline '${JOB_NAME}' (${BUILD_NUMBER}) result",
                            body: "${BUILD_USER}'s pipeline '${JOB_NAME}' (${BUILD_NUMBER}) run failure\n请及时前往${env.BUILD_URL}进行查看."
                }
            }
        }
        unstable {
            script {
                wrap([$class: 'BuildUser']) {
                    mail to: "${CRDE_EAMIL}",
                            subject: "pipeline '${JOB_NAME}' (${BUILD_NUMBER}) result",
                            body: "${BUILD_USER}'s pipeline '${JOB_NAME}' (${BUILD_NUMBER}) run unstable\n请及时前往${env.BUILD_URL}进行查看."
                }
            }
        }
    }
}
发送post请求
def remote = [:]
    remote.name = 'dev'
    remote.host = '123.60.22.227'
    remote.user = 'root'
    remote.password = 'qaz!1234'
    remote.allowAnyHosts = true
    remote.branch = 'master'
    remote.codebase = '代码名称'
    remote.projectId = '项目id'
    remote.projectName = '项目名称'
    remote.codebase = '代码名称'
    remote.tactic = '发布策略'
    remote.product = '制品名称'
    remote.productVersion = '制品版本'
    remote.appName = '应用名称'
    remote.appVersion = '应用版本'
    remote.environment = '部署环境'


pipeline {
    agent any

    tools{
        git 'Default'
        maven 'maven-3.6.3'
    }

    stages {
        stage('代码扫描') {
            steps {
                echo '代码扫描'
                //sh label: '', script: 'sleep 1m'
            }
        }
    }
    post {
        failure {
            echo 'Post Stage'

          script {
                def toJson = {
                  input ->
                  groovy.json.JsonOutput.toJson(input)
              }
              def body = [
                  projectId: remote.projectId,
                  projectName: remote.projectName,
                  tactic: remote.tactic,
                  codebase: remote.codebase,
                  branch: remote.branch,
                  product: remote.product,
                  productVersion: remote.productVersion,
                  appName: remote.appName,
                  appVersion: remote.appVersion,
                  status: false,
                  environment: remote.environment
              ]
              def unregister_url= "http://localhost:9999/devops/deploy"
              response = httpRequest consoleLogResponseBody: true, contentType: 'APPLICATION_JSON', httpMode: 'POST', requestBody: toJson(body), url: unregister_url, validResponseCodes: '200'
            }

        }

        success {
            echo 'Post Stage'

          script {
                def toJson = {
                  input ->
                  groovy.json.JsonOutput.toJson(input)
              }
              def body = [
                  projectId: remote.projectId,
                  projectName: remote.projectName,
                  tactic: remote.tactic,
                  codebase: remote.codebase,
                  branch: remote.branch,
                  product: remote.product,
                  productVersion: remote.productVersion,
                  appName: remote.appName,
                  appVersion: remote.appVersion,
                  status: true,
                  environment: remote.environment
              ]
              def unregister_url= "http://localhost:9999/jenkins/deploy"
              response = httpRequest consoleLogResponseBody: true, contentType: 'APPLICATION_JSON', httpMode: 'POST', requestBody: toJson(body), url: unregister_url, validResponseCodes: '200'
            }
        }

    }
}
API
        <dependency>
            <groupId>com.offbytwo.jenkins</groupId>
            <artifactId>jenkins-client</artifactId>
            <version>0.3.8</version>
        </dependency>
创建jenkins连接
	//接口路径都可以在jenkins上操作,通过控制台查询
    public JenkinsHttpClient getClient(String url, String username, String password) {
        JenkinsHttpClient jenkinsHttpClient = null;
        try {
            jenkinsHttpClient = new JenkinsHttpClient(new URI(url), username, password);
        } catch (URISyntaxException e) {
            e.printStackTrace();
        }
        return jenkinsHttpClient;
    }
	//JenkinsServer 有一些内置的方法
    public JenkinsServer getJenkinsServer(String host, String port, String uri, String username, String password) {
        JenkinsServer jenkinsServer;
        try {
            String url = UriComponentsBuilder.fromHttpUrl(uri)
                    .buildAndExpand(host, port).toUriString();
            jenkinsServer = new JenkinsServer(new URI(url), username, password);

        } catch (URISyntaxException e) {
            e.printStackTrace();
            throw new BusinessException(e.getMessage());
        }
        return jenkinsServer;
    }
# 获取配置xml信息
get http://<Jenkins-Server-Address>/job/<Job-Name>/config.xml

# 获取最近的buildNumber
get http://<Jenkins-Server-Address>/job/<Job-Name>/lastBuild/buildNumber

# 获取最近稳定的buildNumber
get http://<Jenkins-Server-Address>/job/<Job-Name>/lastStableBuild/buildNumber

# 获取最近成功的buildNumber
get http://<Jenkins-Server-Address>/job/<Job-Name>/lastSuccessfulBuild/buildNumber

# 获取最近失败的buildNumber
get http://<Jenkins-Server-Address>/job/<Job-Name>/lastFailedBuild/buildNumber

# 无参构建
post http://<Jenkins-Server-Address>/job/<Job-Name>/build

# 有参构建
post http://<Jenkins-Server-Address>/job/<Job-Name>/buildWithParameters?name=zhangsan&age=23

# 禁用
post http://<Jenkins-Server-Address>/job/<Job-Name>/disable

# 启用
post http://<Jenkins-Server-Address>/job/<Job-Name>/enable

# 删除
post http://<Jenkins-Server-Address>/job/<Job-Name>/doDelete
Publish Over SSH(远程发送Shell命令)
安装Publish Over SSH插件
添加配置

Path to key:jenkins服务器的私钥文件地址。例如/root/.ssh/id_rsa
SSH Servers填写远程服务器信息
Hostname:远程服务器地址
Username:生成密钥的账号
生成脚本
sshPublisher: Send build artifacts over SSH


 6217
6217


 被折叠的 条评论
为什么被折叠?
被折叠的 条评论
为什么被折叠?
 到【灌水乐园】发言


