


YOLOv3,v5和v8都由Ultralytics这家创业公司开发的

https://github.com/ultralytics/yolov5
环境配置
git clone https://github.com/ultralytics/yolov5.git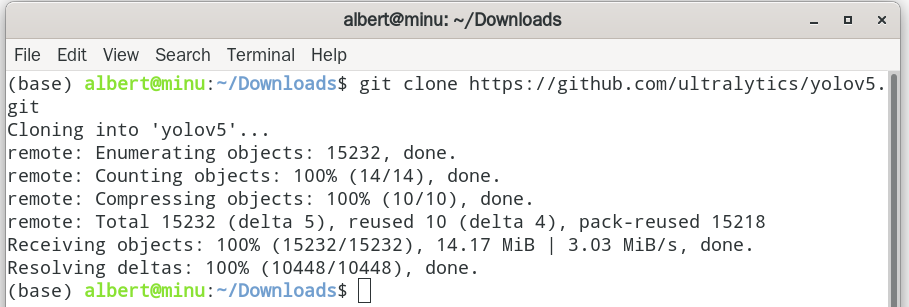
作者要求python=3.6(我用的3.8也能跑通)torch1.7.0
pip install -r requirements_my_version.txtrequirements_my_version.txt里面写了这些
matplotlib==3.2.2
numpy==1.18.5
opencv-python==4.1.2.30 # 注意这个地方官方提供的是opencv-python>=4.1.2,但是安装的时候告诉你没有这个版本要你从里面选,我选了30,后面可以运行
Pillow==7.1.2
PyYAML==5.3.1
requests==2.23.0
scipy==1.4.1
torch==1.7.0
torchvision==0.8.1
tqdm==4.41.0

# plotting ------------------------------------

pandas==1.1.4
seaborn==0.11.0

# deep_sort -----------------------------------

easydict

# torchreid

Cython
h5py
six
tb-nightly
future
yacs
gdown
flake8
yapf
isort==4.3.21
imageio
运行
2.1 shell命令行调用
这里是调用detect.py来实现识别
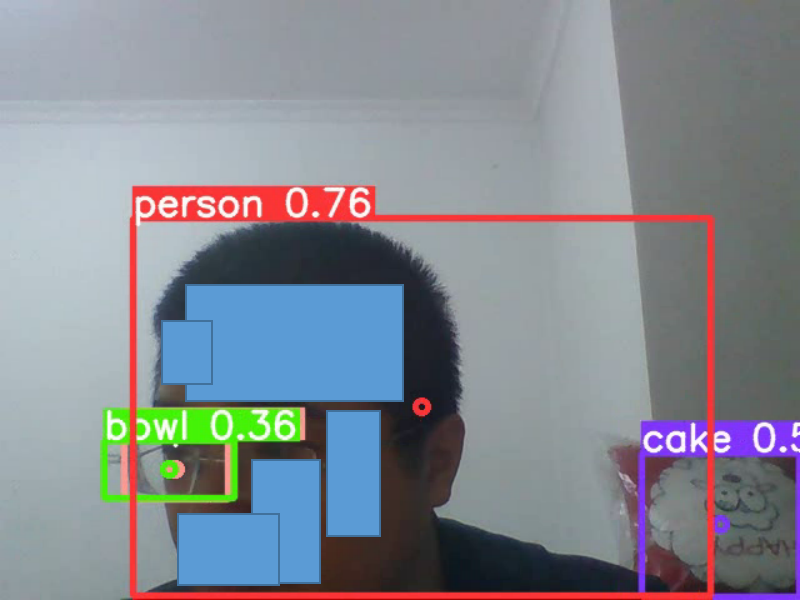
本机摄像头
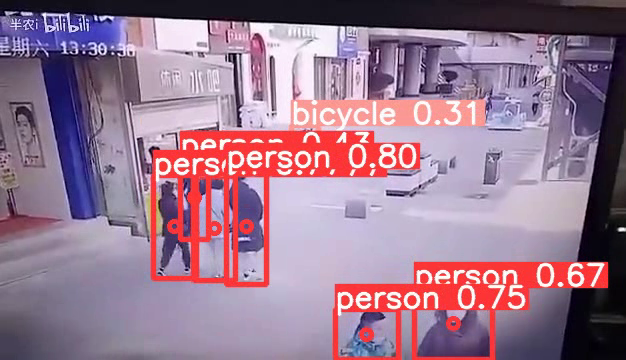
python detect.py --source 0# 摄像头的识别过程会被录像下来,并将录像中的人和手机识别出来,并将录像保存在这个文件夹里,每次运行都会在./runs/detect/exp4 文件名叫0.mp4 (4表示是序号为4,下一次运行就是exp5,以此类推)
我截了一张识别后输出的视频里面的图,可以识别出来。(为了保护个人隐私,所以对人脸进行了遮挡)。画面左边的,镜头中的人的一片眼镜片,这个拍摄视角,形状上和一个小碗的形状类似,所以被误识别成了碗bowl。画面右边的那个红白色的抱枕,被误识别成了蛋糕cake.
单张图片
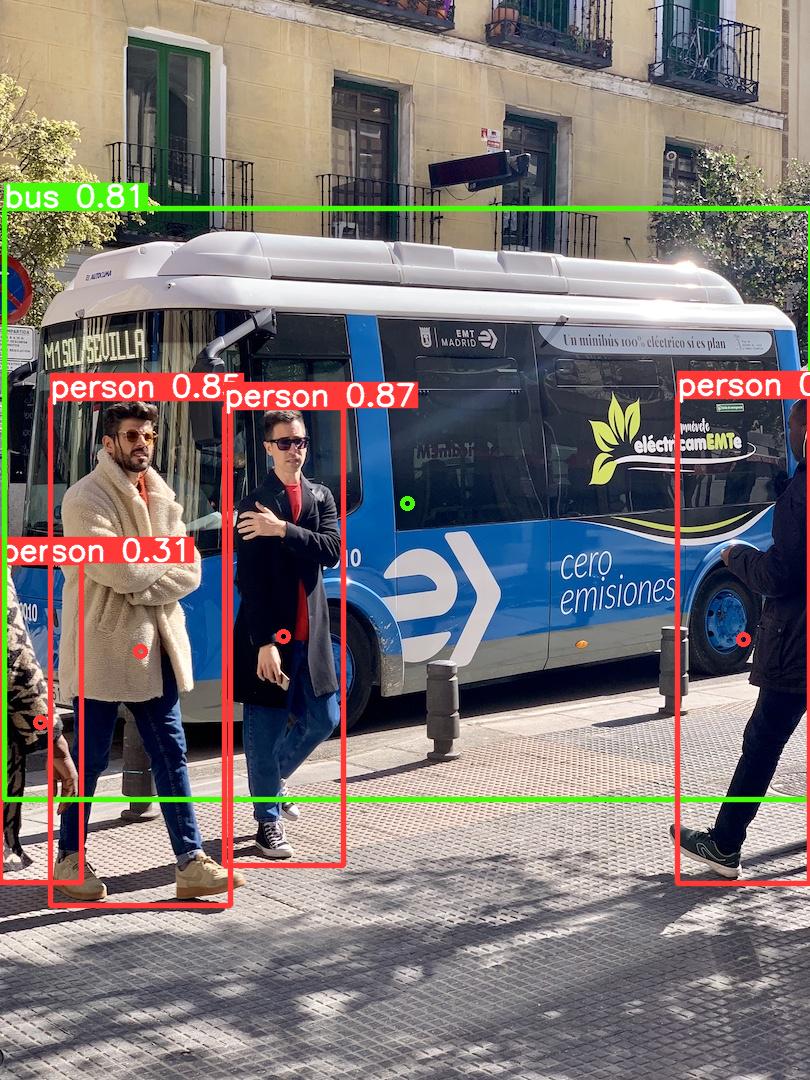
python detect.py --source ./data/images/bus.jpg
    # 图片中人和巴士都被识别出来了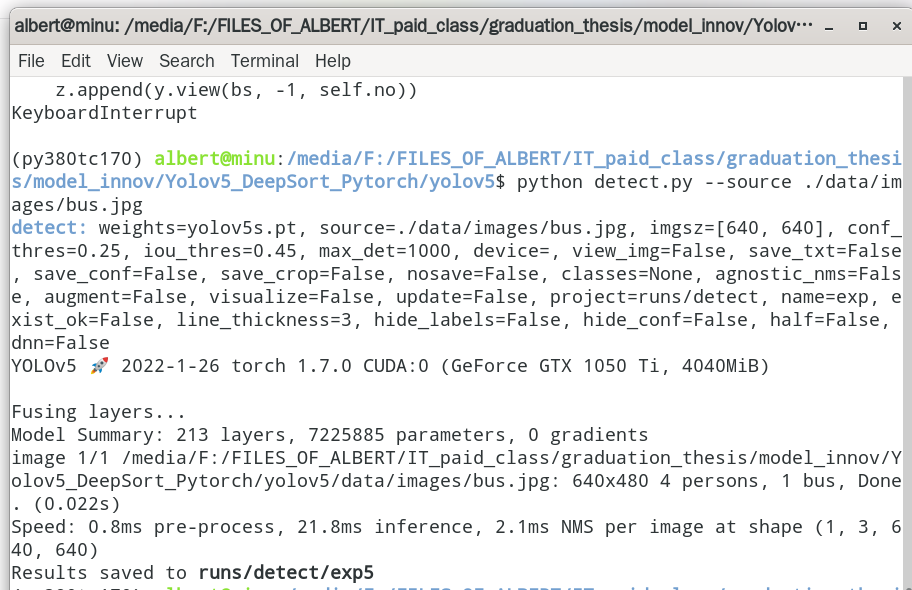
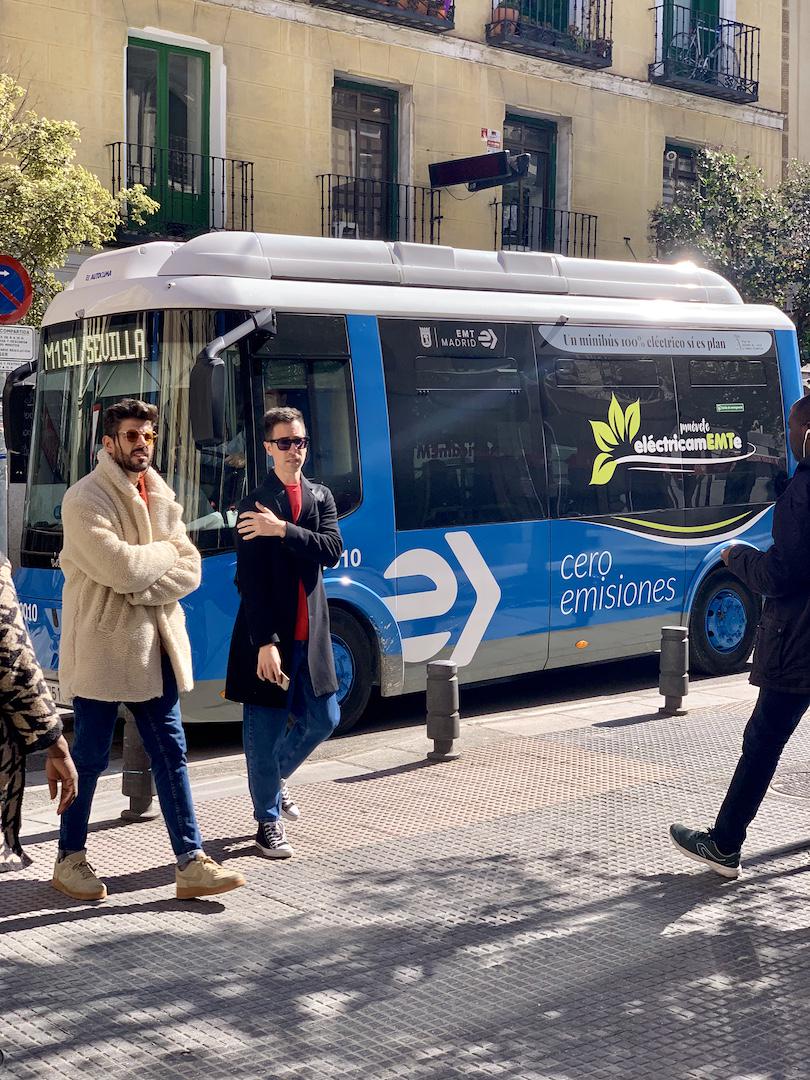
原图长这样
识别以后的图保存在./runs/detect/exp5/bus.jpg
视频
python detect.py --source ./data/video/dandong.mp4
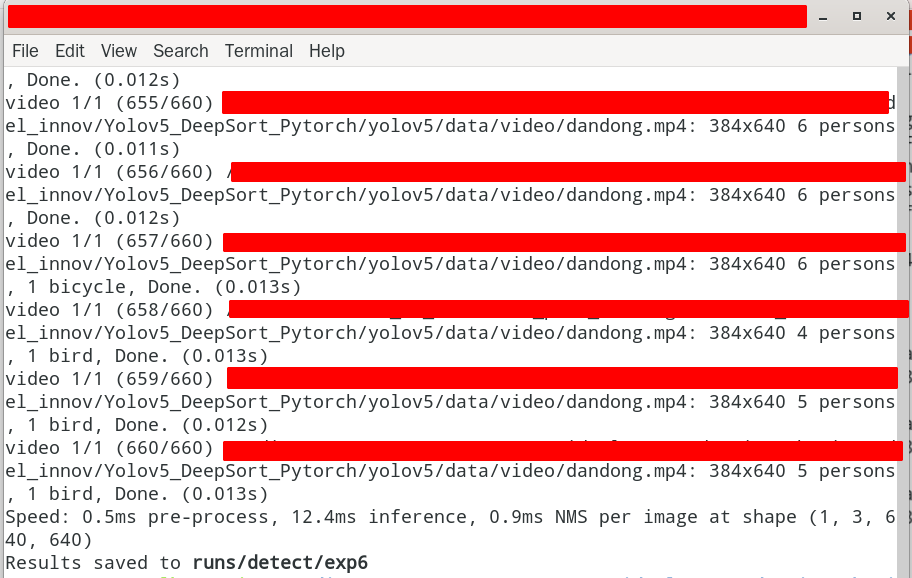
识别出来视频中是这样。人也能识别出来,自行车也识别出来了。
2.2代码内调用YOLOv5实现
你开一个文件叫test.py
touch test.py在test.py里面写上这一段,然后运行
# 导入模型文件,对指定图片进行识别
import torch

# Model
model = torch.hub.load('ultralytics/yolov5', 'yolov5s')  # or yolov5m, yolov5l, yolov5x, custom

# Images
img = 'https://ultralytics.com/images/zidane.jpg'  # or file, Path, PIL, OpenCV, numpy, list

# Inference
results = model(img)

# Results
results.print()  # or .show(), .save(), .crop(), .pandas(), etc.
results.show()
results.save()
results.crop()
我将上面这段代码归纳成了三个步骤,我现在和你逐一讲清楚每个步骤在干什么
-S1-下载并加载模型
model = torch.hub.load('ultralytics/yolov5', 'yolov5s') # or yolov5m, yolov5l, yolov5x, custom
你执行这条代码的背后,做了这两小步
# -S1.1-下载代码和模型文件
# 第一个参数“ultralytics/yolov5”,表示把GitHub上项目名为“ultralytics/yolov5”的代码文件夹下载到这个位置“/home/albert/.cache/torch/hub”。后面读取数据、调用模型的代码存在这个位置“/home/albert/.cache/torch/hub/ultralytics_yolov5_master”
去哪里可以找到“ultralytics/yolov5”这个repo的项目名呢?就在这个Github repository网站左上角显示的那个行字,“ultralytics/yolov5”,就是项目名。
第一次运行下载完这个模型代码后,每一次就会去这个这个位置去读取第一次下载的这个代码,不会重复下载的
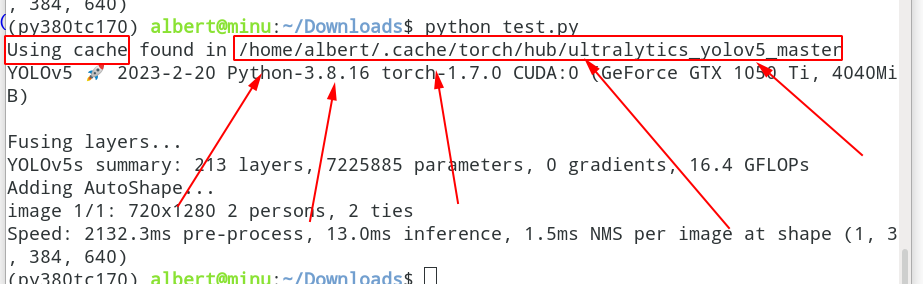
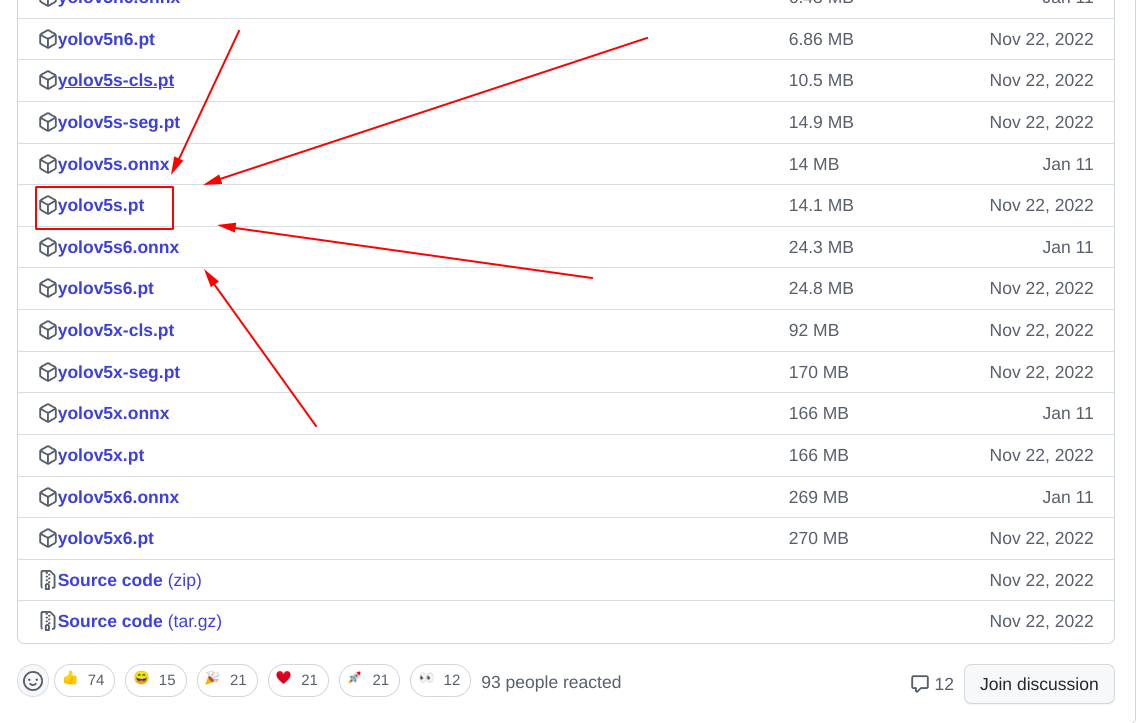
# 第二个参数“yolov5s”,表示从这个repo的GitHub网址 加上 /releases/(此处为https://github.com/ultralytics/yolov5/releases/)中Asset的众多模型中寻找“yolov5s.pt”文件下载到和本代码文件所在文件夹里。
注意,写yolov5s,不要加.pt,否则会报错,无法运行。
yolov5s.pt的下载地址就在这个网站(https://github.com/ultralytics/yolov5/releases/)Asset一栏中可以找到
# -S1.2-加载代码和模型文件
上面解释两个参数的过程里,我们把代码和模型都下载下来了,现在把这两个东西传入torch.hub.load()这个函数。此时代码和模型都有了。现在只缺数据了,下一步就是把数据传进去。
-S2- 将数据输入代码和模型,完成识别
img = ' https://ultralytics.com/images/zidane.jpg' # or file, Path, PIL, OpenCV, numpy, list
results = model(img)
其实把图片输入进模型里面,识别的结果已经出炉了。下面一步,你可以根据你的需要,用各种方式调用这个识别的结果。
-S3-用各种方式调用这个识别的结果
results.print()
调用这句,会在terminal中打印出来,有几个人,几个什么东西(这里是领带领带)
image 1/1: 720x1280 2 persons, 2 ties

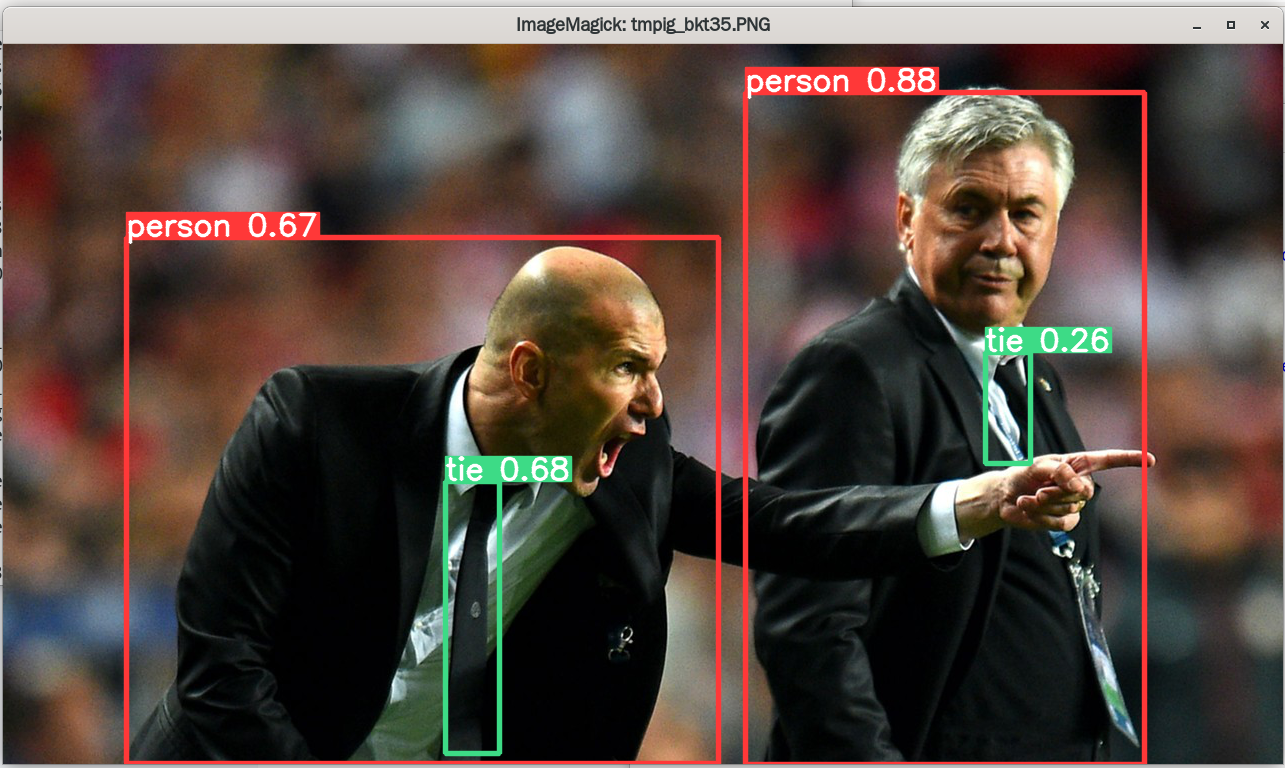
results.show()
会在代码运行结束后吗,会弹出一个像下面这样的窗口,给你显示识别的结果(打长方形框,写label,写上置信度)
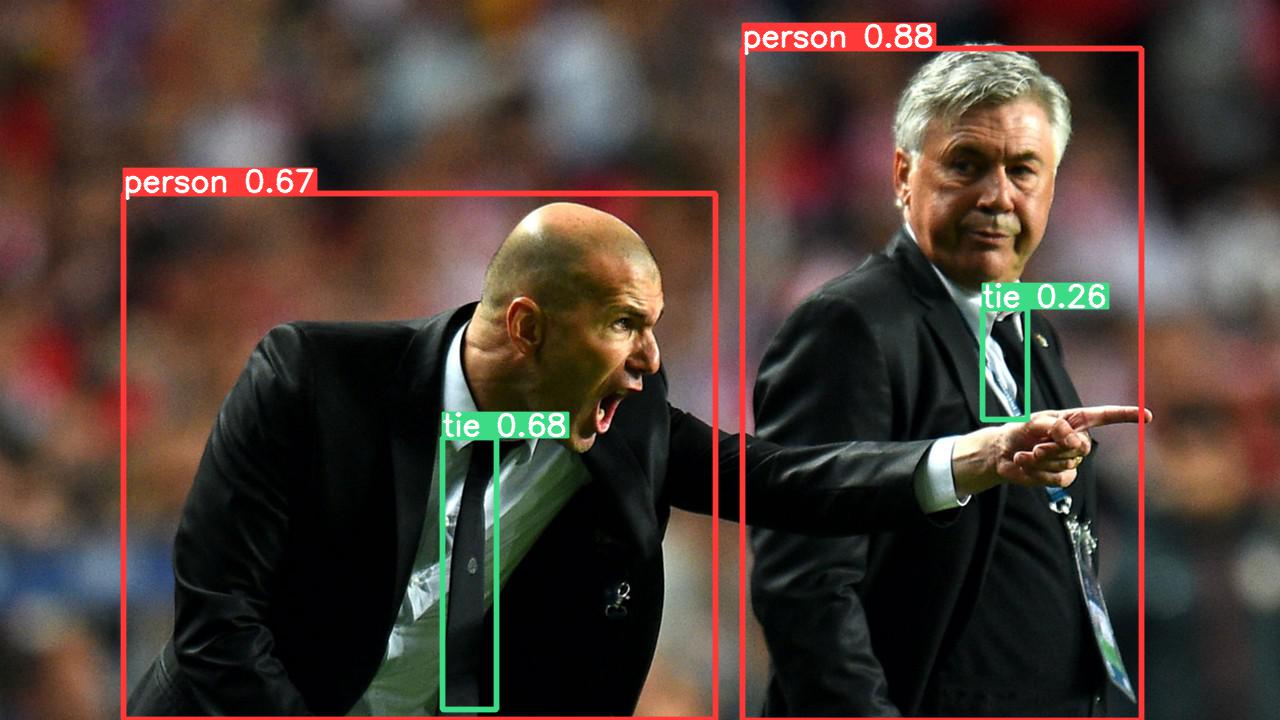
results.save()
你运行后,会在./runs/detect/生成一个exp的文件夹,里面只有一张图(如下),图的内容就是识别后的结果。图片的名字和输入图片的名字是一样的
results.crop()
仅仅调用这一句,就可以在生成这样一个文件夹“./runs/detect/exp”。文件夹里面有整张图的识别结果,和一个叫crop的文件夹,里面识别出的每个object单独切割出来变成一个图片。
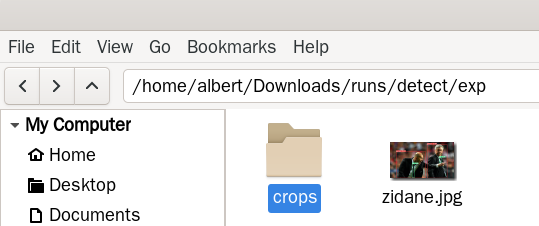
打开crops里面是所有的object的文件夹,像这张图里面只有两个object,一个是person,一个是tie
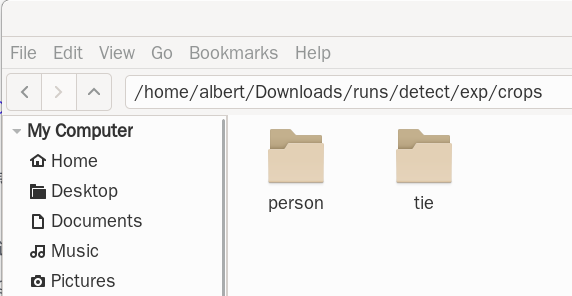
person 和tie打开里面就是每一个object单独切开生成的图片
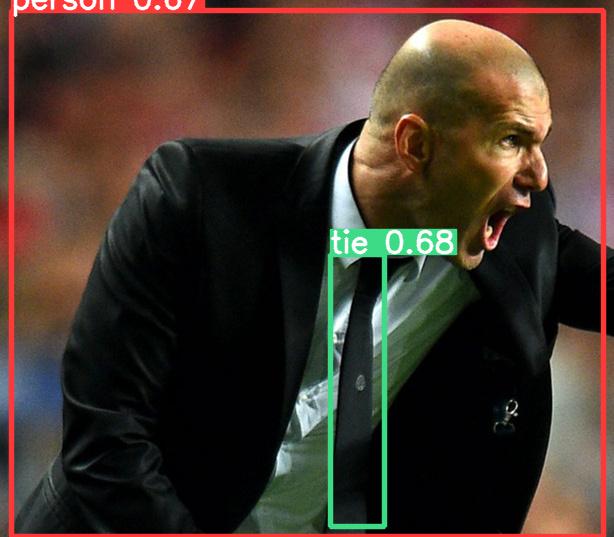
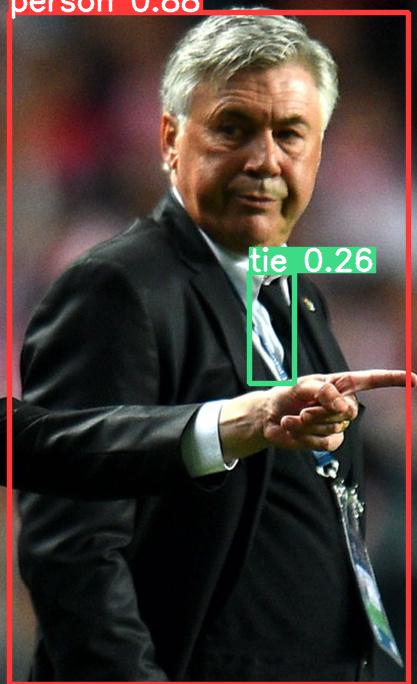
下面是两个人的领带也识别出来了


results.pandas()
这个pandas这个我不知道怎么用,命令行 中没有结果输出,也不会保存东西,打印也出不来什么东西。以后有需要再来研究吧
line8,换成本地图片也是可以运行的
# Images
img = './bus.jpg'
但是换成视频,就会报错。可能这里暂时只支持图片,不支持视频。
line5,可否读取本地的代码?
# Model
model = torch.hub.load('ultralytics/yolov5', 'yolov5s')  # or yolov5m, yolov5l, yolov5x, custom
——不可以
torch.hub.load()这个函数的官方文档对于第一个参数github的说明如下.
github ( str ) – a string with format “repo_owner/repo_name[:ref]” with an optional ref (tag or branch). If ref is not specified, the default branch is assumed to be main if it exists, and otherwise master . Example: ‘pytorch/vision:0.10’
第一个参数的形式必须是 比“repo_owner/repo_name[版本号]”这样的形式,不可以加载本地的代码。
https://pytorch.org/docs/stable/hub.html
关于YOLOv5的一些帖子
https://ultralytics.com/yolov5
YOLOv5来了!基于PyTorch,体积比YOLOv4小巧90%,速度却超2倍https://www.51cto.com/article/618784.html
YOLOv5的文档https://docs.wandb.ai/guides/integrations/yolov5
pytorch上YOLO5的文档https://pytorch.org/hub/ultralytics_yolov5/
https://www.comet.com/docs/v2/integrations/third-party-tools/yolov5/
https://blog.roboflow.com/yolov5-improvements-and-evaluation/


 425
425


 被折叠的 条评论
为什么被折叠?
被折叠的 条评论
为什么被折叠?
 到【灌水乐园】发言


