


Maven下载和安装
下载安装包
官网地址 http://maven.apache.org/download.cgi

解压安装包
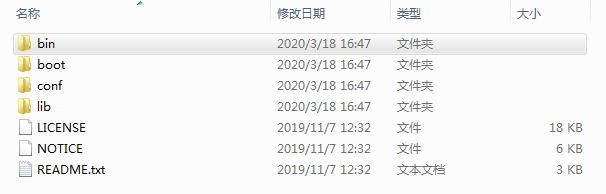
bin: 包含了mvn运行的脚本
boot: 自带的类加载器
conf: 配置文件目录
lib: 运行时依赖的类库
配置环境变量
把${install.direcotry}\apache-maven-3.6.3\bin路径配置到系统的path路径下。maven是用java开发的,所以必须先安装及配置JDK环境。用 mvn -v 命令测试maven安装是否成功。

Maven一般配置
本地仓库地址
- Maven默认的本地仓库地址为 ~/.m2, ~为用户的当前目录,通过conf/settings.xml的localRepository标签进行更改。
  <!-- 配置本地仓库的地址为D盘指定路径 -->
  <localRepository>D:\Development\Maven\Repository</localRepository>
- 配置文件conf/settings.xml对所有用户有效,~/.m2/settings.xml只对当前用户有效,建议使用后者。IDEA下的Maven基本配置。

阿里Maven镜像
- Maven的默认中央仓库下载构件比较慢,国内如阿里、网易等都提供了Maven开源镜像。现已阿里举例如何配置,使用说明地址为 https://maven.aliyun.com/mvn/view,通过conf/settings.xml的mirror标签进行更改。
<mirror>
    <id>aliyunmaven</id>
    <mirrorOf>*</mirrorOf>
    <name>阿里云公共仓库</name>
    <url>https://maven.aliyun.com/repository/public</url>
</mirror>
Maven的基本使用
quickstart构建骨架
- 使用maven-archetype-quickstart骨架构建项目,可以不使用archetype,直接创建Maven项目。
<?xml version="1.0" encoding="UTF-8"?>

<project xmlns="http://maven.apache.org/POM/4.0.0" xmlns:xsi="http://www.w3.org/2001/XMLSchema-instance"
  xsi:schemaLocation="http://maven.apache.org/POM/4.0.0 http://maven.apache.org/xsd/maven-4.0.0.xsd">
  <modelVersion>4.0.0</modelVersion>

  <groupId>org.example</groupId>
  <artifactId>maven-quickstart</artifactId>
  <version>1.0-SNAPSHOT</version>
  <packaging>jar</packaging>

  <name>maven-quickstart</name>
  <!-- FIXME change it to the project's website -->
  <url>http://www.example.com</url>

  <properties>
    <project.build.sourceEncoding>UTF-8</project.build.sourceEncoding>
    <maven.compiler.source>1.7</maven.compiler.source>
    <maven.compiler.target>1.7</maven.compiler.target>
  </properties>

  <dependencies>
    <dependency>
      <groupId>junit</groupId>
      <artifactId>junit</artifactId>
      <version>4.11</version>
      <scope>test</scope>
    </dependency>
  </dependencies>
</project>
项目的打包方式
通过pom.xml的packaging元素可以设置项目的打包方式,默认为jar包,可选内容为。
pom: 用于聚合其它模块或为父模块
jar: 打包成jar包的形式
war: 打包为war包的形式
ear: 打包为ear包的形式
使用依赖的配置
- 常用的提供查询服务的网站 https://mvnrepository.com/, 在搜索框输入要查找的依赖后并回车,就可以获取其依赖的坐标。
把spring-context坐标加入到dependencies标签内部,并刷新maven工程其依赖会自动下载。
<!-- https://mvnrepository.com/artifact/org.springframework/spring-context -->
<dependency>
    <groupId>org.springframework</groupId>
    <artifactId>spring-context</artifactId>
    <version>5.2.4.RELEASE</version>
</dependency>
- 依赖配置常用元素如下所示
 <dependency>
     <groupId>...</groupId>
     <artifactId>...</artifactId>
     <version>...</version>
     <type>...</type>
     <scope>...</scope>
     <optional>...</optional>
     <exclusions>
         <exclusion>
             <groupId>...</groupId>
             <artifactId>...</artifactId>
         </exclusion>
     </exclusions>
   </dependency>
-
dependency下的依赖类型type默认为jar,大多数情况下不需要指定。
-
dependency下的依赖范围scope默认为compile, 有以下可选内容。
- compile: 编译依赖范围,对于编译、测试、运行三种classpath都有效。
- test: 测试依赖范围,只对于测试classpath有效,如JUnit。
- provided: 已提供依赖范围,对于编译和测试classpath有效,但在运行时无效,如servlet-api。
- runtime: 运行时依赖范围,对于测试和运行classpath有效,但在编译主代码时无效,如JDBC驱动。
- system: 系统依赖范围,与provided依赖范围完全一致,必须使用systemPath指定依赖文件的路径。
- import: 导入依赖范围,只用于打包类型为pom的项目中,且只在dependencyManagement下使用。
- 依赖范围影响传递性依赖,最左边一行表示第一直接依赖范围,最上面一行表示第二直接依赖范围。
| compile | test | provided | runtime | |
|---|---|---|---|---|
| compile | compile | — | — | runtime |
| test | test | — | — | test |
| provided | provided | — | provided | provided |
| runtime | runtime | — | — | runtime |
- dependency下的依赖的调解原则,路径最近者优先, 第一声明者优先。
- dependency下的optional可选依赖不会传递,建议尽量不要使用该选项。
- dependency下的exclusions排除依赖,当不想使用依赖传递链中的某几个依赖时。
打包安装到本地仓库
-
使用
mvn clean install进行maven的安装到本地仓库。

-
根据pom中的GAV坐标把生成的构件安装到指定目录,规则为${settings.localRepository}\groupId\artifactId\version目录下。
  <groupId>org.example</groupId>
  <artifactId>maven-quickstart</artifactId>
  <version>1.0-SNAPSHOT</version>


 657
657


 被折叠的 条评论
为什么被折叠?
被折叠的 条评论
为什么被折叠?
 到【灌水乐园】发言


