


2.1回顾上章节
Spring中AOP的理解(一)
上章节展示了使用spring的api接口实现日志功能的添加!本章节使用自定义类方式来实现!
2.2使用自定义类方法实现Aop
(1)结构图
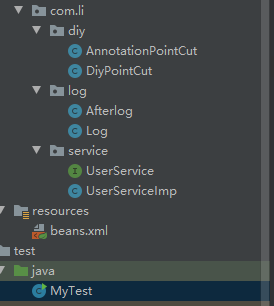
(2)UserService接口
package com.li.service;

public interface UserService {
    public  void  add();
    public  void  delete();
    public  void  update();
    public  void  select();
}
(3)UserServiceImp类
package com.li.service;

/**
 * @Description:
 * @Author: lizq
 * @date 2021/4/6 11:54
 **/
public class UserServiceImp implements  UserService{


    public void add() {

        System.out.println("增加了一个用户!");
    }

    public void delete() {

        System.out.println("删除了一个用户!");
    }

    public void update() {

        System.out.println("修改了一个用户!");
    }

    public void select() {

        System.out.println("查询了一个用户!");
    }
}
(4)DiyPointCut类
package com.li.diy;

/**
 * @Description:
 * @Author: lizq
 * @date 2021/4/6 14:42
 **/
public class DiyPointCut {
     public  void  before(){
         System.out.println("-------------------方法执行之前-----------------");
     }

    public  void  after(){
        System.out.println("-------------------方法执行之后-----------------");
    }
}
(5)beans.xml
<?xml version="1.0" encoding="UTF-8"?>
<beans xmlns="http://www.springframework.org/schema/beans"
       xmlns:xsi="http://www.w3.org/2001/XMLSchema-instance"
       xmlns:aop="http://www.springframework.org/schema/aop"
       xsi:schemaLocation="http://www.springframework.org/schema/beans
        http://www.springframework.org/schema/beans/spring-beans.xsd
        http://www.springframework.org/schema/aop
        https://www.springframework.org/schema/aop/spring-aop.xsd">

    <bean id="userService" class="com.li.service.UserServiceImp"></bean>
  <!--方法二:自定义类-->
    <bean id="diy" class="com.li.diy.DiyPointCut"></bean>

    <aop:config>
     <!-- 自定义切面,ref 要引用的类-->
      <aop:aspect ref="diy">
          <!--切入点-->
          <aop:pointcut id="point" expression="execution(* com.li.service.UserServiceImp.*(..))"/>
          <!--通知-->
          <aop:before method="before" pointcut-ref="point"></aop:before>
          <aop:after method="after" pointcut-ref="point"></aop:after>
      </aop:aspect>
    </aop:config>
</beans>
(6)MyTest类
import com.li.log.Afterlog;
import com.li.service.UserService;
import com.li.service.UserServiceImp;
import org.springframework.context.support.ClassPathXmlApplicationContext;

/**
 * @Description:
 * @Author: lizq
 * @date 2021/4/6 14:13
 **/
public class MyTest {
    public static void main(String[] args) {
        ClassPathXmlApplicationContext context = new ClassPathXmlApplicationContext("beans.xml");
        //动态代理的是接口
        UserService userService = context.getBean("userService", UserService.class);
        userService.add();

    }
}
(7)执行MyTest输出结果
-------------------方法执行之前-----------------
增加了一个用户!
-------------------方法执行之后-----------------
(8)总结
本章节通过使用自定义类来横向开发日志功能,接下来使用注解实现日志功能代码,持续更新中~


 231
231


 被折叠的 条评论
为什么被折叠?
被折叠的 条评论
为什么被折叠?
 到【灌水乐园】发言


